Announcement

Collapse
No announcement yet.

what did you wrench on today??

Collapse
X
 
  • Filter
  • Time
  • Show
Clear All
new posts

    Originally posted by Grimly View Post
    Should fit new copper washers or anneal the old ones (anneal copper by holding them in a gas burner flame until they glow then plunge them into water). There's a washer either side of the banjo - one between the banjo and caliper and one between the banjo and hollow bolt head.
    I have on either side, I added a new one, but I left the old ones...

    They worked great on my test ride now, a lot more feedback.

    But the brake lever is a bit lose, not stiff at the end, and that means my brake light stays on sometimes. Wonder how to fix that.

    I have more washers (they sent some bonus ones), so I guess I can fix it now that I have to bring it inside to remove the head.

    Edit: By a new one I mean two, one on either side. So one between the new and old.
    GS1000G 1981

    Comment


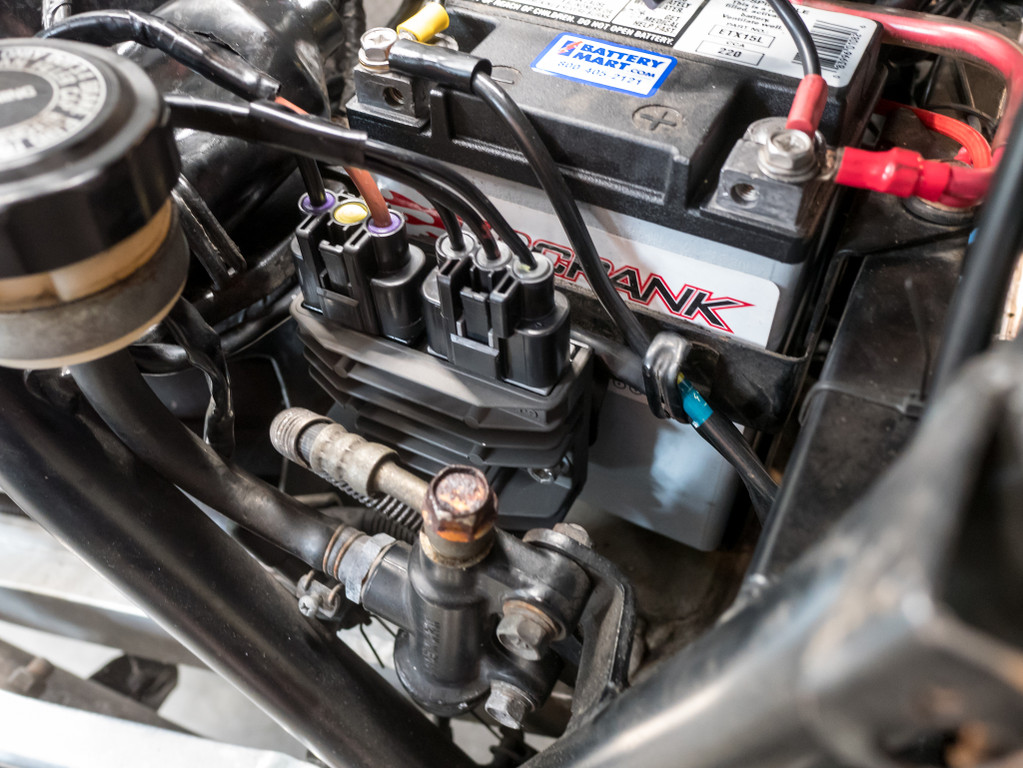
      Finally finished the SH775 conversion on the 1100E over the weekend....

      Bob T. ~~ Play the GSR weekly photo game: Pic of Week Game
      '83 GS1100E ~ '24 Triumph Speed 400 ~ '01 TRIUMPH TT600 ~ '67 HONDA CUB

      Comment


        Originally posted by Baatfam View Post
        Finally finished the SH775 conversion on the 1100E over the weekend....
        Where did you get the connectors to connect to it? Like, my stator has these silly yellow wires with bullet connectors. How do I get them to that?
        GS1000G 1981

        Comment


          Originally posted by Noreg View Post
          Where did you get the connectors to connect to it? Like, my stator has these silly yellow wires with bullet connectors. How do I get them to that?
          Triumph harness part number: T2500676
          Bob T. ~~ Play the GSR weekly photo game: Pic of Week Game
          '83 GS1100E ~ '24 Triumph Speed 400 ~ '01 TRIUMPH TT600 ~ '67 HONDA CUB

          Comment


            Oh and I forgot to mention. I forgot to tighten the clamps holding the engine to the carbs. I noticed a screw was missing. Silly mistake. I took the screw from the rubber thing for the final/secondary drive thing to replace it and held the clamp for the drive with some steel wire. Seemed to have less bouncy RPM at high RPMs now.
            GS1000G 1981

            Comment


              I pulled the head off, now its dinner time, but afterwards we'll try to fashion a new seal.
              GS1000G 1981

              Comment


                Wrenched on this:

                61999770384__21FC9A2C-DD17-4DE3-8BF0-BB19AA0E7074.jpg
                2005 Suzuki Hayabusa
                2010 Suzuki GSX1250FA
                2015 BMW RnineT


                Dave

                Comment


                  Noreg, I'm gonna nit-pik a little about your use of nomenclature. No offence intended, and I don't think I'm being a grammar Nazi. You know I'm pulling for you. I want you to get things straightened out, and I really enjoy your thoughtful threads and your great pictures. So, what you're calling the "head" is not the head. It is the valve cover, AKA, the Cylinder Head Cover (as it is termed on the parts fiches).

                  The part of the engine below the Cylinder Head Cover is the Head. The Head is where the valves are, where your spark plugs screw into, where your intake boots are, and where your exhaust it bolted to.

                  Last edited by Rich82GS750TZ; 08-26-2020, 02:56 PM.
                  Rich
                  1982 GS 750TZ
                  2015 Triumph Tiger 1200

                  BikeCliff's / Charging System Sorted / Posting Pics
                  Destroy-Rebuild 750T/ Destroy-Rebuild part deux

                  Comment


                    Originally posted by Rich82GS750TZ View Post
                    Noreg, I'm gonna nit-pik a little about your use of nomenclature. No offence intended, and I don't think I'm being a grammar Nazi. You know I'm pulling for you. I want you to get things straightened out, and I really enjoy your thoughtful threads and your great pictures. So, what you're calling the "head" is not the head. It is the valve cover, AKA, the Cylinder Head Cover (as it is termed on the parts fiches).

                    The part of the engine below the Cylinder Head Cover is the Head. The Head is where the valves are, where your spark plugs screw into, where your intake boots are, and where your exhaust it bolted to.
                    None taken, I enjoy learning the correct terms. I assumed "head" was shorthand for cylinder head. I lack the lexicon for these things in Norwegian too, so that makes it even harder to get it right.

                    Got the old gasket out, is outlining the parts I could salavage and about to cut it.

                    Should I put something on the gasket or just use the gasket itself?
                    GS1000G 1981

                    Comment


                      Originally posted by Noreg View Post
                      None taken, I enjoy learning the correct terms. I assumed "head" was shorthand for cylinder head. I lack the lexicon for these things in Norwegian too, so that makes it even harder to get it right.

                      Got the old gasket out, is outlining the parts I could salavage and about to cut it.

                      Should I put something on the gasket or just use the gasket itself?
                      "head" IS short for cylinder head. But what you removed is the Cylinder Head COVER. COVER is the word your missing that is the distinction between the 2 parts. No comment on what, if anything, to put on your home cut gasket. I've had them fail with a little WD-40 on them, and I've had them fail dry. But I'm fairly certain that both were due to too much torque on the bolts holding down the cylinder head cover. I suppose it depends on what the material is. Others hopefully will have some advice for you.
                      Rich
                      1982 GS 750TZ
                      2015 Triumph Tiger 1200

                      BikeCliff's / Charging System Sorted / Posting Pics
                      Destroy-Rebuild 750T/ Destroy-Rebuild part deux

                      Comment


                        Originally posted by Rich82GS750TZ View Post
                        "head" IS short for cylinder head. But what you removed is the Cylinder Head COVER. COVER is the word your missing that is the distinction between the 2 parts. No comment on what, if anything, to put on your home cut gasket. I've had them fail with a little WD-40 on them, and I've had them fail dry. But I'm fairly certain that both were due to too much torque on the bolts holding down the cylinder head cover. I suppose it depends on what the material is. Others hopefully will have some advice for you.
                        May I ask what torque you found out is the sweet spot? My wife is almost done outlining the gasket. Then I just need her to cut it and then Ill clean the mating surfaces and voila, back on the road. Might have to wait til tomorrow, early work tomorrow.
                        GS1000G 1981

                        Comment


                          Was going to get a decent set of used OEM GS1100 mirrors, but had a closer look at the cheap and cheerful ones I bought as a stopgap and managed to get them mounted acceptably. I wasn't too impressed with the plastic chrome heads on them and expected them to fall apart in short order, but they've held up well, so some proper mounting technique brought them into range of being quite useful.
                          Nearly fitted a Deauville clutch perch and lever, but decided to leave that for another day, as there's nothing really wrong with the original, just a bit rattly.
                          Then moved on to the Darkside wheel. Was waiting for the bolt head retainers for the disc bolts, so installed them and it's ready to go on.
                          ---- Dave

                          Only a dog knows why a motorcyclist sticks his head out of a car window

                          Comment


                            '
                            Gasket is done, I am cautiously optimistic about this. Should have noted where the long and short bolts go. Need to clean the mating surfaces and then Ill try it out tomorrow. I think cleaning the other part will be a pain, as I assume getting old gasket into the oil is suboptimal...

                            In case this doesn't work as expected I will make a new outline so I can manufacture a new one easier. And by I, read my wife.

                            The old gasket got ripped to pieces when I dissasembled it. Seems to be some sort of paper. Is OEM yellow?

                            https://imgur.com/a/CGewpTh <- the other pictures taken, maybe not particularly useful. Might make a more readable presentation of my process.
                            GS1000G 1981

                            Comment


                              Excellent work.
                              When you fit the bolts, make sure none of the bolt holes are filled with oil else you can get a false impression of them being tight when they're not and worst of all you could hydraulic the threads out, but that tends to happen when some monkey just heaves on them.
                              The valve cover gaskets are definitely not what they used to be - the only ones I'd used previously were OEM and they lasted for years, through several removals / refits, without leaks. An aftermarket one I fitted last year didn't last two thousand miles and it's been replaced by a *supposed* Vesrah (though I have my doubts about its authenticity).
                              ---- Dave

                              Only a dog knows why a motorcyclist sticks his head out of a car window

                              Comment


                                Originally posted by Noreg View Post
                                May I ask what torque you found out is the sweet spot? My wife is almost done outlining the gasket. Then I just need her to cut it and then Ill clean the mating surfaces and voila, back on the road. Might have to wait til tomorrow, early work tomorrow.
                                Sorry to leave you hanging, I'm "wrenching" on my own project, a bathroom renovation, pic below, but first, this:

                                Major Disclaimer: I am only slightly more experienced at this than you, only starting seriously working on my bike a little over 2 years ago. As stated before, I have had a few failed attempts at this. I now have 1500 miles on the engine I rebuilt, so the most recent cylinder head cover bolt tightening job has held up for exactly that long. That said:

                                My Manual suggests a torque for the cylinder head cover bolts of 6.5-7 lb-ft. (your factory manual says 6.5 lb-ft.[09 kg-m], not sure what your Clymer's says.) Because the bigger lb-ft. torque wrench is no good at that low range, use smaller lb-in. wrench, multiply the lb-ft figure x 12 to get lb-in. 6.5 lb-ft. x 12 = 78 lb-in. On my first failed attempt I did not own a torque wrench, bad idea. On my second failed attempt I used 72 lb-in. On my third failed attempt, I used 50 lb-in. My most recent and, so far, successful attempt is at 45 in-lb. You'll have to figure out the conversion to kg-m or N-m if needed. I know there's easy converters on line. Just google it. I am in no way suggesting any of this will work for you. It's what is working for me on my bike right now. (knock on wood, cross my fingers, say a few Hail-Marys). Your home-cut cork gasket (nice work by your wife, by the way), may or may not squish like the OEM gaskets I've used.

                                As for the various bolt sizes. I should have suggested making yourself a cardboard "map" to place the bolts into as you removed them. Just a tip I picked up watching YouTube videos and probably read it on the forum as well. Now I do it whenever I take any cover off the bike. It's a huge help when putting things back together. Anyway, according to the parts fiche from partsoutlaw, you should have (10) 6 x 35mm long bolts, and (6) 6 x 40mm long bolts for the cover. Where they go, I couldn't say. I'm sure someone else w/ experience w/ an 8v engine can tell you. The 4 bolts for the Breather Cover are much shorter 6 x 25mm, so at least you will have those where you need them. Although you probably didn't take the cover off the top anyway. Good Luck.


                                Here's my current project. Drywall, Cabinets, Plumbing, Electrical, Paint (but for a bit of touch-up), Shower Pan, walls and glass doors, and as of tonight, most of the floor is down. Hope to get the rest of the floor and all the trim and new toilet installed by the end of the weekend.

                                Last edited by Rich82GS750TZ; 08-26-2020, 10:05 PM.
                                Rich
                                1982 GS 750TZ
                                2015 Triumph Tiger 1200

                                BikeCliff's / Charging System Sorted / Posting Pics
                                Destroy-Rebuild 750T/ Destroy-Rebuild part deux

                                Comment

                                Working...
                                X