-
Bought the oil pan and valve cover off ebay Stan. Oil pans with the take off are dime a dozen. It took a good while to find an affordable valve cover though. Bought a cooler from a ZR-7. Will have to figure out the frame mounts. And speaking of frame mounts, Kawasaki rubber mounted the engine for '82 (I think), so that's one thing I wish I had. Would have required welding on the frame though so took the easy way out. Still thinking about it though... -
 Guest repliedSeems like you have a collection of all the best bits there Ed.
Is that how the engine was when you got it, or did you go shopping for the cover and oil pan?
Those bits look good, slightly rough is good for paint adhesion I would think, the paint will smooth it out as it flows.Leave a comment:
-
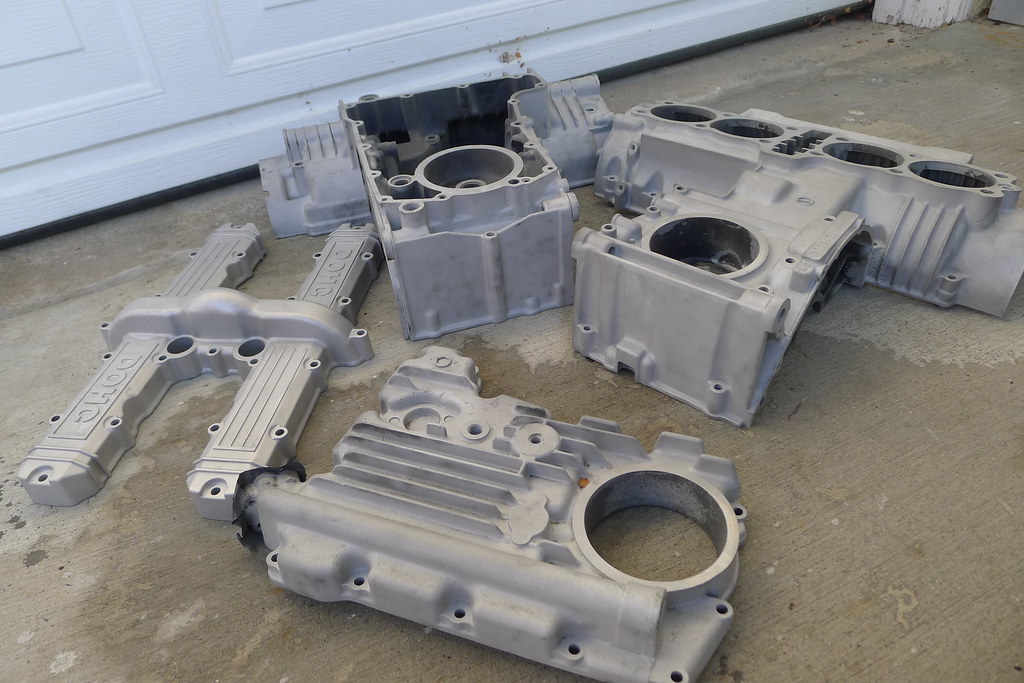
Finally got my butt in gear again. A couple weeks back I started to bead blast the engine case parts but was about to shoot myself because it was taking too long. Today I dumped the glass bead and slammed coal slag in the hopper.
 Much better.
 The finish is a little rough but it's going to get painted anyway so no worry.
Oh, and the valve cover is from a KZ750 Turbo. No air injection junk on top. The oil pan is from a later model 750 that has the oil cooler outlet ports on the front.
 P1010994 by nessism, on Flickr
Last edited by Nessism; 07-30-2017, 10:02 PM.
P1010994 by nessism, on Flickr
Last edited by Nessism; 07-30-2017, 10:02 PM.Leave a comment:
-
Other than the odd cylinder wall wear pattern of the original cylinders.Originally posted by Nessism View Post
How does the new (old) set look? Much better than the originals, about the same, or worse?Leave a comment:
-
Spent the evening measuring and remeasuring the new/old cylinder and pistons, as well as the original cylinder and pistons again. I'm half way batty now and still scratching my head. The cylinder seems to measure .002" oversize to the stock bore size even when measured in the area where the rings don't sweep. The numbers suggest .004" piston to wall clearance, but using the old feeler gauge between the piston and cylinder wall trick suggests just slightly more than .003". This seems right since I can measure about .0008" of wear with the bore gauge and the stock piston clearance is about 2.5 thousands. At any rate, I suspect the pistons and bores are just fine and I don't need this big bore kit after all.Last edited by Nessism; 07-30-2017, 09:59 PM.Leave a comment:
-
Looks awesome Ed. Love the sheen on the pan. Cant wait to see it all together..gonna be sweet.Leave a comment:
-
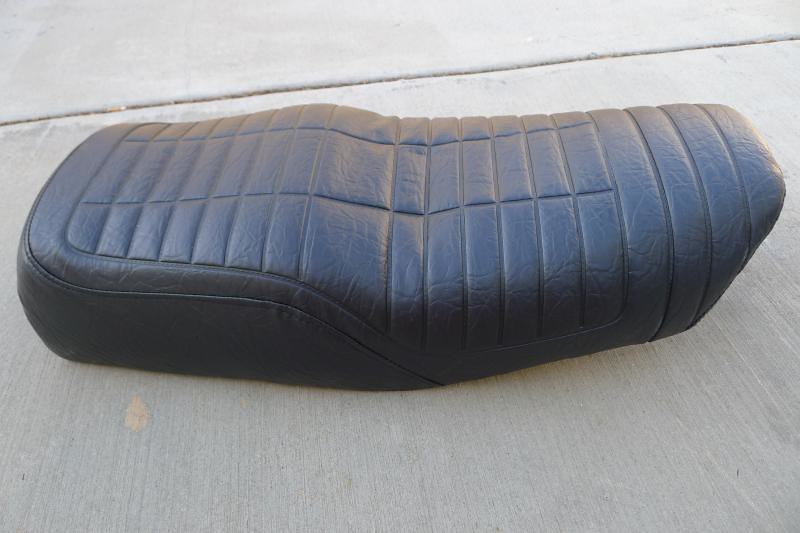
Guest repliedI doubt seriously that the seat pan looked that good when the bike was new! WTG!Leave a comment:
-
Nice work on the seat pan Ed. Is that single stage that has been cleared over, or is it base/clear? To me it looks like it's been hit with clear.
You have that hardware plating down to a science!Leave a comment:
-
Seat cover #2 installed. Turned out okay this time. A little lose in places but I was afraid to pull too much. Gotta find some strap hardware now. The search is on...
 P1010956_zps357a0f45 by nessism, on Flickr
 P1010955_zps16060fe8 by nessism, on Flickr
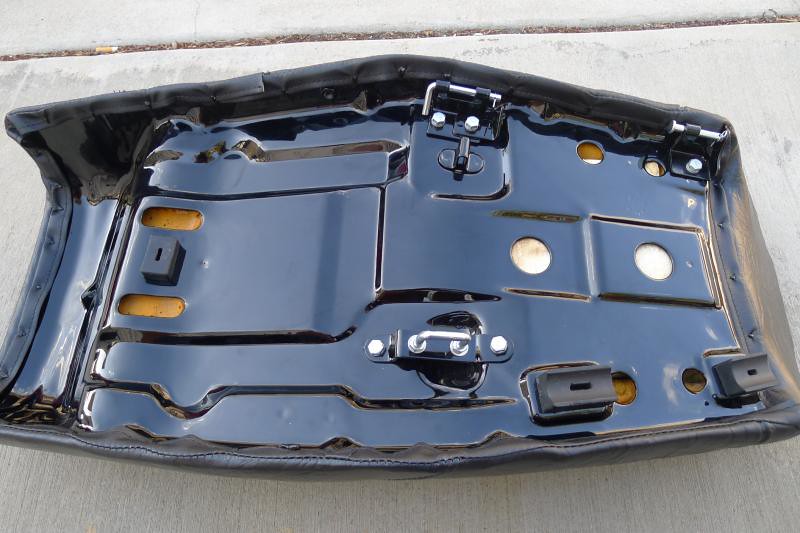 P1010954_zpsa05ad78e by nessism, on Flickr
Last edited by Nessism; 07-30-2017, 09:12 PM.
P1010954_zpsa05ad78e by nessism, on Flickr
Last edited by Nessism; 07-30-2017, 09:12 PM.Leave a comment:
-
If the cylinder measures nice and tight I'll run it sell the big bore kit!Originally posted by rustybronco View Post Never wanted to buy it in the first place. This engine has unknown mileage though, and based on the oil covering the bottom, it has more use than my original engine so not holding my breath.
Leave a comment:
-
If this engine has near perfect internals, is the plan to sell them off and use your old cylinders? That sure would be nice to recoup some of the money you spent towards the big bore kit.Leave a comment:
.png "Powered by vBulletin")
Required reading for all forum users!!!
Welcome!
Register to access the full functionality of the GSResources forum. Until you register and activate your account you will not have full forum access, nor will you be able to post or reply to messages.A note to new registrants...
All new forum registrations must be activated via email before you have full access to the forum.A Special Note about Email accounts!
DO NOT USE sbcglobal.net, att.net, bellsouth.net or email.com email addresses when registering for the forum! Email that our system sends out to these email servers is treated as SPAM and you will never receive your activation email, or any other email that our system may send out. Use an email address from gmail.com or some other email server.A note to old forum members...
I receive numerous requests from people who can no longer log in because their accounts were deleted. As mentioned in the forum FAQ, user accounts are deleted if you haven't logged in for the past 6 months. If you can't log in, then create a new forum account. If you don't get an error message, then check your email account for an activation message. If you get a message stating that the email address is already in use, then your account still exists so follow the instructions in the forum FAQ for resetting your password.Have you forgotten your password or have a new email address? Then read the forum FAQ for details on how to reset it.
Any email requests for "can't log in anymore" problems or "lost my password" problems will be deleted. Read the forum FAQ and follow the instructions there - that's what we have one for...
New users should be sure to read the FAQ as well as the posts in the Announcements forum. This will answer many of the questions you may have about how this forum works.
Before posting questions in the forums be sure to use the forum search function!!! Odds are your question has already been asked and answered before. And when posting, please make sure that you post to the correct forum.
Finally, be sure to check out BassCliff's website here. He has useful information that can't be found on this site. His welcome page containing useful GS information can be found here. Be sure to check it out!
If you are a returning visitor to the forum and can't log in using your old forum name and password, chances are your account is deleted. Just create a new forum account and you should be all set.


Leave a comment: