.png "Powered by vBulletin")
 P1010784 by nessism, on Flickr
-
You'll be glad you took the time to fill the low spots on the side covers, Ed, especially going with a dark color. They would've stuck out like sore thumbs if you hadn't. Now they'll be nice and straight. Nice work.Leave a comment:
-
What was the cost of the black Kerker basecoat you just bought if I may ask?Leave a comment:
-
Did you get anything out of Pit Replica for that seat cover? Trying to decide who to get one from.Leave a comment:
-
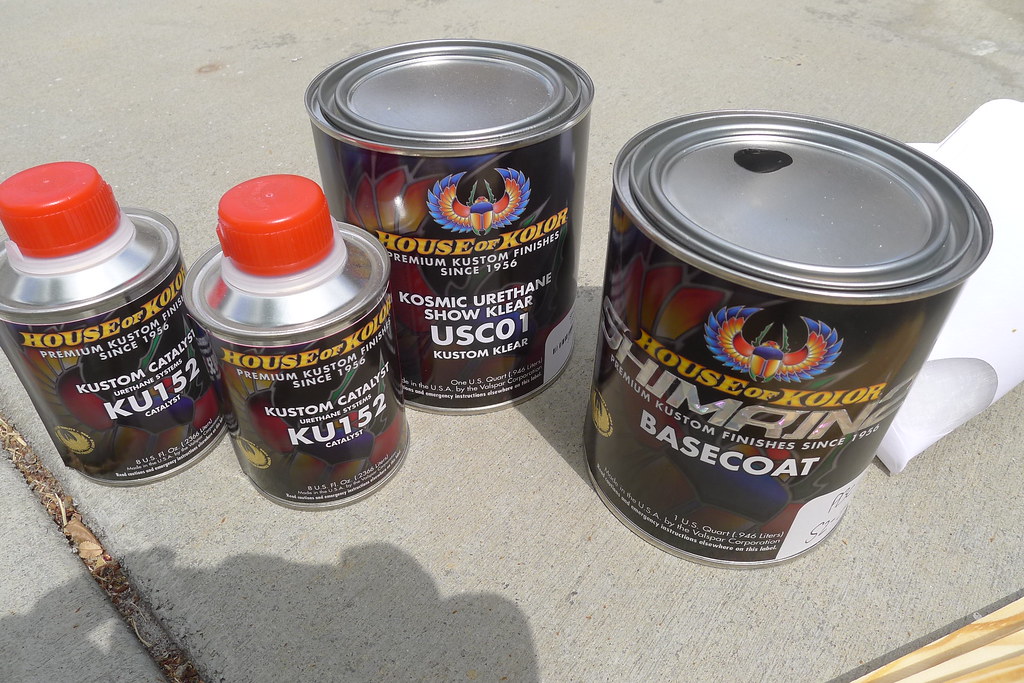
Just got back from the paint store. Bought some clear, basecoat, and hardener. NOT cheap. The clear is the "new" 2.1 VOC flavor. Translated that means it's low solids and thin. In other words three coats needed instead of the old two. Hum, makes one wonder if it actually results in less crap going into the air or what? At any rate, that's how it is in California these days. Took a flier on the color: bought a pint of black and a pint of dark pearl blue and had them mixed together. Going for a black look from distance, but with some pearl blue coming though when you get closer. We'll see.
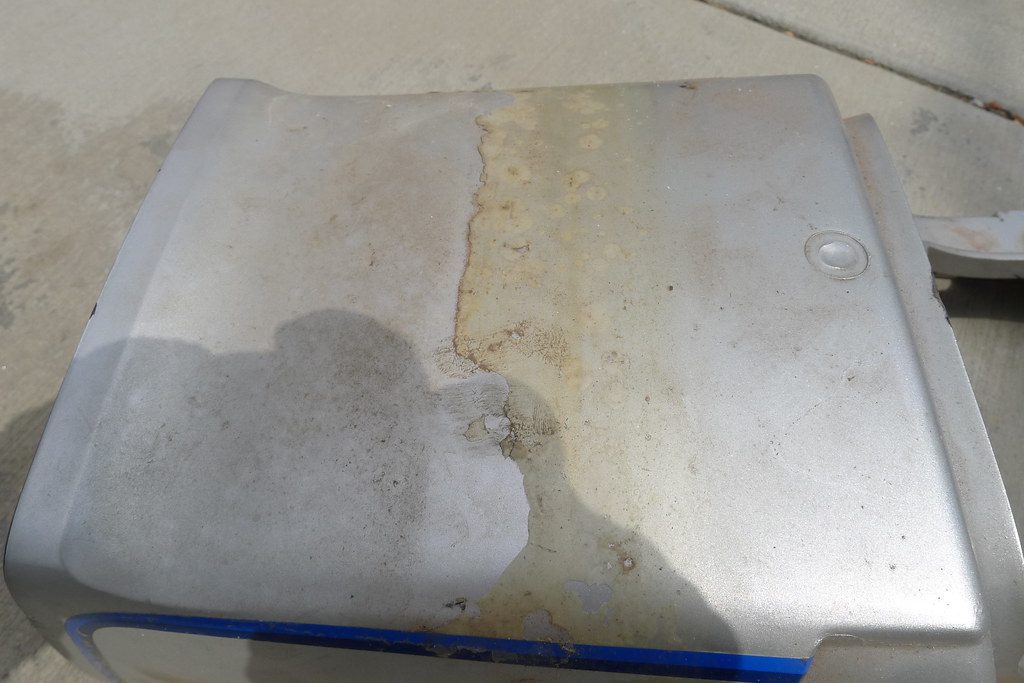
Since the original paint is so chalky and tore up I'm removing as much as possible before prime. Two part epoxy for that of course. One of the side covers had a swale in it so filled it with body mud. Good fun...
 P1010790 by nessism, on Flickr
 Capture by nessism, on Flickr
 P1010788 by nessism, on Flickr
 P1010789 by nessism, on Flickr
Last edited by Nessism; 07-30-2017, 08:35 PM.
P1010789 by nessism, on Flickr
Last edited by Nessism; 07-30-2017, 08:35 PM.Leave a comment:
-
Either your seat foam is collapsed or the seat cover is made wrong.Leave a comment:
-
Hi Dale,Originally posted by rustybronco View Post
Yes, steam. I've been inside OEM auto seat plants before and watched them heat the covers and they have portable steam wands too, so they can apply localized heat.
Regarding the cover itself, I'm not impressed with Pit Replica's edge design methodology. Or maybe it's just my fault for not piercing the cover in the proper place. Leaning toward ordering another one and maybe having it modified to reinforce the seam.Leave a comment:
-
I know this is a bit after the fact, but my Ex-wife used to work for a 'seating division' installing seat covers. Abet their types of seat covers are different than what you are installing but the material has to be similar. They used to throw the covers into a cabinet which heated them with steam for a few minutes before they pulled them over the seat foam. Maybe you could use your 'easy bake' paint box to do something similar.
Also, that stitching is way to close to the retaining spikes. Maybe email pit replica and see if they can drop the stitching in that area, or try adding an extra inch of foam on top of existing foam?Leave a comment:
-
The seat cover looks good, imo, so I would be inclined to try again with the same product. Maybe try the heating method on the cover that's now ripped (as you're throwing it away anyhow) to see how feasible that is OR maybe trim the padding by 10mm or so?
Looking at the pictures again ... I'm wondering if the cover is double layered at the edges between the two rows of stitching? Or is that just cosmetic stitching?
In any case I'm thinking that piercing the fabric right on the stitching line may have caused it to rip, as the stitching already weakens the fabric in that area.
If there is a double layer at the edge then I guess that would be an ideal area where to hook it?Last edited by psyguy; 06-11-2014, 04:28 AM.Leave a comment:
-
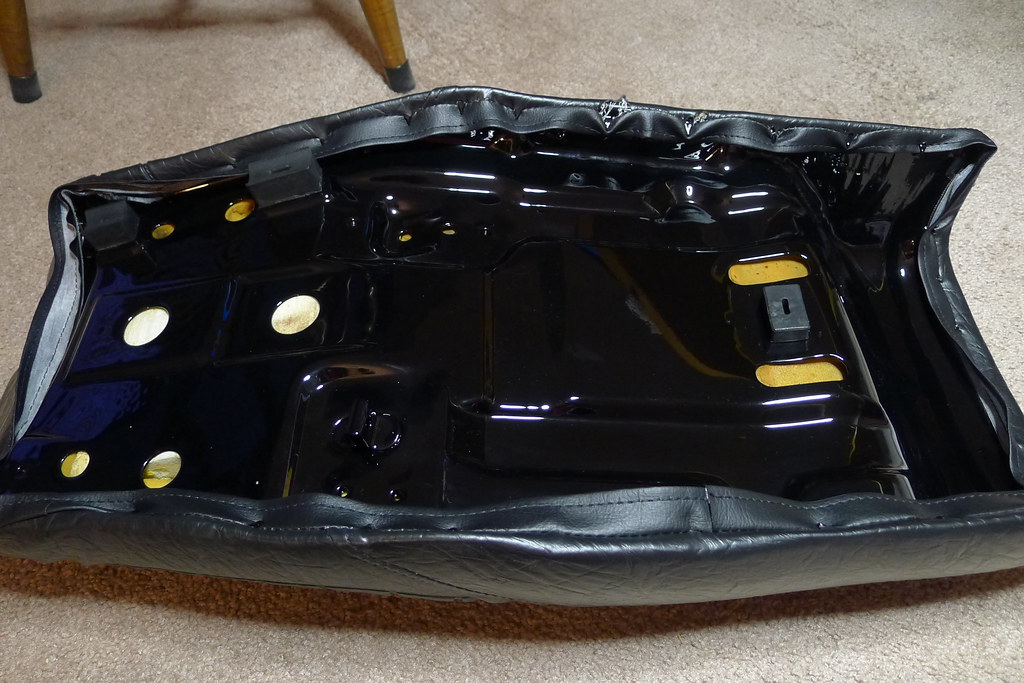
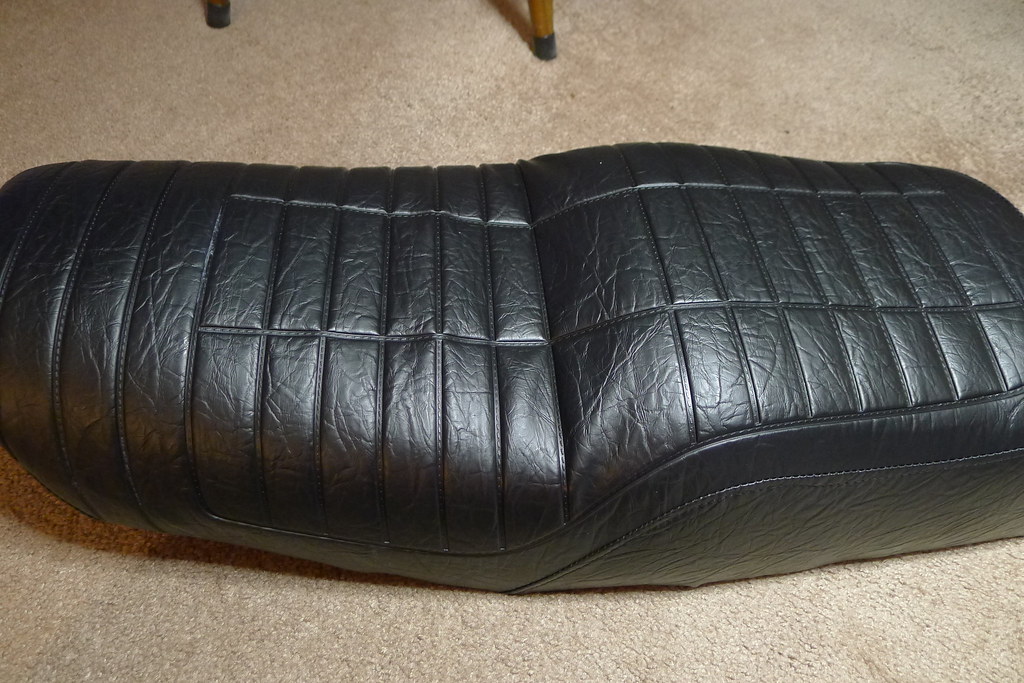
Painted up the seat pan and tried to installed the Pit Replica seat cover. The cover is tight in places and loose in others. After further review I realized that I pierced it in the wrong place. The seam design sucks though since there is no choice other than to pull against the sewn seam. Kicking myself for not being more careful. Quality is not the best but the pattern does match the original really nicely.
 P1010782 by nessism, on Flickr
 P1010779 by nessism, on Flickr
 P1010780 by nessism, on Flickr
Last edited by Nessism; 07-30-2017, 08:30 PM.
P1010780 by nessism, on Flickr
Last edited by Nessism; 07-30-2017, 08:30 PM.Leave a comment:
-
 Guest repliedYea, there are people out there that could screw up a one car funeral!!!Originally posted by tkent02 View Post
There are some people out there that can turn a simple oil change, or replacement of spark plugs into a major project because of their lack of basic mechanical skills.
I had my neighbor out looking for a brass magnet after his wife dropped her ring down the sink!!!!
PRICELESS the look on the clerk's face when he asked him for one!!!Leave a comment:

Leave a comment: