Announcement

Collapse
No announcement yet.

Camshaft Top End Rattle

Collapse
X
 
  • Filter
  • Time
  • Show
Clear All
new posts

    Don, be careful that you don't damage the valve shafts when you lock the chuck on them. You could use a brass shim to protect them, but still not ideal to get an accurate axis.

    Might be safer to find a flat surface and lay the valves on it, rotating them with your finger. If they are bent, you will notice the heads wobble off line as they are turning. Also check the condition of the valve seat surfaces, both on the valve and their mating seats. I doubt that you'll find a bent valve, as I would expect a rough idle as a result of that condition.

    Your chambers and valves are pretty sooty, but probable due to prolonged idling while videoing!! In the second pic, #1 plug is really clean. Was this in the as run condition, or was it fitted after you last ran the engine?
    :) The road to hell is paved with good intentions......................................

    GS 850GN JE 894 10.5-1 pistons, Barnett Clutch, C-W 4-1, B-B MPD Ignition, Progressive suspension, Sport Demons. Sold
    GS 850GT JE 1023 11-1 pistons. Sold
    GS1150ES3 stock, V&H 4-1. Sold
    GS1100GD, future resto project. Sold

    http://i155.photobucket.com/albums/s...s/P1000001.jpg
    http://i155.photobucket.com/albums/s...s/P1000581.jpg

    Comment


      Originally posted by 49er View Post
      Don, be careful that you don't damage the valve shafts when you lock the chuck on them. You could use a brass shim to protect them, but still not ideal to get an accurate axis.

      Might be safer to find a flat surface and lay the valves on it, rotating them with your finger. If they are bent, you will notice the heads wobble off line as they are turning. Also check the condition of the valve seat surfaces, both on the valve and their mating seats. I doubt that you'll find a bent valve, as I would expect a rough idle as a result of that condition.

      Your chambers and valves are pretty sooty, but probable due to prolonged idling while videoing!! In the second pic, #1 plug is really clean. Was this in the as run condition, or was it fitted after you last ran the engine?
      Ian I will clamp the valve stems ever so lightly and spin them in the chuck.

      I had the machine shop face the valve seats and the brand new valves, so the surfaces look good, don't think there is a problem there.

      I also doubt that I have a bent valve as the seal between valve and the seats did not leak when I did the petrol trick.

      The chambers are really sooty as the motor was running rich. I have the mixture screws three turns out which may be a bit much. I also raised the needles by shimming them on advice from the forum. I might need to drop the needles back down again and see if it restricts performance.

      That plug in No. 1 is a replacement plug as the original one (80 miles covered) failed and tested faulty on my testbed.

      I removed the valves today so I can test them for straightness. They came out of the guides without any binding or stiffness. It is very difficult to check the condition of the guides from the top of the head as the lower spring collar and guide oil seal prevent a good visual check. Besides if the valve heads contacted each other or the piston then the lower portion of the guide protruding into the combustion chamer would be the part that would be broken or cracked, not the top portion within the port (exhaust or intake).

      So I have decided to leave the valve guide oil seals in place as to remove them would mean ruining them.

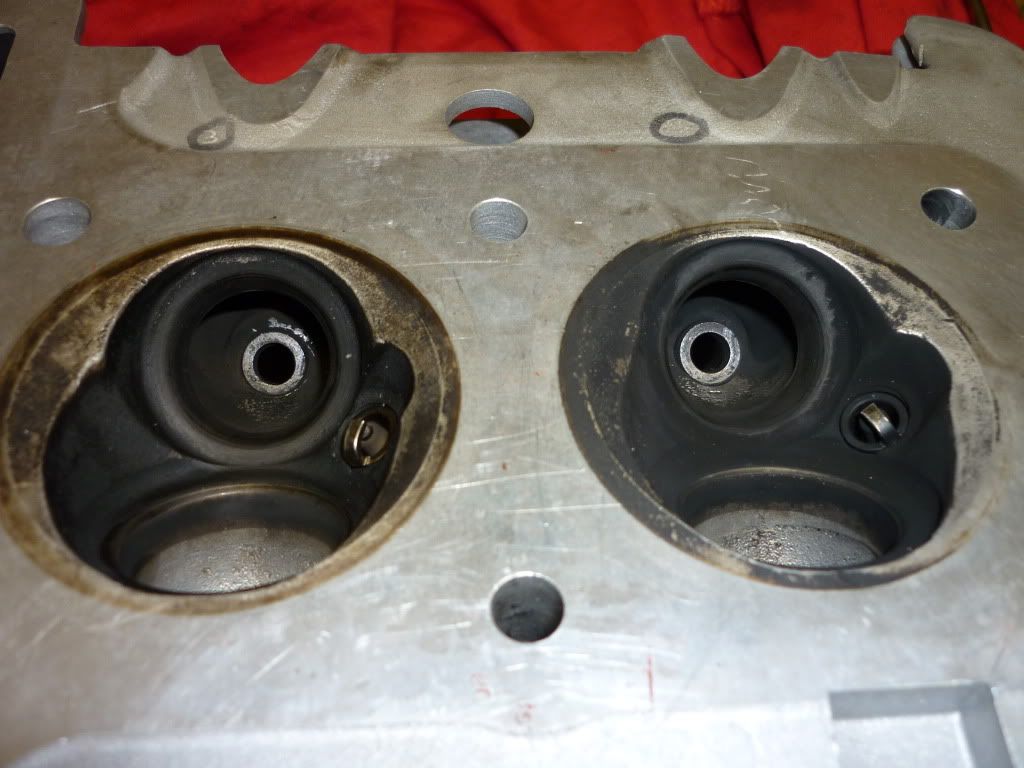
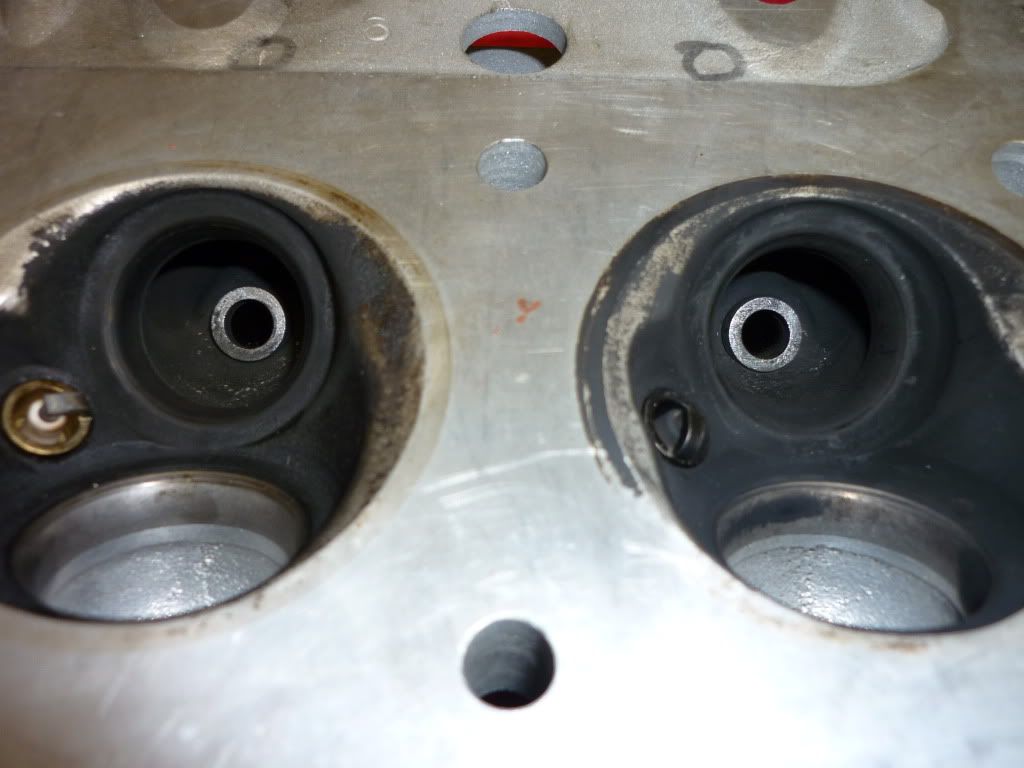
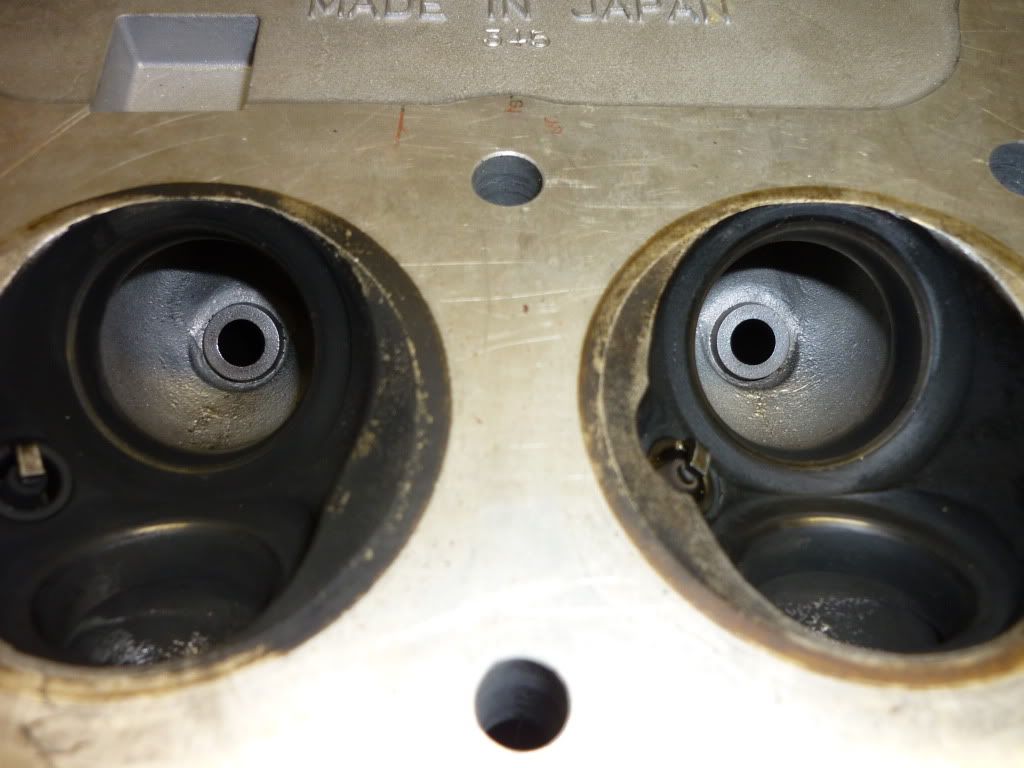
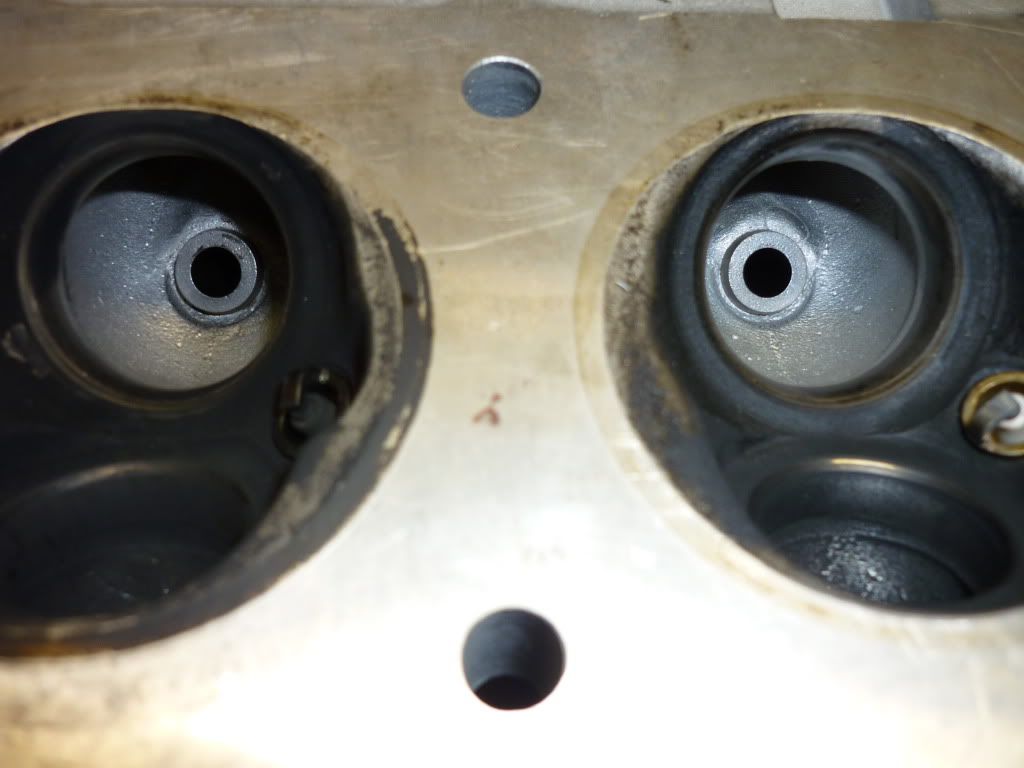
      The following pictures show the results found inside the combustion chamber. No guides are damaged in any way, unless someone can see something that I cannot.

      Please comment:

      __________________________________________________ ______


      Nos. 1 and 2 Exhaust Guides


      Nos. 3 and 4 Exhaust Guides


      Nos. 1 and 2 Intake Guides


      Nos. 3 and 4 Intake Guides
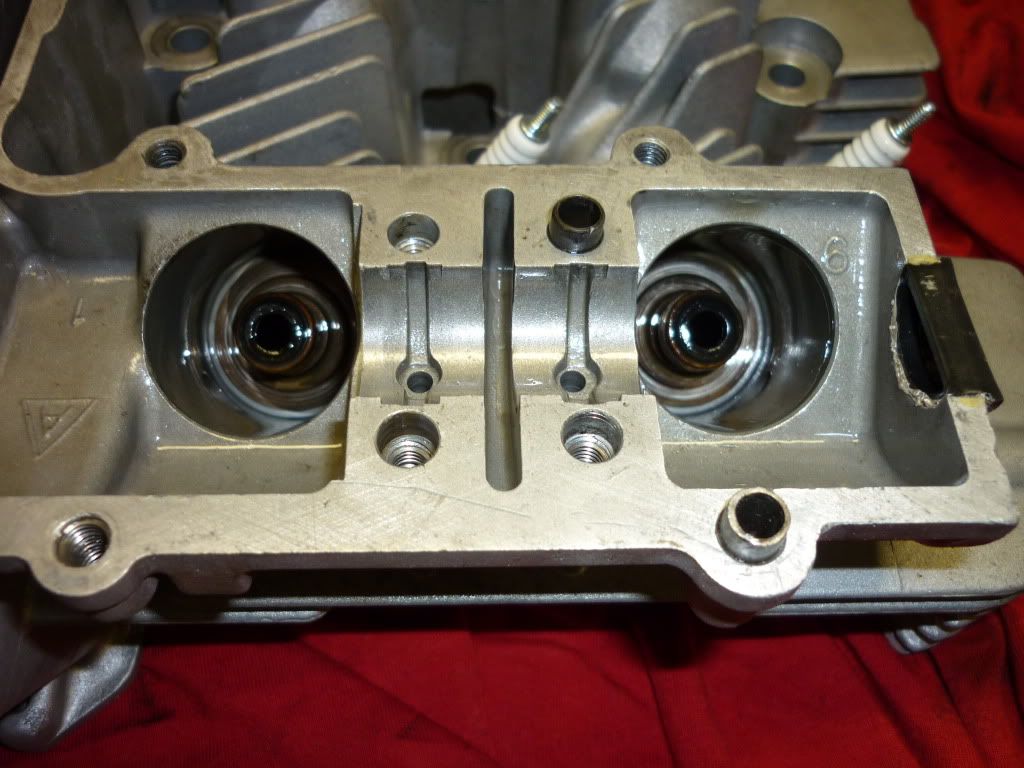


      Difficult to see anything inside where the guides are as bottom spring support and valve guide oil seal obscure view.


      .
      Last edited by Guest; 10-06-2010, 06:54 AM.

      Comment


        Don, I don't know if it's the case on the GS's, but on most of my bikes, removing the valves almost always ruins the guide seals. At a couple bucks a pop, you may as well replace yours.

        Comment


          Originally posted by mlinder View Post
          Don, I don't know if it's the case on the GS's, but on most of my bikes, removing the valves almost always ruins the guide seals. At a couple bucks a pop, you may as well replace yours.
          The cheapest I can get them for over here is $8 each and that's not genuine. Total $64.

          Thoughts please?

          Comment


            I can get the OEM valve stem seals for a buck fifty per here, Don.

            Z1 Enterprises specializes in quality Motorcycle parts for Honda, Kawasaki, Suzuki and Yamaha Classic Japanese motorcycles from the 1970's and 1980's.


            At least, I think they are OEM.

            In any case, see what they will charge to ship to you. If it's outrageous, I'll buy some for you and ship them to you. You pay me back, of course, but it will only cost you 1.47 us per and shipping.

            Let me know.

            The folk at Z1 are really very nice.

            Comment


              Don, I re-used the seals in my student days with no problems though I always replace them now I'm rich (it's all relative).

              I had some unbranded pattern ones on my 1000 that were toast after a year a short while back so replaced with OEM which were not too pricey over here. However, all the Z1 stuff I've had has been pukka and the P&P has been fine on items that don't weigh much. Plus they're super speedy with delivery. Worth a go at those prices.
              79 GS1000S
              79 GS1000S (another one)
              80 GSX750
              80 GS550
              80 CB650 cafe racer
              75 PC50 - the one with OHV and pedals...
              75 TS100 - being ridden (suicidally) by my father

              Comment


                Originally posted by hampshirehog View Post
                Don, I re-used the seals in my student days with no problems though I always replace them now I'm rich (it's all relative).

                I had some unbranded pattern ones on my 1000 that were toast after a year a short while back so replaced with OEM which were not too pricey over here. However, all the Z1 stuff I've had has been pukka and the P&P has been fine on items that don't weigh much. Plus they're super speedy with delivery. Worth a go at those prices.
                Wally I think I will stick with the seals I have. They have only done 80 odd miles plus the other startups I have done to get the bike going and idling it to take videos, etc. The valves pulled out OK, not catching the seals and ripping or damaging them in any way. I see no reason why I cant put the valves back in after oiling them. The seals are not OEM (they are $13.20 each at local dealer), I am pretty sure they are Vesrah. If they fail it is no big deal to pull the head and replace them in a year or two.

                Comment


                  Originally posted by Suzuki_Don View Post

                  Thoughts please?
                  Hey Don, I am really surprised that you have not found the problem yet...Did you happen to check the deck height when you assembled the motor. This would be the measurement from the shoulder (edge) of the piston and the cylinder surface. You need a bare minimum of .035" clearance between the piston edge and the cylinder head. This would usually be a "given", but you have mixed parts from different motors. Usually you can tell if they are running too close by the carbon left in the chamber. The clean spots indicate close proximity of the piston to the head. It's hard to tell from the pics, some of the carbon may have been wiped off.....My gut feeling is that the problem arose from the part swap. Your gut feeling is that it lies in the top end..."Top end rattle".....Check the top end carefully.....Also check the camshaft end float while you have it apart. If you have the valves out, why not??.....Billy

                  Comment


                    Originally posted by BadBillyB View Post
                    Hey Don, I am really surprised that you have not found the problem yet...Did you happen to check the deck height when you assembled the motor. This would be the measurement from the shoulder (edge) of the piston and the cylinder surface. You need a bare minimum of .035" clearance between the piston edge and the cylinder head. This would usually be a "given", but you have mixed parts from different motors. Usually you can tell if they are running too close by the carbon left in the chamber. The clean spots indicate close proximity of the piston to the head. It's hard to tell from the pics, some of the carbon may have been wiped off.....My gut feeling is that the problem arose from the part swap. Your gut feeling is that it lies in the top end..."Top end rattle".....Check the top end carefully.....Also check the camshaft end float while you have it apart. If you have the valves out, why not??.....Billy
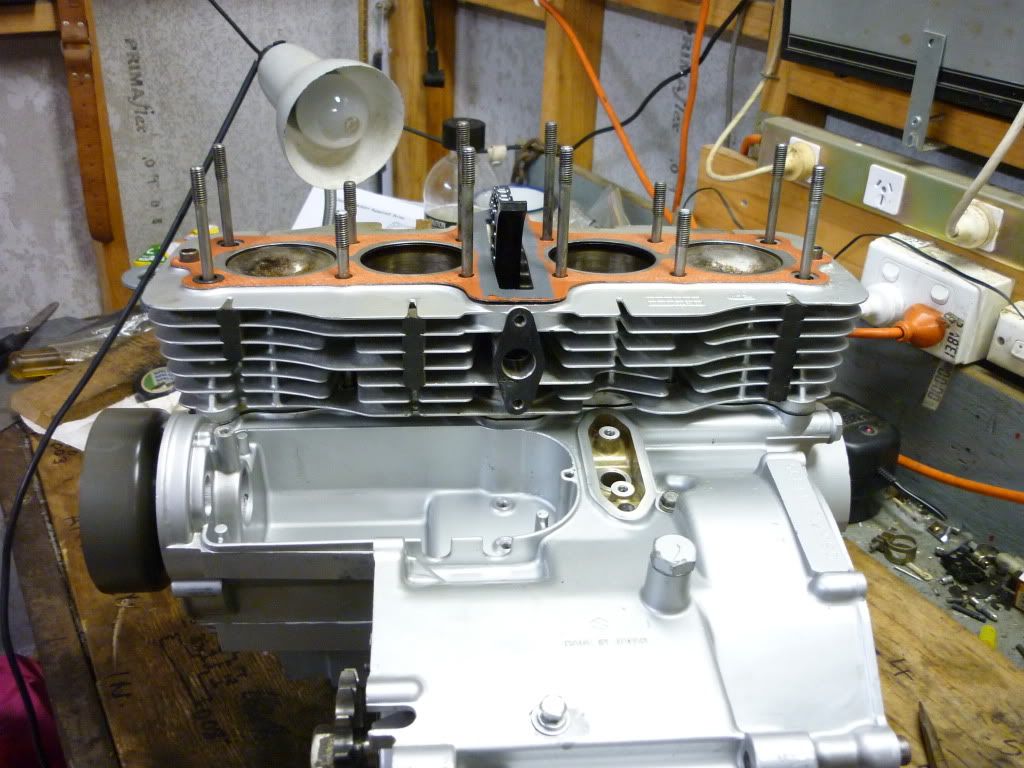
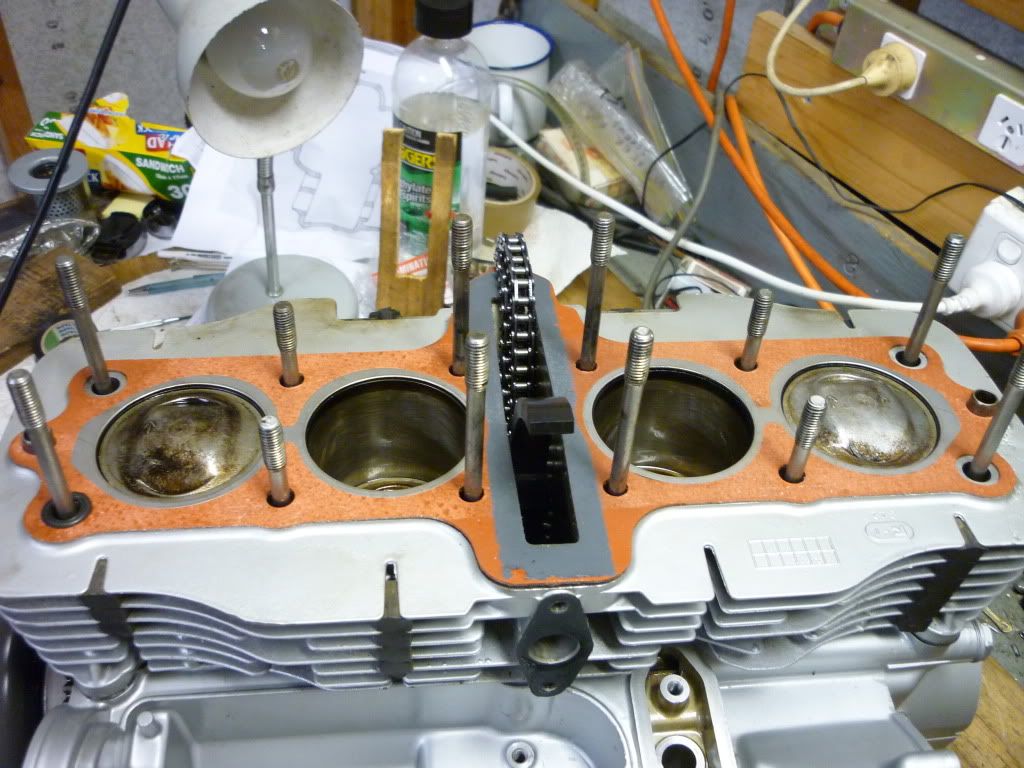
                    Billy here are some pics of the cylinders which gives some indication of the deck height. Look especially at the carbon ring on cylinders 2 & 3. I know this is where the top ring's travel finishes, and the piston top will be somewhat higher than this, but it gives some idea. In these pics # 1 & 4 pistons are at TDC. BTW the stroke for the 550 and 650 motors is exactly the same, same gudgeons, etc.


                    I will measure the deck height again tonight, although the cylinders will not be compressed down hard onto the crankcase until the head is torqued down. But I will get a measurement anyhow and report back.

                    I measured the end float on the cams previously and it was .016" on one cam and I think .012" on the other one. But that was with the valve springs fitted, so I might take the measurement again and as the springs are out the cams should move more freely.
                    Last edited by Guest; 10-06-2010, 11:34 PM.

                    Comment


                      OK so I measured the deck height and I don't have any -- so I don't know where that leaves me.

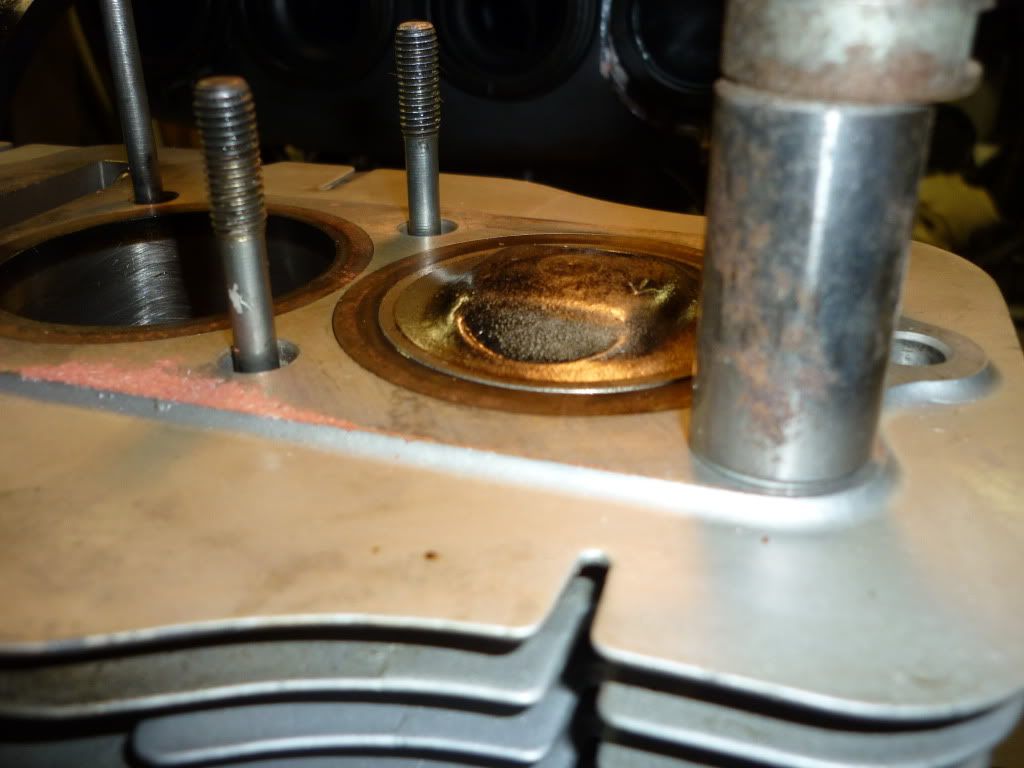
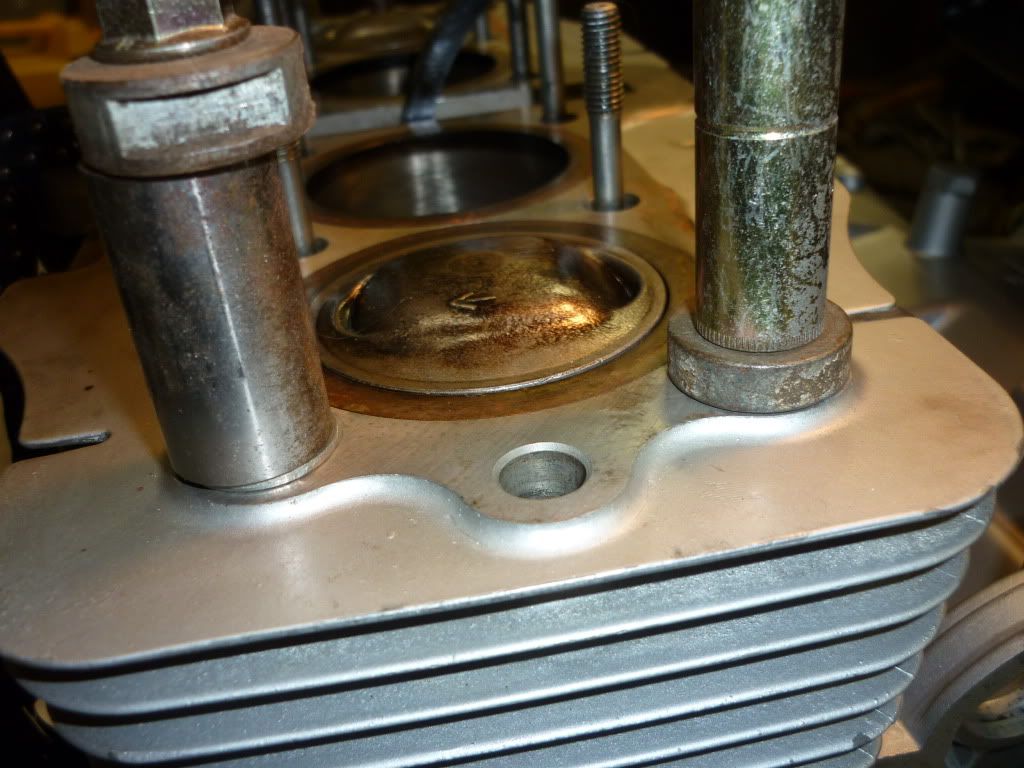
                      The pistons outer/upper circumference is .018" to .022" above the top of the steel cylinder liner.

                      The head gasket thickness is approx .050".

                      So that leaves by my calculation approx. .028" clearance between the top of the piston and the cylinder head surface. Is that enough?

                      Pics of pistons above cylinder height below:


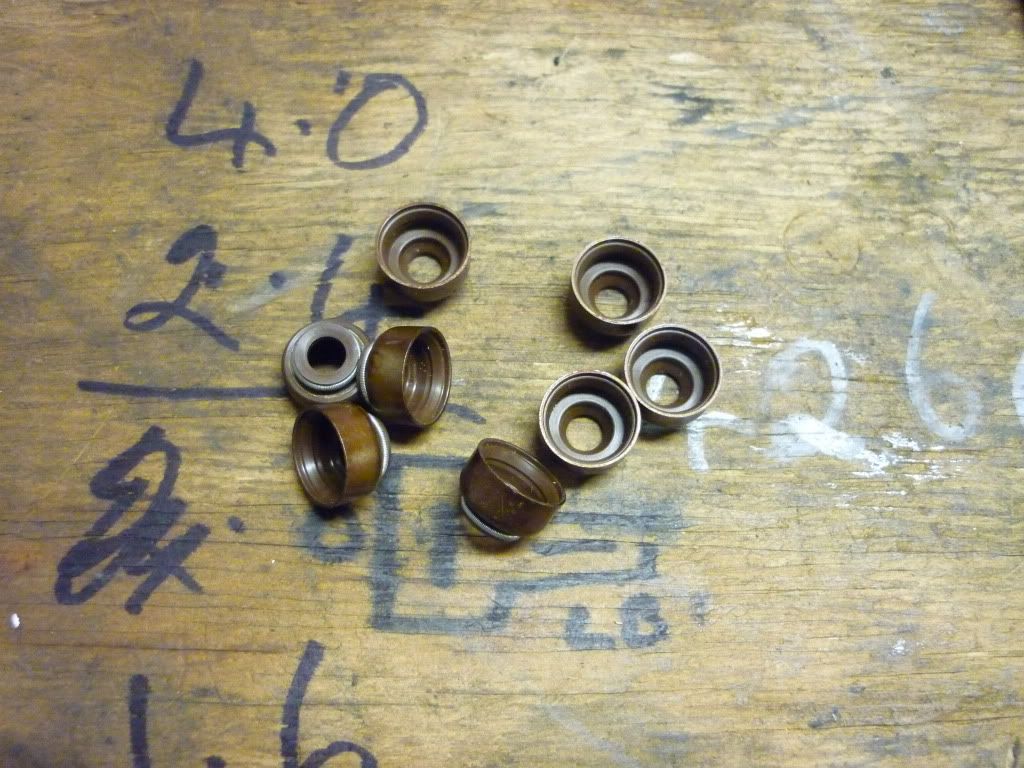
                      I decided to purchase a new set of valve stem seals as well to install as the head goes back together.


                      .

                      Comment


                        Those valve stem seals look pretty good. I'd take a magnifying glass and take a close look for nicks and put them back in service if you don't find any.

                        Regarding the deck height, I suggest you talk to rapid ray about that detail. I've heard of people using two base gaskets to get the deck height where it should be but I don't know how much you need.
                        Ed

                        To measure is to know.

                        Mikuni O-ring Kits For Sale...https://www.thegsresources.com/_foru...ts#post1703182

                        Top Newbie Mistakes thread...http://www.thegsresources.com/_forum...d.php?t=171846

                        Carb rebuild tutorial...https://gsarchive.bwringer.com/mtsac...d_Tutorial.pdf

                        KZ750E Rebuild Thread...http://www.thegsresources.com/_forum...0-Resurrection

                        Comment


                          Don, we are looking at about a .035 clearance at our deck height / shoulder height difference on the race hondas.

                          However, we are also looking at extended use at 12k+ rpm. Stuff stretches. In any case, I would think that .035, or maybe a bit more, maybe .040 would probably be a good number for an air-cooled street bike, but as I said, most bikes can run .035-ish no problem.

                          It appears you are a bit lower than that, though

                          A custom height base-gasket from cometic, or just a second base gasket will bring you within spec.

                          However, there is another option. And, shouldnt be terribly expensive.

                          Stick with the stock gaskets, but have your local machine shop turn down the shoulders on your pistons. Shouldn't be more than 10-15 bucks per, as all they're turning down is the quench band of the piston. It's flat, far as I can tell, on these pistons.

                          Why do this?
                          Because it keeps your compression ratio at what it is now.
                          It also allows you to use stock-height gaskets, which cause less problems in the long run, and of course, are cheaper and easier to get than custom ones (or extra ones for more height) when they need to be changed in the future.

                          The gaskets should compress something like .003-.004 (each), you have .028" uncompressed, so something like .021" compressed, so to get .035", just have them turn off .014 from the shoulders of the pistons you have.

                          That's my recommendation, anyway. But, I'm far from a GS expert (or any kinda of expert, for that matter..) and perhaps someone else will have better advice for you.
                          Last edited by Guest; 10-07-2010, 11:36 AM.

                          Comment


                            Hey Don, Mlinder is correct. The target clearance is .040" ......035" is absolute bare minimum. You need to accurately measure the piston height above the block and also accurately measure the head gasket. I use a piece of 1 1/4" round tubing (3" long) with a small bracket welded to the side for attaching a dial indicator to it. Attach the dial indicator to where when you set the tube down on the block, the dial stem is partially depressed. This allows you to rotate and move the dial around while the needle stays zero'ed. You zero it on the deck and then rotate it over to the piston shoulder while lifting the dial stem over the bump. Let the stem down onto the piston and take a measurement. Do this a couple times to make sure you get repetitive readings. Once the dial is on the piston shoulder, rotate the crank and stop at the maximum piston travel (TDC).....Measure your base gasket to see what value (clearance) you will get with 2 base gaskets on it....I would not recommend cutting the pistons down as this may cause a new problem in the quench area of the piston....Billy

                            Comment


                              BadBilly is probably correct, for the least amount of work to get it running correctly now, etc.
                              But I'm weird. I'd still do the shoulder work. The quench would be the same, and the squish band appears to be really mild, though I'll have a closer look at it tonight.

                              Comment


                                Originally posted by BadBillyB View Post
                                Hey Don, Mlinder is correct. The target clearance is .040" ......035" is absolute bare minimum.....Billy
                                Guys thanks for the replies. Would you believe there is not a single cylinder base gasket for the 650 motor in this country. You guys in the US don't know how lucky you are. So I've been up to Pep's Auto and bought a roll of oil resistant gasket material to make one of my own. It is .8mm thick.

                                So I need your advice on the swish band parameters.

                                The head gasket is .050" thick and the .8mm base gasket will equate to .031" minus .004" for the head gasket squashing up equals .077" then minus the .020" average that the piston swish band is above the cylinder deck equals a distance of .057" (hope my maths is right).

                                You guys are suggesting .035" minimum or preferably .040" as ideal. As my calcs end up at .057" will that be acceptable or will it affect the swish/quench issue and reduce performance in any way.


                                So my choice seems to be .057" with an extra gasket or .028" with only a single base gasket.

                                What are your thoughts on this?

                                Thanks
                                Last edited by Guest; 10-08-2010, 02:51 AM.

                                Comment

                                Working...
                                X