From my point of view where slipper clutches are possibly only marginally legal in our racing, the OP's method where everything is hidden may be preferable - even if harder to do.
Announcement
Collapse
No announcement yet.
Slipper clutch conversion project
Collapse
X
-
Do I gather correctly that the vacuum signal gets to the diaphragm via a hollow pushrod ? And clutch actuation is as normal when no vacuum ?Originally posted by Agemax View Post
From my point of view where slipper clutches are possibly only marginally legal in our racing, the OP's method where everything is hidden may be preferable - even if harder to do.
-
the vacuum actuates the diaphragm by a port on the clutch cover itself, sucking the diaphragm outwards,thus disengaging the clutch slightly.Originally posted by GregT View PostDo I gather correctly that the vacuum signal gets to the diaphragm via a hollow pushrod ? And clutch actuation is as normal when no vacuum ?
From my point of view where slipper clutches are possibly only marginally legal in our racing, the OP's method where everything is hidden may be preferable - even if harder to do.
the clutch actuation works as normal without the vacuum1978 GS1085.
Just remember, an opinion without 3.14 is just an onion!
Comment
-
Thanks - i must have a look at one at the next BEARS meeting here.Originally posted by Agemax View Postthe vacuum actuates the diaphragm by a port on the clutch cover itself, sucking the diaphragm outwards,thus disengaging the clutch slightly.
the clutch actuation works as normal without the vacuum
Comment
-
 ashdricky
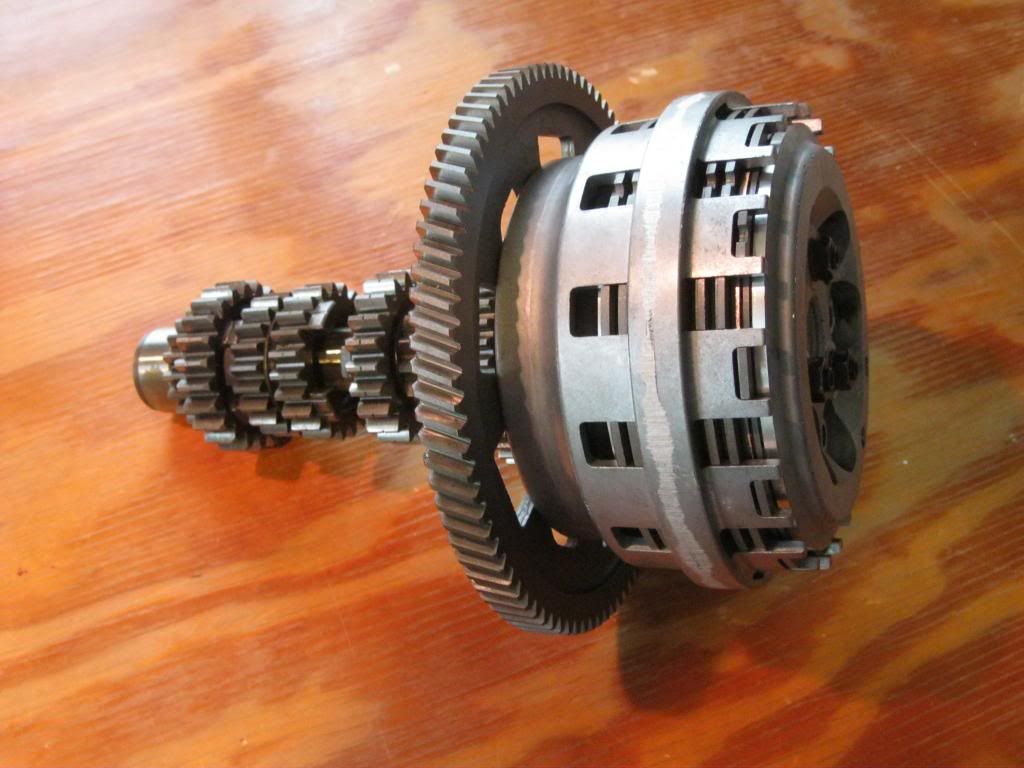
Here is the finished basket and hub assembly, The basket had to be machined another two time before I could get the correct fitment, and the centerhub had to get shortened by~0.050 but everything dose rotate without interference.

I drew these up in cad they are the inserts to fill the cut outs in the primary gear. as a preemptive response regarding the welding process for case hardened parts, the method I plan to use is as follows, first heat the gear to 300F and let cool slowly, then rough the area around the cutouts, and use 80SD2 filler rod (or 312 Stainless) and tack weld the inserts in place. then we will machine the surface flat drill our holes and bolt the basket to the primary.
Note: The inserts are made of 1018

Comment
-
 ashdricky
Thank you Sci your compliments are appreciated.Originally posted by Sci85 View PostWow. You guys amaze me. That looks awesome.
So the next thing I am looking into is the clutch cover, I will need to extend it which will not be much of a problem, what I am considering is installing a window so that the rotating assembly can be seen, what type of "plexiglass" is used to make these windows and how are they typically installed?
Comment
-
Looking good. That amount of cutting and trying is about par for the course.
Personally, i wouldn't do any stress relief/softening/heat treating of the primary gear pre or post welding. I don't know what the gear composition is though it's obviously something equivalent to the old EN36 or 39 specs. Sorry, don't know the equivalent US numbers.
The inserts are going to be trapped in the gear, yes ? Cover plate on the back or at least large washers on the bolts going through them ?
The welds are only to stop them falling out, not taking end loads as i see it.
Comment
-
 ashdricky
wow I am a bit dense sometimes, I had ro read that post again to understand that it the stock Suzuki clutch that you use, not the Aprilia clutch at all.Originally posted by Agemax View Postyou use the complete stock clutch, you will need to machine the stock GS clutch cover to fit the Aprilia end cover.
it works by vacuum. a big diaphragm is bolted to the centre of the clutch pressure plate, on the release pushrod. the end cover is sealed with a tube attached which connects to the vacuum ports on the inlets.
when you throttle off the vacuum in the inlet tracts pull on the diaphragm and disengage the clutch just enough to allow it to slip slightly.
sounds too simple but it really works
Comment
-
 ashdricky
no actually the Inserts will be completely welded on each side, we are only tack welding it to ensure the gear doesn't warp during the weld process. after it has been machined the only indication that inserts were used will be the slight discoloration around the area. I may still use a 1mm titanium plate on the back side of the gear in place of washers. Oh and the preheat treatment was the recommended process by the man who told me which filler rods to use.Originally posted by GregT View PostLooking good. That amount of cutting and trying is about par for the course.
Personally, i wouldn't do any stress relief/softening/heat treating of the primary gear pre or post welding. I don't know what the gear composition is though it's obviously something equivalent to the old EN36 or 39 specs. Sorry, don't know the equivalent US numbers.
The inserts are going to be trapped in the gear, yes ? Cover plate on the back or at least large washers on the bolts going through them ?
The welds are only to stop them falling out, not taking end loads as i see it.Last edited by Guest; 09-18-2013, 03:24 PM.
Comment
-
yep stock GS clutch, but only if you have the pushrod operated clutch or a pushrod/hydraulic clutch conversion. obviously wont work if you have the pressure plate "lifter" in the clutch cover itself.Originally posted by ashdricky View Postwow I am a bit dense sometimes, I had ro read that post again to understand that it the stock Suzuki clutch that you use, not the Aprilia clutch at all. 1978 GS1085.
Just remember, an opinion without 3.14 is just an onion!
Comment
-
I've been following this thread and admiring your willingness to experiment and innovate - and let us all in on the learning. Has there been any recent progress?
"to do something well is so worthwhile that to die trying to do it better cannot be foolhardy. Indeed, life is not measured in years alone but in achievement...." Bruce McLaren
Comment
-
 ashdricky
Yes Sir actually the primary drive gear is at the machinist right now after having several setbacks. I am actually in the process of moving to Ohio for a new job and have had to put the clutch project on a lower priority level.Originally posted by gs58 View PostI've been following this thread and admiring your willingness to experiment and innovate - and let us all in on the learning. Has there been any recent progress?
This conversion has taken so much time and much more machining than originally thought, but we are doing very well and have almost all of the major parts complete.
Comment
-
 ashdricky
the most recent advancement, was the welding of the inserts of the primary drive gear. Unfortunately I used a new welder who I didn't know instead of waiting for an appointment with my usual guy. This new guy just ran 3 full beads on both sides rather than many spot welds which would have minimized the distortion. The result was .009 distortion which could bee seen when the gear was put in the lathe. I am considering moving forward with the project using this gear as putting together another is time consuming. Is there enough play in the meshing of the gears to compensate for this distortion?Originally posted by gs58 View PostI've been following this thread and admiring your willingness to experiment and innovate - and let us all in on the learning. Has there been any recent progress?
Comment
-
I wouldn't have thought so...but do a trial assembly with just the bare crank and the gearbox mainshaft and see if there are any tight spots.Originally posted by ashdricky View Postthe most recent advancement, was the welding of the inserts of the primary drive gear. Unfortunately I used a new welder who I didn't know instead of waiting for an appointment with my usual guy. This new guy just ran 3 full beads on both sides rather than many spot welds which would have minimized the distortion. The result was .009 distortion which could bee seen when the gear was put in the lathe. I am considering moving forward with the project using this gear as putting together another is time consuming. Is there enough play in the meshing of the gears to compensate for this distortion?
You may be lucky....
Bit of a pain to get this far and strike this.
Comment
-
 ashdricky
It is, but I'd rather have to re do the gear than re do the basket which after all of the machining is the most costly part of the assembly, next to the case hardened slipper cam.Originally posted by GregT View PostI wouldn't have thought so...but do a trial assembly with just the bare crank and the gearbox mainshaft and see if there are any tight spots.
You may be lucky....
Bit of a pain to get this far and strike this.
Comment
.png)
Comment