Announcement
Collapse
No announcement yet.
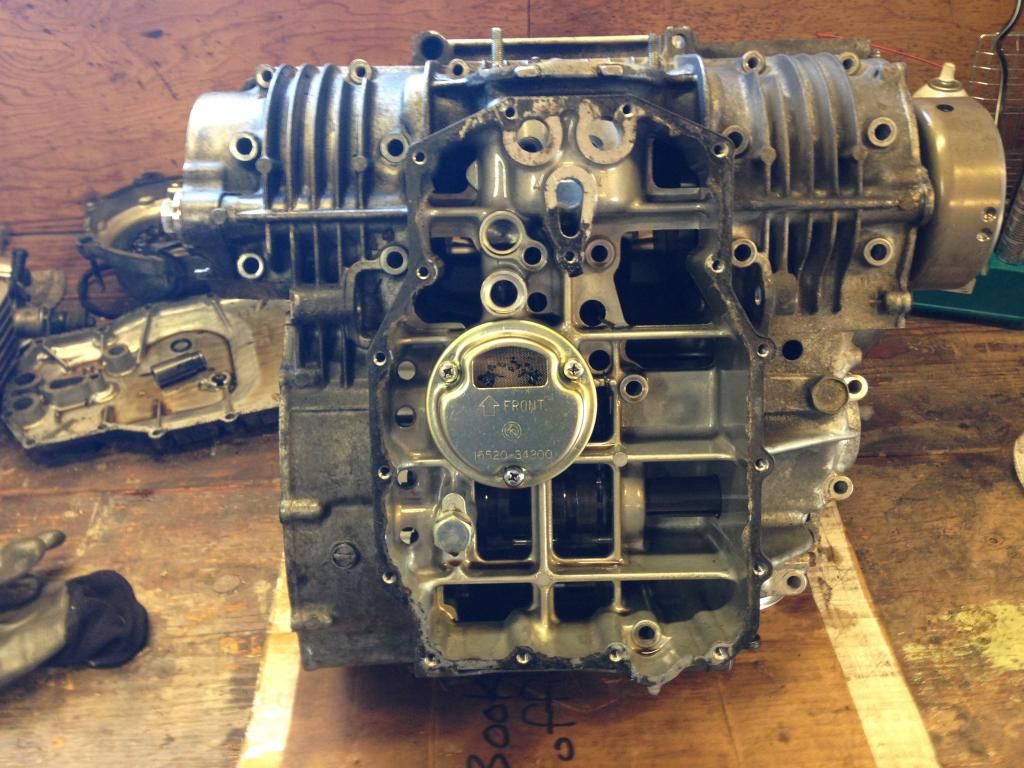
1982 GS650GL. 2nd gear is busted. Time to take apart the engine
Collapse
X
-
 William Groebe
 -
 William Groebe
I pulled out the neutral stopper housing, spring, and housing.
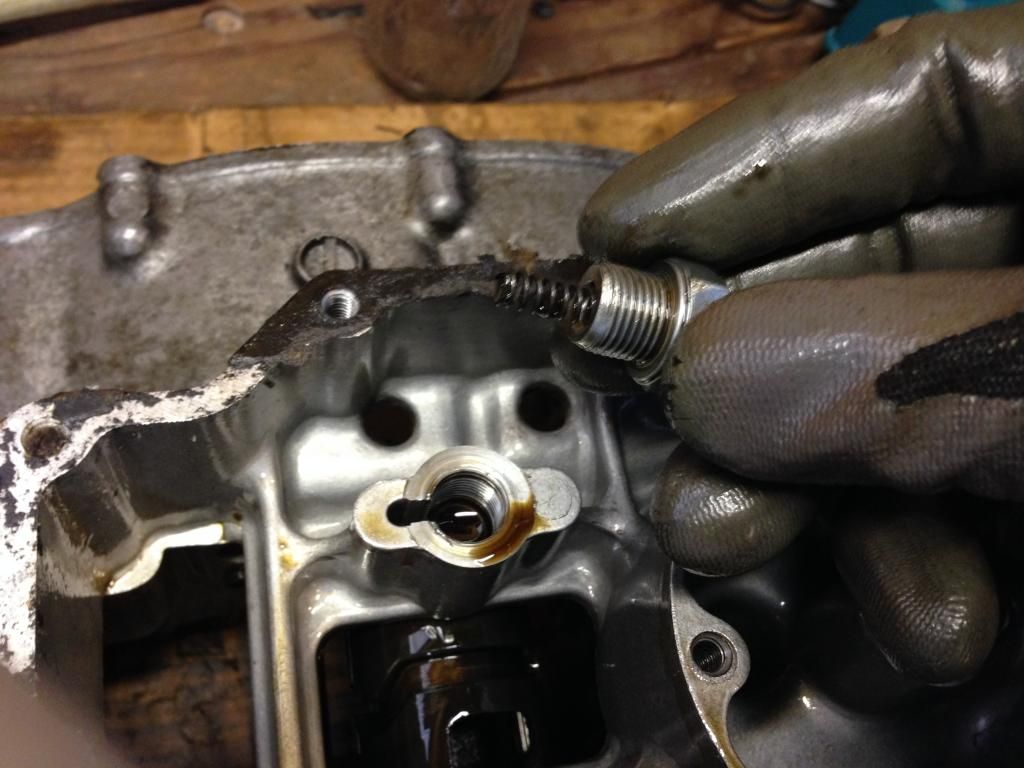
Then I removed the gearshaft camdrive and pawl screws. I removed the little cam stopper spring and it flew off. I found it, but didn't take a pic of where it was connected to the gear shifting fork shaft before removing it. I'll have to figure that one out later. It look slike it was connected to the little widget thingie on the same shaft as the single fork. I pulled out the gear shifting cam and here's the little pieces I've got.
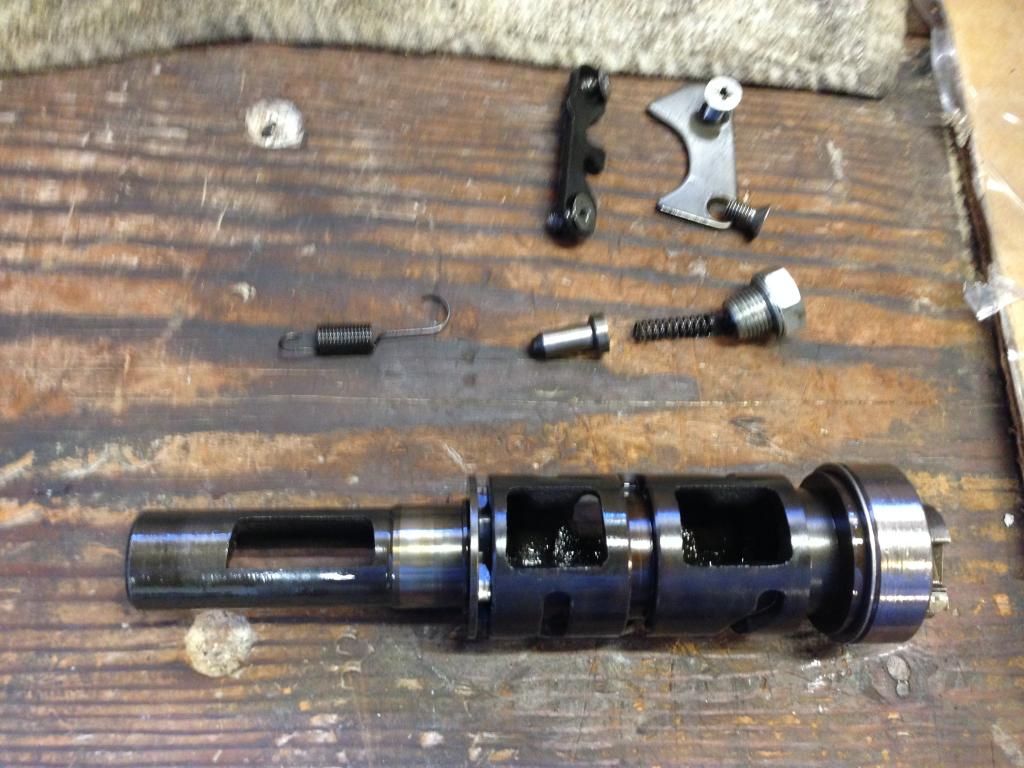
Whoops. I handled the gear shifting cam and some pieces fell off the end of it. I didn't see how it was put together before it all sprung apart.
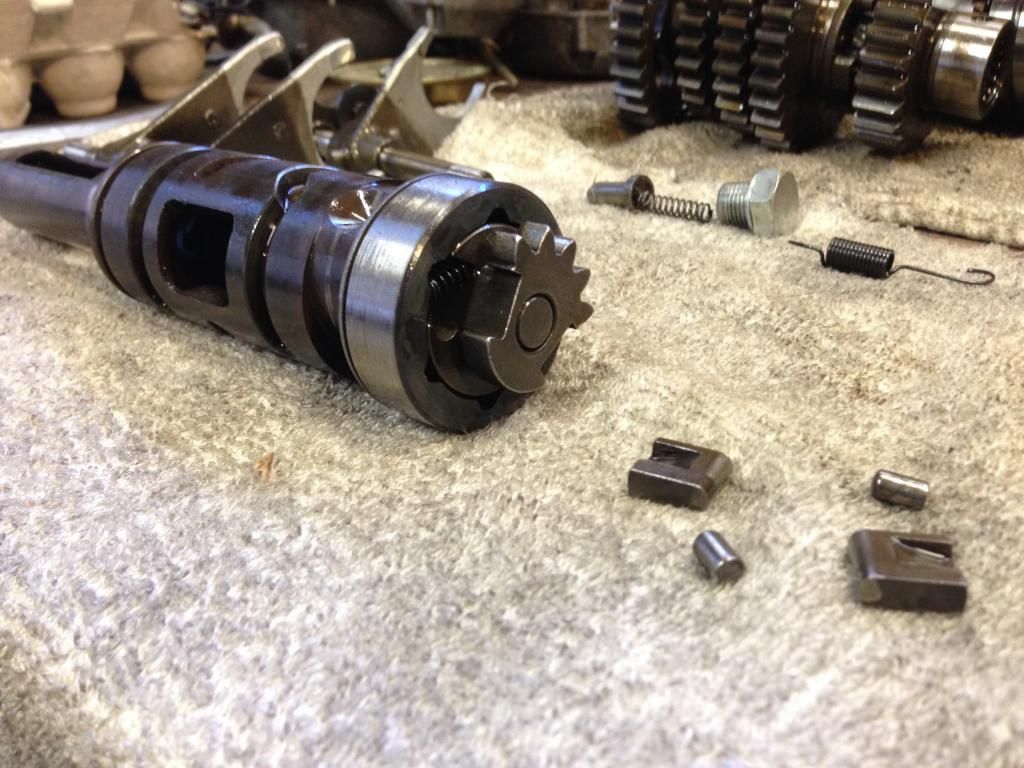
Looks like there are little springs inside the shaft end that push against little rods that hold little shims in place. The rods each have a flat end and a curved end. I assume the flat end pushes against the shims and the round end against the springs. Shout out if I got that wrong. I can't find any info in the service manual about this part.
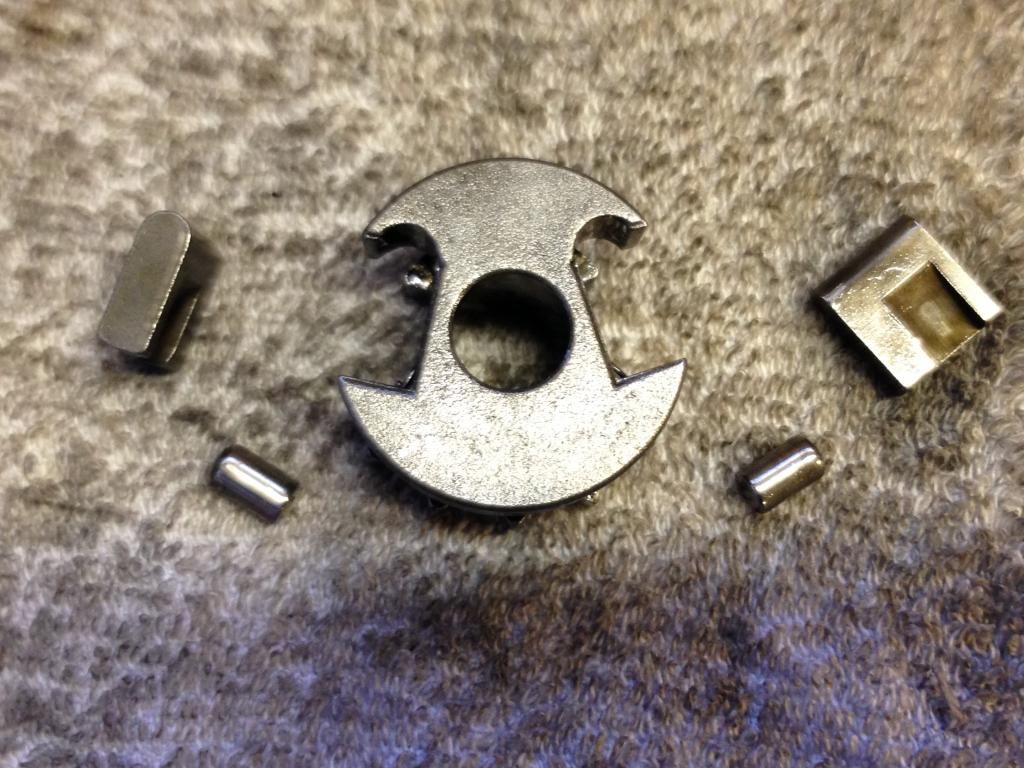
Examining the gear shifting cam there seem to be some gouges in the corners. I need to do aome more research on how the gear shifting cam works. I don't even know which gear position is which. I'm looking for problems with 2nd gear, but want to fix any problem I can while in here. Here's what one of the gouged corners looks like.
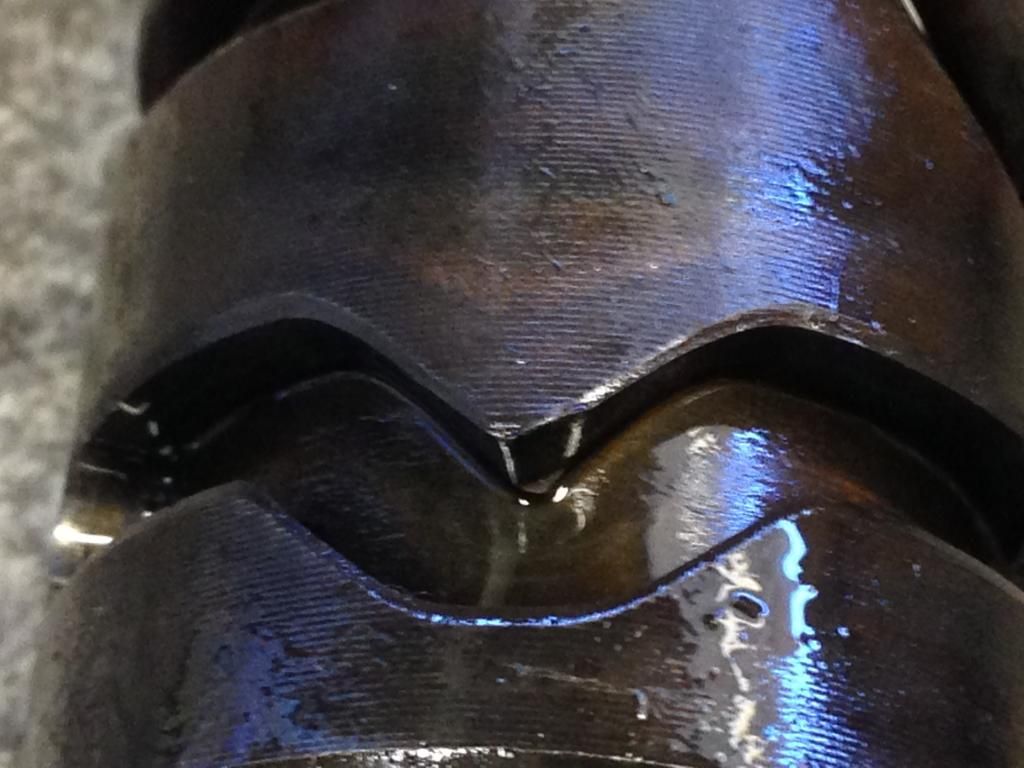
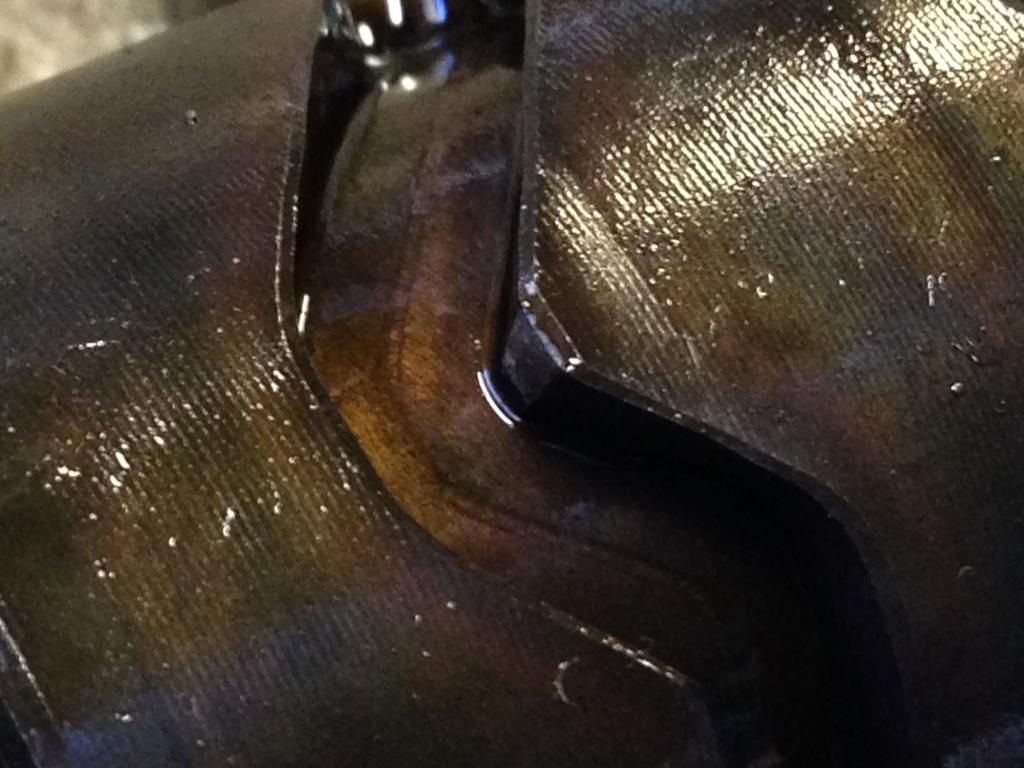
Here's another smaller gouged corner. EDIT** Turns out this is what a corner is supposed to look like. Flattened like this.
 Last edited by Guest; 09-18-2014, 07:54 PM.
Comment
-
 William Groebe
My brain is fried, and my body is fried from sweating in the garage all day. It was a scorcher here in Marin. I'm going to take apart the gear assemblies tomorrow and check the gear dogs and teeth. Here's what they look like now. I can't see any visible damage, so I assume it'll show up once I get them separated. Unless it really only is the shifter fork and gear shifting cam gouges.
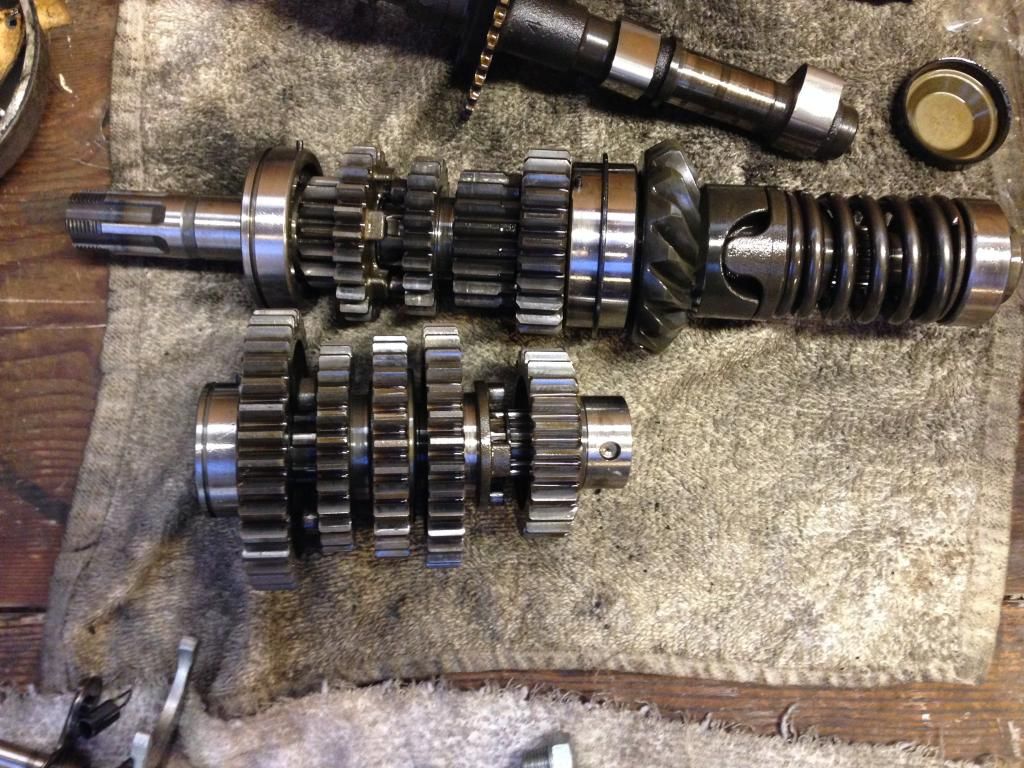
So my little issues are...
Do I need a new gear shift cam? Are the gouges bad enough that I should order a replacement?
I need to order at least one shifting fork to replace the gouged one.
Am I right in thinking that I put the gear shift cam head assembly back together with the little posts flat ends toward the shims and round ends toward the springs?
Where does the little cam stopper spring attach to on the fork shifter shaft? I unhooked it from the bottom of the crankcase and didn't check where it had been connected on the other side.
Thanks to anyone for any feedback. I am having fun with this little project, though I'd like to order myself my replacement parts and get back on two wheels as soon as possible. My truck is no substitute for my GS.
Comment
-
 barnbiketom
nice work!! and really nice pics...we need to REALLY LOOK at the gear dogs and mating surfaces/shaft? for second tho.. I think you will find that instead of the dogs being nice and square with perpendicular surfaces, the ones for second gear engagement will be rounded and SLOPED.
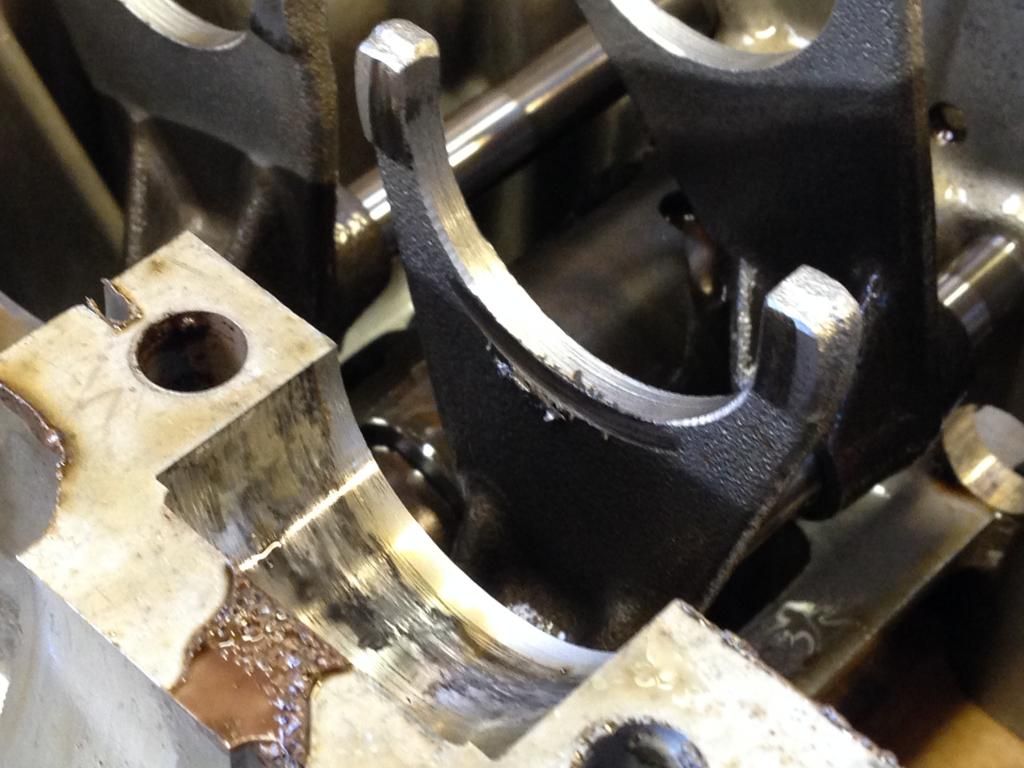
the shift fork is bad too and looks like the bike had someone power shifting it repeatedly!
the shift drum too, now that I look at it, looks like excessive force on the shifter(power shifting?) or maybe the PO dumped the bike and the shifter slammed into something??
or a combination of all the above Last edited by Guest; 09-01-2014, 08:54 AM.
Comment
-
Wow, MR Groebe, this is what I may be facing shortly (not a shifting issue, but a strip-down), so this excellent thread is a VERY welcome addition to the OEM
printed material. OUTSTANDING contribution!sigpicSome of the totally committed probably should be.
'58 + '63 Vespa 150's' (London, GB/RI, US)
'67 X6 T20 ('67 Long Beach, Ca.- misty-eyed)
'71 Kaw. A1-ugh ('71 SF, CA- worked @ Kaw dlr)
'66 Yam. YL1('72 SF-commuter beater)
'73 Kaw. S2A-2Xugh ('73 SF-still parts slave)
'78 GS 750C ('77 SF-old faithful-killed by son)
'81 KZ 750E ('81 SF-back to Kaw. dlr)
'81 GS 650G ('08 back to NE&ME- (project)
'82 GS '82 (2) GS650GZ, L, Middlebury, G current
Comment
-
 William Groebe
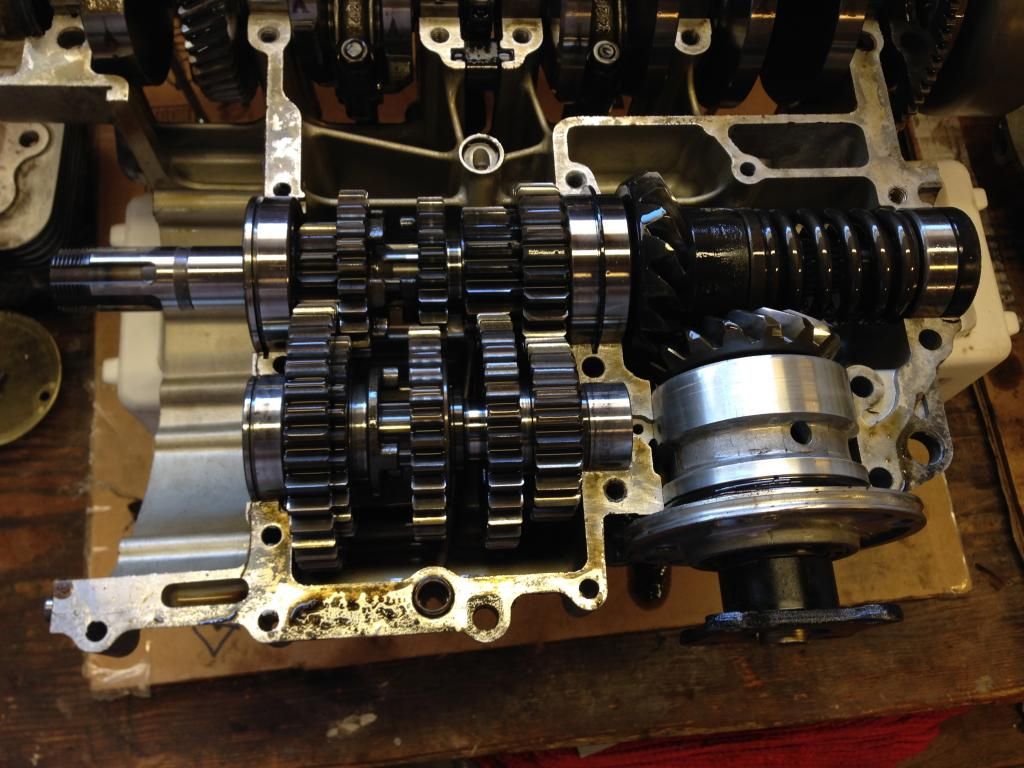
Took apart the transmission shafts and found that on the mainshaft the 2nd gear teeth are worn down a little on the driven edge of every other tooth. (Every other tooth contacts the 5th gear inner teeth)
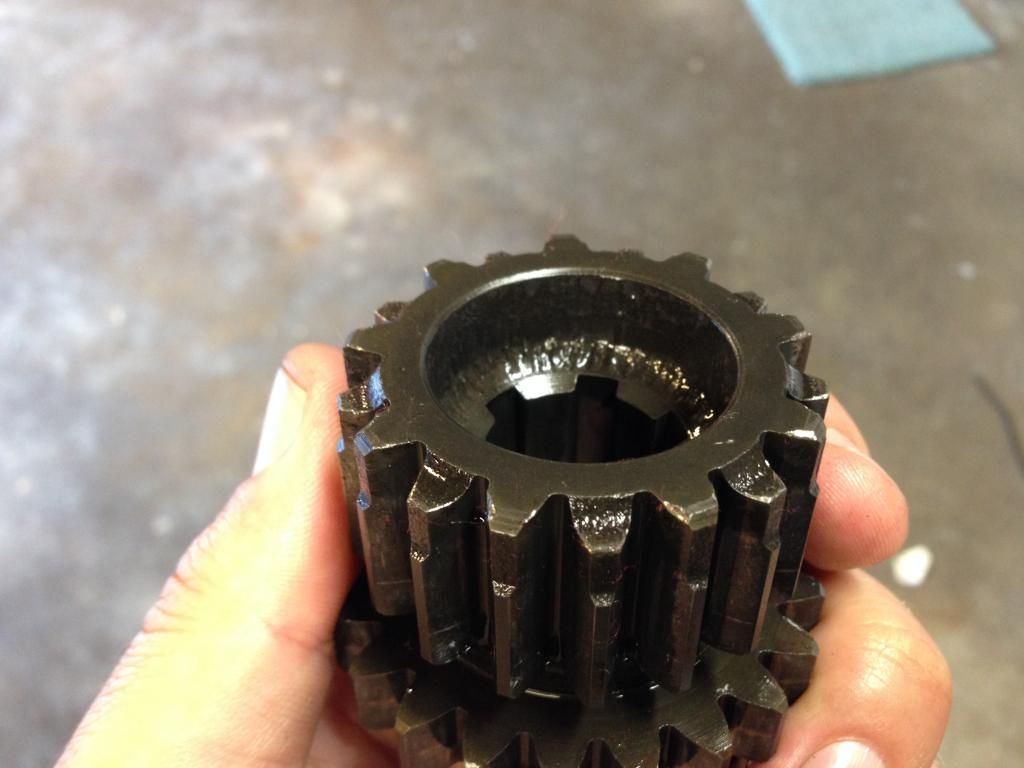
And the adjoining 5th gear inner teeth are a little worn down on the corners
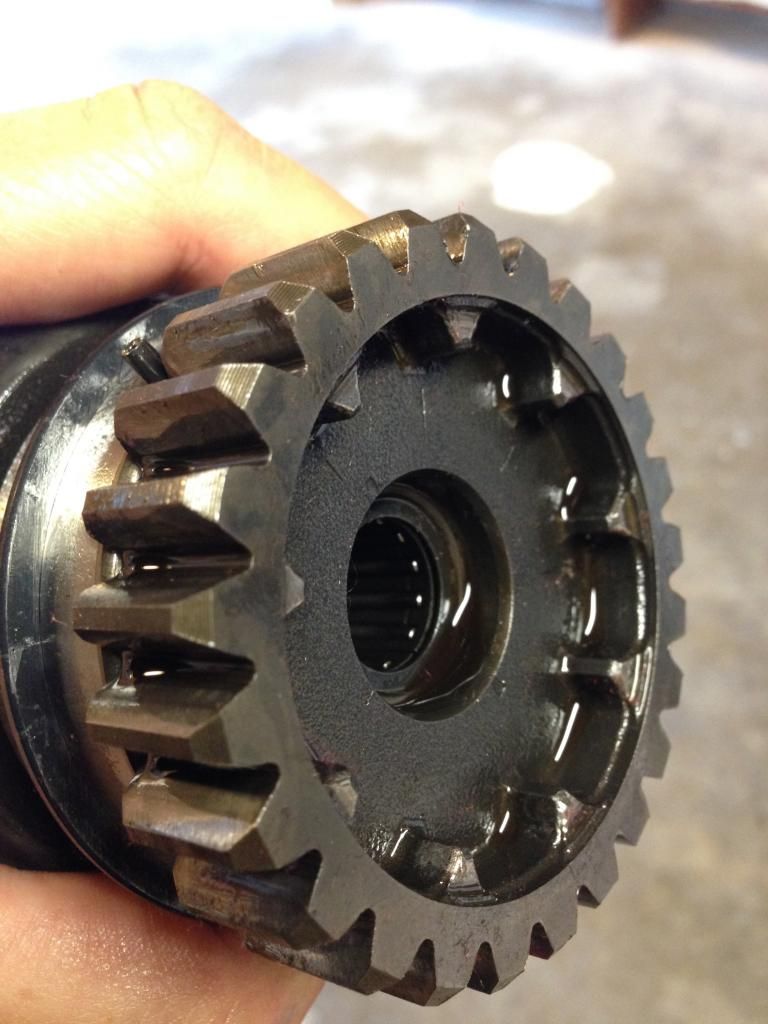
On the layshaft there is very minimal wear on the inner teeth of the 5th gear which is adjacent to the 2nd gear.
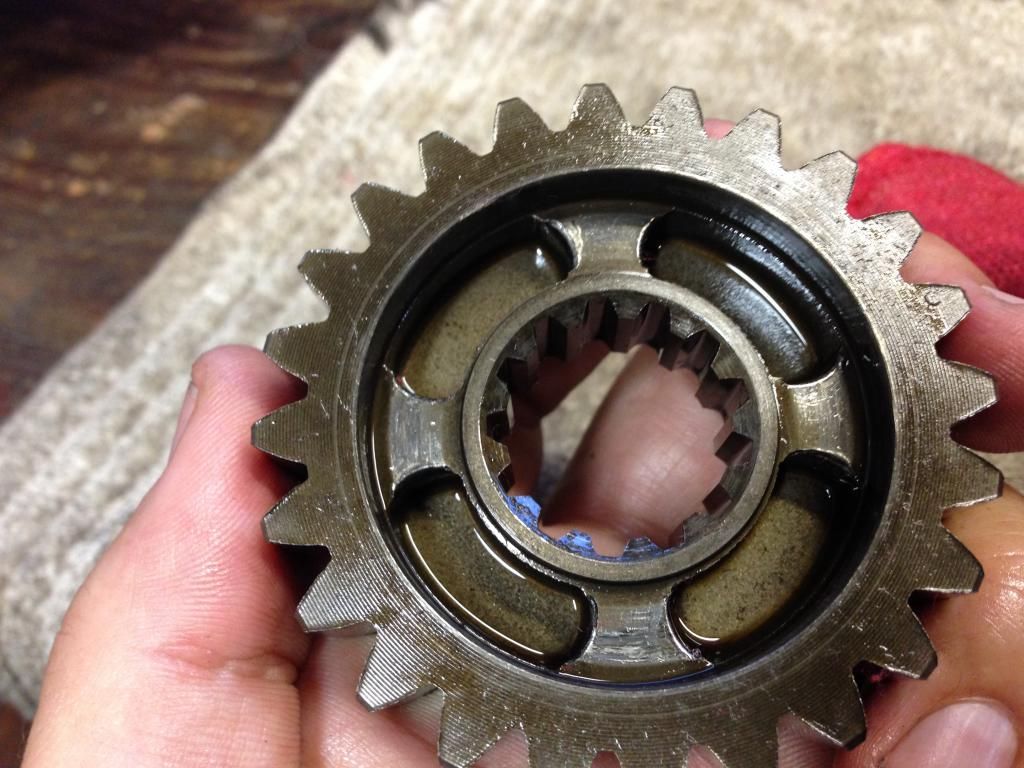
Also on the layshaft I can't see any real wear on the 2nd gear dogs, but maybe the edge should be even more sharp. I guess it's slightly rounded.
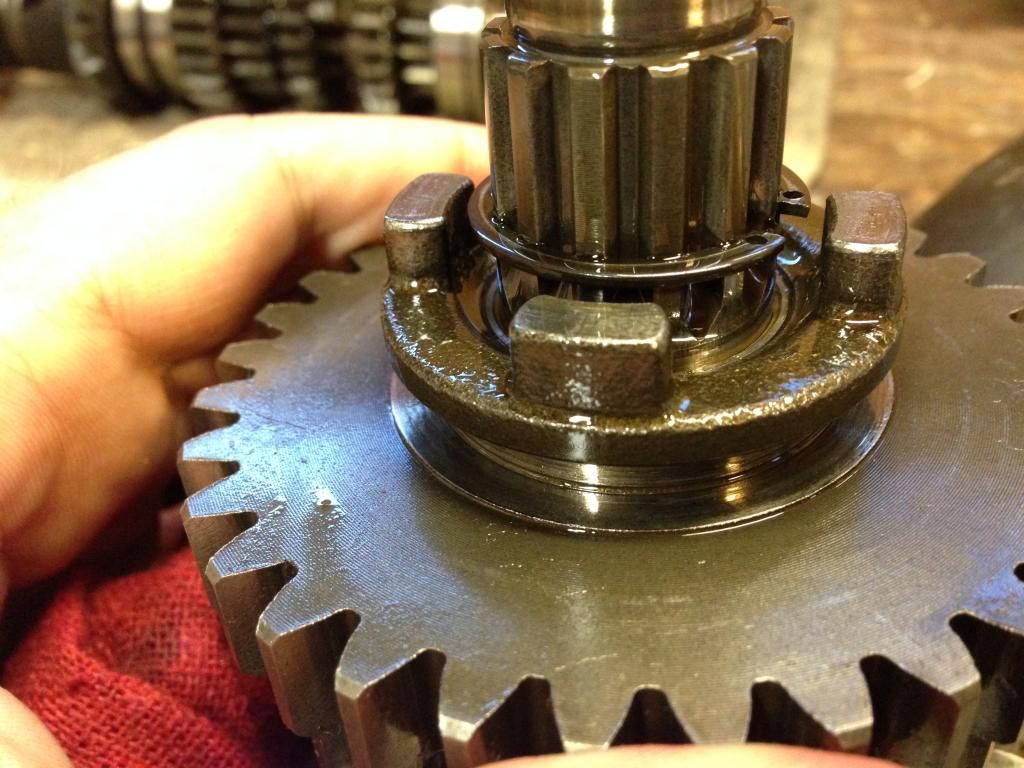
All the other gears look perfectly fine. And these ones don't look that bad to me, but like I said, I don't know anything about transmissions. I guess the one that looks the worst is the 2nd gear on the main shaft.
Should I replace all four of these gears? What says the GS forum?
Comment
-
 William Groebe
Something I figured out while taking everything apart is that the gouge in the groove of the gear shift shaft is where the messed up fork sits while in 2nd gear. Aha!
Comment
-
 William Groebe
Oh yeah.
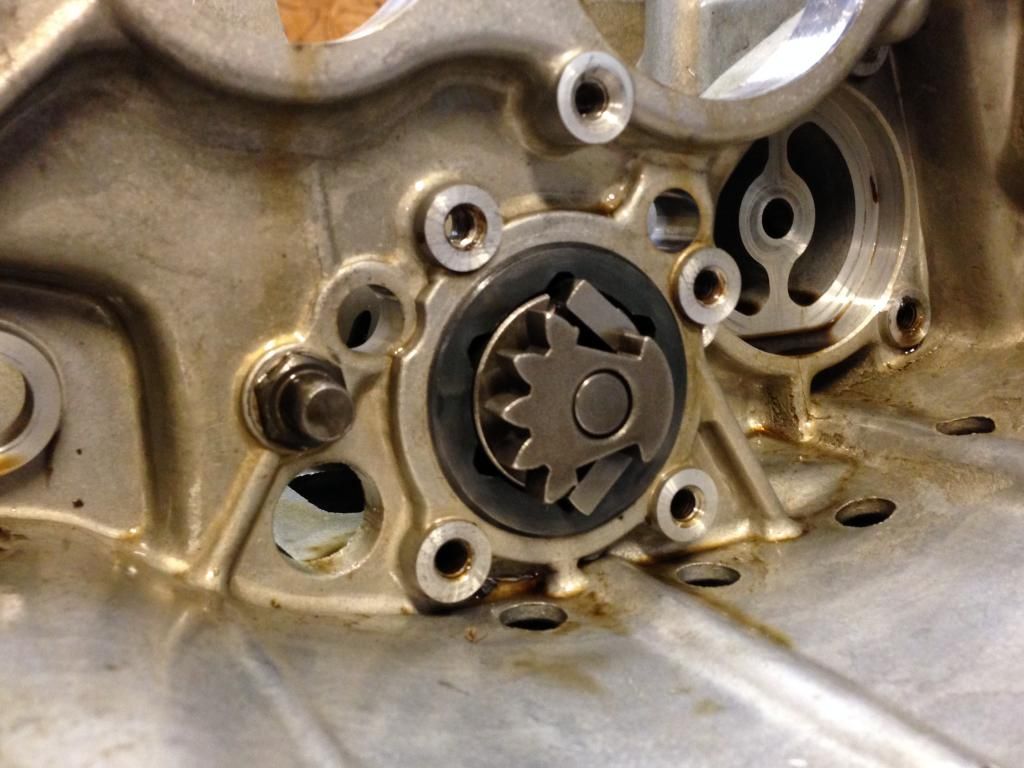
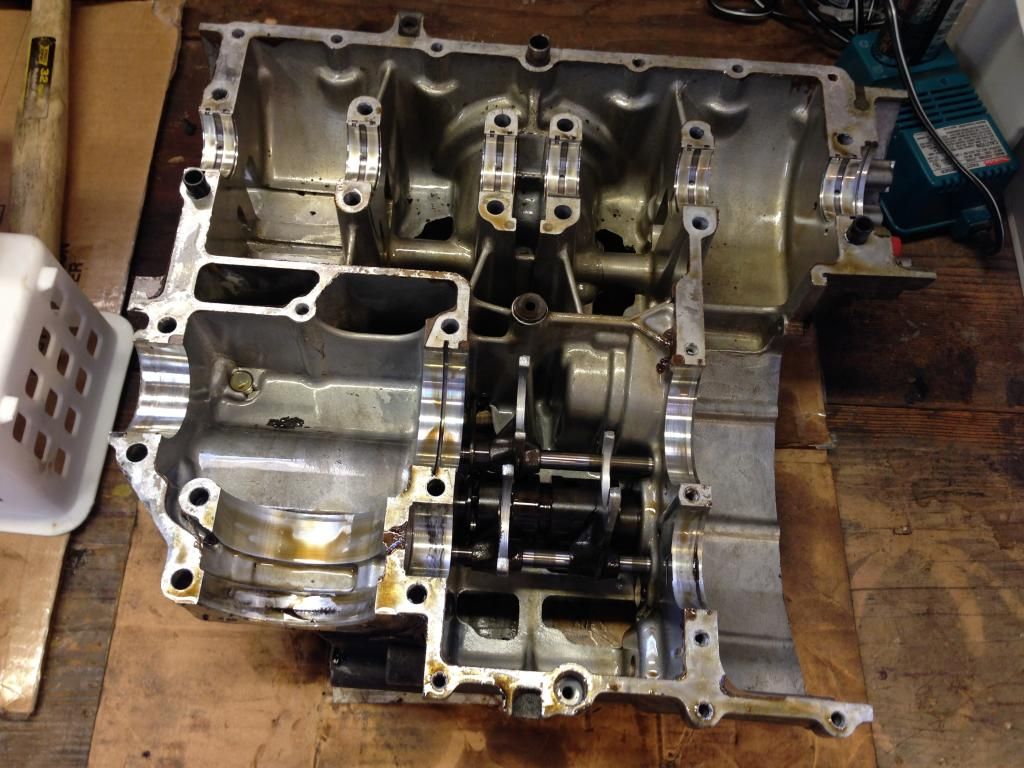
I was also able to figure out how to put the end parts of the gear shift shaft back together. Turns out I had taken a picture of it before disassembly. I put the pins back in to the holes with the springs round side down, and then put the shims in place over the pins and put it back onto the shaft. Here it is now all put back together and sitting in the crankcase for good keeping until I buy a new shift shaft.
Comment
-
"Took apart the transmission shafts and found that on the mainshaft the 2nd gear teeth are worn down a little on the driven edge of every other tooth. (Every other tooth contacts the 5th gear inner teeth)"
On your first pic..... The one showing gears
those "lower"teeth are designed like that (every other tooth)- this apparently aids the transition into fifth gear "lockup"- second gear teeth are really the bigger diameter ones on that "double" gear set.
edit. Here's a pic of shifting stuff
image.jpg1981 gs650L
"We are all born ignorant, but you have to work hard to stay stupid" Ben Franklin
Comment
-
 William Groebe
Yesterday's mail brought me a new (used) transmission, along with a bunch of engine gaskets. I'm waiting on a few more necessities, and then I'll be ready to put this machine back together.
Hopefully I'll be enjoying a nice long Saturday in the garage.
Comment
-
 60ratrod
first off, photos of the score man! also, did you need to tear the motor this far apart to split the cases? i'm getting ready to do the exact same thing to my 81 650g. it'd be awesome if i don't have to
Comment
-
 William Groebe
60ratrod. I'm not sure if you'll need to pull apart as much as I did, but my engine was leaking from the head, head cover, and cylinder , and I had no 2nd gear, so I needed to pretty much pull everything apart. But this is my first time doing this, so I can't really go about giving advice yet. Especially not until I put this bike back together and get it running again. *fingers crossed*
Here's where I am with my loot so far.
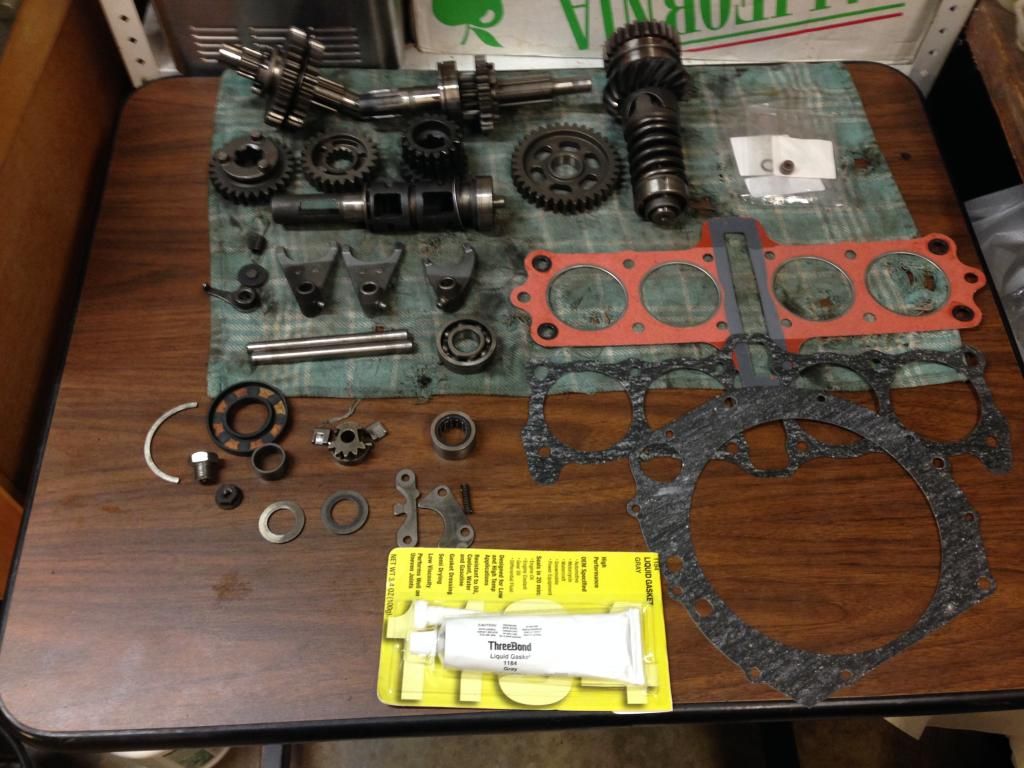
New tranny. New gaskets for the head, cylinder block, and clutch cover. And Threebond 1194 for the crankcase halves. The shift drum looks to be in great shape. No gouges anywhere along any of the grooves. And the shift forks look good too. The gears look about the same as the ones I have, but I think I'm going to go ahead and put the whole new transmission in there anyways just in case.
I'm still waiting for the new intake boots and o-rings, and the cam chain tensioner gasket. My intake boots were probably the originals, and it looks like someone caked on some kind of epoxy to keep them from falling apart. And check out these o-rings. Yeah right.
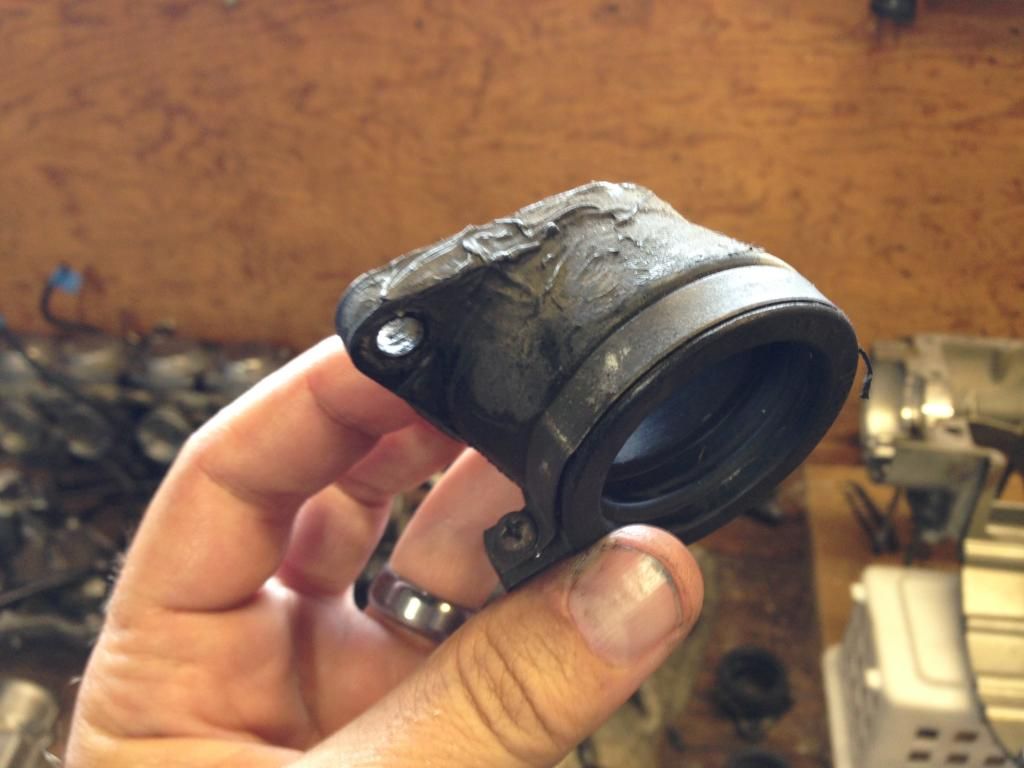
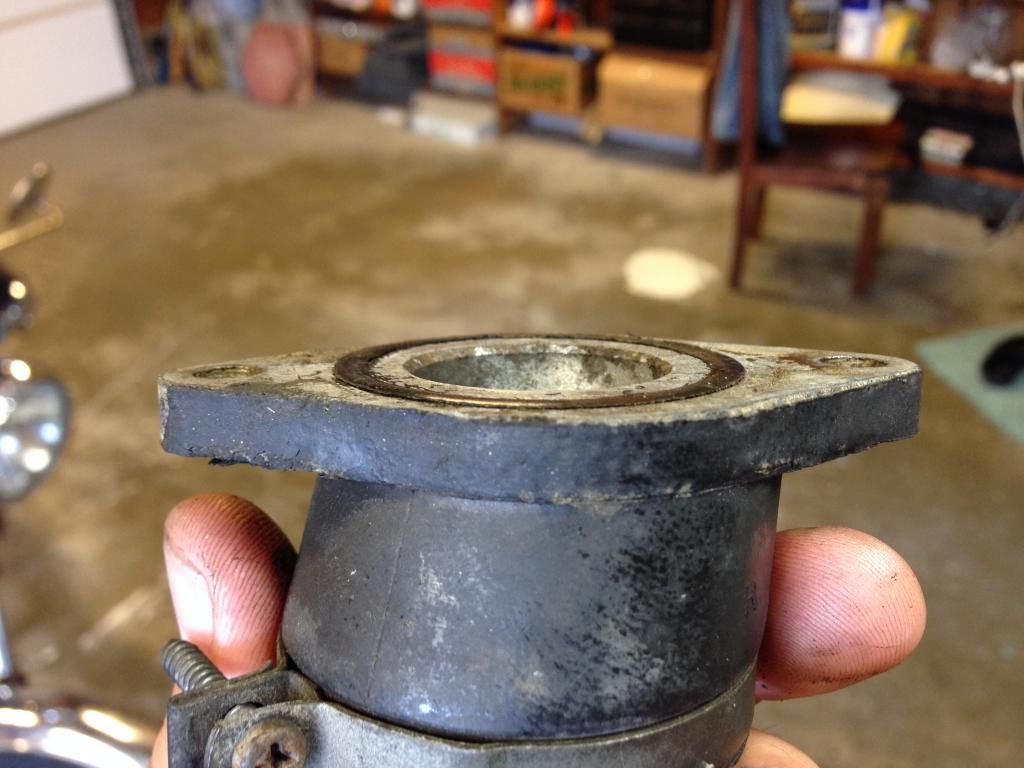
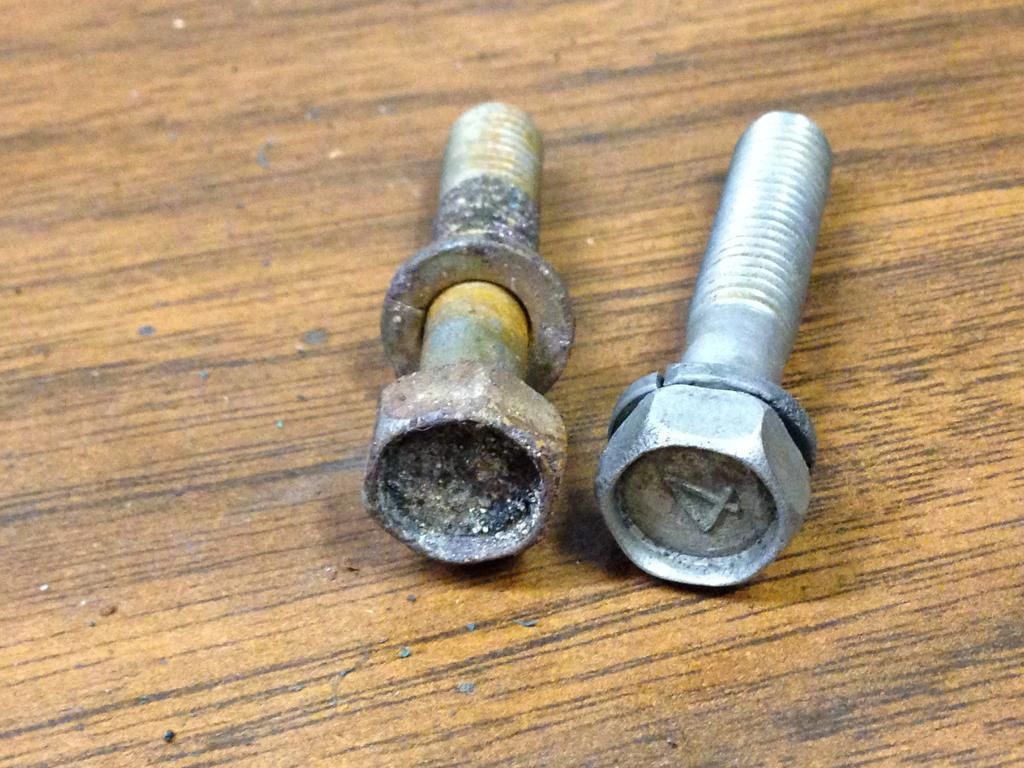
In the meantime I've been doing some cleaning of engine parts and bolts. Man, was my bike dirty and rusty, and covered in caked on and burned on oil and other gunk. I dropped the exhaust bolts in a bucket of vinegar for a couple of days, and then scrubbed them good with some green scotch brite pads. Here's a before and after.
I haven't taken any after photos of the cylinder but check out the before. Oil had been leaking all over the whole thing for decades.
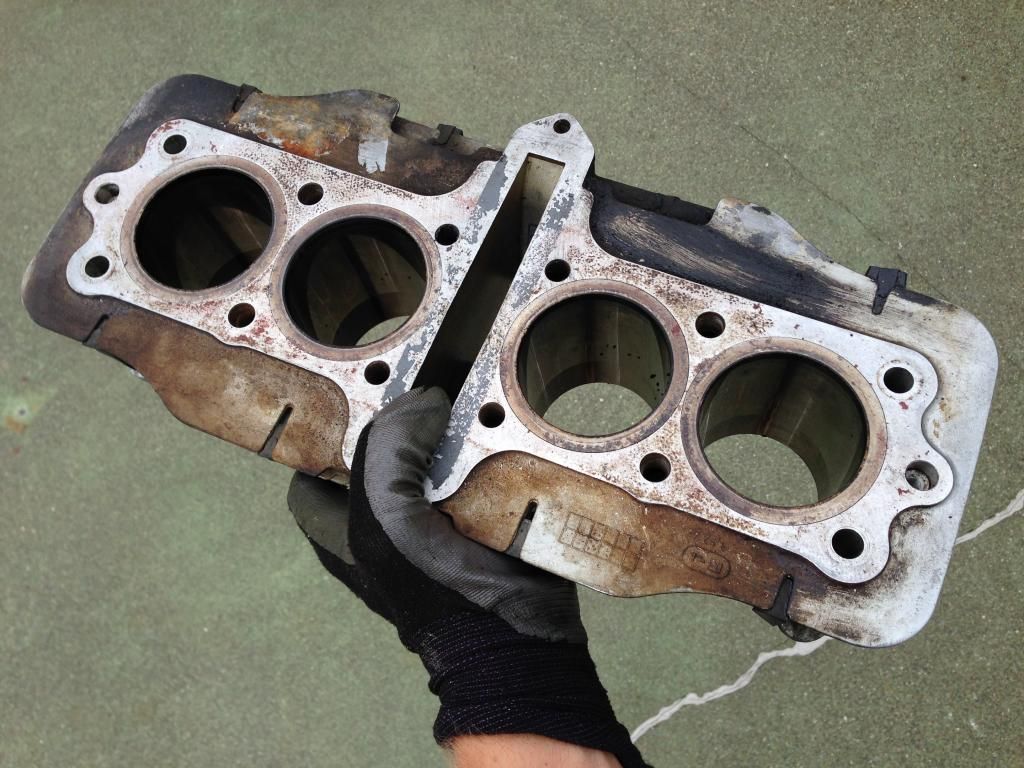
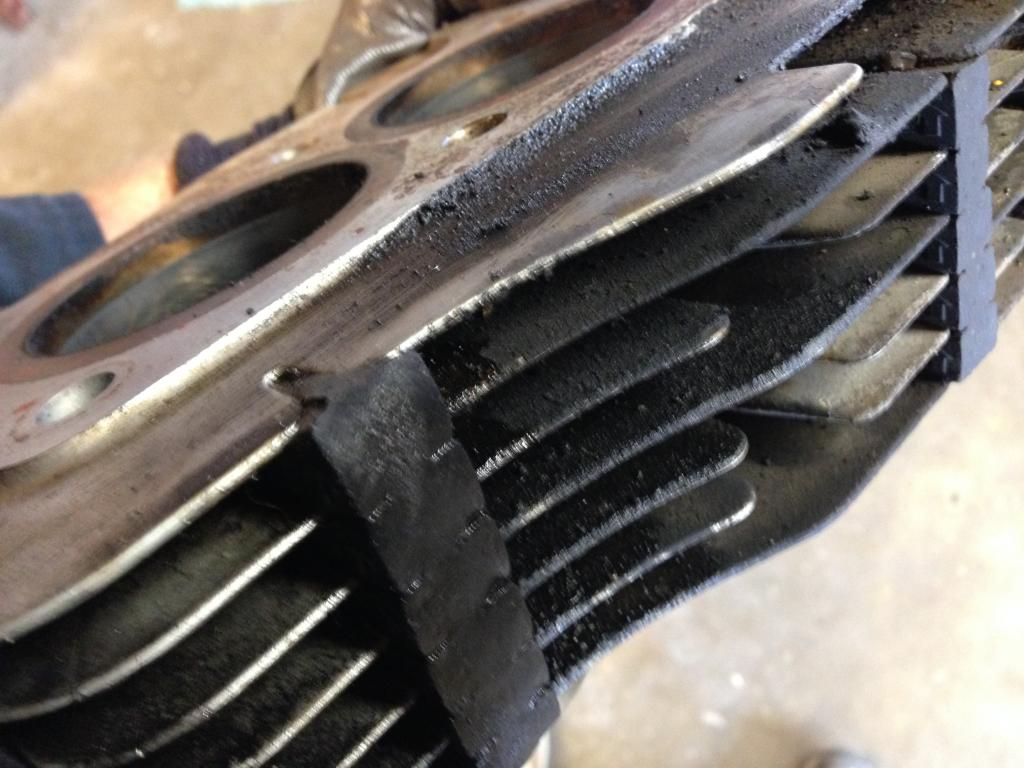
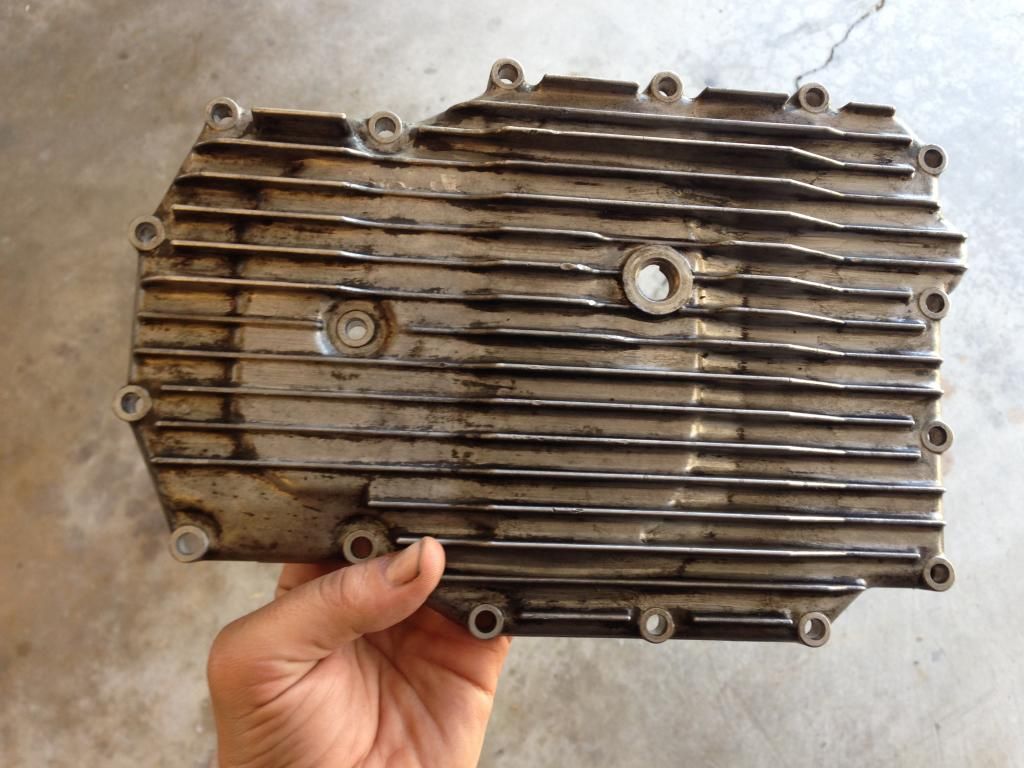
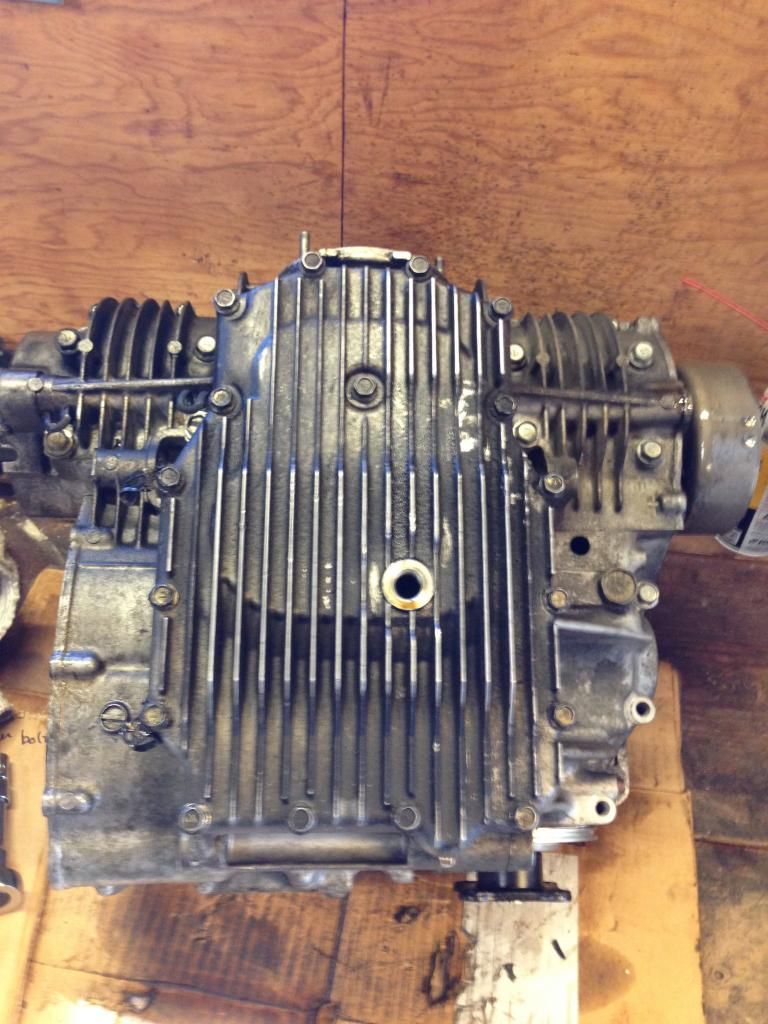
Believe it or not, this is the after photo of the cleaned up oil pan cover. It started off completely black. I decided I'm not going to make this bike museum quality, but just give it a decent wash, so that in the future I'll be able to tell where leaks are coming from.
I'm hoping I get everything by this Friday so I can get to work this weekend.
I can't wait.
Comment
-
 60ratrod
I gave my motor a good soak in power purple and gave it a blast from my pressure washer. Such a huge difference. I think my motor was painted silver. If I tear it down as far as you have then I might look into having it powder coated either black like the frame or blue like what I'm gonna paint the tank, covers, and rear fairing. The cover screws and bolts will be replaced by black oxide allen button head screws. JIS fasteners suck to take out when they've been in there a while. I had to drill the heads off the right side shift cover to get it off
Comment
-
 William Groebe
Snapped a bolt!! ARGH! I feel sick to my stomach
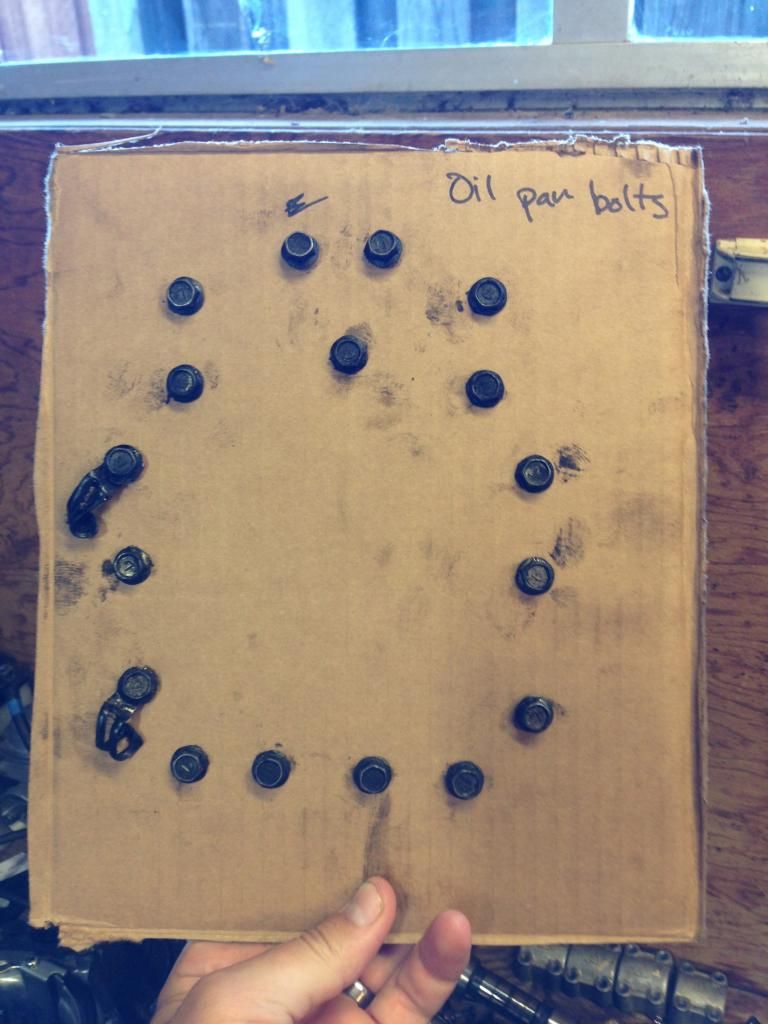
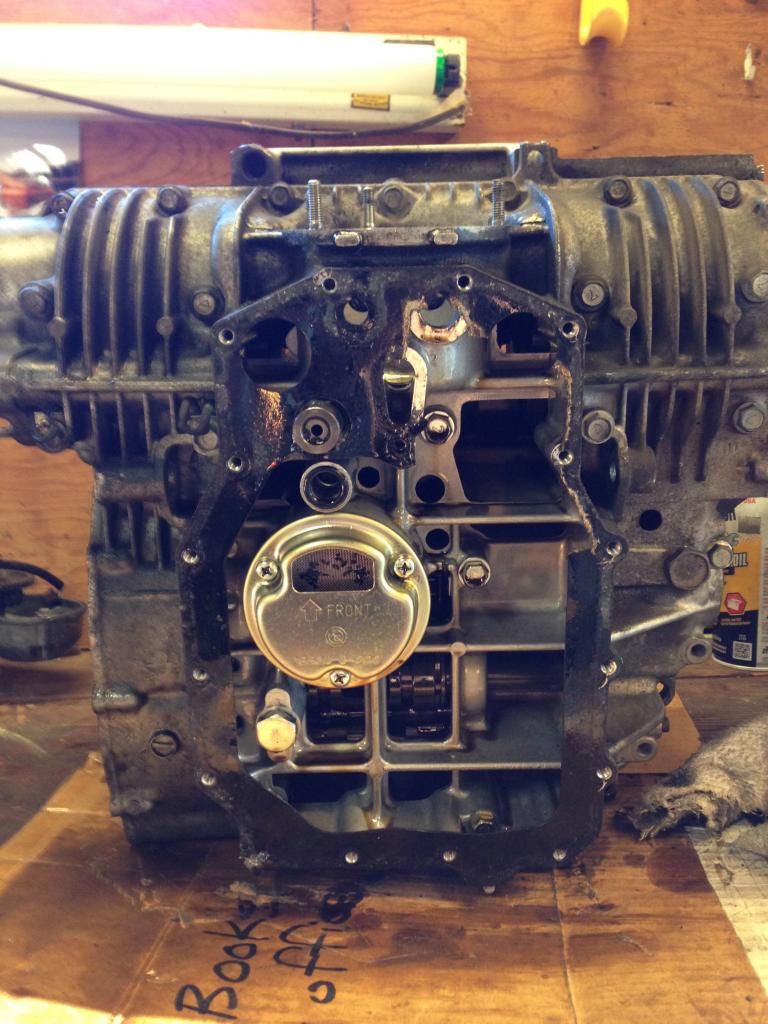
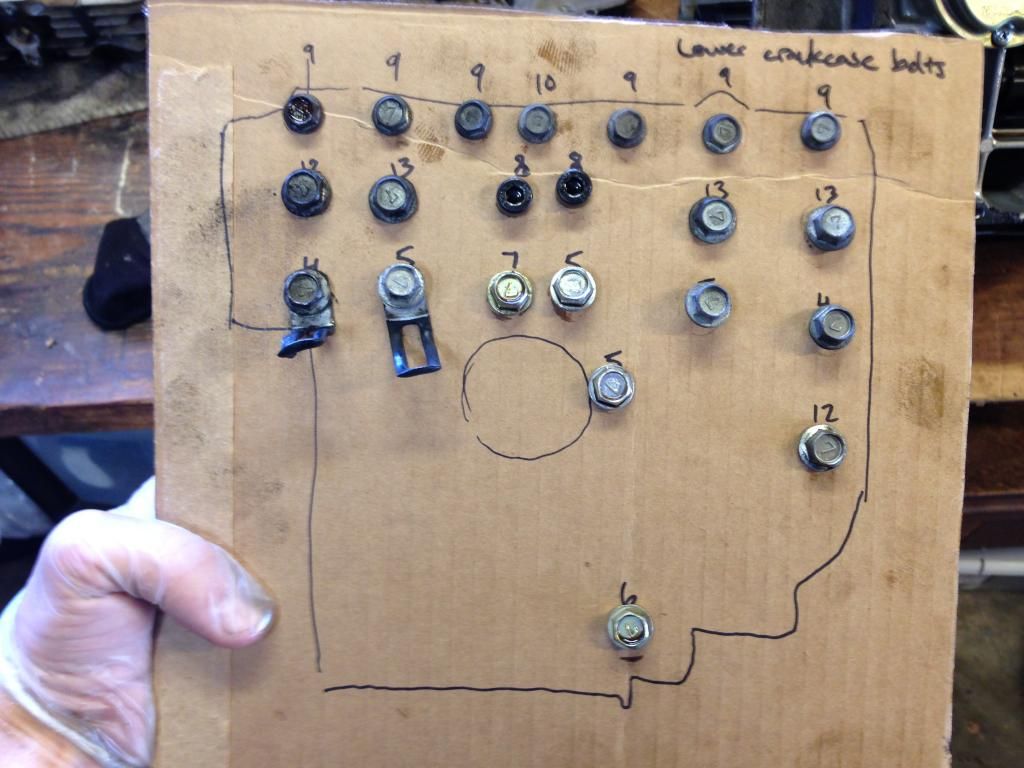
I spent the whole weekend cleaning and prepping the engine for reassembly. I put some threebond on the crankcase and put the two halves together. It's starting to get late, but I just wanted to tighten down the lower crankcase bolts to let the two halves set together overnight.
And then.. on the third to last bolt I was turning the torque wrench and I didn't feel a click and so I kept turning until SNAP.
NOOOOOOOOOOOO!
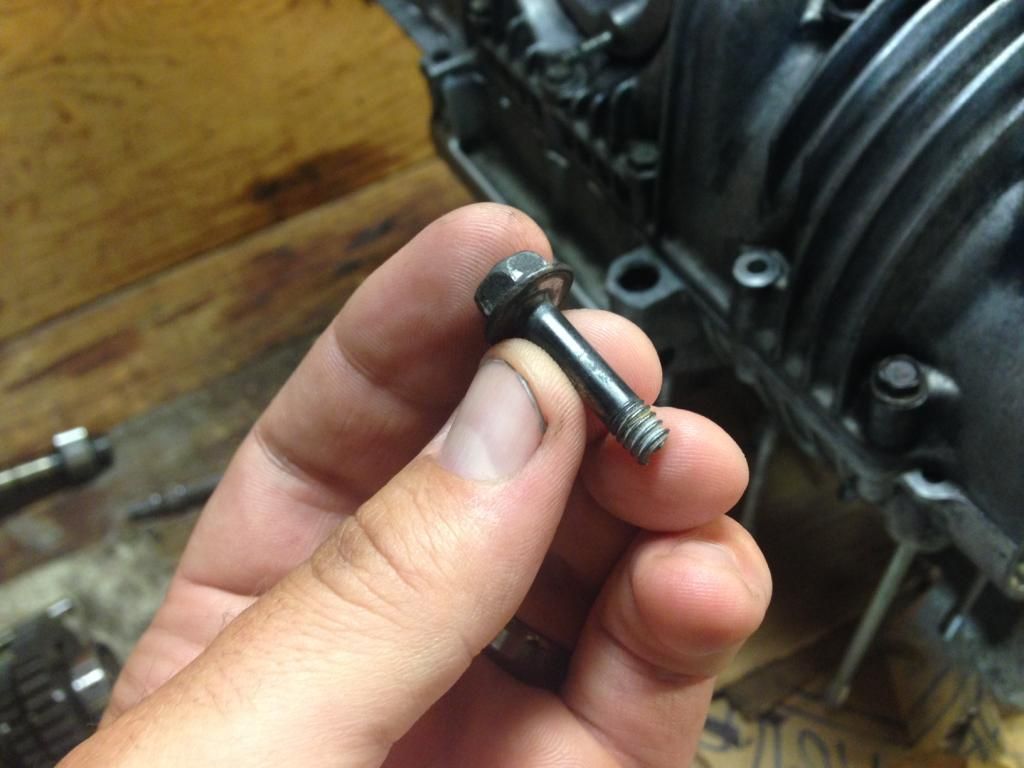
Now I've got to take all the bolts back out, separate the halves, drill out the lower part of this screw, or if I'm lucky I will be able to use my vise grips on the busted end and pull it out. We'll see. Then I've got to remove all the shafts, forks and drum and clean off the mating surfaces from the threebond. Then reapply the threebond and start putting it all back together again.
What a let down.
Comment
-
 60ratrod
apply some anti-sieze before out put the bolts back in. steel and aluminum don't get along too well, and the anti-sieze will make the install easier and prevent corrosion on the threads
Comment
.png)
Comment