Announcement

Collapse
No announcement yet.

Painted Rotors and Rims (Lots of Pics)

Collapse
X
 
  • Filter
  • Time
  • Show
Clear All
new posts

    Painted Rotors and Rims (Lots of Pics)

    Hey guys... So Some of the parts that came on mybike were in some dire need of love. As the current total for this project is currently $2000 and rising, we decided against powdercoating. Instead, we used Duplicolor Gloss Black Engine Enamel (2 light coats, one medium) followed by Duplicolor Clear Engine Enamel (1 light, 1 medium). The results are pretty impressive I think!
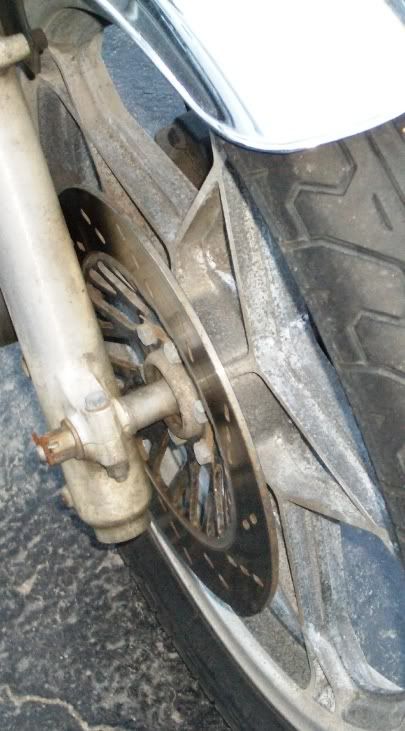
    BEFORE


    AFTER
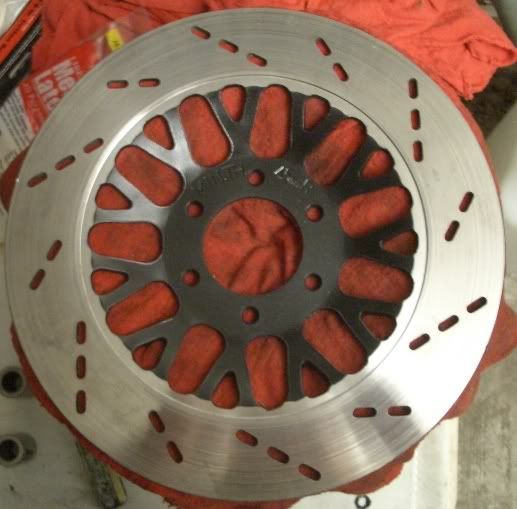
    Here is one rotor (The lighting is bad, it really is pretty glossy)


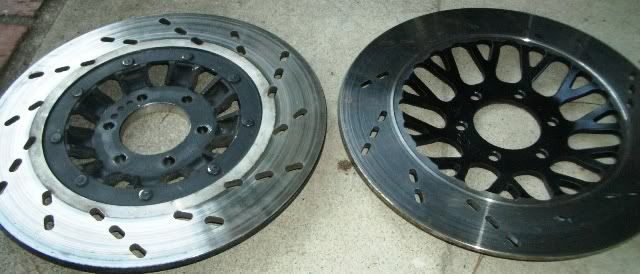
    Here's a comparison between the back (not done) and one of the the fronts
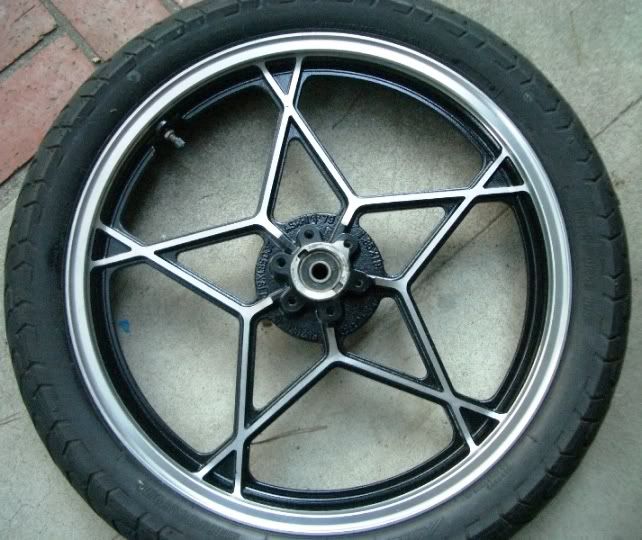
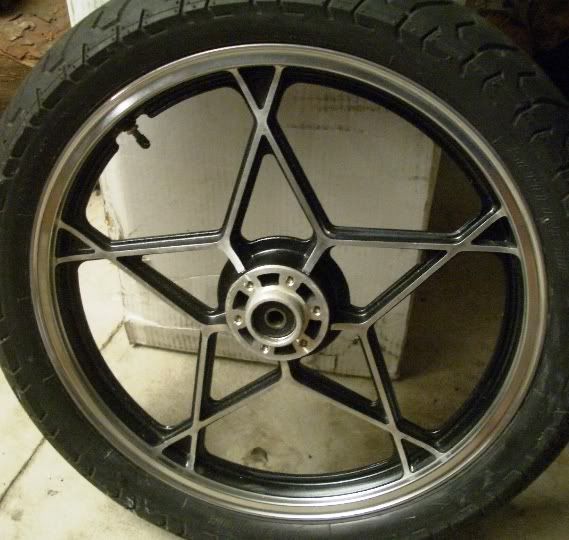

    The rim!

    #2
    And you'll notice that we polished the outside of the rim and took a dremel powered steel brush to the inside before going at it with very fine steel wool.


    I think everything turned out pretty well for only spending a few bucks on spray paint and dremel brushes.

    Comment


      #3
      ohhhh that does look nice

      what did you use to clean all the dirt and what not off of it and prep it?

      Brass bristle/steel bristle brush/wheel?
      sandblaster?

      Comment


        #4
        Thanks Cama! To prep it It was sprayed with a degreaser/descaler that I bought at a local industrial metal supply place. It's basically a degreaser with a phosphoric acid mixture that you spray on and let sit for 10 minutes. At that point I went over it with a green scotchbrite pad and most of it came right off. The rest came off with the steel bristle wheel.

        For the rotor it was just steel wool and rubbing alcohol

        Comment


          #5
          ah, one of my winter projects. I'm going to do both wheels and the rotor mounts in gloss black.

          The rotor looks great, and what a huge difference little things like that make when on the bike. Never underestimate the visual power of little stuff done nicely.

          Good job.

          Comment


            #6
            Originally posted by J_C View Post

            I think everything turned out pretty well for only spending a few bucks on spray paint and dremel brushes.

            I would agree I did my wheels with spray paint also. It's holding up really well and a lot cheaper than powder coating.

            Comment


              #7
              I have a second set of wheels for my bike that I plan to give the paint treatment to. Mine are not as bad as your before pics so I expect to have an easier time of it.

              Having two sets of wheels means I can have a spare in case I pick up a nail. I was down for about a week last year due to a flat while I waited for new donuts to arrive in the mail. It also gives me the ability to run different tire types if I choose.
              1981 GS650G , all the bike you need
              1980 GS1000G Power corrupts, and absolute power corrupts absolutely

              Comment


                #8
                Originally posted by graymulligan View Post
                The rotor looks great, and what a huge difference little things like that make when on the bike. Never underestimate the visual power of little stuff done nicely.
                You're absolutely right. I couldn't believe it when I looked back at my before pictures. What a tremendous difference for very little money and maybe 10 hours of work.

                Originally posted by dig dug mx6 View Post
                I would agree I did my wheels with spray paint also. It's holding up really well and a lot cheaper than powder coating.
                Wow, that silver looks really sharp! Which brand/color is that in case anyone finds this thread in the future and wants to know; I think those look great.

                Originally posted by duaneage View Post
                I have a second set of wheels for my bike that I plan to give the paint treatment to. Mine are not as bad as your before pics so I expect to have an easier time of it.
                You know, it looks like a lot of work but an effective descaling agent can go a long way in cleaning them up. Most of the time came from actually going over the bare aluminum parts with polish or bristle brushes. \\/

                Comment


                  #9
                  That silver is Rust-oleum HAMMERED. "unique hammerd finish"

                  Here is a before http://www.freewebtown.com/123jumps/P1240005.JPG

                  Comment


                    #10
                    Very, very nice looking work.

                    I'm planning on doing the same with my 550's wheels (whenever I get to them).

                    Anyway, I'm kinda lazy (ok, I'm actually admitting that), either that or just trying to find a quick way to get the end result.

                    That being said, did you tape off the bare parts of the wheel before you painted? I just don't see how it can be done easilly without possably blocking areas you want to actually paint.

                    All that being said, Anyone here think that a couple of coats of wax (temporarilly) on the bare parts could essentially work as "taping" off those. Here's my thoughts, the paint will stick where you want it to, and mabye even to the wax, however, the wax could then be easilly rubbed or melted off leaving behind the bare metal once again.

                    Just throwing this idea out to see if anyone can debunk it with good knowledge, or if others see it as a plausable solution..

                    *edit* oh Yeah, there is now way in, well, you know where, I'd even think about this solution with the rotors though, for quite obvious reasons*/edit*

                    Amos

                    Comment


                      #11
                      Lots of tape and razor blade to trip the extra tape. The timei t takes to tape it off is worth it.

                      Comment


                        #12
                        Yes, we taped, and it was actually kind of easy, albeit somewhat time consuming. We used painters tape and laid it over the bare aluminum, then got a razor blade and simply sliced it right along the sides where we wanted to cut it.

                        Don't know about wax, but I have definitely read about people using the same technique with vasoline.

                        Comment


                          #13
                          Nice work!!


                          I've got a spare set of wheels that I was wondering what to do with..... Mayhap some more spraypaint is in my future.


                          BigRed - I did the rotors on my VFR with semi-gloss brake enamel. Seems the import tuner crowd is into detailing brake rotors and calipers as soon as they put larger more "airy" wheels on their cars.


                          Basically, I lightly sanded the part to be painted, then cleaned them up with mineral spirits. I masked over the entire rotor with painter's tape (spend an extra buck or two on quality tape, it's worth it), then used a razor knife to cut the masking tape where I wanted the paint line to end. Rotors typically have a groove at the base of the braking surface, and that's what I used as a guide.

                          Let the paint cure for at least a couple of hours in the sun or a warm room, and peel the tape off slowly for a nice, clean line. All in all, about 20 minutes worth of work for each rotor.

                          They were used rotors when I bought them, and the painted centers had oxidized. For a few bucks and an hours worth of work, there is an appreciable difference in the look of the bike now.

                          FWIW - I rattle-canned my ES metalflake blue last year, and while happy with the rusults, I'm still nit-picking it a year later. But the quality of brake or engine enamel for small applications like this is really great, and easy to get good results from - with far less prep or anxiety than an entire bike is...

                          What I'm planning to do with the wheels is to partially mask the rim lips - not precise, just close. Then I'll paint the whole rim, let cure, and sand/polish the ridges and lips to shine them up - being anal about the polishing stage instead of the painting/prep stage.

                          I'll most likely sand the lips and ridges smooth of casting marks before I paint to cut down on the time it'll take to polish them up after they're painted. Plus the smooth aluminum won't hold the paint as well as the rough aluminum that will remain painted....


                          Hope this helps,


                          -Q!

                          (edited 'cause I'm all freakin' thumbs today)
                          Last edited by Guest; 09-22-2006, 06:40 PM.

                          Comment


                            #14
                            Looks great!
                            I did mine by: chemical paint stripping, hand-held sand blasting, automotive aluminum primer, Sikkens automotive silver basecoat and clearcoat.


                            BTW how do you get full size multiple photos into a post?

                            Comment


                              #15
                              Originally posted by cberkeley
                              Looks great!
                              I did mine by: chemical paint stripping, hand-held sand blasting, automotive aluminum primer, Sikkens automotive silver basecoat and clearcoat.

                              BTW how do you get full size multiple photos into a post?

                              Nice work!


                              As for the multiple photos, you need to upload them to another site and link to them in the body of your post. The forum submission interface will just let you link one photo at a time uploaded to GSR.

                              I guess you could upload several photos (several posts) to a single thread, then link back to all of those photos in another reply, but Frank would prolly get a little bent about the extra bandwidth it would use...


                              [-X


                              -Q!

                              Comment

                              Working...
                              X