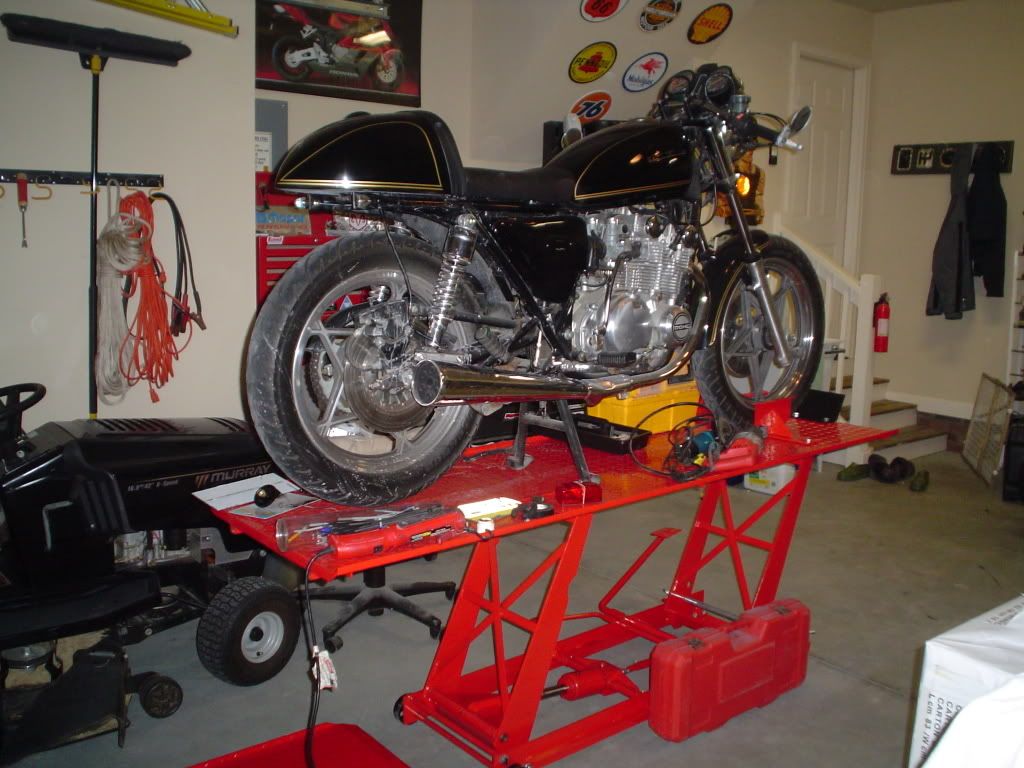
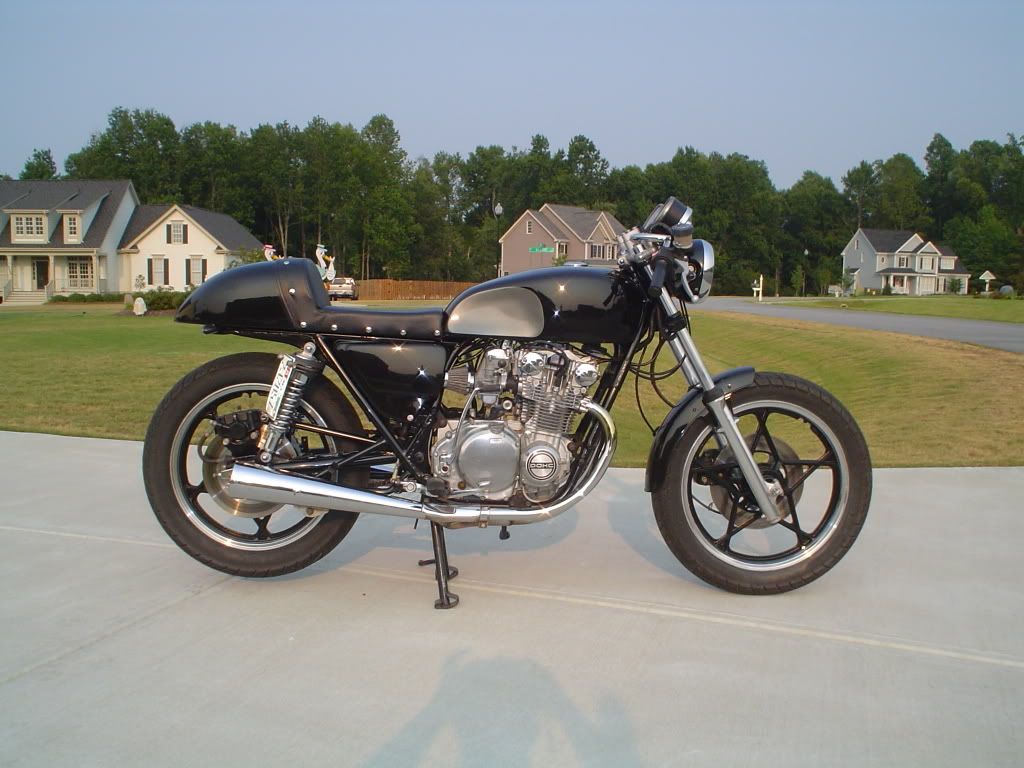
Keep your fingers crossed for me!
Announcement
Collapse
No announcement yet.
Byrdmans "SCUD" cafe project
Collapse
X
-
 byrdman76
Well it "was" nice...
Well it was nice... I used the Duplicolor paint that is ready to spray in a paint gun with no mixing required (supposedly automotive quality). Its sprays great but unfortunately the clear doesn't really harden all that well. Light abrasions really show up in the clear, and it doesn't hold up well to gas. If you get it off immediately theres no problem, but 30 seconds later and you can see a slight blemish. Most of it buffs out but I'm going to wet sand it with some 1500 and spray it again with a good quality clear. Hopefully the paint underneath will hold up. Sometimes cheaper paints will wrinkle and begin to break down when you spray on a good quality clear.Originally posted by snowbeard View Post
Keep your fingers crossed for me!
-
 Guyver
I have a clearcoat related question. After my bike was delivered I had to charge the battery and the previous owner did not remove the plug on the breather tube. As a result when I charged the battery it popped the top so to speak and sprayed acid out on the tank and the surrounding area. I didn't notice this at first and as a result the clearcoat on the tank has little tiny spots that have turned brown and look like paint overspray. I called a body shop and they told me that there is no way to fix this and that the whole tank will have to be repainted. I thought the clearcoat could be lightly sanded to get rid of the spots and then re-shot. If you weren't looking for it you probably wouldn't even notice. Any thoughts?Last edited by Guest; 09-11-2007, 11:28 AM.
Comment
-
 byrdman76
Thats what I would do. Hit it lightly with 1500 to see if you can get down into the clear enough just to get rid of the spots. Once there gone come back and hit the whole tank with 1500-2000 to blend everything and prep it for the new clear coat.Originally posted by Guyver View PostI have a clearcoat related question. After my bike was delivered I had to charge the battery and the previous owner did not remove the plug on the breather tube. As a result when I charged the battery it popped the top so to speak and sprayed acid out on the tank and the surrounding area. I didn't notice this at first and as a result the clearcoat on the tank has little tiny spots that have turned brown and look like paint overspray. I called a body shop and they told me that there is no way to fix this and that the whole tank will have to be repainted. I thought the clearcoat could be lightly sanded to get rid of the spots and then re-shot. If you weren't looking for it you probably wouldn't even notice. Any thoughts?
I would think it would be fine - the only concern is what the new clear will do to the old paint. Sometimes the clear will attack the older paint underneath but you wont know until you try it.
Comment
-
 TheCafeKid
Nice work man!! I love that tank! By any chance you wouldnt be willing to give a few pointers on how you did the knee inserts would you? I can see the basic jist, but im scared to death to try it without some idea of how to start...Originally posted by byrdman76 View PostI finally finshed the bodywork on the tailsection and sprayed it with duplicolor gloss black and duplicolor clear. Wet sanded with 2000 between coats and taped it off in gold trim to match the tank. This is how the bike received its name the "SCUD" since the guys that i ride with all told me the tail section looked like a SCUD missle - haters! I like it so I guess that all that matters.

I never really liked the look of the L tank on the bike so I scored a GS550E tank on ebay that I began grafting onto the L frame. The front and rear mounts had to be removed and relocated on the frame. I used the original rear mount and just moved it back on the frame to accomodate the larger tank. I had to add a cross member but it all worked out pretty well.


any info would be great!
Thanks and keep it up man that's sweet!!
Comment
-
 byrdman76
Take your time! Start at the rear of the tank and work the top edge about and inch to an inch and a half from your "line" (edge of your "crater"). The most critical spot will be when you cross the tank working your way from the top to the bottom. Lightly tap and form this area so that you do not cave in the entire side of the tank. work very slowly to radius your line and try not to square it off. Fill it with bondo and sand it smooth.Originally posted by TheCafeKid View PostNice work man!! I love that tank! By any chance you wouldnt be willing to give a few pointers on how you did the knee inserts would you? I can see the basic jist, but im scared to death to try it without some idea of how to start...
any info would be great!
Thanks and keep it up man that's sweet!!
Create a template to get the sides the same. Use black marker to use as a guide.
Good luck
Comment
-
 humblepie
 -
 byrdman76
Check out Z1 or actually give them a call - thats what i did just to make sure. There always very very helpful. in selecting the correct parts.Originally posted by humblepie View PostHey byrdman,which coils did you get? and which dyna S ignition exactly?
DS3-1 since I was replacing the unit that was formally Kokusan (KD). Nippo ignitions use a different Dyna number (I think its just an adapter to accommodate the KD advance) .
I used the 3 ohm green coils DC1-1. And copper 7mm wires (no suppression)
The coils were a bit of a pain in the butt to mount on the GS550L - but it can be done. The supply voltage was jsut very close to shorting out on the frame. I installed rubber insulators to insure that this never happened.
Comment
-
 ifly85
Beautiful bike byrdman. Congrats on the bike and the babies. I painted my bike with that same scheme in different colors. Like you say though, the rattle can stuff, even if it is the automotive, isn't durable. I will use a spray gun with "real" paint next time or have someone else do it.
Comment
-
 byrdman76
Thanks for the compliments man! post some pics of yours I'd love to see it.Originally posted by ifly85 View PostBeautiful bike byrdman. Congrats on the bike and the babies. I painted my bike with that same scheme in different colors. Like you say though, the rattle can stuff, even if it is the automotive, isn't durable. I will use a spray gun with "real" paint next time or have someone else do it.
It wasn't rattle can paint though, It was the Duplicolor ready to spray pre-mixed paint for most paint guns. The primer and base worked great the clear just doesn't hold up to much of anything.
Hopefully the new clear wont eat the base and primer - only one way to find out!
Comment
-
 Ironriot
 -
 byrdman76
Cut-chop-rebuild
Round 4 -ding
This is why I didn't get to crazy on the 450 - one at a time :-D
convert L forks to E's
vance and hines 4 into 1
relocate and create electrical panel under the seat with improved airflow.
drilled front rotor
convert from mags to spokes
convert from rear disk to rear drum
convert to later model caliper with square pads.
remove and grind anything un-necessary on the frame.
Suggestions - just buy an "E" :-D
See the pics here.
Store your photos and videos online with secure storage from Photobucket. Available on iOS, Android and desktop. Securely backup your memories and sign up today!
stay tuned...
Comment
-
 Ironriot
You DOWNGRADED the rear brake????? Shooting for the old school look? Or you just don't like having braking power????
Like the spokies. These bikes look 10X with spokes. The mags aren't helping ANYONE in the looks department.... What year are the spokes off of?
Comment
-
 byrdman76
Yeah going for the old school look.Originally posted by Ironriot View PostYou DOWNGRADED the rear brake????? Shooting for the old school look? Or you just don't like having braking power????
Like the spokies. These bikes look 10X with spokes. The mags aren't helping ANYONE in the looks department.... What year are the spokes off of?
The rims are from a 78 550. I got everything including the axles, spacers, and brake linkage for 50 bucks. The rear shoes were even in great shape :-D.
The 750 and 1000 rims were just too much. I bid a rear 1000 rim up to 60 bucks not including shipping and lost - I said screw it and started looking for 450 and 550 stuff. Yes I'm a cheap bastard
I paid 12.00 for the front forks, 2.50 for the front caliper and pads, and 45.00 for the V & H 4 into 1. The pipe was by far my best find - nearly new in excellent shape. I had to mod the mount to fit my 79 - it was for an 82. All found on ebay.
BTW V & H might send you a replacement badge for your pipe if its gone. I called them up looking to buy one and they shipped it for free and included a bunch of stickers - big shout out for these guys and their customer service\\ /
/
Thanks for the comments
Comment
-
 LeeGS550E
.png)


Comment