The blank spot in the drawing will be filled in of course. I just wanted to articulate the basic lines of the part. To be continued.....
Announcement
Collapse
No announcement yet.
Starting my own thread
Collapse
X
-
 drhach
Another try cont...
The blank spot in the drawing will be filled in of course. I just wanted to articulate the basic lines of the part. To be continued.....
-
where in chicago do you live?78 GS1000 Yosh replica racer project
82 Kat 1000 Project
05 CRF450x
10 990 ADV-R The big dirt bike
P.S I don't check PM to often, email me if you need me.
Comment
-
 Regent
A foam sheet of that size, of good enough quality to use for a motorcycle seat, would run me 80.00 (wholesale) at the local upholstery supply. Though the foam may seem firm enough when it's brand new, it will break down at an alarming speed, leaving you to try to reproduce the custom foam piece... that you have custom made the cover to fit. The result? Custom patterning of a new cover to fit the new foam - again. Of course you don't need that much foam for just the one seat, but please do buy the good stuff.Originally posted by drhach View PostI picked up the foam this week. Home Depot sells 4'X8'X2" sheets for about $20. If I can convince my wife, I'll start shaping the rear cowl this weekend. As usual, pics to follow.
I'd recommend a trip to your local upholsterer to select a proper grade of foam for your project. Carving and sanding a custom seat takes far to much time to have to do it over!
As for carving the seat, no software is required. Try not to overthink it.
Stack the foam up and glue it into a suitable sized block, make a cardboard template of the front and back end interface, and start hacking! Just take off whatever doesn't look like a motorcycle seat! Take it easy with the electric carving knife, but don't worry about screwing up - if you cut off too much, just glue a chunk back on there with some Super 77 and chop a little less off next time. When you have it roughly blocked out, put a 6" sanding disk on your drill and go to town shaping it. Start with some hella rough paper so you can make good progress ( and I mean huge grit ), and tone it down a little towards the end.
You can cover the seams in the foam, and other imperfections with a
( thin ) layer of bonded dacron when you're finished. your upholsterer will have some. Split it thinly, and glue one large piece over the whole seat with your foam glue. (Note you will want to have made your patterns for the seat cover off the foam before you glue the dacron down.)
Trust me, it can look like Frankenstein by the time you're done, with 20 seams in the foam, and little flaws all over the place, but as long as it's reasonably symmetrical side to side, it'll look just great. Dacron will cover many sins.
I'd be happy to help you with patterning the vinyl for the seat!:-D Just post some pics of your foam progress, and we'll work on it from there. you can have a local shop sew it up for you, if you don't have a friend that sews.Last edited by Guest; 08-20-2007, 01:56 AM.
Comment
-
 drhach
Thanks for the offer. I will definitely let you know if I need help. I've done too much work at this point to go sloppy on the part of the bike that is the first thing people will see. I plan on re-using the foam from the old seat as padding for my new seat. The foam that I purchased was the stuff that will serve as the mold for the fiberglass. It will all come out once the layup is done. I won't be sitting on it. I'm only using it to shape the cowl. The seat pan itsellf will be molded over cardboard. The reason I'm using drawing software is so that I can make changes without having to start over with another piece of foam if I don't like what I'm doing. It just gives me the oppurtunity to try a few different ideas out. Once I start the layup, I'll definitely post pics. I may be able to start this coming weekend. If I get stuck, Ill be sure to ask for help.
Comment
-
 drhach
The work continues
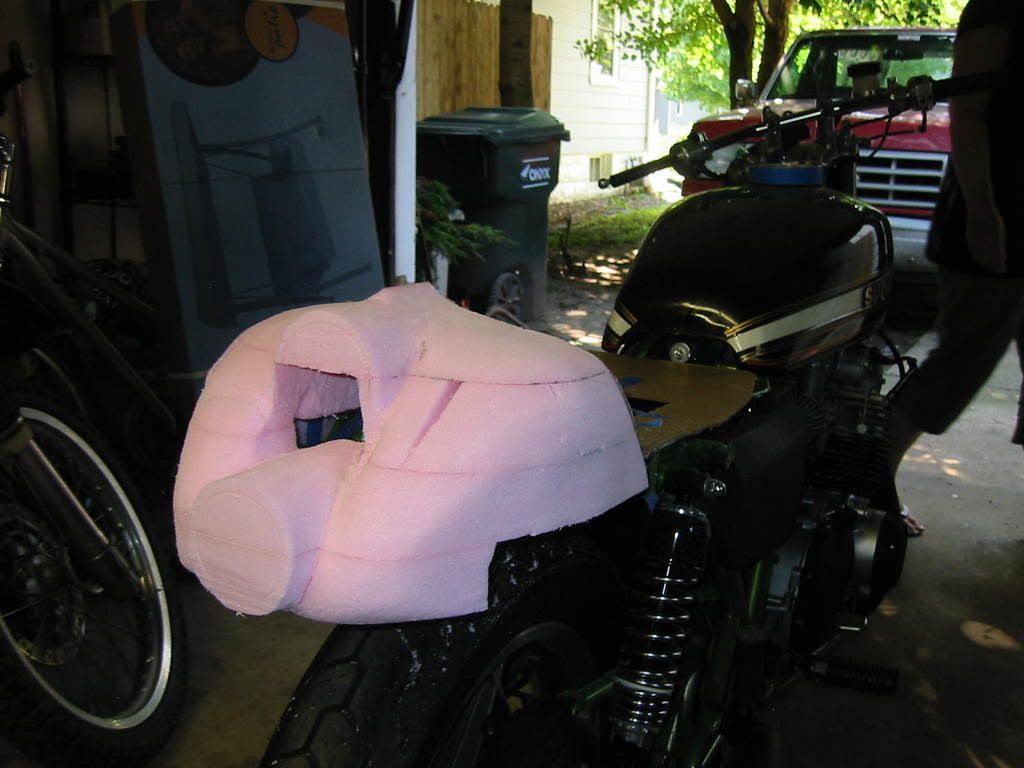
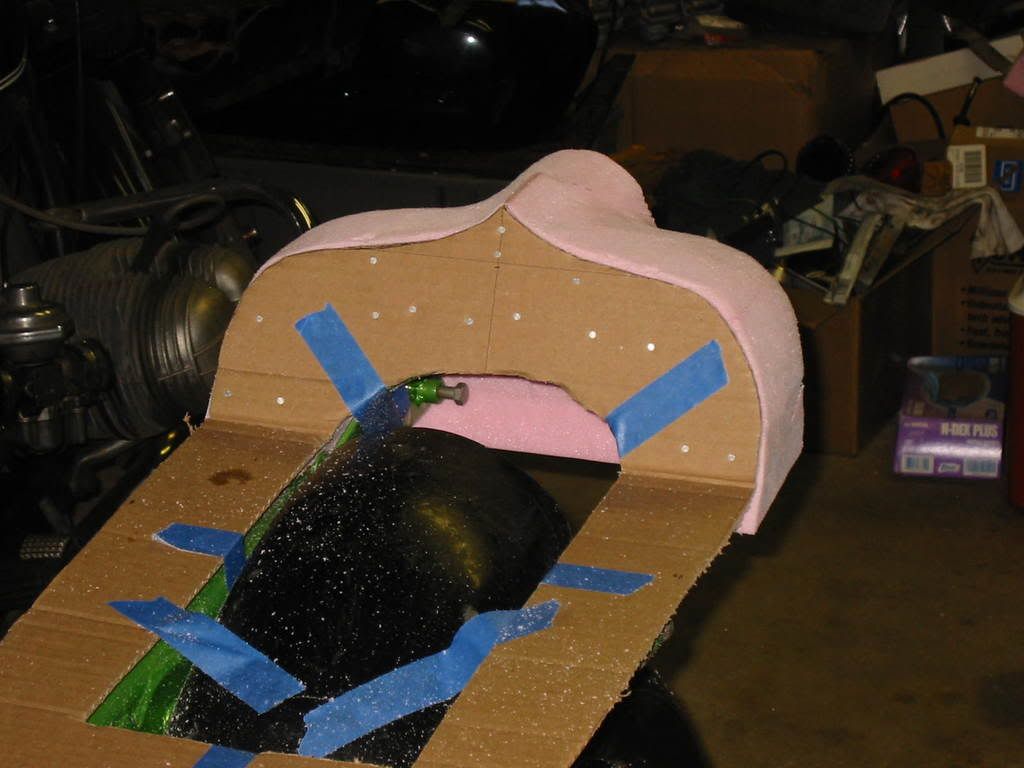
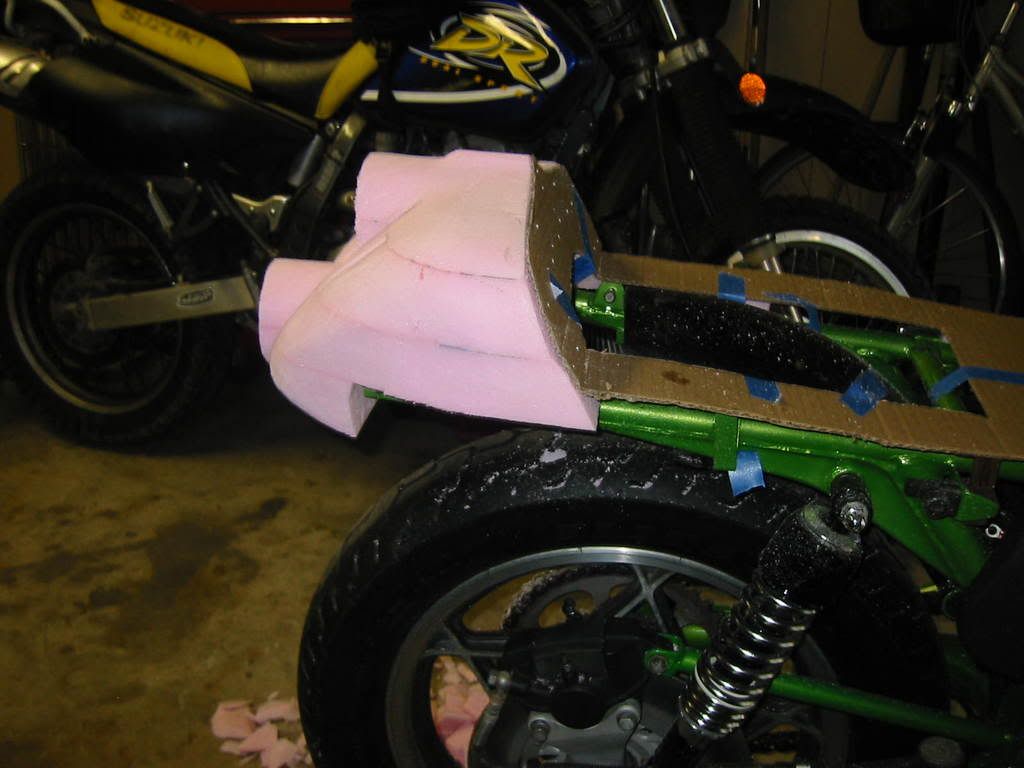
Well the journey from idea to reality is underway. I've made a few deviations from the drawing, but I think the spirit of the idea is there. This foam shapes easily. The only real tools that I have needed so far are: a hacksaw blade for the big chunks, and 60 grit sanpaper for the fine detail. I was worried that 60 grit paper might be too coarse but it actually is working well. I just have to use a fine touch when I only want to remove a little bit of foam.
I took the center section out of the cowl so that I could get at the lower taillight piece. Obviously that will have to go back in when it is done. I'm also thinking very seriously about totally removing the fender so that the seat pan can be flat. I can make another fender out of fiberglass if I think I need the protection. Or I can cut this one down. I think it will make the placement of the seat foam much easier to have the pan flat though.
It's getting there. I hope to do the layup next weekend. The biggest challenge is to maintain symmetry from side to side (not quite there yet). When all is said and done, I should be able to use the original seat hinges and lock. Bonus.
I'm trying to take my time on this and do it right. It will be a big focal point of the bike, so I really want it to look professional. The nice thing about this stage is that, if you make a mistake, you cut the foam off, grab another piece, stick it on, and start over. If all goes well, side panels will be next. I also have an idea for a gas tank. We'll see.
 Last edited by Guest; 09-10-2008, 08:57 AM.
Comment
-
 Vegerito
awesome i love the new design, it goes from kinda old looking car to like jet fighter look
  love it !!! keep us updated !
Comment
-
 drhach
Behind schedule as usual
I did the layup this weekend. It went well. I really wish I could have vacuum bagged it. There were some air bubbles that I just couldn't get out. I think in the future, a vacuum pump will be an absolute necessity, it would have saved a lot of fussing and time. As a result, I think I have a little more work to do on the back end to get it looking right. Other lessons learned, I should have made the mold pieces vertical instead of horizontal. It took a long time getting everything symmetrical. If the sections had been vertical, I could have done one side and used the pieces as templates for the other side. I re-did one section three times because it was so easy to over cut and I had to eyeball everything. With all of these compund curves, it's very easy to misjudge something. My wife was a big help. After I would get something where I thoguht it should be, I'd aske her to look at it. It helps having a second person to scrutinize things a little bit.
I'm letting the part cure in the house. Sunday was apparently the last warm day in the Chicago area. I'm going to pull the part from the mold today or tomorrow. There still is a lot of sanding and probably some Bondo work to do. I may even add some more reinforcements here and there. We'll see how rigid it is. I'll be mounting it on the stock hinges, so that may help too. I think I may do some side panels and maybe even a tank down the road.
The last project like this that I did, I had access to a better shop and better tools. I think I need to upgrade my stuff a little bit. All in all though, I'm happy with the progress.


 Last edited by Guest; 09-10-2008, 08:58 AM.
Comment
-
 hp1000s
 -
 drhach
Mold removal
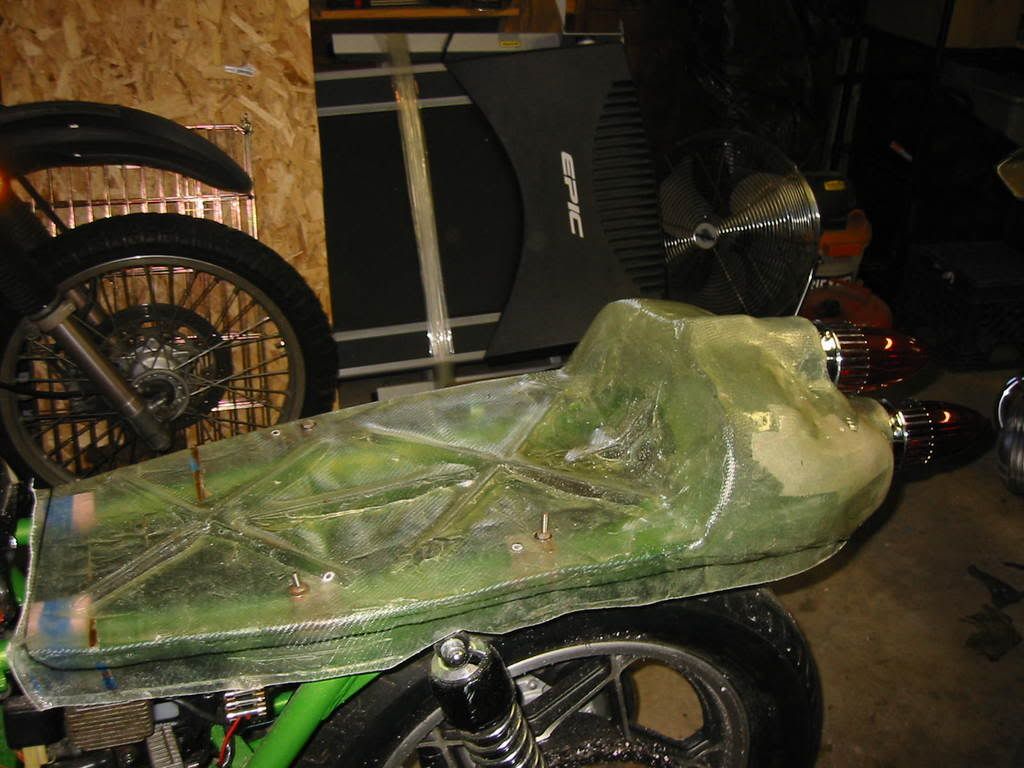
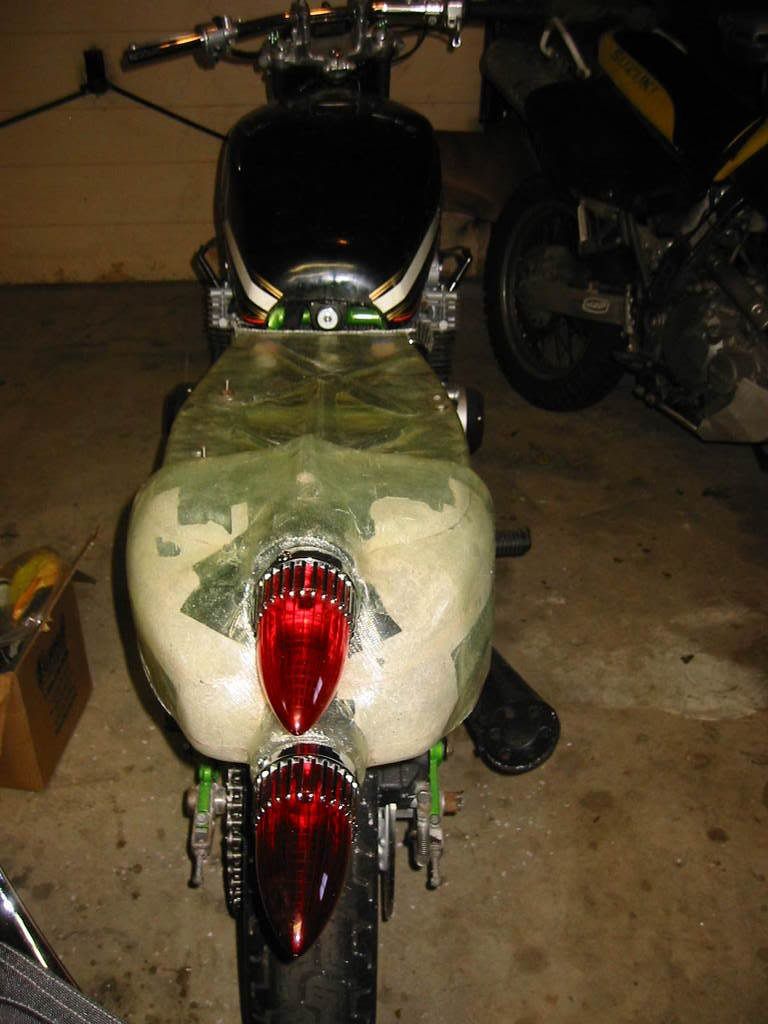
I already got most of it out. I covered most of it in packing tape before I did the lay-up. The parts that had packing tape on the separated like nothing. There were a few places on the carbboard, you can see them as dark spots, where I mssed taping and the epoxy bled through. That stuff stucc a little. Also, I got a little impatient after doing the foam for the third time and I didn't tape all of it. So, there's a little pink fuzz on there. No big deal though. For the most part is popped right out. I had to do a little carving here and there. I'll post another picture tomorrow. I've also started trimming a little bit. I think it'll look nice. I may have te rinforce it a more though. It's kind of flexy. The ribs that I put in didn't eliminate all of it.
Comment
-
 drhach
The foam is out
I pulled all of the foam. It is pretty clear where I did and didn't use the packing tape. Next time I'll spend a little more time and do a better job applying the tape. It made a huge difference. The foam came out pretty easy, but it wouldn't have been necessary had I used more tape. I still have a fair amount of trimming to do. I mocked up the taillights and drilled the holes for the hinges and the lock. I couldn't find any shorter fasteners, so I had to use what I had laying around. I definitely need to reinforce the base a little, it doese'nt tolerate much weight the way it is. That's a pretty easy fix though. Also, I think my next task will be to carve the foam and fit it to the pan. More to come....
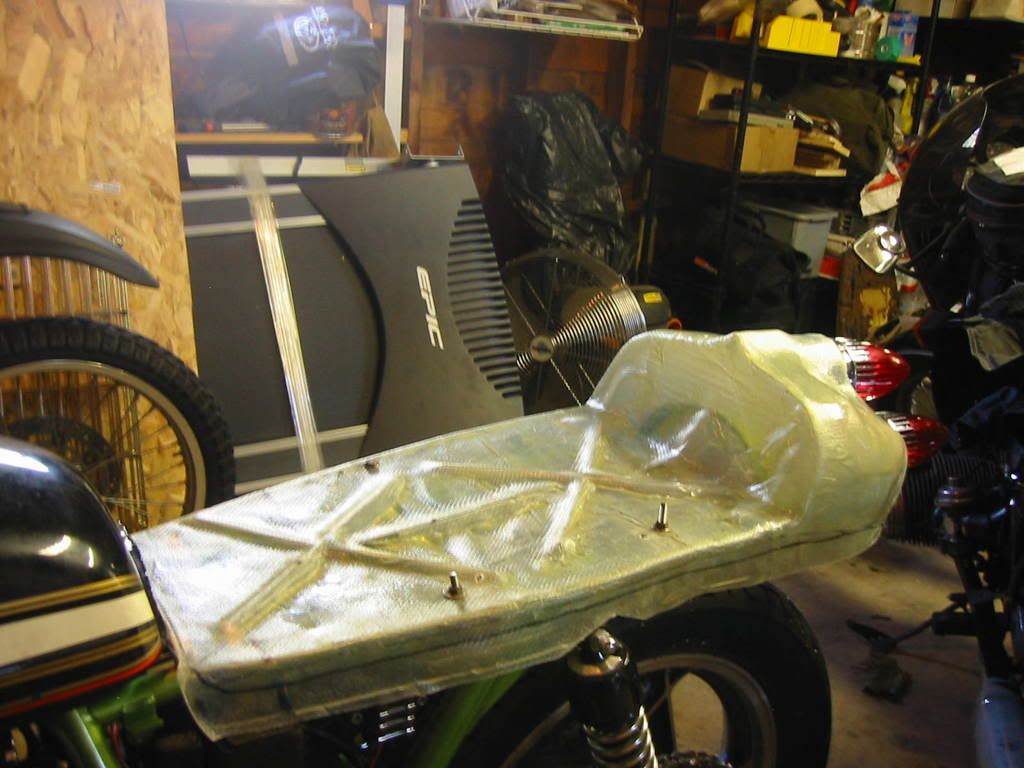
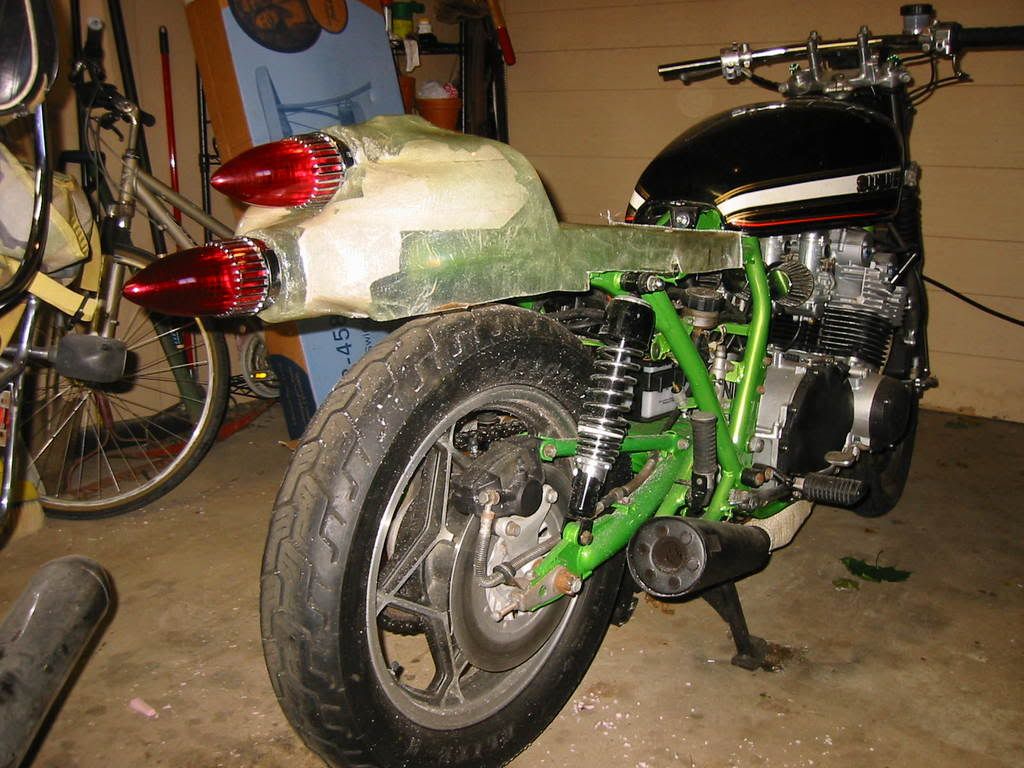 Last edited by Guest; 09-10-2008, 08:56 AM.
Comment
-
 GS700E Lover
Bopi
Did you find it hard tearing the bike down to the frame? I am contemplating that with mine. Any advice or thoughts would be great.
Comment
-
 TheCafeKid
.png)
 :shock:
Comment