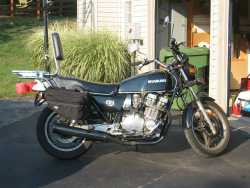
I was never really happy with the square light and huge cluster. It screamed "1980". After changing out the cluster with a single small Acewell unit, the headlight bucket was going to look really out of place. So, I decided to replace the whole thing with a 7" Chrome unit:
From CRC2, I purchased:
HLEAR-M34
Chrome Universal Headlight Ears
$ 11.95
HL-KZ40
KZ 7Headlight Kit UNI-Mounting
$ 64.95
HEADLIGHT01
Headlight Bulb - H4 Halogen w-remv bulb
$ 29.95
From somewhere else (not sure where), I purchased a set of Osram Silverstar H4 bulbs for $30ish, shipped
The new ears were a little bit of a challenge. Each ear is two pieces - one that has a small bent tab and the other has a slot. The tab fits in the slot and a bolt clamps the ear to the tube. I guess I should have measured my forks before ordering because the ears were for a smaller fork diameter. With a little bending, I was able to get the ears to fit nice and strong on each tube.
The light mounted pretty easily to the ears. I purchased two M8 x 16mm chrome socket button head bolts from boltdepot.com to match much of the other bolts I've replaced on the bike.
Wiring, like everything else, was a bit of a challenge. The hole in the back of the light for wiring has a rolled edge to protect the wires, which was a nice touch. For most of the wiring, the new headlight bucket would have be sufficient, if cramped. However, I needed to add three relays to my system, so I added a new junction box to the front of my frame (more on that in another posting).
Instead of using the harness wiring, I pulled a fused feed directly from the battery. This feed goes through two relays before going to the light. Relay one's coil is activated by a wire that goes hot when the bike is turned on. The N/O output from this relay goes to the common post of the second relay. The second relay's coil is hooked to the original low beam wire. The feeds for the low and high beam of the lamp are hooked to the N/O and N/C posts of relay two.
As for the light output, I'm not sure how different it is than my old setup as it has been a number of months since I had to ride at night. Maybe it's just me, but the contrast between oncoming car lights makes what's in front of me seem dim on low beam. When there are no oncoming cars, I can see fine and the light reaches pretty far. High beam, on the other hand, is a definate improvement. Road markings and signs are really easy to see.
Here are some pictures:
Original Bike:

Modded Bike:

Bucket Closeup:

Thanks,
- Tony
.png)
Comment