Announcement

Collapse
No announcement yet.

Refurbishing case covers

Collapse
X
 
  • Filter
  • Time
  • Show
Clear All
new posts

    Refurbishing case covers

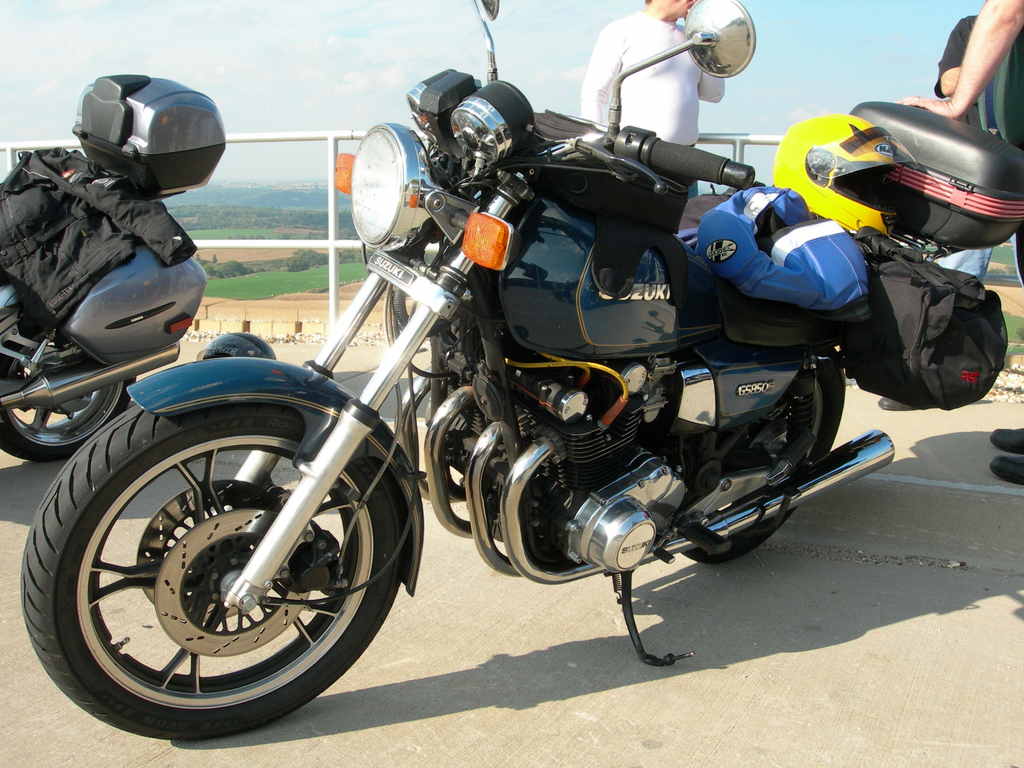
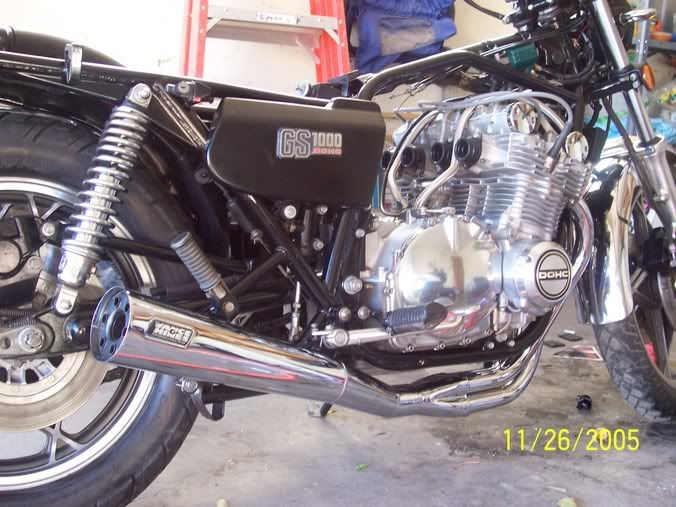
    I'm going to be removing the case covers this week, there's scale and rust everywhere on this poor neglected thing. (Glad it was free) Hopefully I'll reach a brushed aluminum look, don't care too much about chrome. I'll also be ordering the bolt kit from z-1 to replace these worn out bolts. Does that kit come with bolts for the valve cover? I really would like to toss them, especially those odd 4 Phillips bolts that look really out of place.

    and since you like pics so much: here we go


    #2
    Mine looked worse than that, but after a couple of hours with a polishing wheel they look great now.


    We mounted a couple of cotton buffing wheels on my bench grinder, started with red compound, and finished with white compound.

    After experimenting with the first piece, we didn't bother stripping the old remnants of the clearcoat -- it comes off very quickly.

    I just keep them waxed, and they seem to keep their shine quite well.

    Polishing stripped all the paint out of the badges, so I'll need to repaint or replace them. You can see where the "Suzuki" looks a little ratty where I was trying to paint the lettering, but it kept coming out when I wiped it off.

    Al did most of the polishing (he's more of a "cleaner", and I'm more of a "fixer"), and he ended up looking like a reverse raccoon where he had goggles on. Be warned -- black crud and bits of cotton go everywhere. You need to wear goggles and clothing you don't care about. And take a shower afterwards.

    You can stop polishing whenever you like. Just wipe off a section every few minutes and see if you're happy yet. I took the fork legs to a matte finish by stripping the clearcoat with pain remover, using a wire wheel gently to remove some really nasty pitting, then using the red wheel, then just a touch of the white wheel.
    Last edited by bwringer; 02-27-2008, 12:25 PM.
    1983 GS850G, Cosmos Blue.
    2005 KLR685, Aztec Pink - Turd II.3, the ReReReTurdening
    2015 Yamaha FJ-09, Magma Red Power Corrupts...
    Eat more venison.

    Please provide details. The GSR Hive Mind is nearly omniscient, but not yet clairvoyant.

    Celeriter equita, converteque saepe.

    SUPPORT THIS SITE! DONATE TODAY!

    Co-host of "The Riding Obsession" sport-touring motorcycling podcast at tro.bike!

    Comment


      #3
      I did mine by hand after stripping the clear with a chemical product. Use the finest sandpaper you can that will get the scratches out without loosing your sanity. I used wet 320/400/600. The stock covers had a brushed appearance - similar to 600 paper applied in one direction. I wrapped the paper around a plastic sharpie marker to get into the recess areas near the bolt holes. Of course, a buffer on a motor will be easier, but you still have to figure a way to get into the recesses.

      Ed

      To measure is to know.

      Mikuni O-ring Kits For Sale...https://www.thegsresources.com/_foru...ts#post1703182

      Top Newbie Mistakes thread...http://www.thegsresources.com/_forum...d.php?t=171846

      Carb rebuild tutorial...https://gsarchive.bwringer.com/mtsac...d_Tutorial.pdf

      KZ750E Rebuild Thread...http://www.thegsresources.com/_forum...0-Resurrection

      Comment


        #4
        I will be painting mine black to match the rest of my engine, then getting new emblems and stainless bolts for them. Should make for a nice look, and much less maintenance.

        Just an option for you.

        Comment


          #5
          Originally posted by groundshock View Post
          I will be painting mine black to match the rest of my engine, then getting new emblems and stainless bolts for them. Should make for a nice look, and much less maintenance.

          Just an option for you.
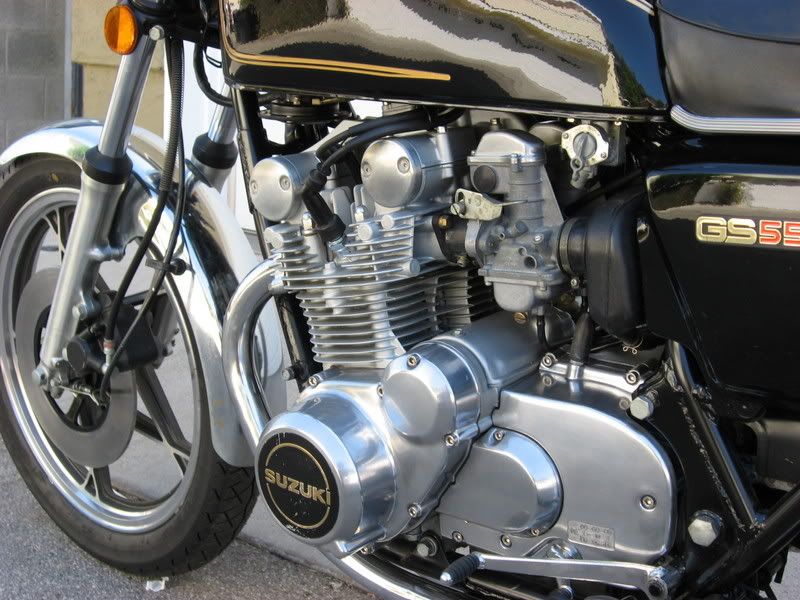
          Here's a '79 GS850 engine I rebuilt -- it's painted black, with stainless bolts. You can see that the emblem is pretty ratty even though I painted over it, so new emblems would look very nice. But the black really sets off the stainless jewelry nicely.


          1983 GS850G, Cosmos Blue.
          2005 KLR685, Aztec Pink - Turd II.3, the ReReReTurdening
          2015 Yamaha FJ-09, Magma Red Power Corrupts...
          Eat more venison.

          Please provide details. The GSR Hive Mind is nearly omniscient, but not yet clairvoyant.

          Celeriter equita, converteque saepe.

          SUPPORT THIS SITE! DONATE TODAY!

          Co-host of "The Riding Obsession" sport-touring motorcycling podcast at tro.bike!

          Comment


            #6
            That looks absolutely killer.

            Theres a thread in the general forum right now abotu those very emblems you need, bikebandit.com has them for 10.something a piece.

            Nice work man.

            Comment


              #7
              Being that the Aubra bike is an '82 T and the '83 T had a black engine, painting the cases is not such a stretch.
              Last edited by yasser; 02-28-2008, 10:03 PM.
              Hondas
              '73 ATC70 '85 XL125S '02 XR650L
              Suzuki
              '83 gs750t vin#551 '97 DR650
              Kaw
              '89 KLR650

              sigpic

              Comment


                #8
                If you want to shine it back up and don't have the buffer, i used about the same technique as NESSIM only finsihed with a 1000 grit and with a little bit of Mother's it shined right up. Time consuming and tedious though.

                Comment


                  #9
                  I'm not sure what kind of tools that you have access to. I used a sandblaster to clean my parts up. It went really fast. Very liitle elbow grease. I had no intention of polishing them so it was the way to go. Here are some pics after I painted them. I don't think I have anything from after I sandblasted but, you get the idea.

                  Comment


                    #10
                    I've polished a lot of covers. My bikes are riders, not show bikes, but they look pretty good. this is how I do it:

                    1. chem stripper to remove old varnish
                    2. 320/400/600/1000/1500 wet sandpaper to remove scratches
                    3. eastwood 3/4 hp dual shaft buffer motor with eastwood recomended wheels and buff compound.

                    with this set up I can take a engine case cover (like the clutch cover) from well and truly trashed to almost chrome looking in a little less than an hour. I use "NEver Dull" about once per year to prevent oxidation.

                    Comment


                      #11
                      glad its just for riding and not show,you would kick my azz with the way it shines !

                      Comment


                        #12
                        So you want to polish aluminum eh?

                        If you want to make your alum. look like a mirror, try this.


                        First go get some 4# (4 o's) steel wool and some carb cleaner, this is for the glaze that is already on the alum. Spray the steel wool with the carb spray and get to work (don't get tempted to use rougher wool!!). DO NOT use a wire wheel! It will pit aluminum badly. (dont smoke either, lol)

                        Once the aluminum surface is exposed you can use wet type 1500 to sand off the dark little surface 'veins' that always appear under old aluminum. Use the sand paper dry though.

                        Ok, now see if you can find a specialty polishing shop around town, they polish engine components (engine intakes & stuff). if you find a shop ask them if they'll sell you any left over polishing wheels and compound. Every shop throws this stuff away, it's junk to them. If you cant find a shop, then go to a family owned jewelry store. If asked, all you need is 'medium' and 'finishing' BUT NOT JEWELER'S 'ROUGE' unless you can get it cheap. Common kinds of wheels are bench grinder mounted but you can put them right on angle grinders or die grinders easily (this is handy for follow-up polishing in the future).

                        Use the compund (comes in colored bricks) sparingly and don't press hard when you polish. Take your time and wear at least a bandanna over your face (aluminum oxide may lead to alzheimers).

                        When you get done with the final polishing phase, use a clean cottony material(sweat pants inside out work great) and white flour powder to clean up, as the compound has oil in it and the flour will pick it up but not scratch.

                        Good luck!!!!
                        Last edited by Guest; 03-04-2008, 09:45 AM.

                        Comment


                          #13
                          ....Polish weekly to maintain it. You guys are gluttons for punishment. I'd rather be riding.

                          Comment


                            #14
                            Originally posted by drhach View Post
                            ....Polish weekly to maintain it. You guys are gluttons for punishment. I'd rather be riding.
                            You don't need to polish weekly. I hit mine with Mother's (by hand) every second wash. They look as good as when I first polished them.

                            Here's a pic from when I first polished:


                            ...and here's one from last summer. Not much difference.

                            85 GS1150E May '06 BOM
                            79 GS1000S Wes Cooley Beast


                            Comment


                              #15
                              Well, what about my old Mikuni carbs? Lots of nooks and crannies in there. I got a brushed alum finish on the tops (not too much work) but now the carb bodies match. And should they be sealed/clear coated after? I know I don't want to bead blast them!
                              Oops, sort of wrong topic for this thread.
                              Last edited by Guest; 04-06-2008, 12:44 PM. Reason: wrong

                              Comment

                              Working...
                              X