Thought I might share this.
I can't post any pics to show ya'll since I'm on a locomotive right now on my phone, but you can see my seat in my avatar or on my other posts.
Needed:
Stretchable material, 4 yards, $4
Heat shrink plastic from 2 window insulation kits, $4
1 roll of 2" masking or duct tape $2
Tools:
Good utility stapler with 3/8" staples
Set of plastic spring type clamps
Beer
I went to wal-mart to see if I could find any material for my seat. They sell a thin, smooth, stretchable material in various colors that works like a dream for $1 a yard. I used 4 yards on my bike.
You can use heat shrink plastic under the material to waterproof the foam (optional), but of course the material will still be exposed. It can also be bought at walmart, just buy 2 window heat shrink insulation kits. The material can still obviously get wet, but it dries fast and this is a $10 job. Someone helping will make this job about 2 minutes long, pay them with beer.
The heat shrink should be at least 3 layers thick, all it will do is keep the foam dry and away from water logging. Put the layers on loosely one layer at a time anchoring it with any kind of tape, masking tape is good and cheap, tape the plastic further under the seat away from where the original and future staples will hold the stretch material, the excess plastic and tape is temporary and will later be removed. then shrink it (between layers) with a blow dryer, be mindful to NOT get it too tight, it needs to be smooth, but not 'wrinkly'.
Then comes the stretchy material
Fold the 4 yards of the material in a way where it covers the seat the most efficiently. Cover the seat, using the plastic clamps to hold the material in place. Work your way around the now upside-down seat while stretching the fabric and adjusting the clamps, you actually need only 5 clamps if you want to start at one end and work your way up, but remember that 1 clamp must hold the fabric at the opposite end of the seat to keep some 'end tension (hence the odd number). But the more clamps the better, use 20 if you got em'.
You'll find that the part where your butt sits is the hardest, but emphasize on pulling the SIDES to get it right.
Now, when the material is exactly right (and only then), start stapling the unsderside, DON'T STAPLE TOO CLOSE TO THE EDGE, THEY'LL STICK THROUGH, don't remove any clamps, just staple every place in between them for now. You will need to put the seat on it's side to staple against the table surface, in-turn reenforcing the back so the staples bottom out. MAKE SURE EACH AND EVERY STAPLE BOTTOMS OUT, NO EXCEPTIONS. Then, remove 1 clamp at a time, staple, then put the clamp back. Each staple should be no more than 1/8" apart when completed.
So now cut off the excess and you're done!
P.S. I swear I had no idea this post would be so long.
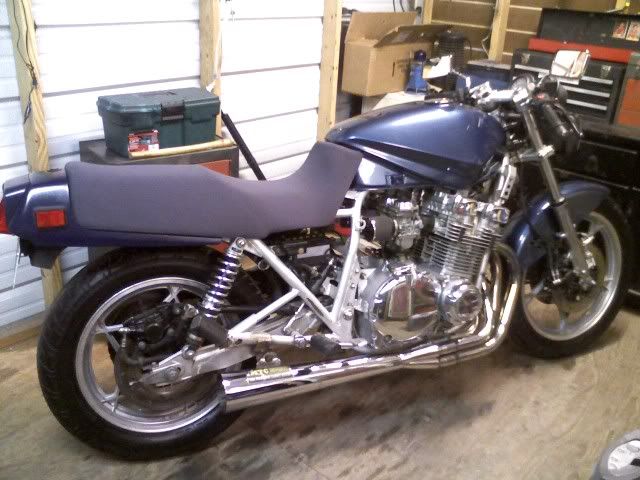
$10 Katana seat, life is good.
I can't post any pics to show ya'll since I'm on a locomotive right now on my phone, but you can see my seat in my avatar or on my other posts.
Needed:
Stretchable material, 4 yards, $4
Heat shrink plastic from 2 window insulation kits, $4
1 roll of 2" masking or duct tape $2
Tools:
Good utility stapler with 3/8" staples
Set of plastic spring type clamps
Beer
I went to wal-mart to see if I could find any material for my seat. They sell a thin, smooth, stretchable material in various colors that works like a dream for $1 a yard. I used 4 yards on my bike.
You can use heat shrink plastic under the material to waterproof the foam (optional), but of course the material will still be exposed. It can also be bought at walmart, just buy 2 window heat shrink insulation kits. The material can still obviously get wet, but it dries fast and this is a $10 job. Someone helping will make this job about 2 minutes long, pay them with beer.
The heat shrink should be at least 3 layers thick, all it will do is keep the foam dry and away from water logging. Put the layers on loosely one layer at a time anchoring it with any kind of tape, masking tape is good and cheap, tape the plastic further under the seat away from where the original and future staples will hold the stretch material, the excess plastic and tape is temporary and will later be removed. then shrink it (between layers) with a blow dryer, be mindful to NOT get it too tight, it needs to be smooth, but not 'wrinkly'.
Then comes the stretchy material
Fold the 4 yards of the material in a way where it covers the seat the most efficiently. Cover the seat, using the plastic clamps to hold the material in place. Work your way around the now upside-down seat while stretching the fabric and adjusting the clamps, you actually need only 5 clamps if you want to start at one end and work your way up, but remember that 1 clamp must hold the fabric at the opposite end of the seat to keep some 'end tension (hence the odd number). But the more clamps the better, use 20 if you got em'.
You'll find that the part where your butt sits is the hardest, but emphasize on pulling the SIDES to get it right.
Now, when the material is exactly right (and only then), start stapling the unsderside, DON'T STAPLE TOO CLOSE TO THE EDGE, THEY'LL STICK THROUGH, don't remove any clamps, just staple every place in between them for now. You will need to put the seat on it's side to staple against the table surface, in-turn reenforcing the back so the staples bottom out. MAKE SURE EACH AND EVERY STAPLE BOTTOMS OUT, NO EXCEPTIONS. Then, remove 1 clamp at a time, staple, then put the clamp back. Each staple should be no more than 1/8" apart when completed.
So now cut off the excess and you're done!
P.S. I swear I had no idea this post would be so long.
$10 Katana seat, life is good.