I have access to a bead blaster at work, after rebuilding them, stripping them back apart, I hit them with the glass beads. They look way better, but do I NEED to clearcoat the carbs to keep that look? If so, what type of paint? Thanks for the help.
-
-
There have been various painted carbs over the years so it can be done. I'd recommend a catalized urethane of some sort, or maybe some paint from POR-15 since the formula cures with moisture and is resistant to gasoline. Easiest thing to do is nothing; just live with your carbs as is. As long as you keep corrosive chemicals off them they should look good for quite a while.Ed
To measure is to know.
Mikuni O-ring Kits For Sale...https://www.thegsresources.com/_foru...ts#post1703182
Top Newbie Mistakes thread...http://www.thegsresources.com/_forum...d.php?t=171846
Carb rebuild tutorial...https://gsarchive.bwringer.com/mtsac...d_Tutorial.pdf
KZ750E Rebuild Thread...http://www.thegsresources.com/_forum...0-Resurrection -
What nessism said...
I like the carb bodies natural, unless you have a black motor and want to paint them to match. But some (like me) have polished the carb tops and bowls, and some have used clear on those parts. I guess it depends on if you have alot of moisture and/or humidity on whether or not you need to use the clear. I live in a very dry area, and didn't clearcoat anything.
Comment
-
Can you post a picture of blasted carbs? I'd like to see what a really clean set of carbs looks like.Comment
-
Unless you use a clear that is specific to high temp ranges, youre just asking for more disappointment and trouble next time. The other thing to consider is the amount of effort needed to access whatever parts are going to need ongoing appearance maintenance form now on.Comment
-
I'm not sure blasted carb bodies would look any different than ones that have been dipped. My carbs were dirty and greasy when I started. I dipped them overnight, scrubbed them with a toothbrush, then dipped them again overnight. They came out spotlessly clean. I would say that is all you need to do.
Comment
-
paint is bad and clearcoat is bad, you will regret it mate. it will flake, degrade, fall off look crap after a while. dont care what anyone says i speak from experience.. but i do live in the uk lol. bare ally kept clean and looked after will never give you a reason to look at your engine and think " god i need to take that out next winter and spend 3 weeks preparing it to respray it again"1978 GS1085.
Just remember, an opinion without 3.14 is just an onion!Comment
-
I am new with the 1979 GS850 VM carbs and just cleaned them for the first time. I noticed on the micro fiche that the idle adjusting screw and spring is on the bottom of the carbs. When i took mine apart the idle adjusting screw was on top of the carbs. I thought when i disassembled them that is were it was. Did I reversed the location of the screw ?? I don't have the rack on the bike yet, still waiting for the intake boots, but it seems to okay where it is. Everything seems to be working well regarding the throttle return spring.1979 GS850G
2004 SV650N track bike
2005 TT-R125 pit bike
LRRS #246 / Northeast Cycles / Woodcraft / Armour Bodies / Hindle Exhaust / Central Mass Powersport
http://s327.photobucket.com/albums/k443/tas850g/Comment
-
I agree with Bruce, dipping gets them just as clean without risking media clogging a jet or passageway. I also boiled my for a few minutes after dipping (to help get a broken air screw tip out) and it really improved the surface by removing the remaining oils.
Bruce, what did you do polish the covers? They look great.Comment
-
Great, I'll give it a shot. The uneven oxidized (varnished too maybe) clearcoat and bare aluminum really bothers me.
Unrelated, be careful to anyone using Jasco Paint Stripper (or others fwiw). I burned myself half a dozen time on little splashes, but water served quickly was fine. However, as I was flipping the tank up onto its tail on a sawhorse, I got a few drops on my shin that I had to let sit for 15seconds or so to rebalance the tank. I felt it burn in and washed heavily, but it turned into a big ugly wound overnight. ATTGATT applies even when the bike is on the stand!Comment
-
What do you dip them in?
Comment
-
Berryman's carb dip. It's a 1 gallon can with a parts bucket inside. Very caustic.Comment
-
Most recently I used the Gunk Carburetor Dip to good results, but this may have been why I felt the need to use boiling water to remove the residue, as I did not do that when using Berryman's on the CV carbs on my old XS triple, although I suspect this more had to do with the level of grime on my carbs to begin withComment
-
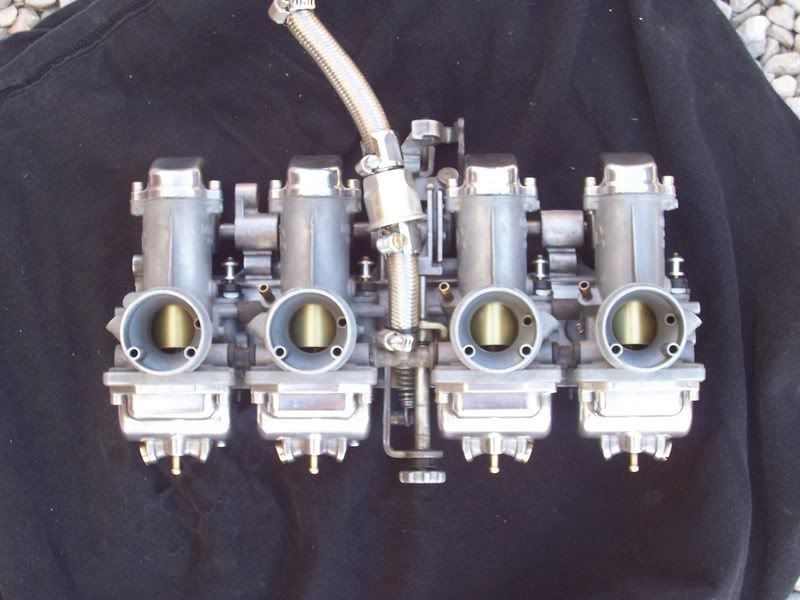
Pic of Glass Bead Blaster carb from 1979 GS750
I'll try to get the picture up.
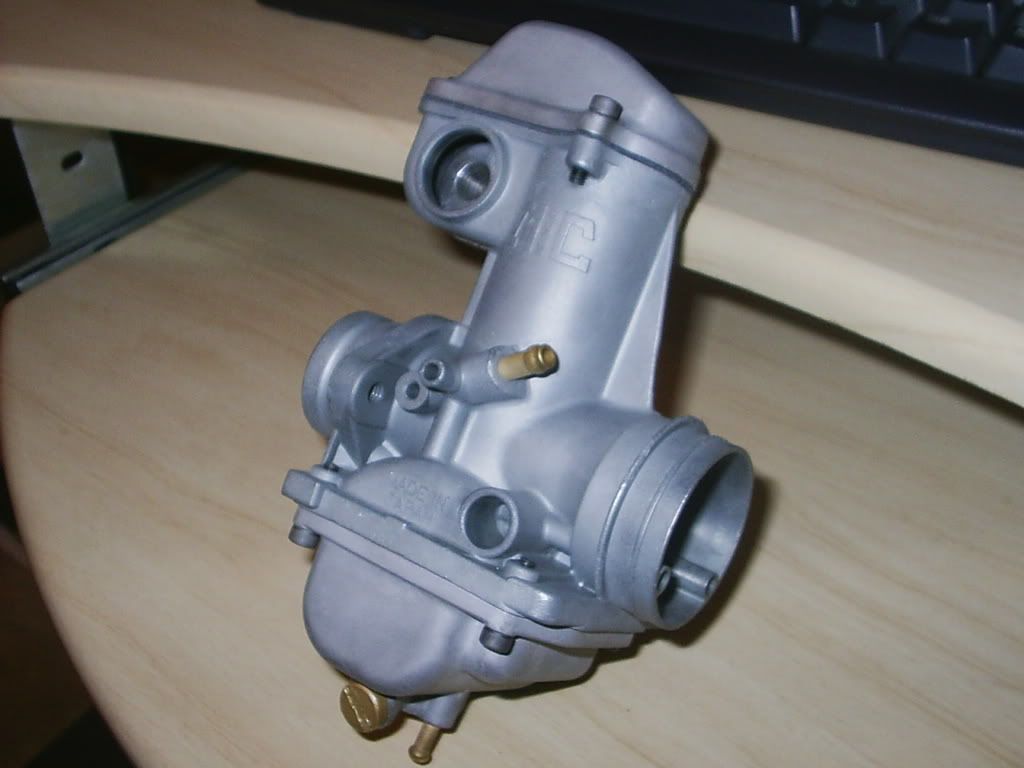
IMG]http://i178.photobucket.com/albums/w268/oshanac/Mic26.jpg[/IMG]Comment
Comment