Announcement

Collapse
No announcement yet.

Tremclad Paint Job Begins...

Collapse
X
 
  • Filter
  • Time
  • Show
Clear All
new posts

    #46
    Originally posted by Mark M View Post
    Any comments, etc. welcome.

    Mark
    You missed a spot right over ........ THERE!

    Just kidding ... looking very good so far! Have a Happy Turkey Day!

    Regards,

    Comment


      #47
      What grit paper are you using? Use 800 or 1,000 wet & dry with water and a rubber sanding block. The paper glides on the water, cuts better, the block keeps the paper universally flat and distributes your hand pressure to avoid sand through. Keep at it, looks good so far.

      Happy Thanksgiving,
      Stiksave

      Comment


        #48
        Originally posted by stiksave View Post
        What grit paper are you using? Use 800 or 1,000 wet & dry with water and a rubber sanding block. The paper glides on the water, cuts better, the block keeps the paper universally flat and distributes your hand pressure to avoid sand through. Keep at it, looks good so far.

        Happy Thanksgiving,
        Stiksave
        Remember to add a few drops of liquid soap to the water, and keep the sandpaper wet by letting it soak in the water for 10 or 15 minutes before you start. Also, using a sprtizer bottle with the same water/soap and spritzing while you sand allows for better fluid control and less mess. I've found that the newer microfiber cloths do a hell of a job with this whole process to wipe away accumulated slurry, etc.

        Comment


          #49
          Originally posted by stiksave View Post
          What grit paper are you using? Use 800 or 1,000 wet & dry with water and a rubber sanding block. The paper glides on the water, cuts better, the block keeps the paper universally flat and distributes your hand pressure to avoid sand through. Keep at it, looks good so far.

          Happy Thanksgiving,
          Stiksave
          I used 400 on the primer and the first coat. I will be using 600 on the second coat, then 1000 on until the end. All sanding is done wet. I tried a block, but it was very difficult to get into the corners and contours on the side plates. If I had large open areas like a car body, it would be all block sanded.

          Mark

          Comment


            #50
            Try those sponges from the dollar store that have a green Scotchpad glued to one side. They are rigid enough to wrap the paper around but flexible enough to follow contours.

            If they get too wet they lose their rigidity but still work fairly well.

            Give it a try.

            cheers,
            spyug.

            PS I still think its a lot of work but an interesting exercise and tutorial for others. Thanks man.

            Comment


              #51
              Originally posted by spyug View Post
              PS I still think its a lot of work but an interesting exercise and tutorial for others. Thanks man.
              It is a lot of work. Having got this far, I have to say that spraying is way easier to do and get a decent finish. However, spraying entails having the equipment and space to do it. If that is not available, this seems like a reasonable alternative for very little investment.

              Mark

              Comment


                #52
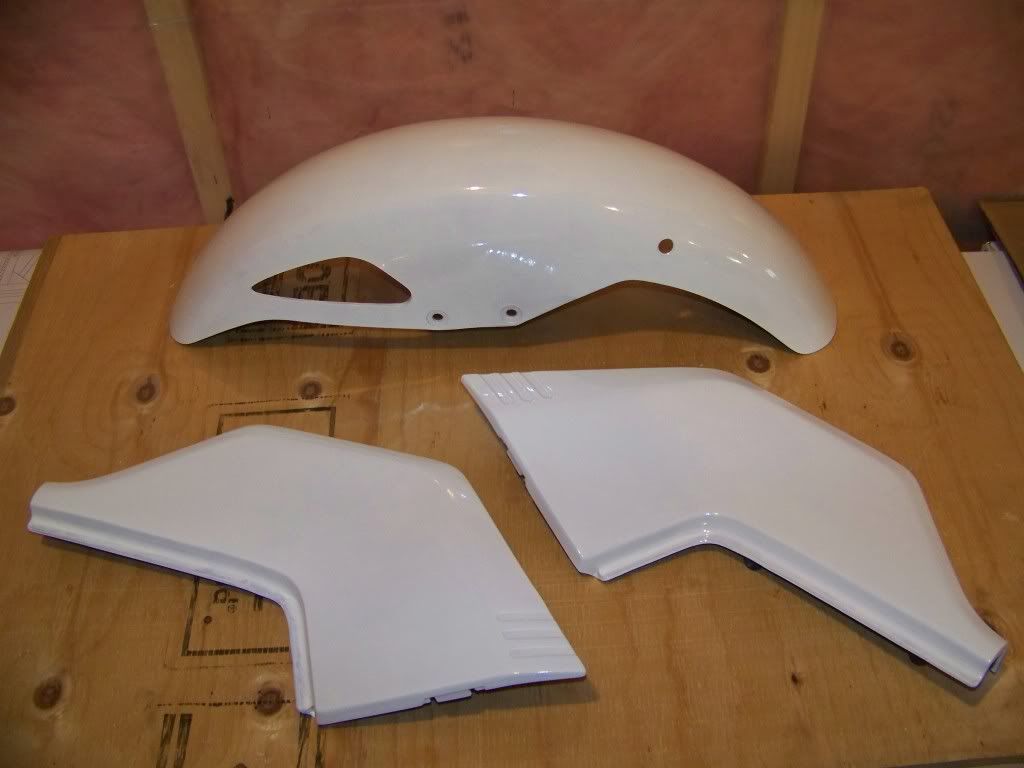
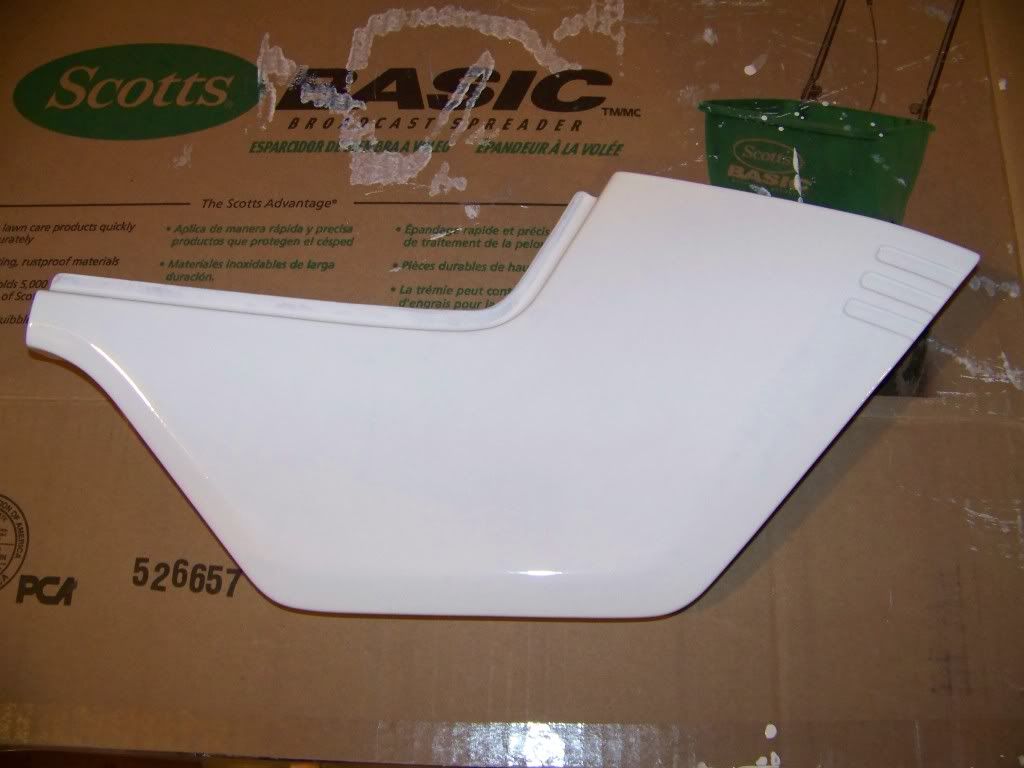
                Now we're getting somewhere! Coat #3 is on and looks WAY better than #2. Coverage is looking much better and is almost solid white with no blemishes showing through. One more coat and things should be looking very nice. I did have a couple of mistakes where I tried to touch up a small run on the fender and a small blemish on one of the side panels after the paint had started to flash off. I have now learned to leave it alone at that point, because the paint was too set to level off after I touched it with the roller and left behind some surface roughness... Ah well, nothing some sandpaper and paint won't fix.

                All the pieces together:


                A close up of one side panel to show how much better the coverage is now and how even the color is:


                Mark

                Comment


                  #53
                  wow thats looking good! im excited to see the finished product

                  Comment


                    #54
                    Bump

                    Mark, how's the paint job progressing?
                    1978 GS 1000 (since new)
                    1979 GS 1000 (The Fridge, superbike replica project)
                    1978 GS 1000 (parts)
                    1981 GS 850 (anyone want a project?)
                    1981 GPZ 550 (backroad screamer)
                    1970 450 Mk IIID (THUMP!)
                    2007 DRz 400S
                    1999 ATK 490ES
                    1994 DR 350SES

                    Comment


                      #55
                      I have been doing my 79 GS100 in black with great results!!! I have to learn how to post pictures here!!!

                      Comment


                        #56
                        Originally posted by stain View Post
                        I have been doing my 79 GS100 in black with great results!!! I have to learn how to post pictures here!!!
                        Ed

                        To measure is to know.

                        Mikuni O-ring Kits For Sale...https://www.thegsresources.com/_foru...ts#post1703182

                        Top Newbie Mistakes thread...http://www.thegsresources.com/_forum...d.php?t=171846

                        Carb rebuild tutorial...https://gsarchive.bwringer.com/mtsac...d_Tutorial.pdf

                        KZ750E Rebuild Thread...http://www.thegsresources.com/_forum...0-Resurrection

                        Comment


                          #57
                          Originally posted by Big T View Post
                          Bump

                          Mark, how's the paint job progressing?
                          Nothing for the last week and a half, I have been out of town for work and getting swamped with family and Christmas stuff. Maybe next week I will be able to get back to it. I figure I need one more coat on the side covers and 2 more on the fender. I planned for the winter, so I am still doing OK. After these are done, I will do the tail piece and then the tank last.

                          Mark

                          Comment


                            #58
                            I am also doing the Tremclad paint job. I have my fourth coat on and everything looks good except for the most important part, the tank itself. I have quite a bit of orange peel. Now this means the paint was too thick, right? I have to sand with 800 grit yet but the tank looks rough.
                            Also, after my 6th and hopefully final coat, i use the 1500 grade, then a polish, then wax, Correct? Will the polish and buffing smooth out any minor orange peel?

                            Paul
                            80 gs1100 16-v ported & polished, 1 mm oversize intake valves, 1150 carbs w/Dynojet stage 3, plus Bandit/gsxr upgrades

                            Comment


                              #59
                              Originally posted by nastyjones View Post
                              I am also doing the Tremclad paint job. I have my fourth coat on and everything looks good except for the most important part, the tank itself. I have quite a bit of orange peel. Now this means the paint was too thick, right? I have to sand with 800 grit yet but the tank looks rough.
                              Also, after my 6th and hopefully final coat, i use the 1500 grade, then a polish, then wax, Correct? Will the polish and buffing smooth out any minor orange peel?

                              Paul
                              Sorry to barge into this thread since it's not mine...but you need to sand in between each coat, or every other coat at least, if you want to paint to be smooth. Hit what you have with 600 used wet and watch the corners or you may cut though to the metal. After you smooth out the paint apply more layers until you get the coverage and depth of color you are looking for.

                              Good luck.
                              Ed

                              To measure is to know.

                              Mikuni O-ring Kits For Sale...https://www.thegsresources.com/_foru...ts#post1703182

                              Top Newbie Mistakes thread...http://www.thegsresources.com/_forum...d.php?t=171846

                              Carb rebuild tutorial...https://gsarchive.bwringer.com/mtsac...d_Tutorial.pdf

                              KZ750E Rebuild Thread...http://www.thegsresources.com/_forum...0-Resurrection

                              Comment


                                #60
                                Originally posted by nastyjones View Post
                                I am also doing the Tremclad paint job. I have my fourth coat on and everything looks good except for the most important part, the tank itself.
                                I found I had less orange peel with a fully wet coat. Trying to be too light on the paint caused me more problems. But I am no pro at this, so I may be wrong there.

                                You should post some pics of your progress, since mine has stalled out until next week.

                                Mark

                                Comment

                                Working...
                                X