Announcement

Collapse
No announcement yet.

polishing methods... which way?

Collapse
X
 
  • Filter
  • Time
  • Show
Clear All
new posts

    polishing methods... which way?

    I know that there's a lot of threads on polishing aluminum, and I've seen many different methods.

    What I need to ask is if there is a preferred method for polishing aluminum. Some guys start out wet sanding via successive grits, others use twist lock discs (for blurring/deburring etc).

    For the buffing stage, how much time should be spent on medium/fine compounds? how often do you apply compound to the buffing wheel? Finally, would using Mothers mag/alum polish after this stage be necessary? I have a friend who specializes in Royal Enfields who's good at this but I think it's better I get a head start to get a jump on my winter project (hence the 3am posting)

    #2
    this is the best link that I have seen by far. This one was posted by another member and I bookmarked it so I can reference it while doing my own polishing this winter. Ask away if there is something this doesn't answer.


    Comment


      #3
      Originally posted by mighty13d View Post

      Um....... WOW!!! He did a very nice job of that!!

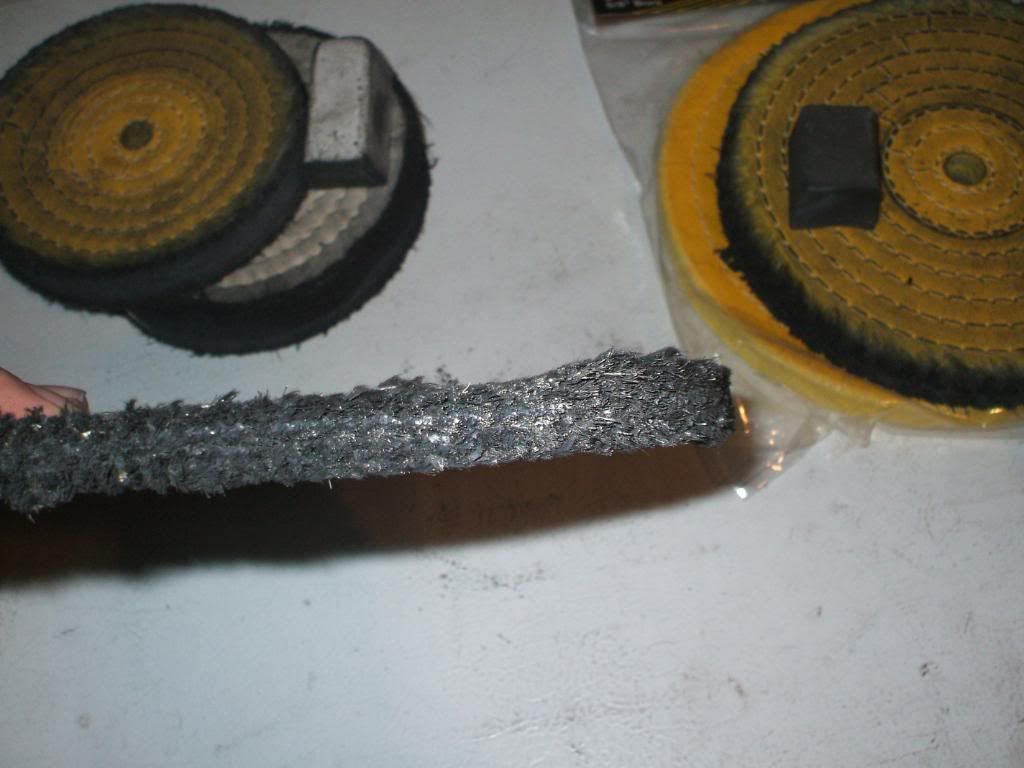
      Myself, I don't so much polish for a show finish as a presentable finish for a machine that will get used. I have 3 different wheels, and use 2 different compounds. If the part isn't horribly corroded, I start out with my sisal (yes, made of baler twine!) wheel with black coarse grit compound. This takes the pitting and scratches out pretty well, and quickly.

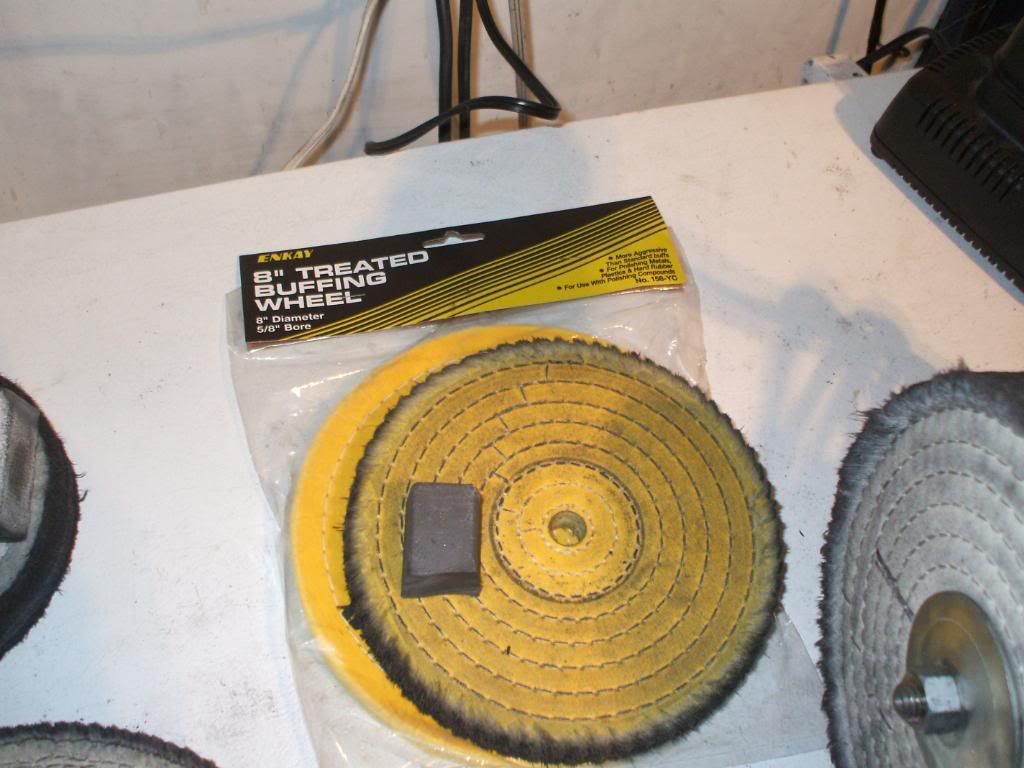
      Then I move to a yellow cloth wheel with the black compound. The yellow wheel is a little coarser than the white wheels that you can get everywhere. I use this to smooth out the surface and take the little scratches out that were left by the sisal wheel.

      Then I move to a soft white wheel running white diamond compound. This removes any marks left by the yellow wheel and really brings out the shine.

      This is what it ends up looking like.


      This is how it started.

      Comment


        #4
        Very Nice

        Can you shoot me a pic of the tools you are nusing? Man that looks awesome...I have a bunch of parts I want to do but wasn't sure on what process to use..

        jw

        Comment


          #5
          Originally posted by jwhelan65 View Post
          Can you shoot me a pic of the tools you are nusing? Man that looks awesome...I have a bunch of parts I want to do but wasn't sure on what process to use..

          jw

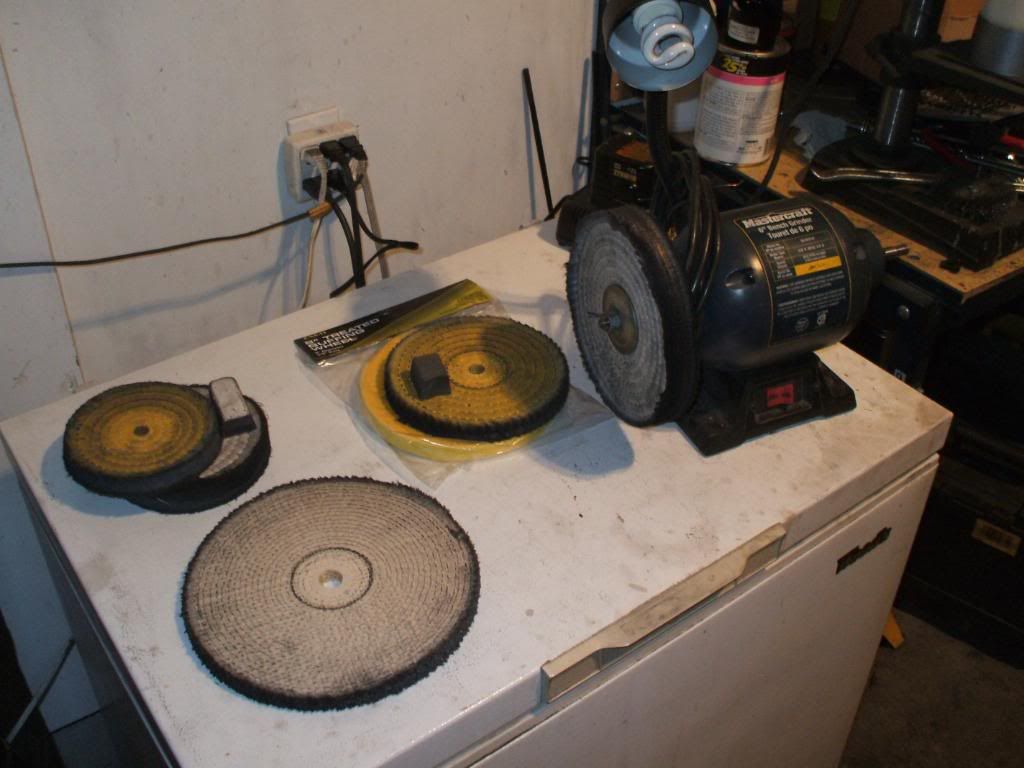
          I'll take some pics of my setup tomorrow. pretty simple, just a couple wheels, cheapie bench grinder, and some compound. My advice is to buy the biggest and baddest bench grinder you can afford. I spent $30 on mine, but it's just a small one. 1/2hp I think. I use a 12 inch wheel though. Works pretty sweet cuz the surface speed is up there, and the momentum makes it a LOT harder to kill than with an 8 inch wheel. Also have a fancy attachment I fabbed up with parts and pieces. Pics explain that better though.

          Comment


            #6
            Easiest way I've found is to get a stitched buffing wheel and some heavy cutting compound (I used the Harbor Freight "Grey" cutting compound). My buffer is an auto polisher that has lots of torque so you can really bear down on it - you will need to if you want to avoid all the laborious hand sanding. It took me a while to get though the corrosion pitting on the engine cases but using this method is way easier on the hands compared to hand sanding.
            Ed

            To measure is to know.

            Mikuni O-ring Kits For Sale...https://www.thegsresources.com/_foru...ts#post1703182

            Top Newbie Mistakes thread...http://www.thegsresources.com/_forum...d.php?t=171846

            Carb rebuild tutorial...https://gsarchive.bwringer.com/mtsac...d_Tutorial.pdf

            KZ750E Rebuild Thread...http://www.thegsresources.com/_forum...0-Resurrection

            Comment


              #7
              I start out with non-woven cutting discs to remove any deep pitting/imperfections. I don't know what kind of intermediate step to choose between here and tripoli/white rouge buffing finished with Mother's polish.

              I've seen people using emery cake as an intermediate step such as the following two websites:


              Then there's the guys who use sandpaper:

              Step by step advise for mirror polishing aluminum from two dozen readers; lots of agreement but a few points of contention


              (thanks mighty13d)

              Tomorrow I'm picking up another buffing wheel for the drill for the emery cake plus loads of sandpaper, I guess I'll try both.

              Comment


                #8
                I have a Craftsman 1/2 horse bench grinder mounted on a mobile pedestal and use 6" stitched wheels from Lowe's, along with their white compound. If the part is really bad, I will smoothe it out by sanding, but most of the stuff I polish has already started rather shiny, so I just use the one grade of compound and one wheel. If I was getting into show-quality work, I might get a second grinder and another wheel, but I am satisfied with what I have and the results I get.


                sigpic
                mine: 2000 Honda GoldWing GL1500SE and 1980 GS850G'K' "Junior"
                hers: 1982 GS850GL - "Angel" and 1969 Suzuki T250 Scrambler
                #1 son: 1986 Yamaha Venture Royale 1300 and 1982 GS650GL "Rat Bagger"
                #2 son: 1980 GS1000G
                Family Portrait
                Siblings and Spouses
                Mom's first ride
                Want a copy of my valve adjust spreadsheet for your 2-valve per cylinder engine? Send me an e-mail request (not a PM)
                (Click on my username in the upper-left corner for e-mail info.)

                Comment


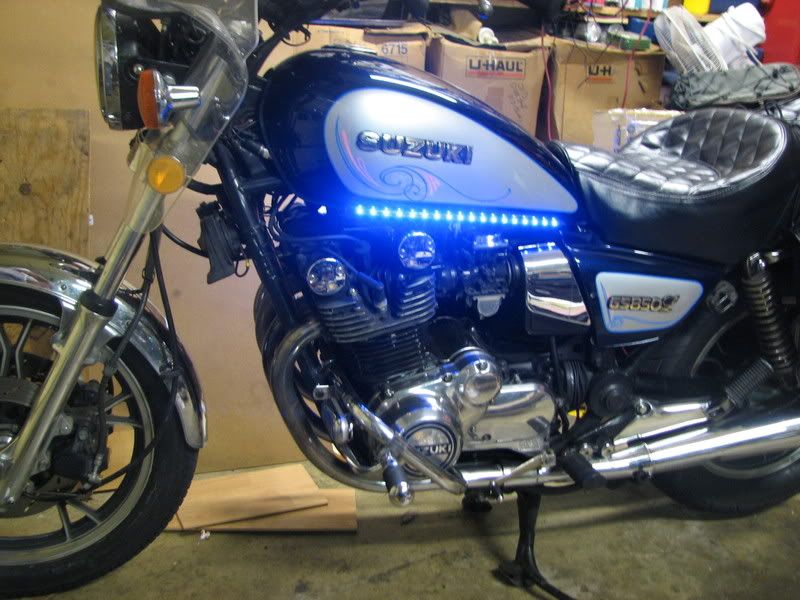
                  #9
                  Wow Steve. ...post more pics of that bike! Purrrdie.

                  Comment


                    #10
                    OK.


                    .
                    sigpic
                    mine: 2000 Honda GoldWing GL1500SE and 1980 GS850G'K' "Junior"
                    hers: 1982 GS850GL - "Angel" and 1969 Suzuki T250 Scrambler
                    #1 son: 1986 Yamaha Venture Royale 1300 and 1982 GS650GL "Rat Bagger"
                    #2 son: 1980 GS1000G
                    Family Portrait
                    Siblings and Spouses
                    Mom's first ride
                    Want a copy of my valve adjust spreadsheet for your 2-valve per cylinder engine? Send me an e-mail request (not a PM)
                    (Click on my username in the upper-left corner for e-mail info.)

                    Comment


                      #11
                      thanks! My only negative would be the l.e.d.,rotate it to the under side of the tank, more space ship, ethereal glow kinda thing when you can't actually see the light. LOL I see the light !! Praise the lord I see the light! Oh sorry, went out on a tangent there. BOT would you guys say the harbor frieght stuff is good enuff for garage work. Steve the results you've achieved would more than make me happy. How bad do you think it would be to do the carb bodies?

                      Comment


                        #12
                        Steve,

                        Your bike looks great. Nice job.SW Ohio to WNY shouldn't be too awful far, maybe you could stop by and put a shine on my bike. Should only take a day or so...

                        Just kidding.

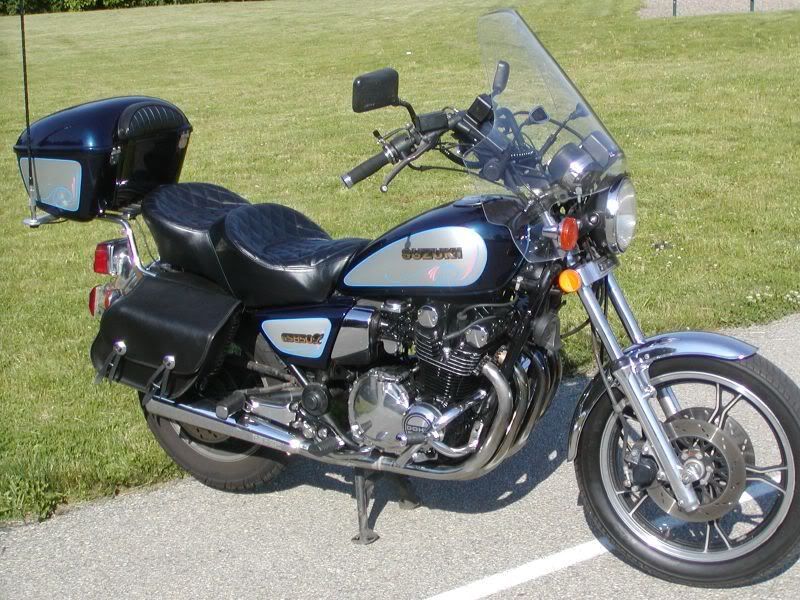
                        I do like the looks of your wind screen, where did you get it? Does it rattle or squeek? How do you like it? How much was it? I'm in the market for one sometime before next August, and imput would be a big help. I've tried 3 different types 1. A vetter faring that came with the bike, rattled like mad 2. A road warrior, it was OK but it had lousy mounts. It would slip at speed(70mph) 3. Was a freebie a buddy gave me, too small and broken, so I never really had a chance to try it. All these I tried on my "G", haven't tried anything on the "GL" yet. I may try to modify the road warrior, and save some $$.

                        Sorry for running on about windscreens when we were talking about polishing

                        Andy
                        1986 GS1150ES "JUNO QUICK”
                        1984 GS1100GK
                        1982 GS1100E “RANGER”
                        1978 GS750E-"JUNO RIOT" on the road in 2013
                        1980 GS550GL complete, original, 4900 miles

                        Comment


                          #13
                          Originally posted by jwhelan65 View Post
                          Can you shoot me a pic of the tools you are nusing? Man that looks awesome...I have a bunch of parts I want to do but wasn't sure on what process to use..

                          jw
                          Finally had a chance to take some pics. Here it is.


                          The more aggressive wheels.


                          Sisal wheel.


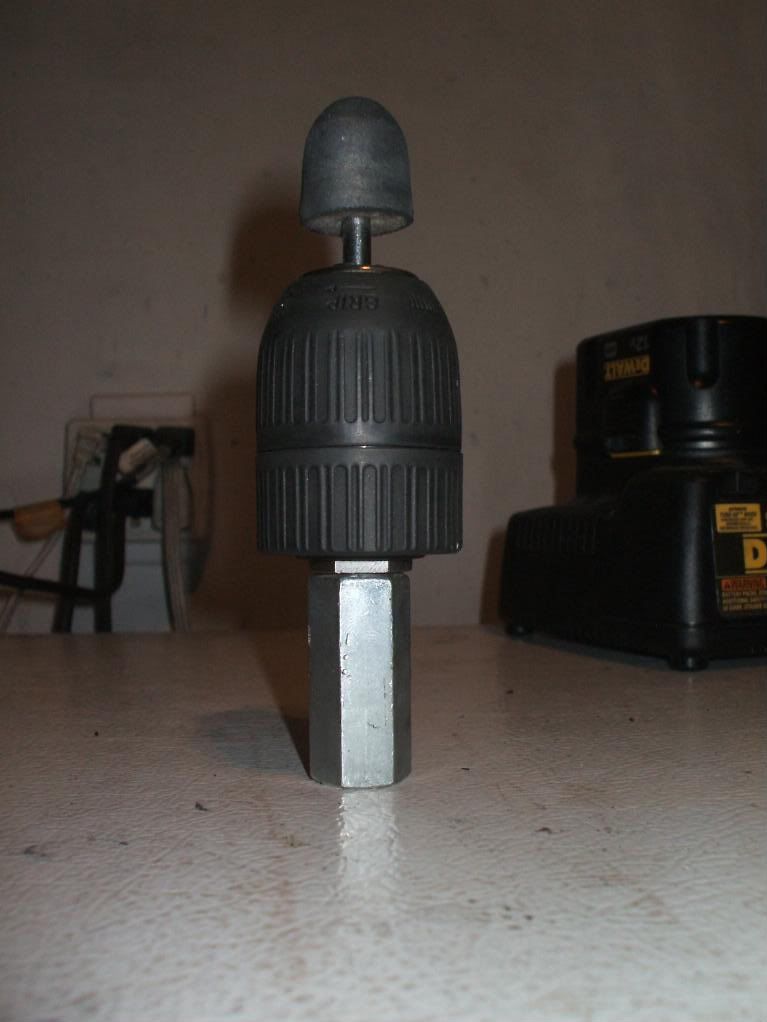
                          And for those hard to reach areas....


                          I made this with a threaded coupler, a bolt, and the drill chuck. Works pretty well, and attaches to the right side of the grinder only, because of the RH thread.

                          The drill chuck has a UNF thread (don't remember what size), so I cut the head of the bolt off, threaded the coupler and bolt onto the shaft of the grinder, then used my angle grinder with the bench grinder running to "turn down" the bolt to the required diameter to run the die over to get the correct UNF thread for the chuck. Pretty easy considering I used tools most of us have in the garage already. All in, I think I spent $15.
                          Last edited by Guest; 11-30-2008, 07:20 PM.

                          Comment


                            #14
                            Originally posted by ALB80-850 View Post
                            Steve,

                            Your bike looks great. Nice job.SW Ohio to WNY shouldn't be too awful far, maybe you could stop by and put a shine on my bike. Should only take a day or so...

                            Just kidding.
                            406 miles. Easy ride, but kinda hard to bring the polishing equipment. Might be better if you come my way.
                            By the way, ... it's her bike, not mine. (Check the links in my signature.)

                            Originally posted by ALB80-850 View Post
                            I do like the looks of your wind screen, where did you get it? Does it rattle or squeek? How do you like it? How much was it?
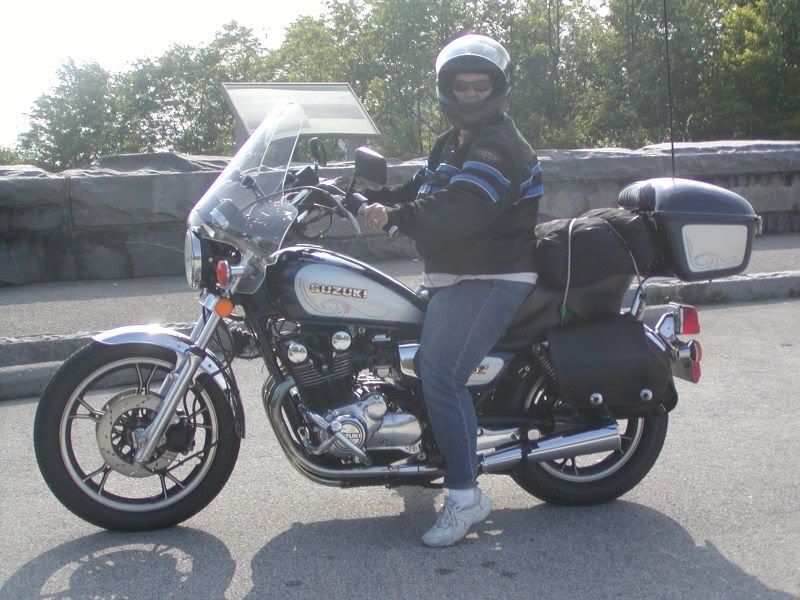
                            Not sure exactly where we got it, but it is a National Cycle Plexifairing 3. The one in the pictures you have seen are actually a Plexifairing 2. The difference is in the length of the lower leg. The 3 is about 4 or 5 inches longer than the 2.

                            If it is properly installed (which is not hard), there is no rattle or squeak to it.

                            I like it fine, but again, it's her bike. Actually, I have ridden it to visit someone about two hours away and found protection to be quite good. The angle is set more for her height (5'4"), but seemed to work OK for me, too (6'5").

                            We got it about three years ago, I think it was about $175 or so. They are available in clear or light tint. The tint is not bad, it's no darker than the standard tint on a car's windshield, just a different color (smoke instead of a car's blue or green). The windshield on my Wing is tinted and sometimes it's hard to tell, but if I look sideways, I am quickly reminded how nice the tint is.

                            The National Cycle windshields use four mounting points on the bike, so there is no problem with slippage. There are two clamps that clamp onto the handlebars and two that clamp onto the fork legs near the turn signals. There is usually enough room to adjust the angle a bit to minimize turbulence around your head, which would cause noise. Done slowly and carefully, mounting the shield the first time might take 20-30 minutes to get the clamps set right. Once they are set, you can have the shield on or off in about a minute.


                            Let me know when you are going to stop by for a weekend polishing session.
                            We'll just call in all the locals and make a party of it: TheCafeKid, N1ElkyFan, Dogma, RageZro, Bill Lloyd, and a few others I can't remember right now.

                            .
                            sigpic
                            mine: 2000 Honda GoldWing GL1500SE and 1980 GS850G'K' "Junior"
                            hers: 1982 GS850GL - "Angel" and 1969 Suzuki T250 Scrambler
                            #1 son: 1986 Yamaha Venture Royale 1300 and 1982 GS650GL "Rat Bagger"
                            #2 son: 1980 GS1000G
                            Family Portrait
                            Siblings and Spouses
                            Mom's first ride
                            Want a copy of my valve adjust spreadsheet for your 2-valve per cylinder engine? Send me an e-mail request (not a PM)
                            (Click on my username in the upper-left corner for e-mail info.)

                            Comment


                              #15
                              Originally posted by briyenkieth View Post
                              My only negative would be the l.e.d.,rotate it to the under side of the tank, more space ship, ethereal glow kinda thing when you can't actually see the light. ... How bad do you think it would be to do the carb bodies?
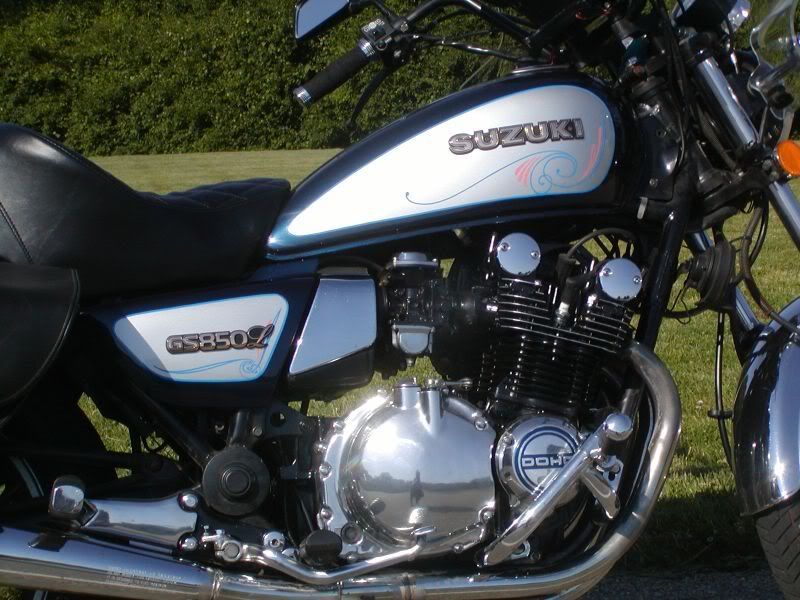
                              I might put another set of LEDs under the tank, too, but the ones I used (Pilot units from Auto Zone) don't bend sideways very well, so might not follow the curve of the outside of the tank well enough. They just happen to be exactly the same width as the seam on the bottom of the tank, so I mounted them there. She wants more lights (she hangs out with too many Goldwingers ), so I will be exploring more possibilites.

                              Polishing the carb bodies would be possible, but VERY tedious. I have used my Dremel tool to clean up some carb bodies and gotten them to look rather decent, but I have not found a good set of polishing wheels that lasted very long in a Dremel. There are just too many nooks and crannies that make it very difficult to reach, making polishing difficult. That is why I chose to just polish the diaphragm covers and the float bowls and paint the rest of the carbs black. After I had painted the engine, I found that Suzuki did it starting with the '83 models, so it's not totally out of place, just a year early to be perfectly correct.

                              .
                              sigpic
                              mine: 2000 Honda GoldWing GL1500SE and 1980 GS850G'K' "Junior"
                              hers: 1982 GS850GL - "Angel" and 1969 Suzuki T250 Scrambler
                              #1 son: 1986 Yamaha Venture Royale 1300 and 1982 GS650GL "Rat Bagger"
                              #2 son: 1980 GS1000G
                              Family Portrait
                              Siblings and Spouses
                              Mom's first ride
                              Want a copy of my valve adjust spreadsheet for your 2-valve per cylinder engine? Send me an e-mail request (not a PM)
                              (Click on my username in the upper-left corner for e-mail info.)

                              Comment

                              Working...
                              X