Announcement

Collapse
No announcement yet.

GS550 Cafe Seat Build (or Attempt...)

Collapse
X
 
  • Filter
  • Time
  • Show
Clear All
new posts

    GS550 Cafe Seat Build (or Attempt...)

    I have posted a few times on this forum, but they were mainly me asking questions instead of me trying to contribute. I am pretty new to the motorcycle game but it has been fun so far and thanks to this forum I have learned quite a bit. This will be the third year I have had my motorcycle, a 1979 GS 550. I bought it for cheap in non-running condition and was able to get it running with just a can of seafoam and some new gas. During the past three years I have done much more work to the bike than that. I have done the regular stuff...stator papers, proper carb clean, valve shim, new chain, etc. I have also replaced all the bearings, the tires, the handlebars, brake lines and various other compenents. It is working pretty well for me at this point (only pretty well because I still do not have the pod airfilters completely adjusted for yet - another story though). One thing I never dealt with though was the seat. I never liked the seat and it was torn up and taped together. The seat pan was rusty and the seat foam was shot. I could not find a replacement on ebay so I started looking at alternatives and the whole cafe seat style was something that I really liked. So chronicled here will be my attempt at trying to make a fiberglass cafe seat for my bike.

    I went to the local craft and hardware store tonight and picked up a few things. I had read a few different threads on this forum and some others on building seats and foam selection seemed to be a pretty crucial aspect. It seems the expanding foams in a can (Great Stuff) are not the greatest for sanding. For this reason I chose a florists foam that I was able to find in the craft store. The stuff seems pretty dense and hopefully will sand nicely. If anyone has any hints for sanding I would love to hear them. This is my first time so I am not expecting any miracles.

    I actually had a camera out in the garage tonight so I snapped a few pictures of the process. Hopefully if this is successful it will help someone else in the future. If I fail then at least people will know what not to do!

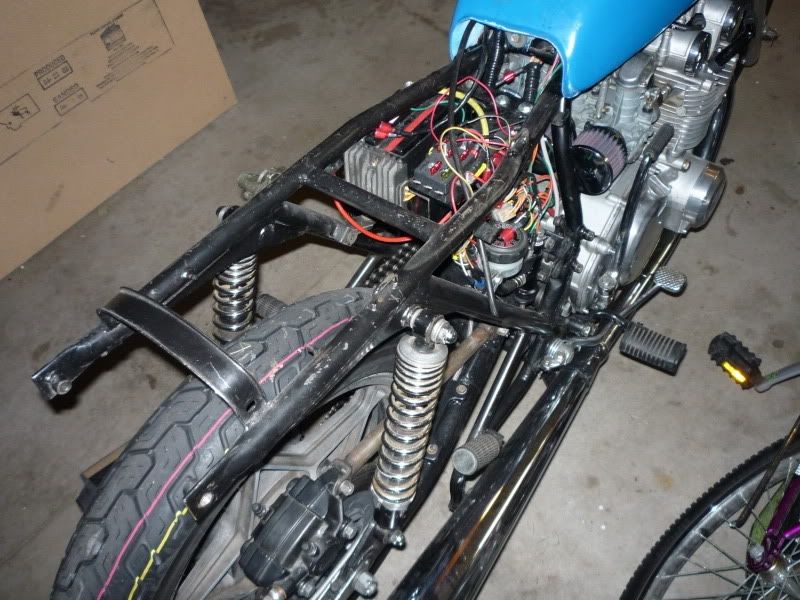
    First thing I did was measure the frame of the bike where the existing seat used to rest. From these measurements I cut out a piece of MDF to the shape of the future seat pan. I then placed some florists foam cut to the same shape over the MDF and glued it down.
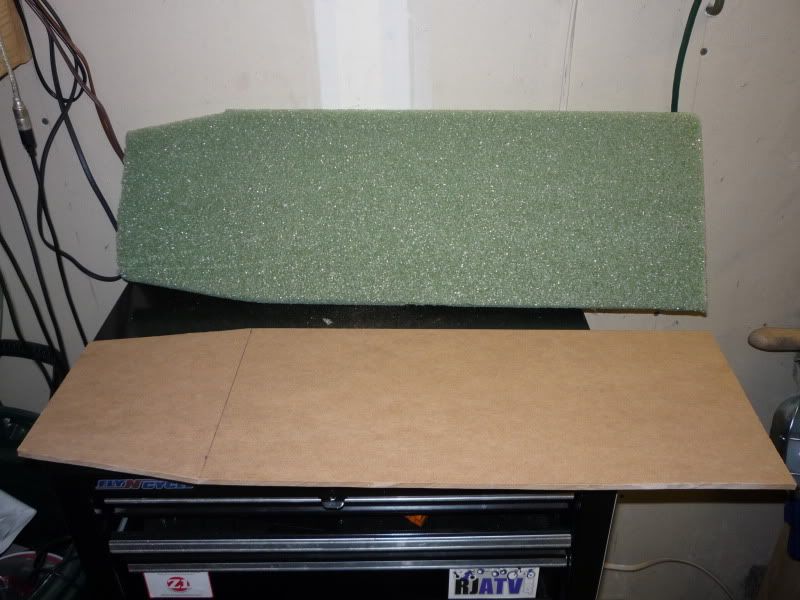


    Next, I glued various blocks of florists foam to the seat pan area in order to make a 'rough' version of the shape of the rear area of the seat.
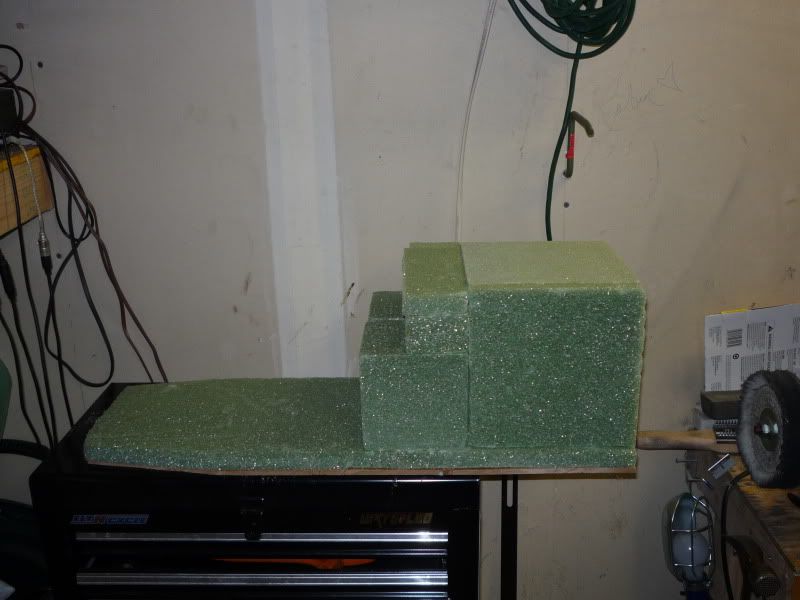


    That is all the progress I made tonight. Tomorrow I plan on sanding down the florists foam to a shape that is more agreeable. I like the classic cafe look so I suspect my final shape will look pretty cliche.

    If anyone has any hints or suggestions I would be very grateful.

    -Jake

    #2
    Looks like your making some progress. Keep us up to speed with your project, I'm curious to see how your seat turns out. I cant stand my GS1000 seat either..the pan is shot, and it is just plain uncomfortable!

    I have a RJATV decal on my toolbox too! Picked up a clutch cable for my CR250 from him on E-bay....cool!

    Jeff (teet)

    Comment


      #3
      Originally posted by MinnesotaGS View Post
      I have posted a few times on this forum, but they were mainly me asking questions instead of me trying to contribute. I am pretty new to the motorcycle game but it has been fun so far and thanks to this forum I have learned quite a bit. This will be the third year I have had my motorcycle, a 1979 GS 550. I bought it for cheap in non-running condition and was able to get it running with just a can of seafoam and some new gas. During the past three years I have done much more work to the bike than that. I have done the regular stuff...stator papers, proper carb clean, valve shim, new chain, etc. I have also replaced all the bearings, the tires, the handlebars, brake lines and various other compenents. It is working pretty well for me at this point (only pretty well because I still do not have the pod airfilters completely adjusted for yet - another story though). One thing I never dealt with though was the seat. I never liked the seat and it was torn up and taped together. The seat pan was rusty and the seat foam was shot. I could not find a replacement on ebay so I started looking at alternatives and the whole cafe seat style was something that I really liked. So chronicled here will be my attempt at trying to make a fiberglass cafe seat for my bike.

      I went to the local craft and hardware store tonight and picked up a few things. I had read a few different threads on this forum and some others on building seats and foam selection seemed to be a pretty crucial aspect. It seems the expanding foams in a can (Great Stuff) are not the greatest for sanding. For this reason I chose a florists foam that I was able to find in the craft store. The stuff seems pretty dense and hopefully will sand nicely. If anyone has any hints for sanding I would love to hear them. This is my first time so I am not expecting any miracles.

      I actually had a camera out in the garage tonight so I snapped a few pictures of the process. Hopefully if this is successful it will help someone else in the future. If I fail then at least people will know what not to do!

      First thing I did was measure the frame of the bike where the existing seat used to rest. From these measurements I cut out a piece of MDF to the shape of the future seat pan. I then placed some florists foam cut to the same shape over the MDF and glued it down.


      Next, I glued various blocks of florists foam to the seat pan area in order to make a 'rough' version of the shape of the rear area of the seat.


      That is all the progress I made tonight. Tomorrow I plan on sanding down the florists foam to a shape that is more agreeable. I like the classic cafe look so I suspect my final shape will look pretty cliche.

      If anyone has any hints or suggestions I would be very grateful.

      -Jake
      This is exactly how i did mine. I have/had a full thread on it on here too...might be able to find in a search if it didnt get eaten in the attacks..

      Suggestions/Tips
      One, I would suggest making THIS mould a little larger than you want your final to be, and then once you get this glass done, remove the foam, and then use IT to cast another from the inside. Otherwise, you will have to fill the crap out of this one with body filler, and it ends up being PRETTY heavy and still not looking all that great. Plus, with the vibrations, i would bet that the body filler will eventually start breaking/cracking. I did just this when i did mine, and wish i had made it larger and cast a new one from the inside like i suggested to you.

      Secondly, make no mistake in covering your foam. The glass resin will eat that stuff REALLY fast, and then you will be left with a puddle of green goo. I covered mine with layers of painters tape and used car wax as a release agent. Worked pretty darn great actually.

      Third, if you dont plan on using this as a mould itself, try to make it as smooth as you possibly can with the final layers of resin only. I would also suggest you use the woven cloth stuff for the areas that you want to be especially strong, and I ended up doing about 4-5 layers around stress points, and 3-4 everywhere else.. worked pretty good too..

      Comment


        #4
        Best of luck!

        Whatever shape or design you like is your show, but I highly recommend 2 inches of high density foam padding. Any less and you'll be sore.
        Bill
        1982 GS1100G- road bike
        1990 GSX750F-(1127cc '92 GSXR engine)
        1987 Honda CBR600F Hurricane

        Comment


          #5
          Good start, I need to do this eventually

          Have you figured out how it will mount?

          Comment


            #6
            There is an easier way of doing this than making a plug to cast in. Use epoxy resin and the so called 'fiberglass over foam" technique.

            Build the seat in foam to the shape you like. Foam can be shaped with most hand tools and sanded easily. I find that artistic foam to be too soft to work, however and it tends to crumble fairly easily when worked with tools. Go to the lumber yard and get pink or blue insulation.

            Once the seat is shaped cover with a layer of fine woven fiberglass using epoxy resin which will not eat the foam as standard f'g resin will. To do the job easily and efficiently first cut your cloth into panels to cover the various areas i.e. the flats and the humps. Use push pins to hold the cloth in place. Don't try and do top and bottom in one fell swoop. Do one side first, let it cure and then the otherside. Make sure you use enough resin to "wet" the cloth through and squeegy off the excess. Once it sets, pull out the pins and dab over the area with resin.

            After the cure you can add an additional layer but one single layer will be plenty strong. You will not even need a wooden or metal base for stiffness.

            The seat pan should be fairly smooth but to make it absolutely so put on a thin coat of "Bondo" and sand smooth. Fill any minor dimples with surface putty and smooth. Paint with Primer surfacer before top coat.

            You will find this method will take much less time than the buck/plug method and is easier for the neophyte. It is a bit more expensive as epoxy resin is likely double if not triple the cost of standard resin however.

            As mentioned, make sure you build a fairly plush seat as these seat pans are hard. You need to be careful with them as they can cause you a medical problem known as Sciatica. If, like me, your sciatic nerve in the buttock area is close to the surface it can be compressed if sitting on a very hard surface. If you haven't had it it is one of the most excrutiating and debilitating pains you can experience. It can also cause long term nerve damage in the leg. I am 3 years on and still can't feel 3 toes in my left foot. After building that type of seat for my XS Tracker I was only able to ride it for about 340 km and its been parked for these three years.

            Anyway enjoy the project and keep posting the pics.

            Good luck with it,
            Spyug

            Comment


              #7
              So, i take it that the standard fiberglass resin is what they have at Walmart and Home Depot.....where do you buy epoxy resin?

              and, how much do you need for a seat?

              Comment


                #8
                Epoxy resin is commonly found at boating supply stores.

                Comment


                  #9
                  does a project like this take a quart? or a gallon? 2 gallon?

                  Comment


                    #10
                    fiberglass doesnt have to be dripping wet, i would guess a quart should do you just fine and he is definitely right about the mesh instead of the matting...much easier to use and finer finishd product. if money is tighter you can always put aluminum foil over the foam and use the resin you get at auto zone or wherever, but make sure it is PERFECTLY SMOOTH or you will feel it on the surface. if you have never fiberglassed anything before i would suggest practicing or playing with it and trying to lay something up that has some curves and lines, doesnt have to be big but it helps you get a feel for what the glass will do dry and what it will do wet.. good luck!

                    Comment

                    Working...
                    X