Announcement

Collapse
No announcement yet.

Smokin's 82 Kat Restorification project

Collapse
X
 
  • Filter
  • Time
  • Show
Clear All
new posts

    #31
    I don't recommend...

    I was once shown "The best way" to get the glass out by a hack-job MC mechanic.

    Step one is to make up an adapter to go from the metric thread for the lines to an airline fitting.

    Step two is to apply 180 psi to the master, and watch as the whole thing explodes into 14 and a half pieces.

    Step three is to say it must have been faulty, and order a new master.

    I do not recommend this procedure for anyone, anywhere, anytime.

    I have only replaced sight glasses that were cracked, and they came out with a little light prying and minimal clean-up. I suppose once you strip out all of the internals from the master, you could heat the part to expand the metal, then pop the glass out with a push from behind with an allen key.

    Hope this helps,

    Comment


      #32
      Love the suggestion Mac, I'll get right on that one.

      Good news tho, i got over my fear and, using a piece of piano wire bent at about a 45 degree angle, pushed on the back of the sight glass and viola! it popped right out.

      Since I was at work, I went down to the maintenance guys and enlisted their help in making a replacement. Lo and behold, they returned with two pieces of plastic, of approximate diameter, to be finish sanded by me.

      Pics to follow....

      Comment


        #33
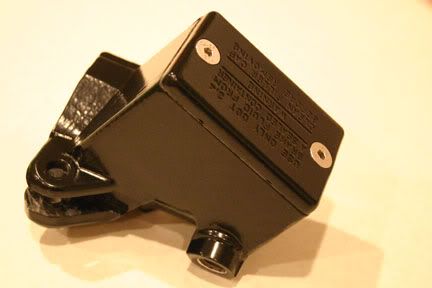
        As promised, pics of the front master cylinder....

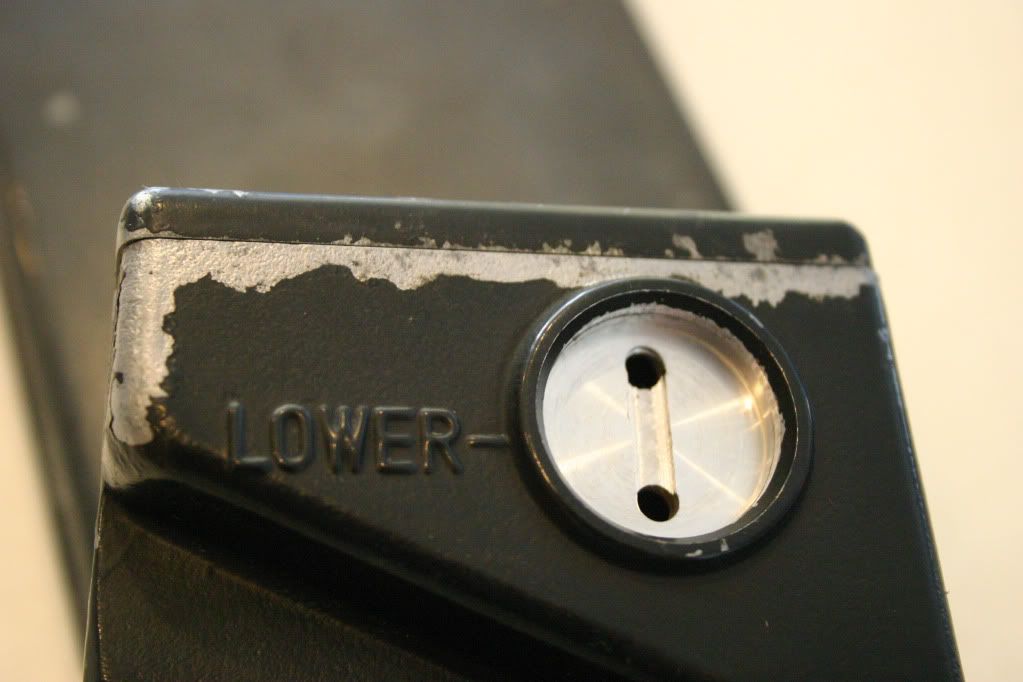
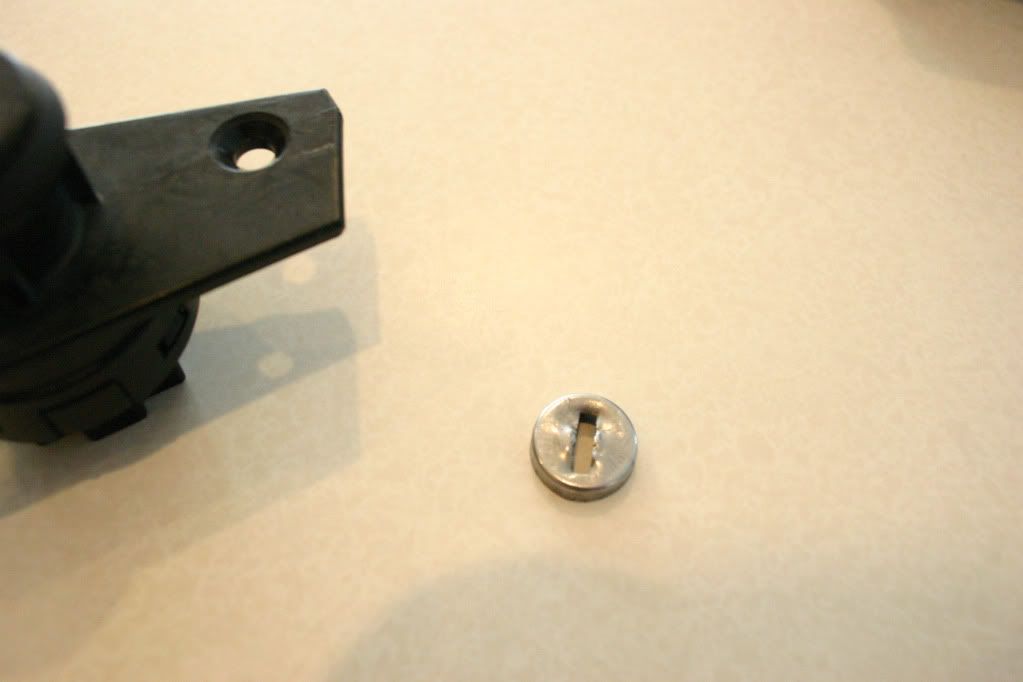
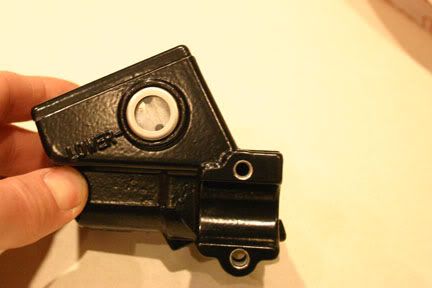
        As stated previously, my maintenance guys at work made a new sight glass window for me. Problem we realized was that the material was too thick, and once pressed in, would not allow any room behind the window for brake fluid to flow, thereby showing the level. So, I had them mill a groove between the upper and lower holes:

        Upon looking more at the overall pucture, I think I'll have them make me a new window out of thinner material.

        I dropped off the last bits and pieces to the powdercoaters today. This includes the clip-ons, upper triple clamp, master cylinder, fork brace, battery box, and electrical panel. Photos to come when I get them back sometime next week.

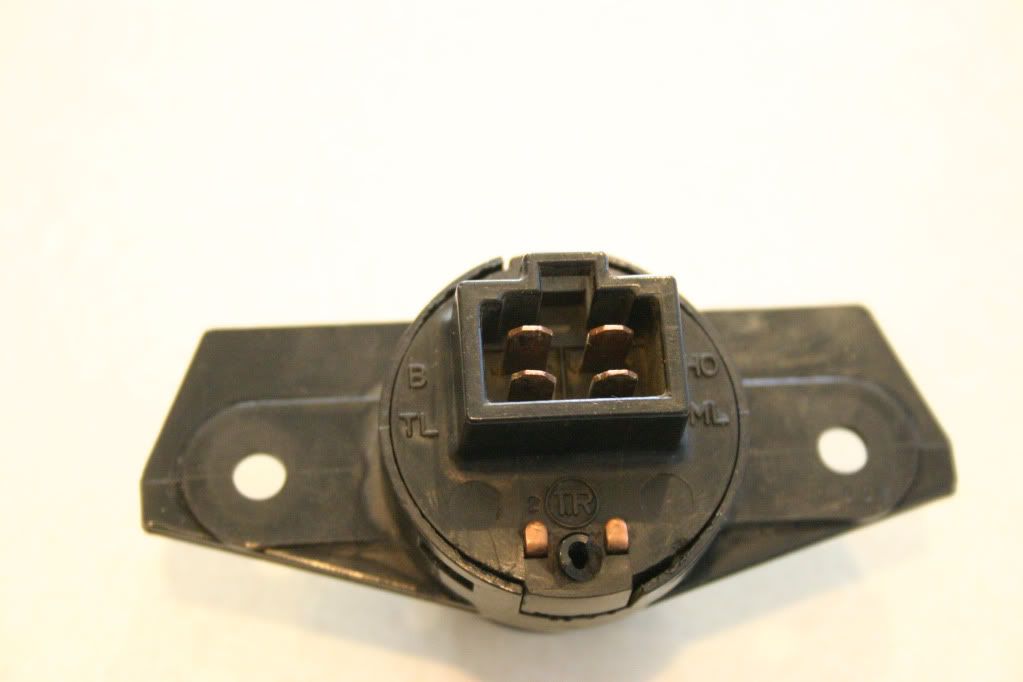
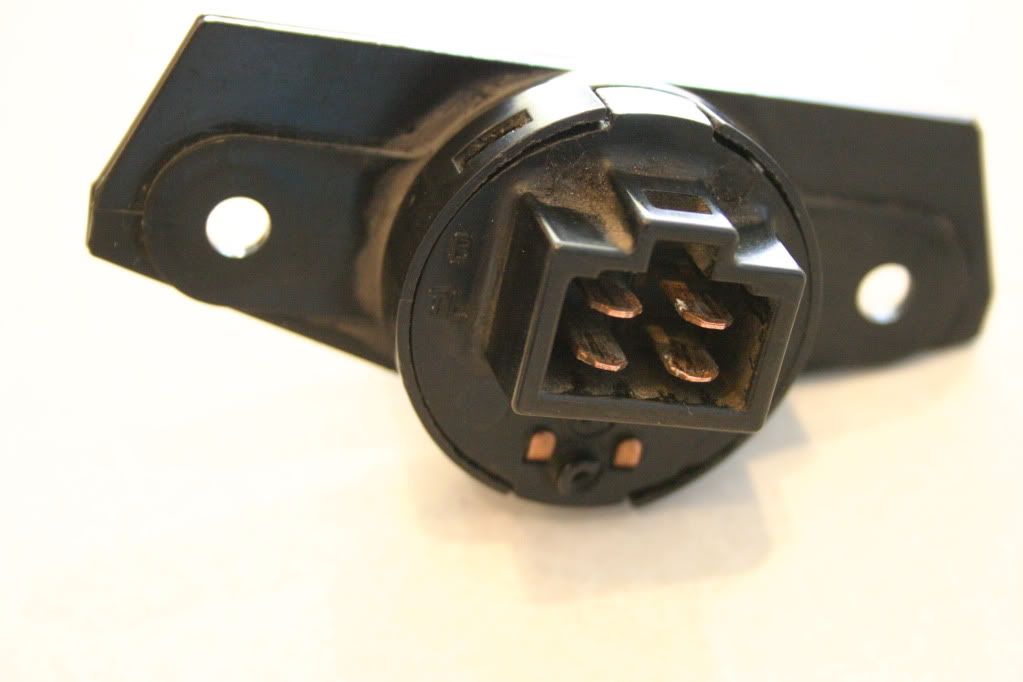
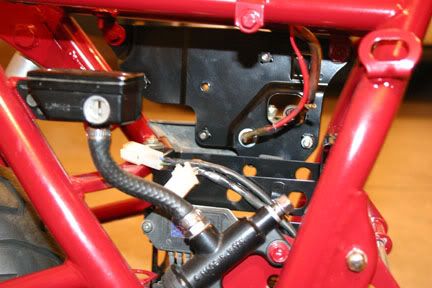
        With all that done, I turned to the wiring harness. Knowing I have an issue with the ignition switch, this was the logical starting point, problem being that the PO or someone with no brains at all cut off the connector that clips into the back of the ignition switch. So my wiring harness needs to find a viable, reliable, obtainable solution. I can't find a connector anywhere:


        Any help anyone can offer is super appreciated.

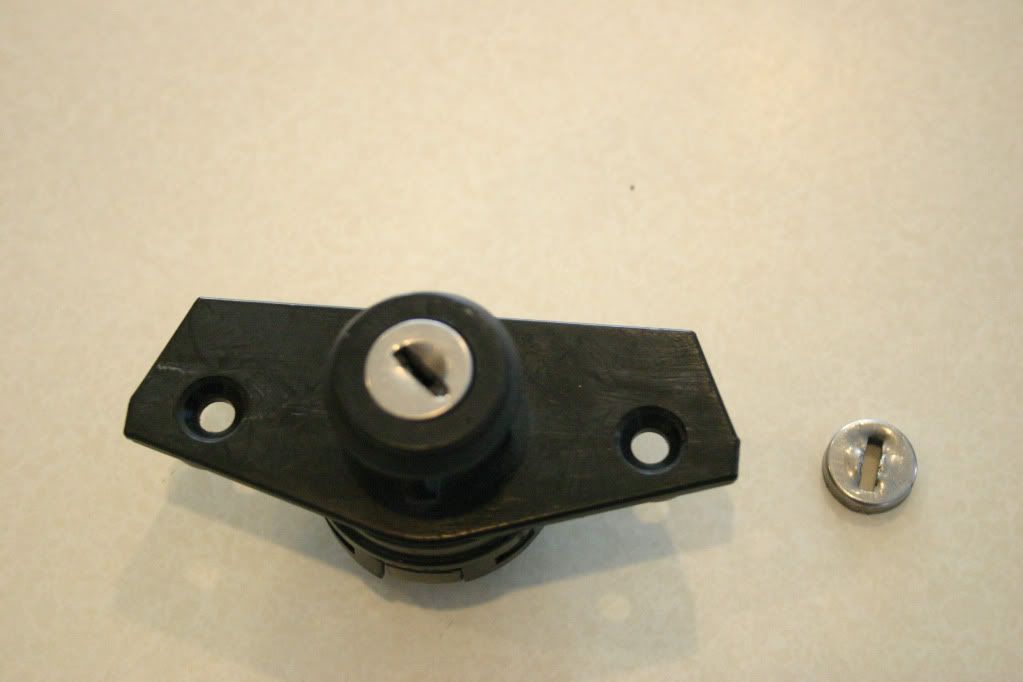
        And lastly for this week; My ignition switch was keyed (by me, a few years ago) to utilize a key I got off ebay along with a replacement gas cap and rear seat lock. Problem was that the seat lock was broken, so I ended up getting another seat lock with a non matching key. So, long story short, I decided to attempt to re key the seat lock to match my ignition switch. While I was at it I wanted to replace the face of the switch because the original one looked terrible:


        After some fiddling and some drilling (there is a roll pin inserted through the side of the seat lock body into the drum, thereby securing the drum from being pulled out), I was able to pull the drum which contains all the tumblers and move the individual tumblers around to match my key. In summary, I was able to key the seat lock to match the ignition switch and gas cap, and replace the ignition switch face with one that is nicer:


        Thats it for this week, stay tuned for more tedious fun!

        Comment


          #34
          The last of the powdercoat has arrived!

          Finally, all the powdercoat is complete:

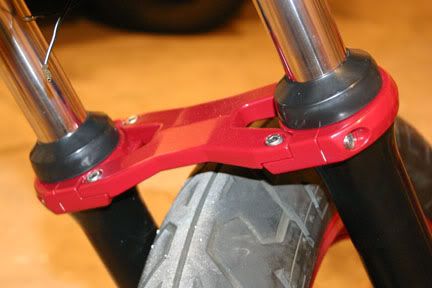
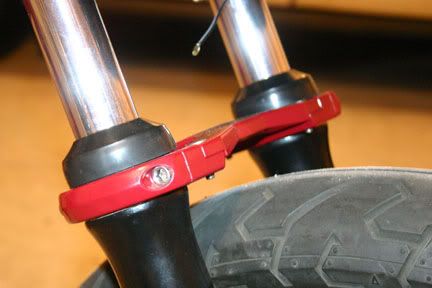
          ATK Fork brace complete with new stainless hardware:


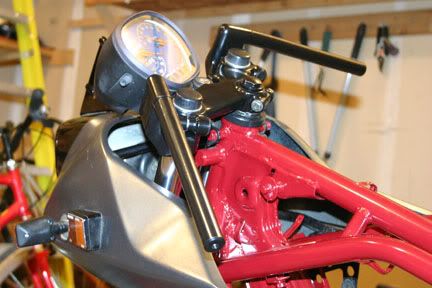
          Clip ons from an XN-85 Turbo; these provide approx. 1" higher rise than stock (which I also have). Also note the upper triple clamp is now PC'd, as well:


          Front master cylinder is now complete with new glass sight glass!


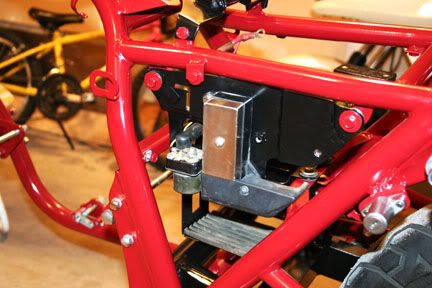
          Electrics panel and battery box (also note the rear reservoir with new glass sight glass):


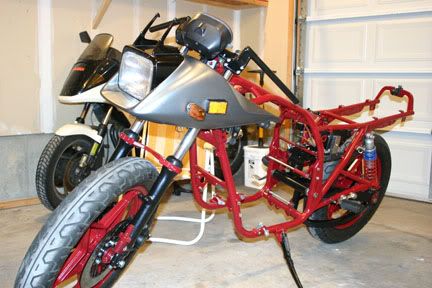
          I just had to put the fairing on to see how the gray will look with all that red:

          The body work will be done by a professional in a shade similar to what is shown here.
          And yes, that is a pop up headlight Katana in the background - I am a lucky man!
          I guess the next thing to get after is the wiring harness, then engine reassembly, then carbs and hopefully fire it up!
          Thats all for this week folks!

          Comment


            #35
            Very nice project so far.

            Just a little tip, imageShack will keep your images much longer than chumbucket.

            Comment


              #36
              No worries, I have them all on my harddrive should I ever need...

              Comment


                #37
                Looking good! Just wondered if you had the shocks rebuilt by Thor, or not?
                Tony.
                '82 GS1100E


                Comment


                  #38
                  No Tony, I have not contacted Thor yet. That is still on my to do list....

                  Comment


                    #39
                    Hi Smokin', she's looking good, love the black powdercoat! Looking forward to seeing the pics later this week, cheers.
                    Badgezz, we don need noh stinkin' badgezz!
                    Shin-Ken 1074
                    1982 GSX1100SXZ Wire Wheel Katana - BOM Nov 2011
                    1981 GSX1135 Katana Build completed Mar 2024, Curb Weight, all fluids and 21 lt fuel = 206 kg.

                    Comment


                      #40
                      WARNING! Perfectionist at work!

                      Dude, you have way too much time on your hands.

                      I am continually impressed with the high degree of quality you are putting into this build!
                      Lovin' the fork brace, ATK does put out some sharp looking braces.
                      I can't wait to see the next set of pictures!

                      Comment


                        #41
                        Thanks Mac, but I really don't have a ton of time. Mostly I get weekends after the kids are in bed. It helps that I work 4 10's so I have 3 nights a week to get after it.

                        I really want a nice, reliable (and yes, pretty) machine when I'm done.
                        Reading through Posplayr's resto and seeing the fabulous work that Nessism does were my inspiration, and I hope to deliver a product that they would consider "good enough", because I guarantee their good enough is definitely good enough for me.

                        I bought this bike at a garage sale 1 street over for 200 bux. Wires were hanging out, fairing was gone, spray paint all over it and the butt-ugliest seat I've ever seen. But looking underneath revealed the Metmachex swinger, steel braided lines F&R, Dyna coils, and that sweet fork brace, so I figured it'd be worth the investment. This was about 4 years ago, and after doing a minimal repair to get it safe and roadworthy I rode it for a year, then tore it apart 2 years ago to do what I just got around to doing.
                        I debated about parting it out to get a GSX 1100G, but just couldn't bring myself to that.

                        So, figuring I could spend 3k to buy something newer and difinitely more plebian, or I could spend 3k(ish) to do a full blown resto on the sexiest motorcycle ever made, well, the decision was pretty easy.

                        Thanks for the compliments!

                        Comment


                          #42
                          well i would love to see what the project looks like but photobucket has removed about 99% of your photos
                          time for a better host i think

                          Comment


                            #43
                            I posted many pictures but then moved them into a dedicated album on Photobuckets site. This is the reason why the first 3 pages show no photos.

                            Here is the album where they all can be seen:

                            Comment


                              #44
                              Originally posted by Smokinapankake View Post
                              I posted many pictures but then moved them into a dedicated album on Photobuckets site. This is the reason why the first 3 pages show no photos.

                              Here is the album where they all can be seen:

                              http://s270.photobucket.com/albums/j...20Kat%20Rehab/
                              thank you for the link

                              Comment


                                #45
                                So I solved my wiring harness issue with the help of Russr33 - He happened to have a new complete wiring harness and offered it to me at a reasonable price. I'd rather send my dough to a fellow GS'r than some mail order reseller. Thanks Russ!

                                I know you all like photos, and I have a bunch, but my wife will have to prepare them for you first. But I do have some shots of some bar end weights I had turned down by a fella at work. They are made of Zirconium (which is used in the manufacture of nuclear fuel rods) as I work at the only Zirc manufacturing plant in the states. It is similar to stainless in that it doesn't corrode, but it has another interesting property - it is transparent to radiation. This makes it perfect for the manufacture if fuel rod tubeshell as all the radiation is used to heat the water in a nuclear power plant.

                                Anyway, here are the bar ends which were made to match the bar end weights on my old Kawi GPz 750:


                                More photos forthcoming once my wife gets around to them.

                                Comment

                                Working...
                                X