 I sincerely admire your work, and your pics and descriptions are fantastic. I have to get after my Kat and this thread is inspiring, now all I need is 9" less snow and some time.........
Announcement
Collapse
No announcement yet.
Smokin's 82 Kat Restorification project
Collapse
X
-
 Can_O_Tuna
I think you deserve the restOriginally posted by Smokinapankake View Post I sincerely admire your work, and your pics and descriptions are fantastic. I have to get after my Kat and this thread is inspiring, now all I need is 9" less snow and some time.........
-
 cavehamster
Well, as I said, I'm currently in the middle of prepping the engine bits for paint, and after that, I still have suspension and electrics and the seat and it goes on and on... I just hope to be on the drag strip in a month or soOriginally posted by Smokinapankake View PostWell, Cave, I doubt that. I haven't done a thing the past two weeks.
Need to hone the cylinders, order rings, and reassemble the motor.
Kind of ran out of steam since they put me in swing shift, 5 days a week. I miss that 3rd day off!
I did pull the 84 750 out of hibernation few weeks ago to find a broken speedo cable. That just came in yesterday so will have to put it back in, then maybe with this unseasonably warm weather can put some miles on that one!
Would love to meet up sometime!
I'd love to meet up sometime and swap ideas for sure!
Comment
-
 Smokinapankake
Thanks for the compliments guys, I started this out thinking I'd keep control of the beast but it has become a full-blown monster. All I had to do was start with the powdercoat; it just snowballed from there. Now almost nothing is good enough; everything is somehow inferior.
The scary part is that once this is done, I'm afraid I'll see the 84 as due for its turn. I've already started nitpicking what was perfectly acceptable last summer.
Unfortunately, I've just recently had a $1600 trans repair bill on my Suburban. That will put a bit of a damper on restoration expenditures for a little while. Then, with spring coming, mama wants a new deck, I want to finish the basement, and it may be time to start looking for a new car.
I hope to have it done by fall (if I could fire it up for the first time on my birthday in August that would be sweet!) and presumably, if I quit being a lazy-a$$ I could have it done well before then. I'm down to engine reassy, carb overhaul, and body work. Rear shox need to go out as well.
Body work includes seat reupholster.
Problem is I get distracted by other interests (bicycles, trains) and the aforementioned honey-do's all conspire to eat away at my motorcycle time (and budget). Not to mention the regular attention the 84 750 requires. I guess those are good problems to have, though!
Ultimately, I want as reliable, low maintenance, and distincive a motorcycle as possible, that I never have to go through again.
Can-O-Tuna,
I'm intrigued to hear more about your project. There can never be too many Katanas here - post up some pics! Glad I can be of inspiration, Posplayr and Nessism are my two greatest influences. THose guys do some amazing work!
Cave, if you're on the strip in a month you will beat me undoubtedly. No way this will be ready to go in a month.
Comment
-
 cavehamster
 -
 Smokinapankake
Some progress again; at last!
SO who can tell me what is missing from this picture (besides the top half of the motor)?
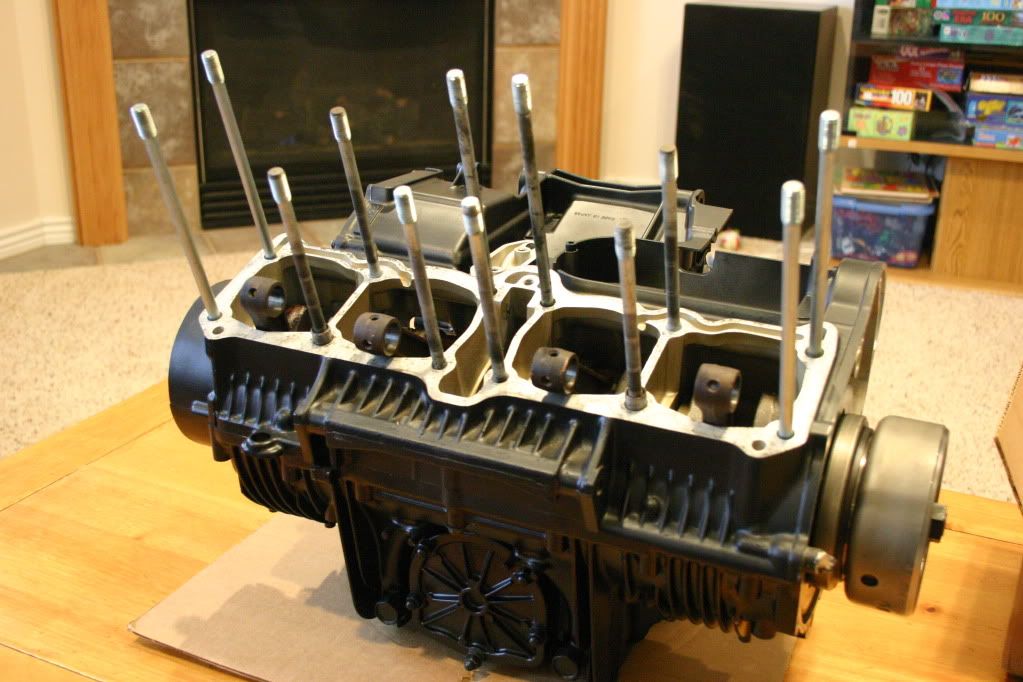
Needs a camchain!
So apart it goes:
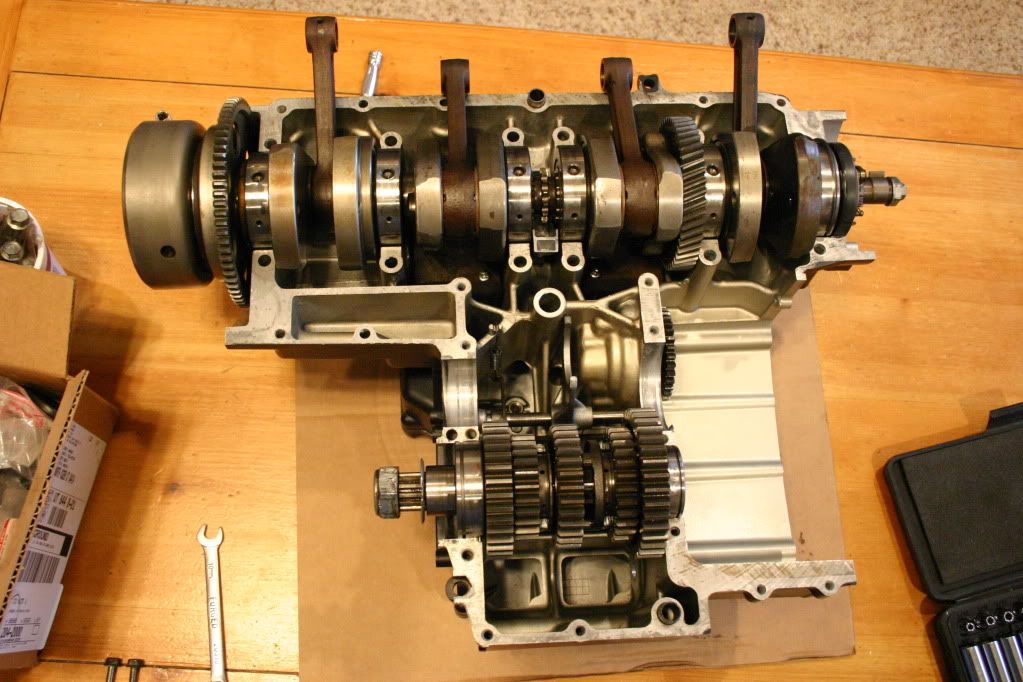
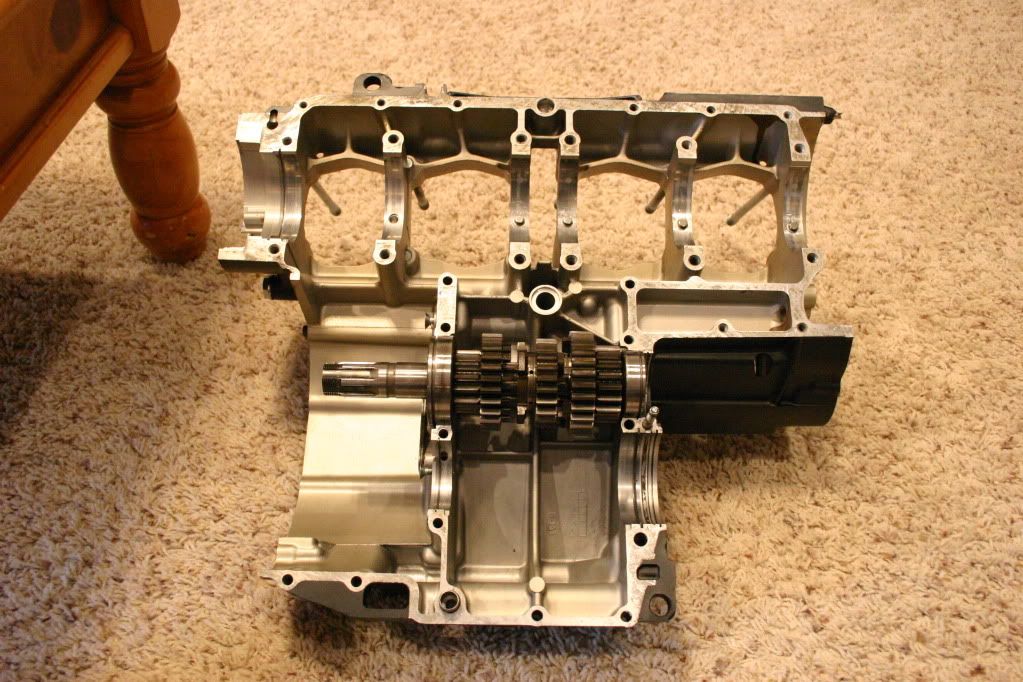
So I had a helluva time geting the top to mate with the bottom - seems the pins that fix the crank bearings from spinning in the cases were difficult to line up, along with the c rings that secure the alignment of the transmission bearings, along with the end seals, along with the camchain, along with the connecting rods along with the..... You get the idea. All the while I had Hondabond 4 drying on the crankcase mating surfaces.
I couldn't figure why I had such a hard time assembling this thing, but then I got out my service manual, and it said to assemble the cases with the crank and transmission assembled into the top half - I was trying with them assembled in the bottom half!
At the end of the day, it came together:
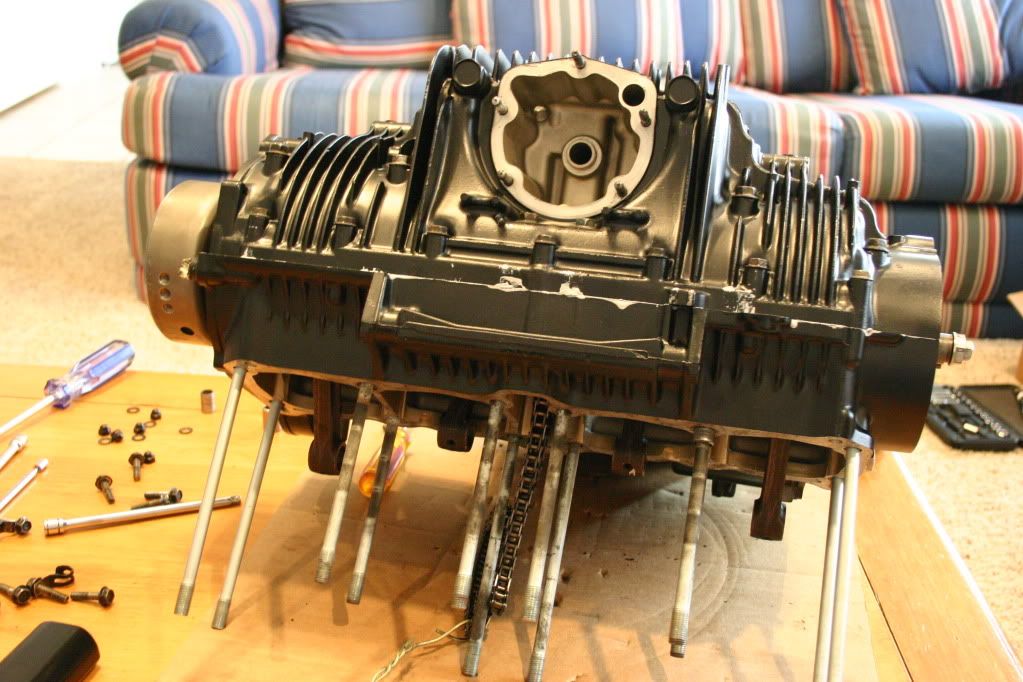
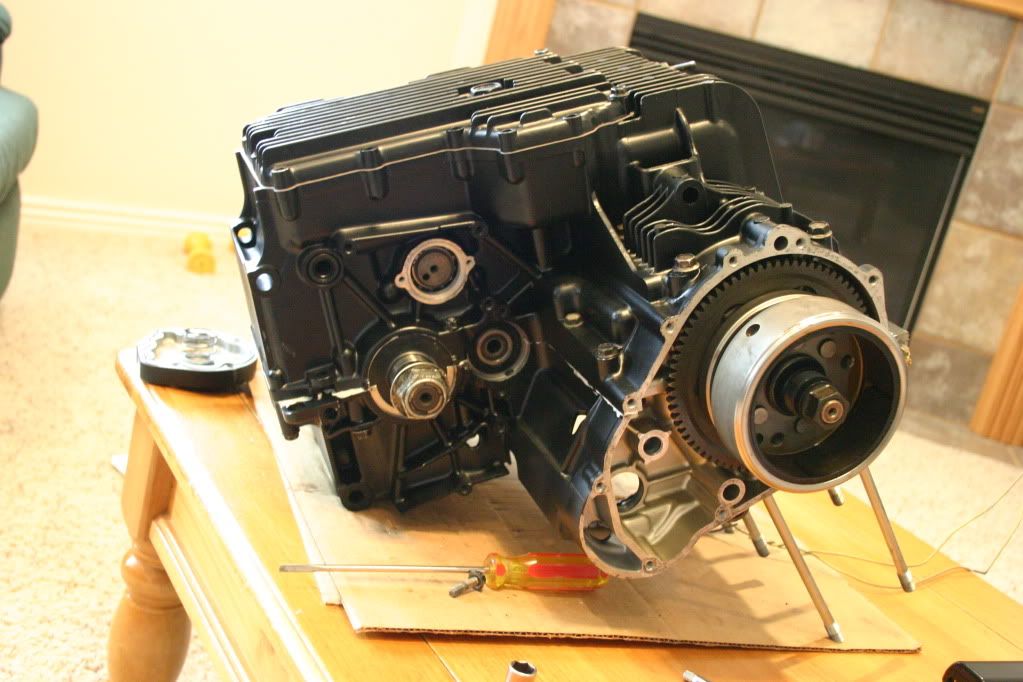
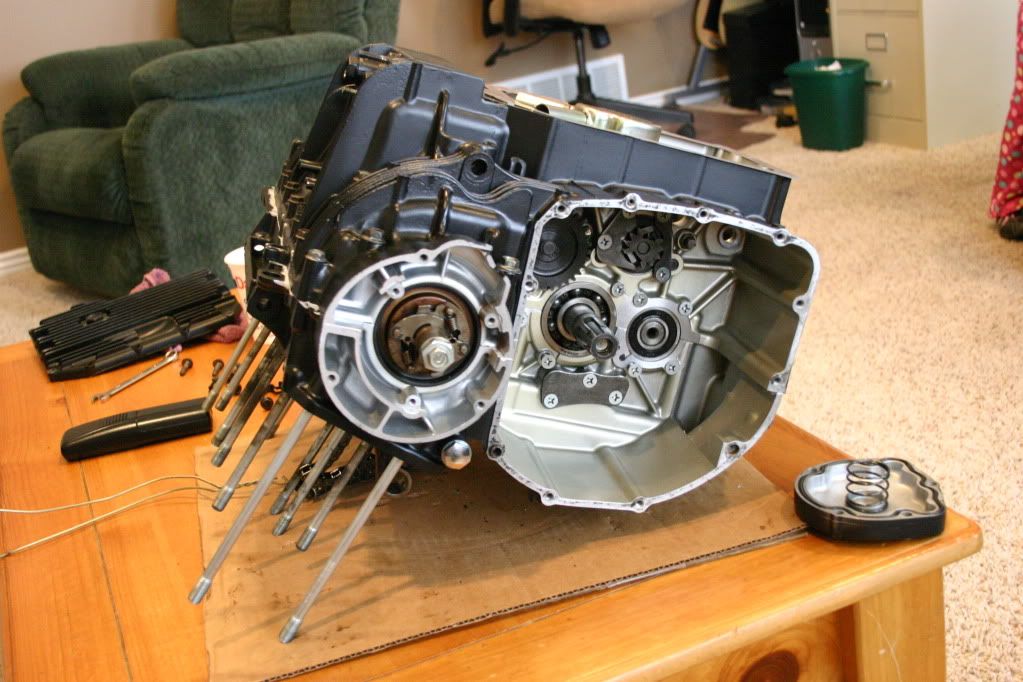
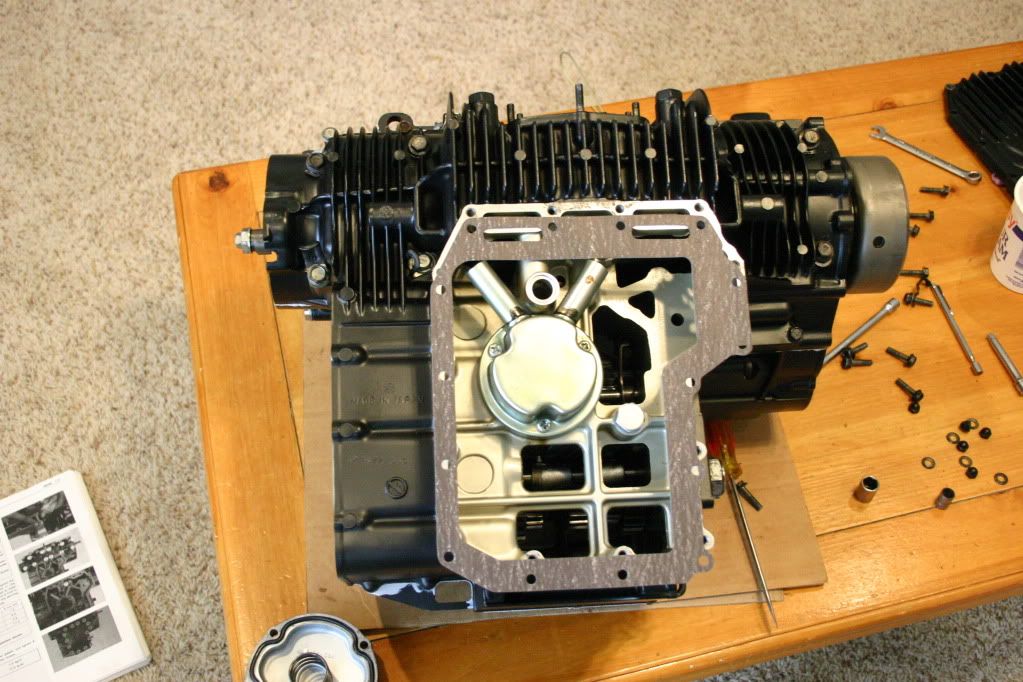
And what the hey, why not use the new gasket that came in my gasket kit?
Here's what I used to glue the two halves together:
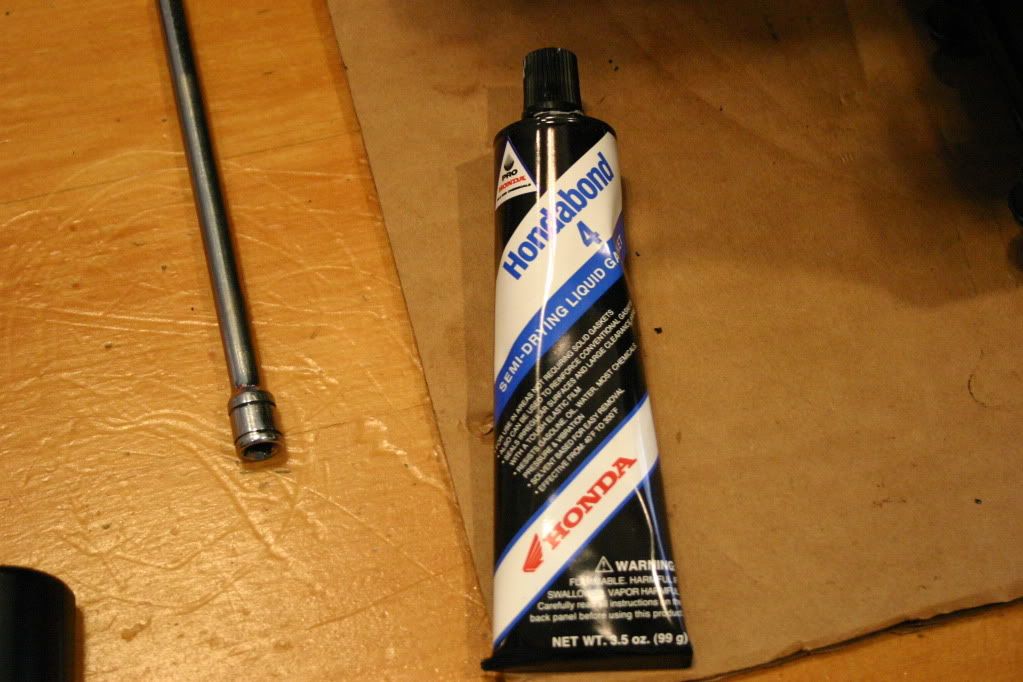
My drag racin', engine buildin', V-Max ridin' buddy Tim swears by this stuff, so I figure if it's good enough for a drag racer, it oughta be good enough for me!
Been kinda slow lately; they put me on swing shift 5 days a week so I have a great deal less time to screw around with this thing now ...
...
Comment
-
 Macguyver
 -
 cavehamster
I'll remember to put stuff in the top half on mine. My paint finished up this weekend, I hope to assemble it this week.
Comment
-
 Smokinapankake
Thanks Mac, I'm glad to have that half done....
I'm a little concerned about the engine paint, tho. I cleaned the cases really well in a solvent tank and then parts washer, repeating the cycle about 4 times.
Then I used Dupli-color engine paint, low-gloss black. Didn't post cure bake them so I'm hoping the paint will hold up... Any thoughts/input?
Comment
-
 spyug
spyug
Very understanding wifey you have there assembling the engine in the family room right on the coffee table. I get weird looks even when I'm doing things like that in the man cave .
.
Yup this bike resto is a slippery slope. I'm not as bad on this one as I was on the XS build however. I've learned to curb my" want it.....got to have it" impulse. This time I'm shooting for clean, tidy, safe and functional, no performance mods other than the quick turn throttle tube ($15). Even with a tight fist on the wallet I have already shot passed the $1500 budget but I'm getting close on finishing so hopefully not much more will be sunk into it.
Careful with the engine paint as it will be affected by gas and oil until it has been heat cured. I ruined mine when some gas shot out of a carb as I was attempting to fire it up. Put some halogen work lights on it for a few hours that will help some.
You are doing a bang up job and this is an entertaining read so by all means take your time and let us savour it all. You know we all like to live vicariously through others, what a bunch of wonks we are
Cheers,
spyug
Comment
-
 Macguyver
Need a little heat!
Hey! I resemble that remark...oh wait, crap.Originally posted by spyug View PostYou know we all like to live vicariously through others, what a bunch of wonks we are

+1 of the halogen heat lamp idea. Anything we can do to make that paint more resistant is a plus. Baking would be ideal to get all of the solvent out of it, but do what you can to heat the engine. Maybe a space heater blowing at the bottom of it, since heat rises, you might be able to get a semi-bake going if you can get enough heat to it.
I don't recommend a salamander heater. Don't ask me how I know. rassa frassin fricka fracking co-op students! grumbe grumble
Comment
-
 cavehamster
As long as you got all the grease, oil, and loose bits off the engine first, the paint should stick. I was a tad paranoid on mine, I jet washed the block, degreased it, hit it with walnut shells out of a sandblaster, shot it with brake cleaner to get anything left, then some aluminum etching cleaner, an epoxy sealer/primer, before finally putting on a coat of black bbq high temp paint on it. We'll see if I have any luck with it staying on too, hehe.Originally posted by Smokinapankake View PostThanks Mac, I'm glad to have that half done....
I'm a little concerned about the engine paint, tho. I cleaned the cases really well in a solvent tank and then parts washer, repeating the cycle about 4 times.
Then I used Dupli-color engine paint, low-gloss black. Didn't post cure bake them so I'm hoping the paint will hold up... Any thoughts/input?
Comment
-
 Smokinapankake
Thanks for the encouragement fellas, your positive vibes help me stay motivated!
I wondered if anyone would mention the coffee table/family room thing. Only comment she made was that she's "glad she doesn't care about the coffee table". She's wonderful for even letting me consider rebuilding this motorcycle. Especially after the grief I got when I bought the 84 750!
I hear ya loud and clear Spyug on the resto thing. I'm fighting the urge to splurge on a stainless bolt kit! Speaking of which, I'm looking forward to seeing some photos of your Kanotuna!
I may try directing some heat from a portable room type heater at it; at this point there aint no way it's going into the oven (or barbecue for that matter) for a bake out. I figure running it around oughta be like a bake out, eh?
At the worst, if it starts chipping and peeling it'll be two tone engine paint! Back in the 80's crackle paint was very popular on bicycles..... Try that on your resto! Besides, I'm never doing this again. So we'll just have to see what happens, right?
Comment
-
 Macguyver
Aw, c'mon, half the fun is having to paint everything twice!Originally posted by Smokinapankake View PostAt the worst, if it starts chipping and peeling it'll be two tone engine paint! Back in the 80's crackle paint was very popular on bicycles..... Try that on your resto! Besides, I'm never doing this again. So we'll just have to see what happens, right?
I would think the first run should do the trick. I keep having a thought rattling around in my head that engine paint should be baked in the first 24-48 hours... I can't remember where I heard that though.
I know I wouldn't want to have to pull everything apart again to bake it , so I completely understand the "let's wait and see" attitude regarding the engine paint.
As always, great work, keep it up!
Comment
-
 Smokinapankake
Hopefully its not the first 24-48 hrs. This thing has been sitting on a shelf in my basement for 2 years now. Prolly out of that time frame, I bet
Thanks for the encouragement and the feedback about my stupid ideas - they keep me on track.
One other thought Spyug - She didn't even bat an eye when I proposed to assemble frame, suspension, and wheels into a rolling chassis in the entryway. My argument was that everything was clean and new; she said "sure, why not?" Gotta love a woman like that!Last edited by Guest; 03-09-2010, 02:52 AM.
Comment
-
 Smokinapankake
Again, a little progress!
But sadly, no photos. Unless you wanna see some pics of ringsets...
Just ordered some piston ring sets from Babbitts online to the tune of about 140 bux including shipping and a few other little things.
Its always the little things that add up.
I'd decided that, although the Katana fund is overdrawn, if I don't get this motor together the whole thing will never go together.
SO, once that is done it becomes a matter of carbs (which are already tuned - just need cleaned), bodywork, and installing the wiring harness. Granted, there are several mini steps encompassed in each of those big ones, but I think I see a very very dim light at the end of the tunnel (or is that just my own reflection in the mirror - you know, dim being most appropriate )!
)!
Comment
.png)
Comment