Announcement

Collapse
No announcement yet.

Smokin's 82 Kat Restorification project

Collapse
X
 
  • Filter
  • Time
  • Show
Clear All
new posts

    #91
    Piston Ring sets have arrived!

    After what seems to me an inordinately long time. Babbits won the price war, but lost for delivery time. I'd probably order from them again, tho.

    So, even though I had all that time while waiting for rings to come, I didn't hone the cylinders or lap the valves. Dummy me, but now that needs to be done afore anything else happens. Hmmm, when will I find the time to do it?

    Yeahm,

    Comment


      #92
      Piston Ring sets have arrived!

      After what seems to me an inordinately long time. Babbits won the price war, but lost for delivery time. I'd probably order from them again, tho.

      So, even though I had all that time while waiting for rings to come, I didn't hone the cylinders or lap the valves. Dummy me, but now that needs to be done afore anything else happens. Hmmm, when will I find the time to do it?

      Yeah, yeah this project has slowed wayyyy down from the early stages. So sorry sports fans, but my time is at a premium right now so be patient.....

      Comment


        #93
        Hey don't I know about projects slowing to a crawl.

        About a month back I got involved with helping a young lady buy her first bike (GS400 documented elsewhere herein) and agreeing to teach her to ride safely on the street ( she took the course last year).

        Since finding the bike, it was decided it was the wrong colour so our hero "volunteered" to repaint it. Big mistake, that paint job is kicking my ass ( also documented elsewhere herein) and the trainee is getting bugged about missing lessons (its been over a week now and I still have to repaint and clear the tank).

        There have also been house projects ( new floor still unfinished after 2 weeks) and business is steadily improving and going off on new tangents.

        The Kat project is languishing. I have the base coat down and the decals ready to go on but I was planning on clearing it all over the long weekend with the stuff from the 400. Didn't happen, of course.

        There's a big bike show this weekend coming so Saturday is already written off. Sunday is a ride day as they're calling for good weather again and next week I have to finish floor before the boss gets back from Florida holidays.

        No rest for the wicked and no time to vinish the Kat Diamnnnnnnnn

        Hope you can get those rings in and that mill buttoned up sooner rather than latter.

        Cheers,
        Spyug

        Comment


          #94
          Originally posted by Smokinapankake View Post
          So, even though I had all that time while waiting for rings to come, I didn't hone the cylinders or lap the valves. Dummy me, but now that needs to be done afore anything else happens. Hmmm, when will I find the time to do it?
          I have just this past week lapped the valves back into my freshly painted head... then I re-installed them (along with new valve stem oil seals).

          This was my first time doing this task & my God, you need the hands of a surgeon to get all those little valve spring "keepers" back into place!

          Good luck with process - hopefully you're better & quicker at it than I was - took me about 2 hrs to get 'er done.

          Mike
          '85 GS550L - SOLD
          '85 GS550E - SOLD
          '82 GS650GL - SOLD
          '81 GS750L - SOLD
          '82 GS850GL - trusty steed
          '80 GS1100L - son's project bike
          '82 GS1100G - SOLD
          '81 GS1100E - Big Red (daily rider)

          Comment


            #95
            Originally posted by hikermikem View Post
            I have just this past week lapped the valves back into my freshly painted head... then I re-installed them (along with new valve stem oil seals).

            This was my first time doing this task & my God, you need the hands of a surgeon to get all those little valve spring "keepers" back into place!

            Good luck with process - hopefully you're better & quicker at it than I was - took me about 2 hrs to get 'er done.

            Mike
            Not to highjack but Mike, next time, use a little bearing grease as "glue" It will hold one side on, while you put the other in place. Do it that way, will cut your time in half.

            Comment


              #96
              Originally posted by TheCafeKid View Post
              Not to highjack but Mike, next time, use a little bearing grease as "glue" It will hold one side on, while you put the other in place. Do it that way, will cut your time in half.
              Hey Josh,

              I did use grease, but it still took me quite a while to complete the job - those 16 valve engines take some patience!

              However, my home-made valve depressor (modeled after Steve's version) worked like a charm.
              '85 GS550L - SOLD
              '85 GS550E - SOLD
              '82 GS650GL - SOLD
              '81 GS750L - SOLD
              '82 GS850GL - trusty steed
              '80 GS1100L - son's project bike
              '82 GS1100G - SOLD
              '81 GS1100E - Big Red (daily rider)

              Comment


                #97
                Originally posted by hikermikem View Post
                Hey Josh,

                I did use grease, but it still took me quite a while to complete the job - those 16 valve engines take some patience!

                However, my home-made valve depressor (modeled after Steve's version) worked like a charm.
                Yeah the 16Vs are a little tighter to work in. Plus you have double the valves. I use a compressor Steve made for me as well! They absolutely do work like a charm, and cost a 1/4 of what an actual tool would cost..

                Comment


                  #98
                  Thanks for the encouragement and patience, guys, but to be honest, I'm a little intimidated about putting the top half back together. This is probably half of what's stopping me right now. Combined with the urgency to rebuild my deck before it gets too bloody hot, Saturdays riding bikes (bicycles) with the kids, and a basement family room in dire need of mud and tape, well, the Katana falls to about last slot on priority.

                  Add in that I have the 84 750 to bum around on, my motorcycle jones is fulfilled somewhat that way.

                  Have any of you lapped valves and what does it involve?

                  Comment


                    #99
                    any updates?

                    Comment


                      Funny you should ask, wesmoon,

                      I've scheduled this coming Friday the 28th (even though the 30th is my 12 year anniversary, and I work Sundays) to have my buddies Matt and Tim come over and button up this bloody motor.

                      Matt is the shop supervisor at a local Victory Cycles dealership, and has built hundreds of motors over his career. Tim, Matt's brother in law, is a hard-core drag racer, V-max ridin, crew chief for a pro-stock drag car based in Salt Lake City. Tim is also parts manager at the local Honda (cars) dealership in Salt Lake. Tim has had his hands in more than his share of motors, although they be of the V-8 persuasion.

                      I'm confident that between the three of us we'll be able to accomplish that which has stalled me (solo) for months now.

                      The deck is semi-finished, the basement has been put on hold due to the deck, and since my work schedule has been reinstated (Sun-Wed), wifey said "go ahead and get that thing done".

                      Many many pics to follow!

                      PS - I've got the following in hand in preparation for the reassembly:
                      Hone
                      assembly lube
                      all gaskets and O-rings
                      Matt uses plain ol' motor oil for the hone operation
                      lapping compound for valves
                      valve lapper handle tool thingy with suction cups on the end...
                      Matt has ring compressors

                      Need: to formulate some sort of valve spring compressor. Pics of some homemade versions would be helpful. Or, alternatively, I may be able to borrow one from a fellow enthusiast at work, if he has one. I'm thinking if I fabricate one it will be along the lines of a big C-clamp with an "adapter shoe" made from brass or plastic (PVC?) tubing with access windows cut in to insert the spring retainer keepers. Hate to buy one for a one time use and I don't know anywhere I can rent one of the correct configuration/size. Granted, I haven't looked around anywhere either.

                      Anything else I may need? We're planning on putting the cylinders back on, reassembling the head - this means lapping and installing valves, installing and timing the cams - and installing the head.

                      Thanks for the help and encouragement, folks!

                      Comment


                        Originally posted by Smokinapankake View Post
                        Need: to formulate some sort of valve spring compressor. Pics of some homemade versions would be helpful. Or, alternatively, I may be able to borrow one from a fellow enthusiast at work, if he has one. I'm thinking if I fabricate one it will be along the lines of a big C-clamp with an "adapter shoe" made from brass or plastic (PVC?) tubing with access windows cut in to insert the spring retainer keepers. Hate to buy one for a one time use and I don't know anywhere I can rent one of the correct configuration/size. Granted, I haven't looked around anywhere either.
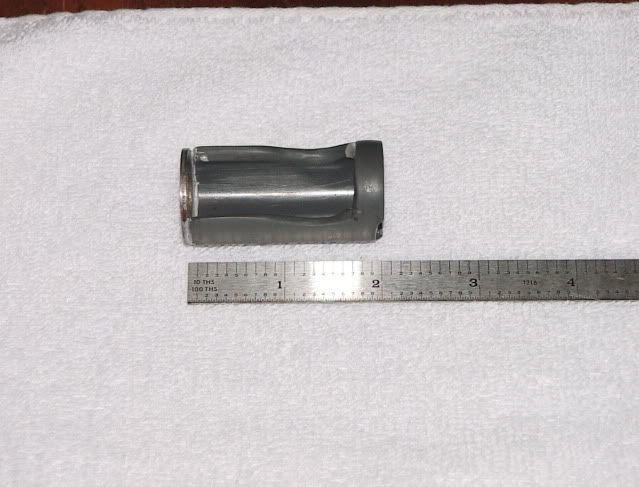
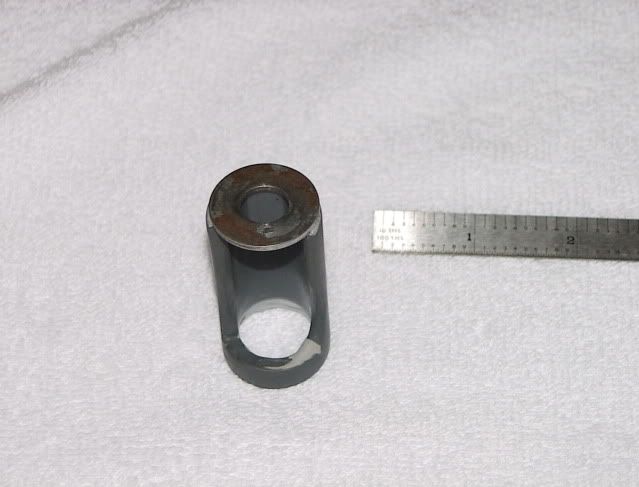
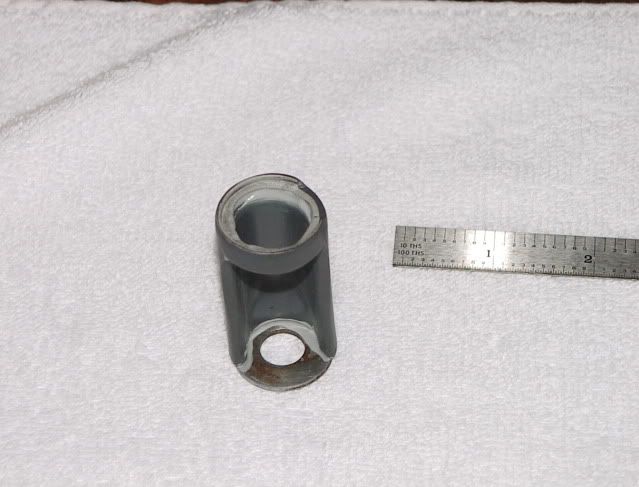
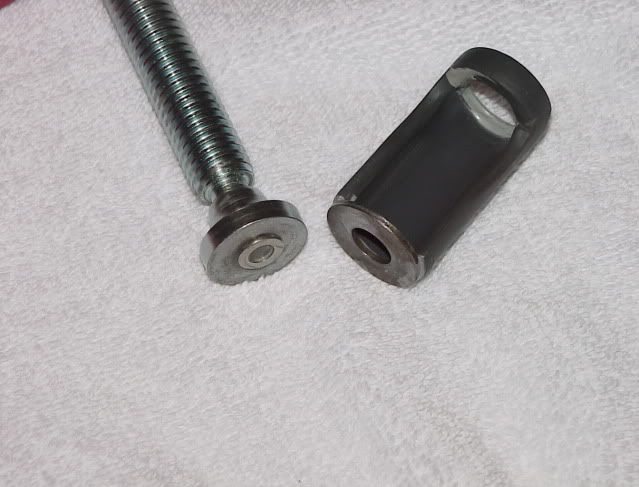
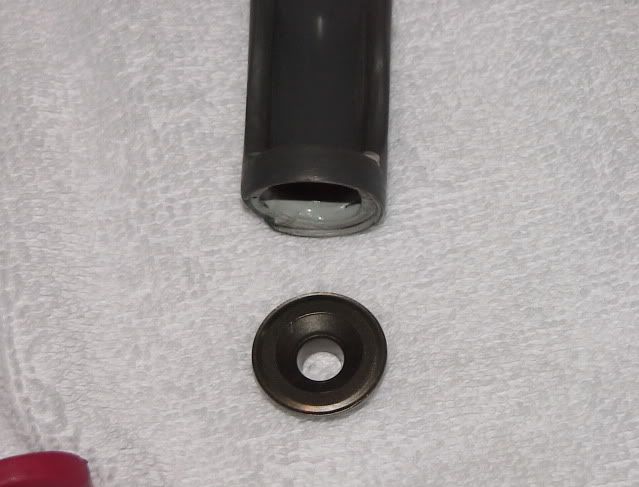
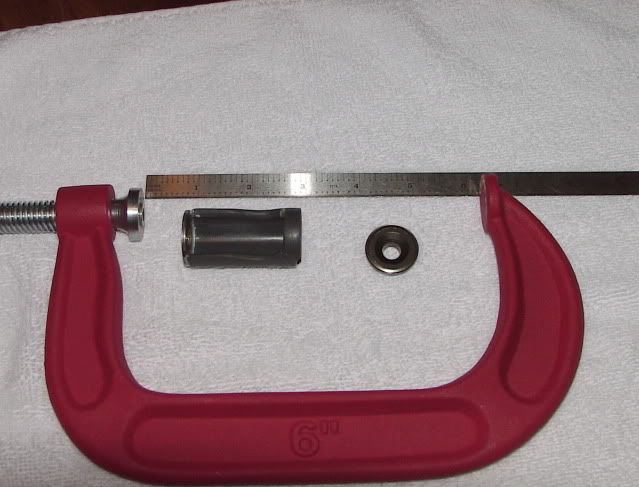
                        Here's some pics of the one I made for my 1100EX 16 valve head...


                        The plastic pipe is 3/4" - I epoxied a large flat washer on the top where the C-clamp swivel end sits. I then epoxied another small flat washer on the face of the swivel that fits inside the hole of the larger flat washer on the pipe end. That keeps the tool secured & centered on the C-clamp while you tighten it...

                        On the "spring cap" end of the pipe I beveled the ID so the spring cap would fit into the ID flush with the end of the pipe; then I mudded up the ID with some epoxy and pressed the "greased" spring cap into it to make a "mold" the spring cap fits into (the grease keeps the epoxy from sticking to the pipe). This kept the pipe from slipping off the spring cap (which it wants to do...).

                        You will also have to sand down the pipe OD a bit so it will fit better - it's a tight fit into some of the valve spring cavities.

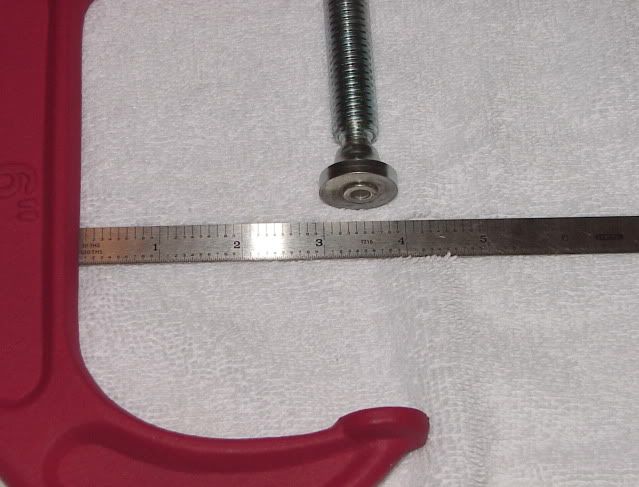
                        The C-clamp has to have enough "throat" to reach the valve caps without rubbing against the side of the head, The clamp I used was from Home Depot and had 3.5" of throat, this was just enough.

                        The process of installing all the valves back into the head took me about 2 hrs, it's a real PITA to get those keepers in position on the valve stem so you can release the spring. My method was to apply a little dab of grease on the keeper and then pick it up with the end of a magnetized screw driver - once I'd gotten it into position I used the wooden end of a long q-tip to push it off the screw driver. Sounds hard, but once you get the hang of it it's not so bad - VERY time consuming.

                        Good luck!!

                        Mike
                        '85 GS550L - SOLD
                        '85 GS550E - SOLD
                        '82 GS650GL - SOLD
                        '81 GS750L - SOLD
                        '82 GS850GL - trusty steed
                        '80 GS1100L - son's project bike
                        '82 GS1100G - SOLD
                        '81 GS1100E - Big Red (daily rider)

                        Comment


                          Thanks Mike,

                          That's exactly what I was looking for! I may have my machinist guy at work spin me something up on a lathe.... Now that would be sweet!

                          And of course, pics of the final product will be posted.

                          Comment


                            Originally posted by Smokinapankake View Post
                            Thanks Mike,

                            That's exactly what I was looking for! I may have my machinist guy at work spin me something up on a lathe.... Now that would be sweet!

                            And of course, pics of the final product will be posted.
                            I originally cut a slot into a deep-dish socket, but I couldn't keep the spring cap end from slipping off the cap - hence my funky epoxy "cap-mold" idea...
                            '85 GS550L - SOLD
                            '85 GS550E - SOLD
                            '82 GS650GL - SOLD
                            '81 GS750L - SOLD
                            '82 GS850GL - trusty steed
                            '80 GS1100L - son's project bike
                            '82 GS1100G - SOLD
                            '81 GS1100E - Big Red (daily rider)

                            Comment


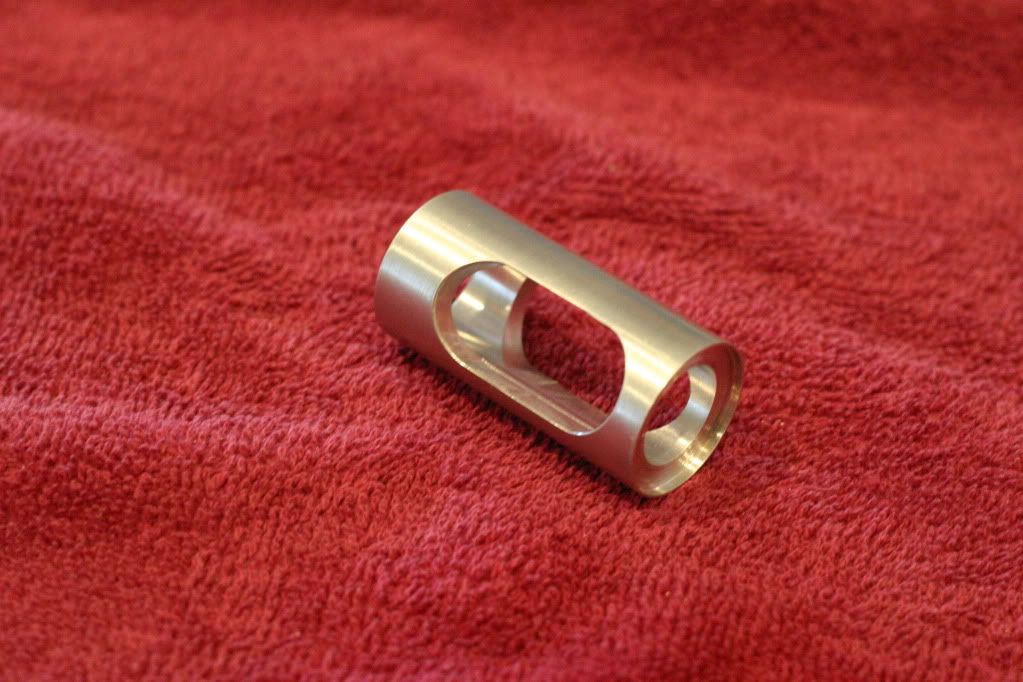
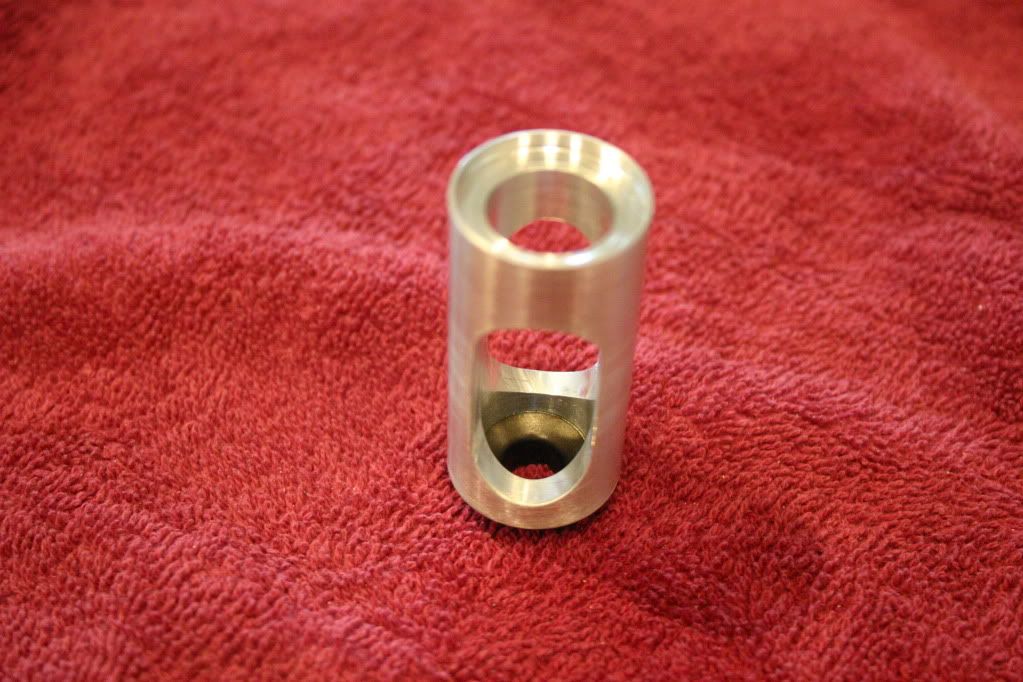
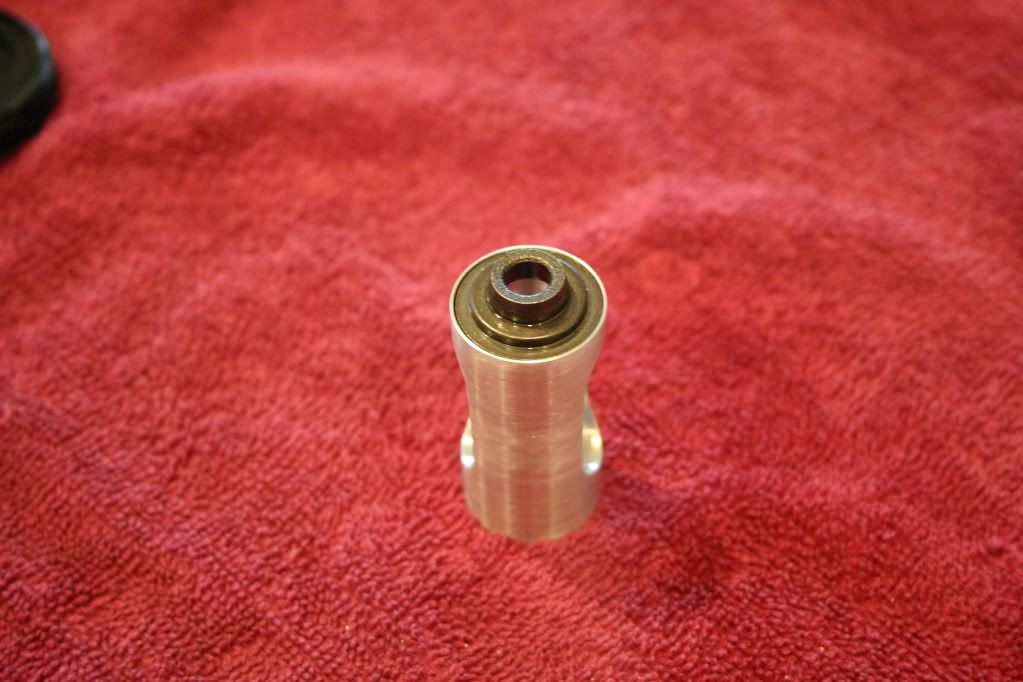
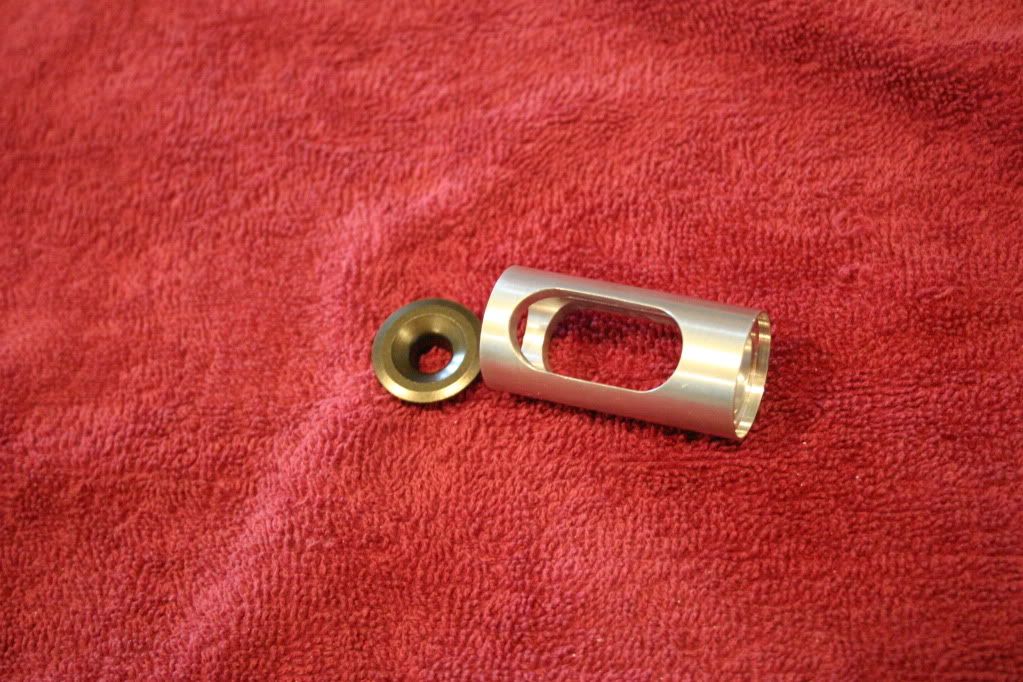
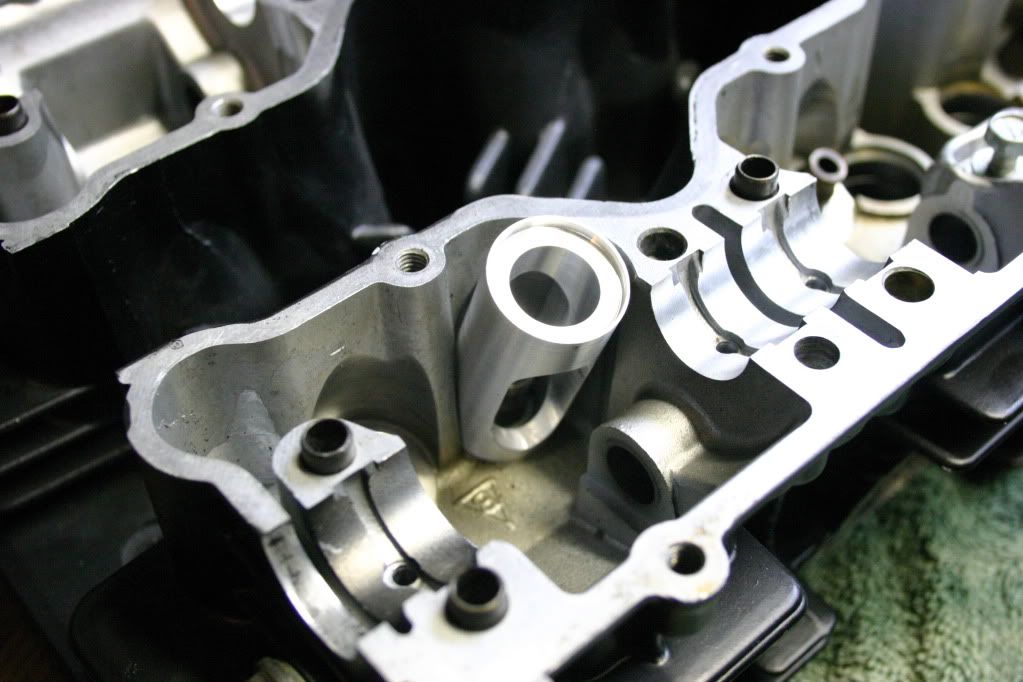
                              So my guys at work were able to turn me one on a lathe out of aluminum, and since we all love pictures, here we go:


                              Retainer in the bottom:


                              Now flipped end for end:


                              And in the head checking for clearance:


                              Dan, my friendly and very accomodating machinist at work, did this for me. He was also the one to do the grounding bus bar mentioned earlier - thanks Dan!

                              Material is aluminum, and the swivel end of the C-clamp I bought fits down into the recess on the top of the tool. The the slot end that is closest to the tool end is the retainer end (does that make any sense?) and the retainer fits down into a matching recess, holding everything in place while I squish the valve springs. At least thats the theory. The video Steve made and that can be accessed on BassCliffs site is really helpful in explaining how this whole mess goes together. Thanks to Steve and as always to BassCliff for his excellent website!

                              Will post updates Friday or Saturday as to how it all went!
                              Last edited by Guest; 05-24-2010, 10:35 PM.

                              Comment


                                Hi Smokin', hey mate great follow-up with the machined tool photos, now thats quality work to get the job done! Your very fortunate to have access to the gear and skills to have things like that done and share the results here. Thanks for the pics and details, cheers.
                                Badgezz, we don need noh stinkin' badgezz!
                                Shin-Ken 1074
                                1982 GSX1100SXZ Wire Wheel Katana - BOM Nov 2011
                                1981 GSX1135 Katana Build completed Mar 2024, Curb Weight, all fluids and 21 lt fuel = 206 kg.

                                Comment

                                Working...
                                X