.png "Powered by vBulletin")
Looks good. What are you going to paint with?
-
Rob
1983 1100ES, 98' ST1100, 02' DR-Z400E and a few other 'bits and pieces'
Are you on the GSR Google Earth Map yet? http://www.thegsresources.com/_forum...d.php?t=170533 -

My stator cover is a bit more beat up than yours.

But came out OK when I painted it.
The power was out here one day on the weekend,finished them up with a bit of hand polish.Comment
-
I am going to go with VHT primer and then universal aluminum. Polish the covers. It too cold here to paint right now, but I am working on getting things polished.Originally posted by azr View PostComment
-
Looks good SV. I am going to replace the emblems with new eventually so I am not as concerned with the existing emblems.Originally posted by SVSooke View PostComment
-
I have not been able to locate any VHT universal aluminum paint locally. Can't even find any that they can order to the store. I can get it online but shipping doubles the cost of the paint. I picked up some duplicolor engine enamel primer and aluminum engine enamel today. Temps are right at 60 degrees and the humidity is a little high to paint just yet. Plus I want to get some work finished on the motor before I paint it. I did work on polishing a little today. Will have pics posted when I get a little more finished on that.Comment
-
Nice job GT. I am anxiously waiting your results as I plan on taking this same course of action. I need a bigger compressor though first. Couple of questions:
How much and what kind of soda did you use?
How much pressure did you use and how big is your compressor?
Were you able to take off the really baked on oil grime?
Thanks and can't wait to see the final results. But, I've always wondered how well tha paint sticks over time and many heat/cool cycles. Would love to hear from others who have painted their engines how well it has held up over the years.1982 GS550M Rebuilt Winter '12 - 550 to 673cc engine conversion.
1989 Kawasaki ZX-7 Ninja
2016 Ducati Scrambler Full ThrottleComment
-
Thanks Sci.Originally posted by Sci85 View Post
I used Arm & Hammer baking soda from the grocery store. I used four "medium" boxes. There were about .89 each.
I dialed the compressor to 120 psi. I have a 5 hp 25 gallon compressor.
It took the oil off. I was pleased.
I had to tap on the gun as I used it since it is gravity fed. I found that short blasts did better then holding the trigger down.
As far as the paint, even if it only lasts four or five years that ok with me. I'd rather have it look better. I'll probably do a top end rebuild before then anyway and would get it blasted anyway. With the way AirCraft paint stripper works it's not that big of a deal to repaint. Most of the guys on the forum that have done it seem to have had good results.
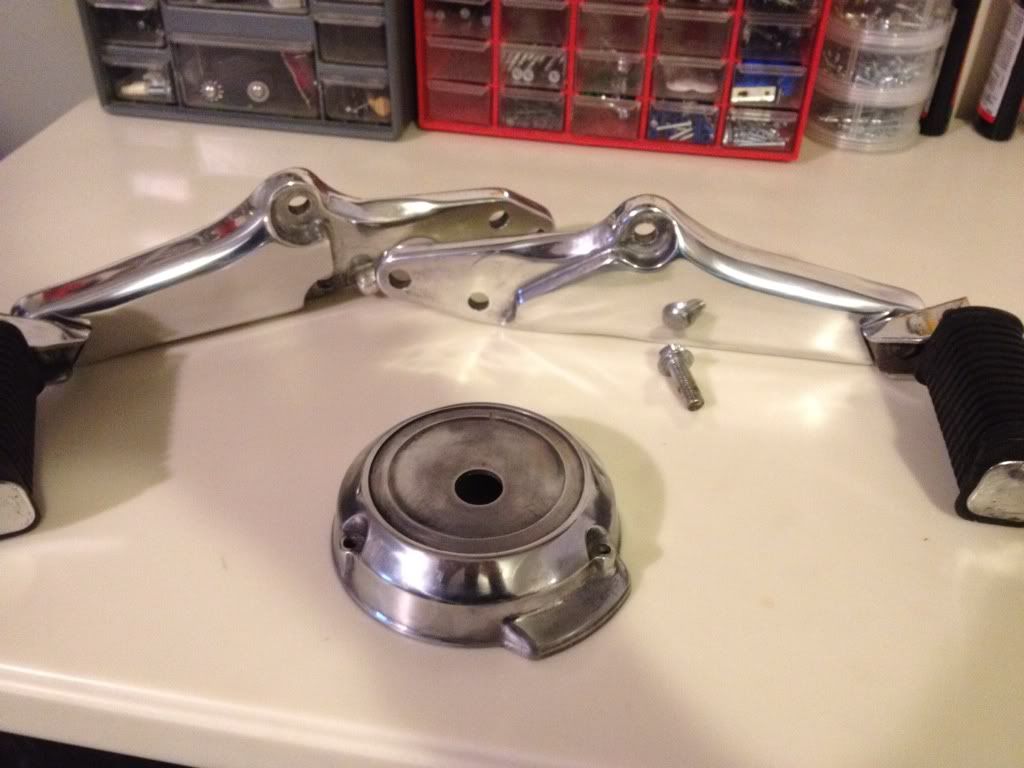
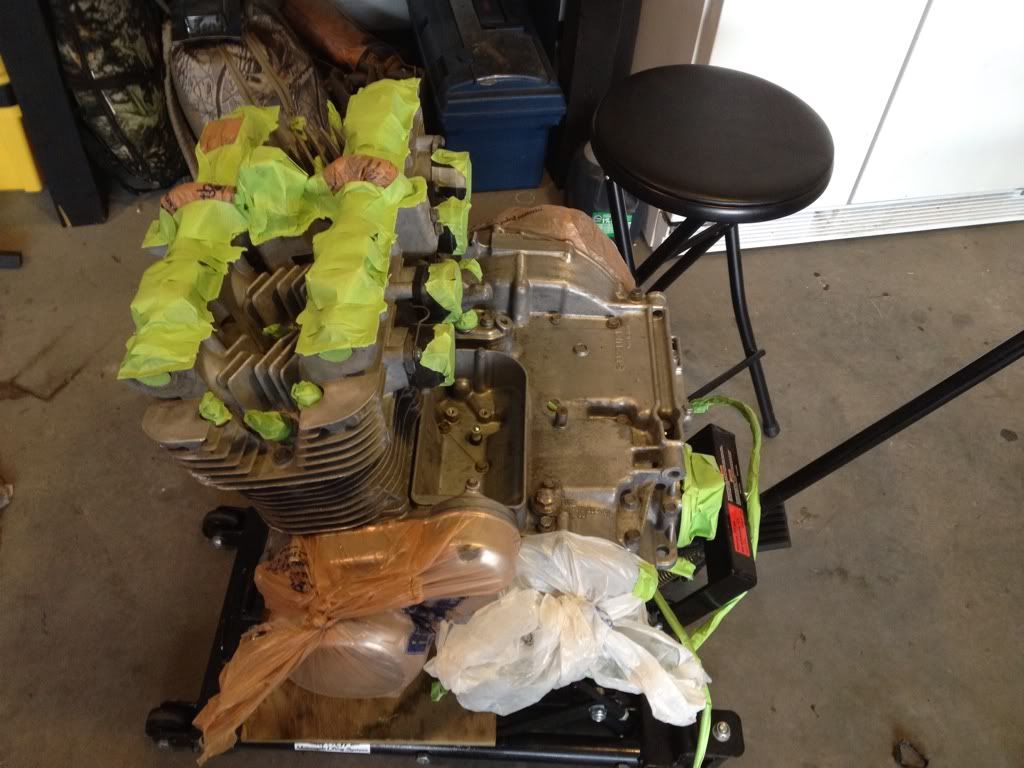
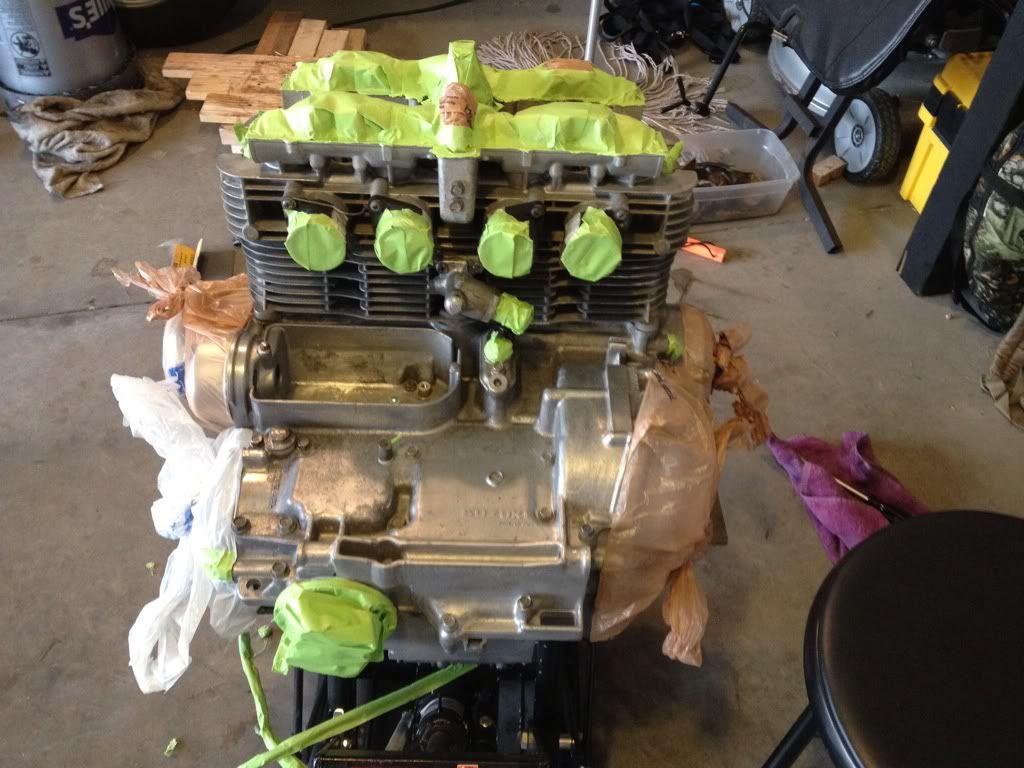
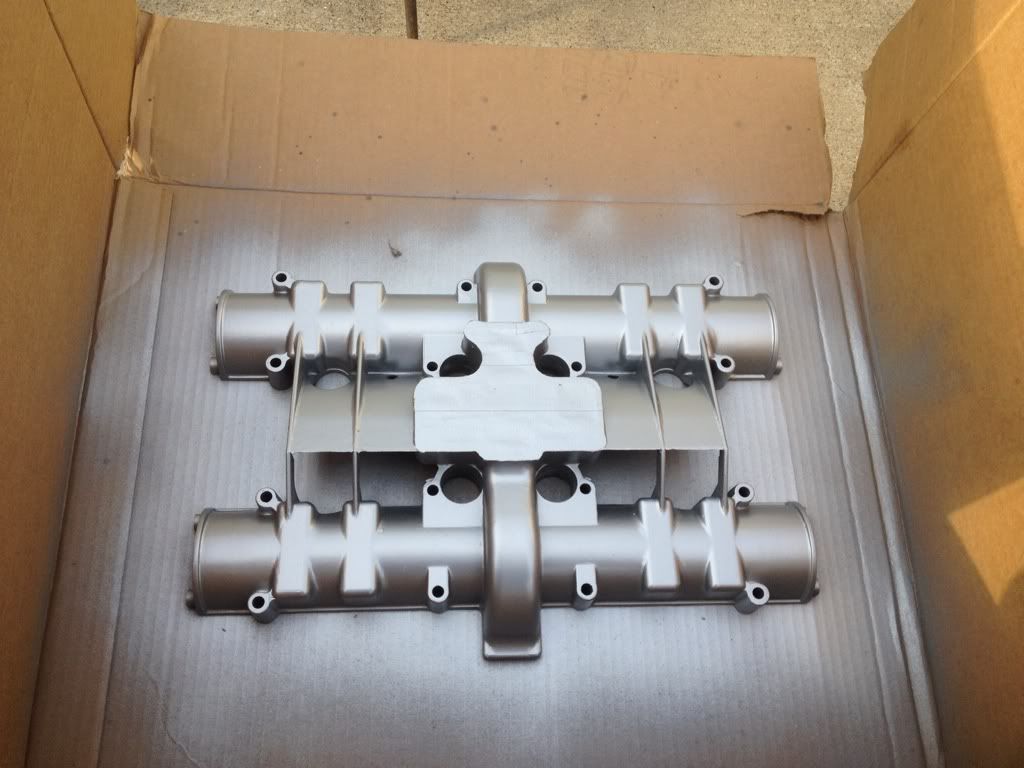
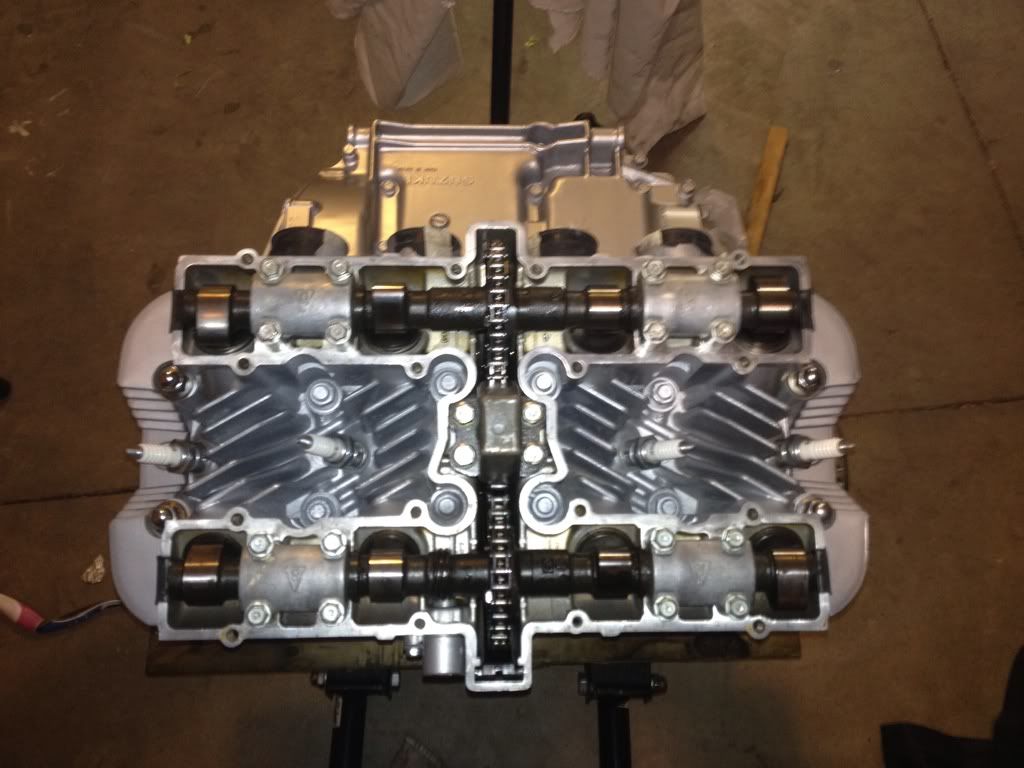
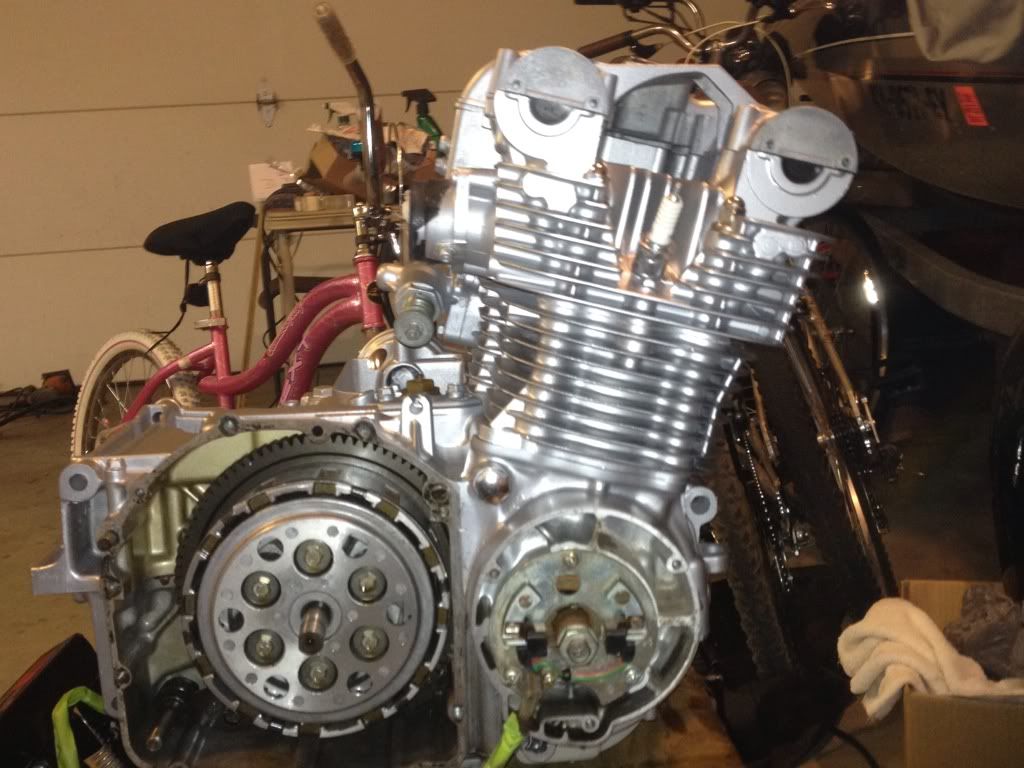
Here's the polishing results so far. The ignition cover is mid process. It's taking a while to sand there parts. Lots of nicks and scratches.
before:

after:
 Last edited by Guest; 02-05-2012, 10:25 PM.
Comment
-
Thanks GT. I'll have to save up for a good used bigger compressor. I just have a little pancake style. Looks like baking soda is the way to go then.
You've got the polishing skill down pat. Don't you just love turning something all old and nasty into something bright and shiny? One of my favorite parts of a rebuild.1982 GS550M Rebuilt Winter '12 - 550 to 673cc engine conversion.
1989 Kawasaki ZX-7 Ninja
2016 Ducati Scrambler Full ThrottleComment
-
You can do it with a small compressor, just blast shorter, let it refill longer. Be patient.Originally posted by Sci85 View Post
It will take longer, can't be helped. And if the little compressor burns up, you have a great excuse to get a bigger one.
Comment
-
It's looking great! can't wait to see her back together and see how the dupicolor turns out. I've used VHT engine enamel on a couple of blocks (with no primer as I could never get it up here). The oldest was 4 yrs and the paint still looked almost like the day I put it one but VHT does not like gas that much or brake fluid, but touch ups are easy. This spring my GS1000G is going to get POR-15 engine enamel, I'm looking forward to seeing how it works. Just a note for the soda blasting, SVSooke suggested trying "washing soda" instead of the baking soda and WOW what a difference. Much harder so it took everything (even the old burnt on oil) off much faster and better. A big bonus was there was minimal dust as well. I 'may' stick to baking soda for the carbs but for anything else it's washing soda from now on. I can buy it up here for less than baking soda too boot.Rob
1983 1100ES, 98' ST1100, 02' DR-Z400E and a few other 'bits and pieces'
Are you on the GSR Google Earth Map yet? http://www.thegsresources.com/_forum...d.php?t=170533Comment
-
I was going to give the washing soda idea here but my friend above let it out of the bag.Going to borrow his blaster and try.Used it with my DIY blaster.Worked better than baking soda with that contraption.Can't wait to try it with a real blaster.Trying Plasti Kote 207 Aluminium Engine Enamel on mine.I's gots to be differents Last edited by Guest; 02-06-2012, 12:41 AM.
Comment
-
I thought about using the washing soda, but chose the plain soda. Wasn't sure if it was a harder or softer substance. Now I know. I'll use that next time! There was a lot of dust with the regular soda for sure. I looked like the abominable snowman when I was finished.Originally posted by azr View Post
From what I've heard about POR-15 they make a great product. I bet that engine enamel is good stuff.Comment
-
Originally posted by tkent02 View Post
That was a long drum roll for sure but the weather finally got warm enough to paint so I got er done today.
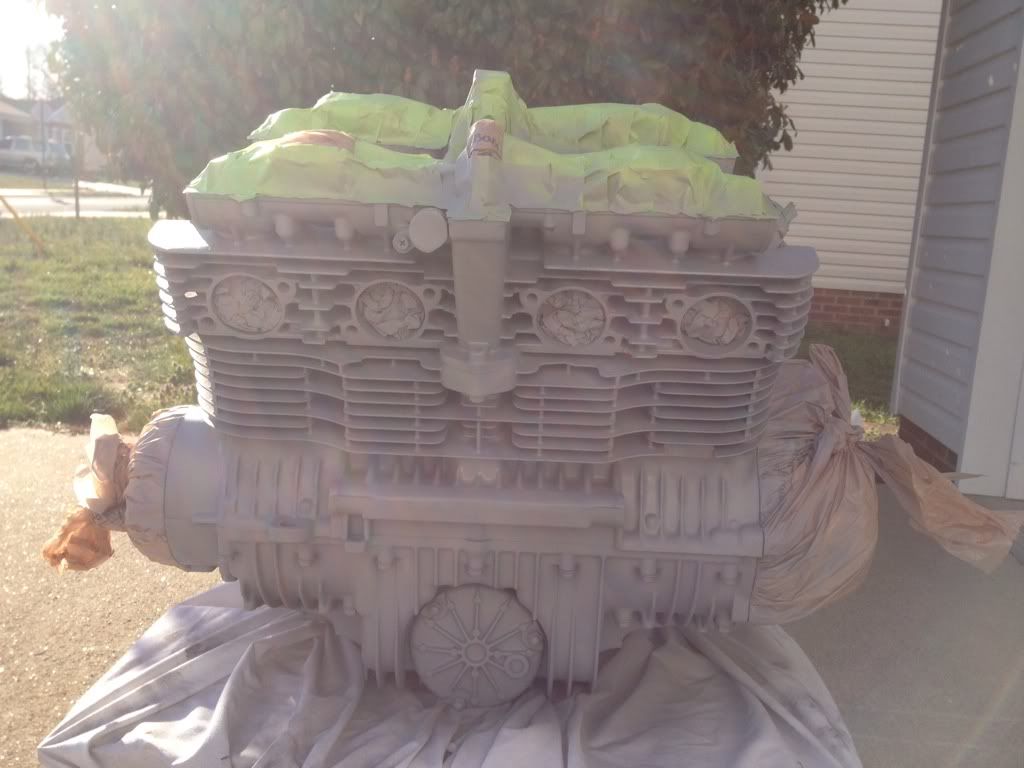
Masked and ready to go:
One coat of Duplicolor high heat engine primer:
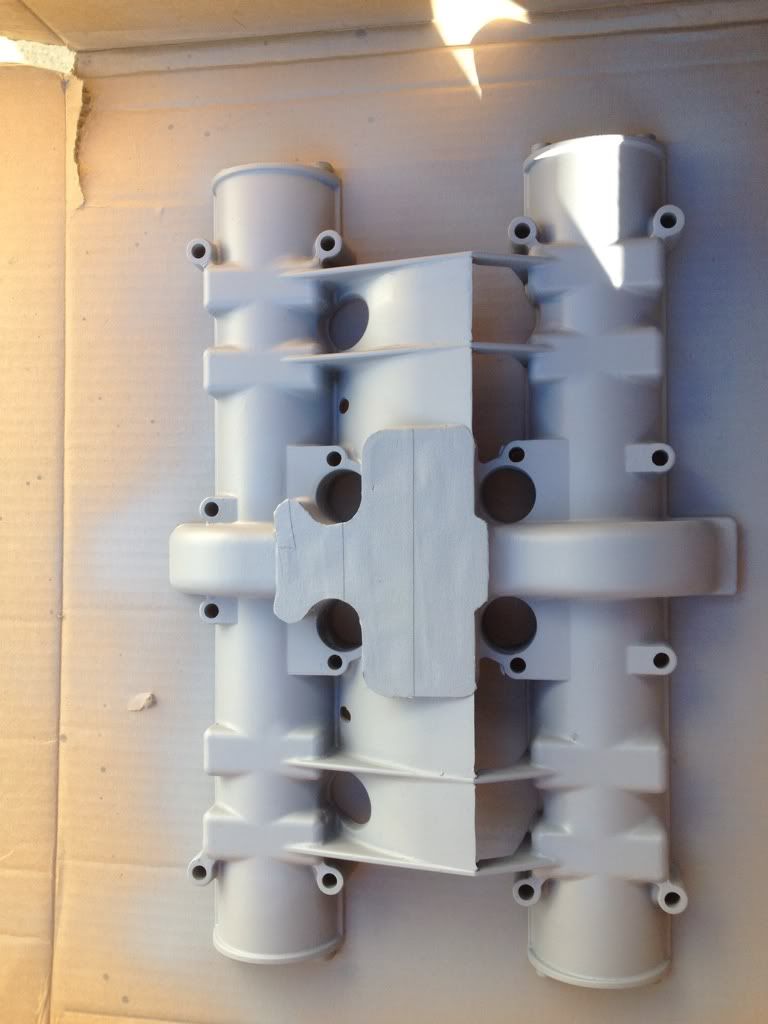
Three coats of Duplicolor Aluminum high heat engine enamel. All done 10 minutes apart within the one hour spraying window:
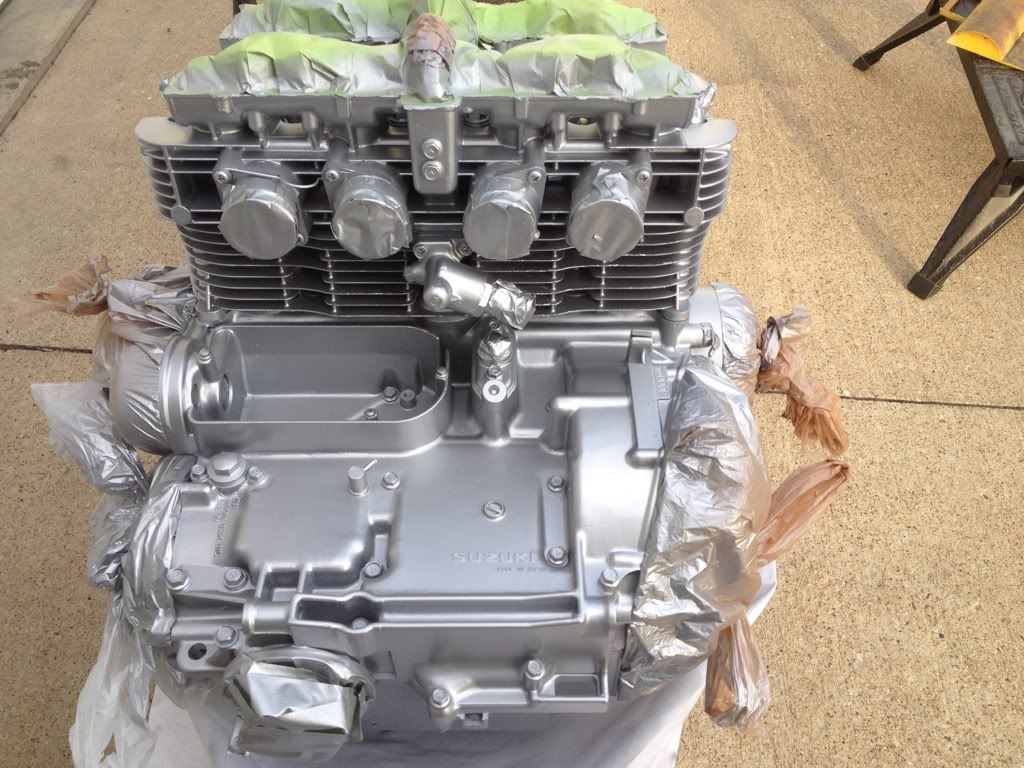
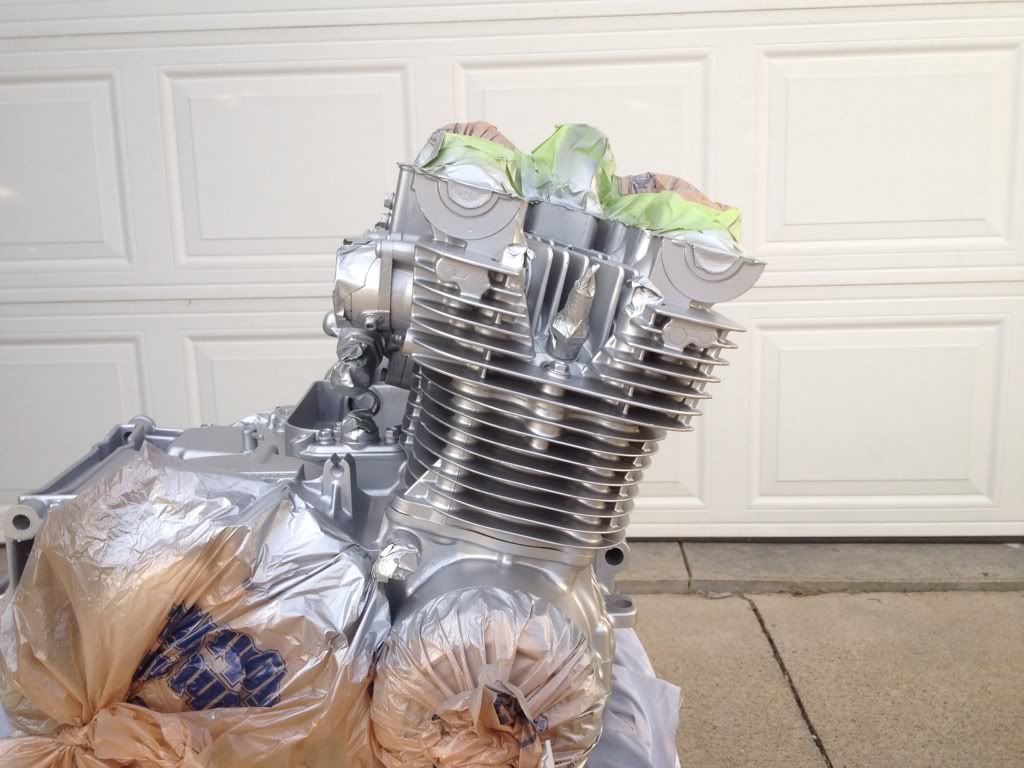
Let it dry for a couple of hours and then unmasked/debagged:
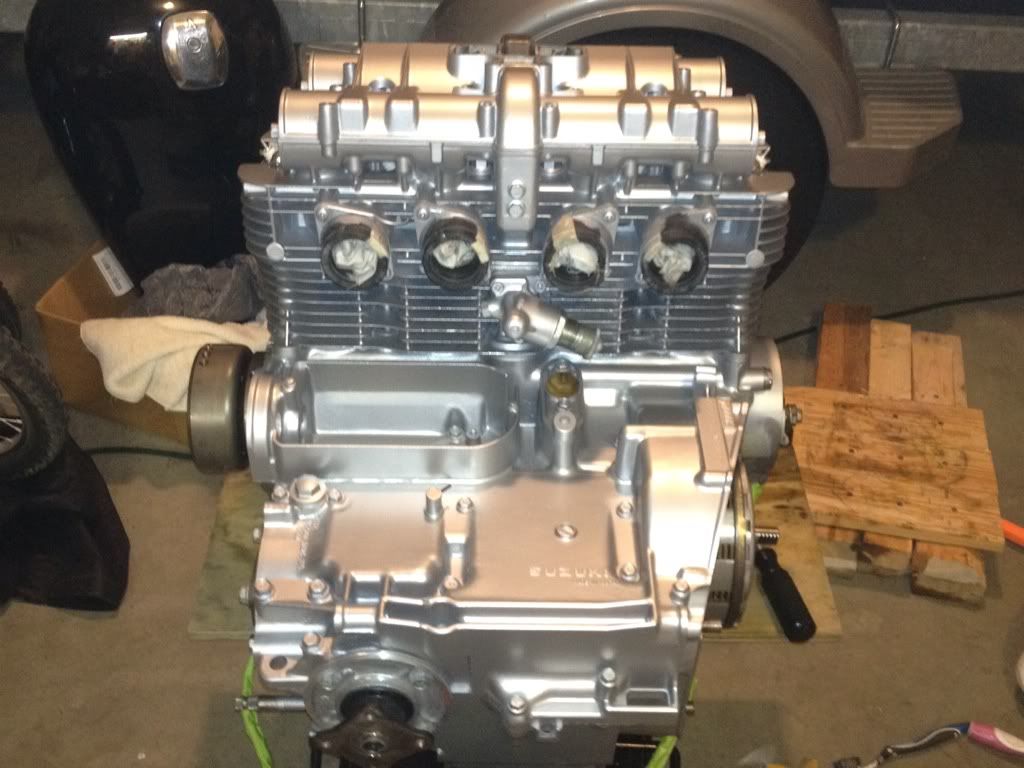
I was pleased with the result. Not perfect, but it looks a whole lot better. I liked the Duplicolor as well and really like the final result with the aluminum. I'm replacing the intake boots so no matter that they got painted.
I wanted to use VHT universal aluminum but couldn't get it locally. This worked out just as well in my opinion.Comment
-
It's going to look fantastic in the frame. Good job.Rob
1983 1100ES, 98' ST1100, 02' DR-Z400E and a few other 'bits and pieces'
Are you on the GSR Google Earth Map yet? http://www.thegsresources.com/_forum...d.php?t=170533Comment
-
Great looking job. I'm envious.Cowboy Up or Quit. - Run Free Lou and Rest in Peace
1981 GS550T - My First
1981 GS550L - My Eldest Daughter's - Now Sold
2007 GSF1250SA Bandit - My touring bike
Sit tall in the saddle Hold your head up high
Keep your eyes fixed where the trail meets the sky and live like you ain't afraid to die
and don't be scared, just enjoy your ride - Chris Ledoux, "The Ride"Comment
Comment