Announcement

Collapse
No announcement yet.

Wet sanding before clear?

Collapse
X
 
  • Filter
  • Time
  • Show
Clear All
new posts

    Wet sanding before clear?

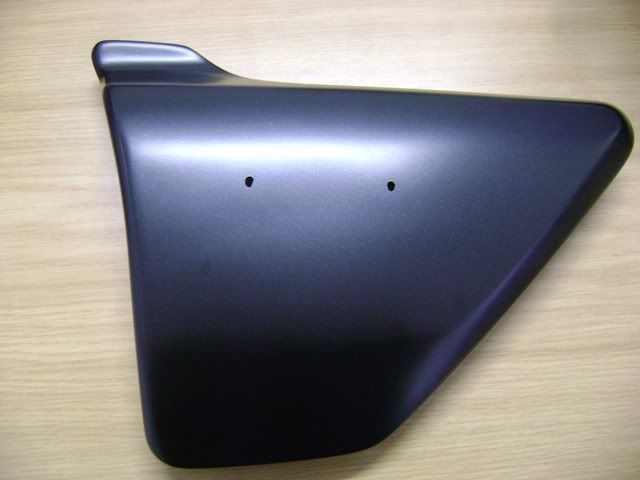
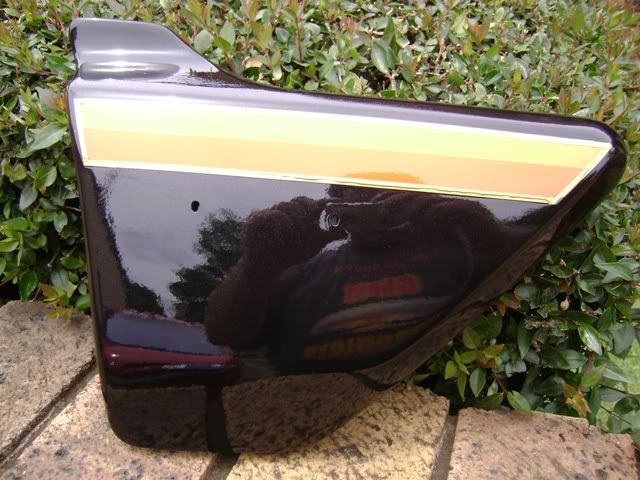
    Okay, so I have been struggling getting my tank painted. I am painting it black using duplicolors factory match paint. I choose the chevy black which has a very slight metallic sparkle in it. Anyway, the paint went on rather dull even after laying it down up close. So, I was going to sand it down and try a different paint. So I wet sanded it using 400 grit. When I went to wash off the residue, as it sat there wet it was absolutely beautiful. Deep black with just a hint of metallic flake. I'm like, that's exactly what I wanted! Obviously, after the water dried, I have a smooth but scuffed and dull tank now.

    So, can I use like spraymax 2k clear over this scuffed and dull black to get that same look as when it was wet with water or will it just be a end up as a scuffed and dull, albeit glossy, black?

    Thanks,

    Sci85
    1982 GS550M Rebuilt Winter '12 - 550 to 673cc engine conversion.
    1989 Kawasaki ZX-7 Ninja
    2016 Ducati Scrambler Full Throttle

    #2
    Sci, here is the trick, base coat dries to a dull matt finish, it is not supposed to shine, once you put the clear over it, it comes to life.
    If you are working with a metallic, you should, at all costs avoid sanding the base coat before laying down the clear, it disturbs the metallic flakes.
    Only sand where absolutely necessary and as little as you can get away with.

    I am doing Jennifer in the same black with a fine silver flake in it, I am using BMW Cosmos Black.

    Base coat, note the matt finish


    After applying the clear coat.

    Comment


      #3
      Ok perfect. That helps Flyboy. Mine was just not uniformly dull across the surface and I am having trouble getting it to be that way since. Not a problem on smaller pieces but finding it difficult with something as large as the tank. Will give it another shot once the humidty drops back down around here. BTW, I am using aerosol. Is that what you used too?

      And, BTW, that panel looks freaking awesome.
      1982 GS550M Rebuilt Winter '12 - 550 to 673cc engine conversion.
      1989 Kawasaki ZX-7 Ninja
      2016 Ducati Scrambler Full Throttle

      Comment


        #4
        You can wet sand the clear to get that super smooth surface and apply a few coats to add depth.
        MY BIKES..1977 GS 750 B, 1978 GS 1000 C (X2)
        1978 GS 1000 E, 1979 GS 1000 S, 1973 Yamaha TX 750, 1977 Kawasaki KZ 650B1, 1975 Honda GL1000 Goldwing, 1983 CB 650SC Nighthawk, 1972 Honda CB 350K4, 74 Honda CB550

        NEVER SNEAK UP ON A SLEEPING DOG..NOT EVEN YOUR OWN.


        I would rather trust my bike to a "QUACK" that KNOWS how to fix it rather than a book worm that THINKS HE KNOWS how to fix it.

        Comment


          #5
          Sci, the uneven look may be due to hunidity, as you say or technique when laying the paint down. I am on the phone so typing is a drag, so I am not going to get into it now, I am sure the paint gurus who know far better than I will chip in.
          Yep my paint coes out of a can, I don't have a compresor, the condo Nazis would do a back flip.
          Thanks for the compliment, but it was a stuff up, it is sitting in my garage, sanded back down waiting to be redone.

          Comment


            #6
            Yeah, I'm thinking maybe you're right. I should have known better than to spray in 100% humidity.

            Wow, if that's what your flubb's look like, I can't wait to see what you feel is adequate!
            1982 GS550M Rebuilt Winter '12 - 550 to 673cc engine conversion.
            1989 Kawasaki ZX-7 Ninja
            2016 Ducati Scrambler Full Throttle

            Comment


              #7
              The info from Flyboy and Chuck is right on the money. Spray your base color, get the metallic even, then immediately spray your clear coats. 3-4 coats of clear, then wet sand with 800-1,000-1,500 and finally 2000 grit. Then rub it out with first with a heavy rubbing compound, followed by a medium compound, then a final glaze, all with a buffer all with progressively finer pads. Wool, then foam. That's the only way to get the liquid smooth finish. It has to be done in progressive steps. Each step removing the scratches of the previous step. Also, the humidity has to be less then 80%.
              1979 GS1000S,

              1982 Honda CX500 Turbo, 1982 Honda MB5 w/CR80 motor, 1977 Honda "nekid" Goldwing, 1976 Honda CB550F cafe', 1972 Honda XL250 cafe'

              Comment


                #8
                Well, I tried again today (54% humidity, yay!). I finally got the base to lay down nice and even but as it dried, there was something wrong with the underlying base coat that made it look very splotchy in some areas. So, with layers of paint already on the tank, I decided to bite the bullet and sand here back down to bare and start over. At least now I have the procedure and will carefully prep this time too using all the same brand paint except for the clear coat. Hopefully 3rd times the charm!
                1982 GS550M Rebuilt Winter '12 - 550 to 673cc engine conversion.
                1989 Kawasaki ZX-7 Ninja
                2016 Ducati Scrambler Full Throttle

                Comment


                  #9
                  Paint

                  Hello Sci If you have any more questions I will answer as best I can I have been a collision tech and painting for 20 years now. Your prep work is the key to a good finish!! Do not clear over sanded base coat. you will see the sanded areas when cleared. Keep the tip of the gun or poof can the same distance at all times to get best and uniform coats, not to wet this is what is causing your look that you are seeing.To close wet, to far dry, wet metalics will lay down, dry and they tend to stand this reflects light differently. when you think you are ready for your last coat of base, take 800 or 1000 grit paper and just sand the dirt specks off, you are not trying to sand the whole part. Then your final coat should be just enough to hide the sand marks(spray whole part, not just sanded areas) Now you are ready for clear. I hope this helps you. Good luck and take your time.

                  Comment


                    #10
                    Pay attention to the distance from the tank that you are spraying also KEEP the can shaken up

                    Comment


                      #11
                      Ok thanks everyone. I will hopefully have the tank finish sanded tomorrow and ready for another try on Sunday. Will post some pics when done.
                      1982 GS550M Rebuilt Winter '12 - 550 to 673cc engine conversion.
                      1989 Kawasaki ZX-7 Ninja
                      2016 Ducati Scrambler Full Throttle

                      Comment


                        #12
                        Phaaaa, Sci, you will do just fine, take your time and it will all work out.
                        What has already been said;
                        Make sure you hold the can the same distance from the tank at all times.
                        Make sure you have the spray 90 degrees to the tank at all times.
                        Make sure your speed across the tank as you move from side to side is the same at all times.
                        Lastly, when changing direction once reaching the end of the tank, make sure that you start the flow of paint before you hit the tank and keep it going until you are off the tank on the other side.
                        Piece of old takkie, now go lay down some paint down and give us something to drool over.
                        We want pics, lots of 'em, you know how we love pics.

                        Comment


                          #13
                          Ok, i sanded it all back down, feathered all the bondo edges again, then laid down a fresh coat of primer. Now, I have a few questions. As you can see in the photo's below, the sheen is different where it was bare metal versus where there is some bondo. There is no actual edge that can be felt. Will this sheen difference also show up on the base coat (black) and if so, how do I correct it? More primer coats or ?


                          Thanks guys,

                          Sci85
                          1982 GS550M Rebuilt Winter '12 - 550 to 673cc engine conversion.
                          1989 Kawasaki ZX-7 Ninja
                          2016 Ducati Scrambler Full Throttle

                          Comment


                            #14
                            i would not take any chances, i would put on more primer.

                            Comment


                              #15
                              Sci, I work to this rule,"if you can feel it, you will see it" no matter how small.
                              In fact, just before I lay down colour, I run my bottom lip across the piecem as it is much more sensitive than work hardened finger tips, I must look like a right idiot, if anyone saw me, they would have me certified, some would argue that they should, regardless.
                              Point is, no matter how small the imperfection, it will show as soon as colour goes down.
                              But if you can't feel anything, you should be good to go, blemishes should not matter, they will just cover, but kdo has a point, for an extra coat or two of primer and another hour out of your life, why take a chance, give it another coat, what the heck.

                              Comment

                              Working...
                              X