Announcement

Collapse
No announcement yet.

Wet sanding before clear?

Collapse
X
 
  • Filter
  • Time
  • Show
Clear All
new posts

    #16
    Nope, can't feel nothin but then again, I haven't kissed it

    Alright, I will go get some more primer and put another coat on tomorrow and see of that covers up the differences.
    1982 GS550M Rebuilt Winter '12 - 550 to 673cc engine conversion.
    1989 Kawasaki ZX-7 Ninja
    2016 Ducati Scrambler Full Throttle

    Comment


      #17
      Sci, I meant, if you have primer and it is no hassle, if you have to delay the whole process and go out and buy more primer, I would just start laying down colour, I am far too antsy to wait like that if the piece is good.
      You have more patience than me, brother.
      If the piece is smooth and you can feel no blemishes, ..........
      You can always wet sand the first coat or two of colour to smooth things out if needed.

      Comment


        #18
        A couple more coats of primer won't hurt, and remember, you still need to block sand the primer before painting it again. Block sanding will blend in the areas of concern you have. Fog a very light "guide coat" of black over it first and then sand it with 400 grit. That will show you any defects or scratches. Finish sanding it with some 600 grit just to remove the 400 scratches then spray your base coat again followed by the clear, all in one session. BTW, a really good way to feel defects, is by using a shop rag between your hand and the surface you're feeling. The rag actually amplifies the feeling way better then just your bare hand.
        1979 GS1000S,

        1982 Honda CX500 Turbo, 1982 Honda MB5 w/CR80 motor, 1977 Honda "nekid" Goldwing, 1976 Honda CB550F cafe', 1972 Honda XL250 cafe'

        Comment


          #19
          Very interesting tip about using the shop rag, who would have thought.
          Have you relocated and started the new job yet Larry?
          If so, I hope it is going well, how about a link to your audio stream and what times you are on.

          Comment


            #20
            Sci... Two pieces of advice for you that haven't been mentioned. 1. Spray a mist coast and let it set up for 5 minutes before you start painting. 2. when wet sanding, the less scratches you put in, the less you need to get out. I only used 1500 grit on my most recent tank, then 3M Scratch Remover and it came out BEAUTIFULLY!!!

            Comment


              #21
              I only used 1500 grit on my most recent tank, then 3M Scratch Remover and it came out BEAUTIFULLY!!!

              Comment


                #22
                Okay great advice from everyone thank you! I have laid down additional coats of primer today and it is looking better. How long do I let the primer cure before laying on the base coat? Do I need to sand the primer coat before base?
                1982 GS550M Rebuilt Winter '12 - 550 to 673cc engine conversion.
                1989 Kawasaki ZX-7 Ninja
                2016 Ducati Scrambler Full Throttle

                Comment


                  #23
                  wet sand with 400, I use a different color primer coats so I can see low spots, I paint mine when it was dry.

                  Comment


                    #24
                    Ok, so here is where it stands. Just for fun, I will post the before pics with all the dents and irregularities and then what it looks like after today.

                    Before:


                    Currently:


                    I don't see anymore differences in sheen or tone so I think I'm good to go for the black base coat again. Hopefully this time I get it right. So I will lightly sand the primer with 400 (or is it 600) then base coat it hopefully tomorrow followed by the Spraymax 2k clear. Wish me luck!
                    1982 GS550M Rebuilt Winter '12 - 550 to 673cc engine conversion.
                    1989 Kawasaki ZX-7 Ninja
                    2016 Ducati Scrambler Full Throttle

                    Comment


                      #25
                      wet sand I used 400

                      Comment


                        #26
                        Like Larry suggested, before you sand the primer with 400, spray a very light mist coat of black over the tank, that way, as you sand the primer, any low spots will show up straight away, you can even use a cheap and nasty rattle can for that, as it will be sanded off anyway.
                        Tank is looking awesome so far.

                        Comment


                          #27
                          Okay cool, I will do that. Should i use a sanding block for that step or just my hand? if that process reveals any low spots (or high for that matter) then whats the procedure for correcting them at this stage?

                          Thanks guys, this has really been helpful.
                          1982 GS550M Rebuilt Winter '12 - 550 to 673cc engine conversion.
                          1989 Kawasaki ZX-7 Ninja
                          2016 Ducati Scrambler Full Throttle

                          Comment


                            #28
                            Should i use a sanding block for that step or just my hand?
                            I am going to pretend you never asked that question..... hahahaha,
                            Sci, always use a sanding block, sanding by hand will create grooves, it defeats the object, your fingers will just conform to the low spots, you want something that will ride over them, same with the high spots, you want them to stand out.
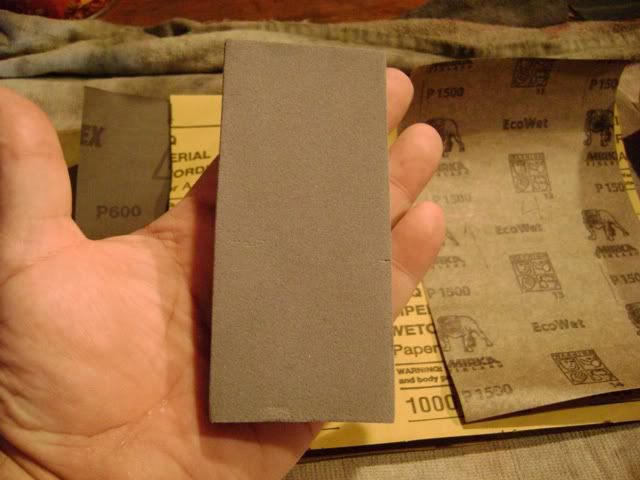
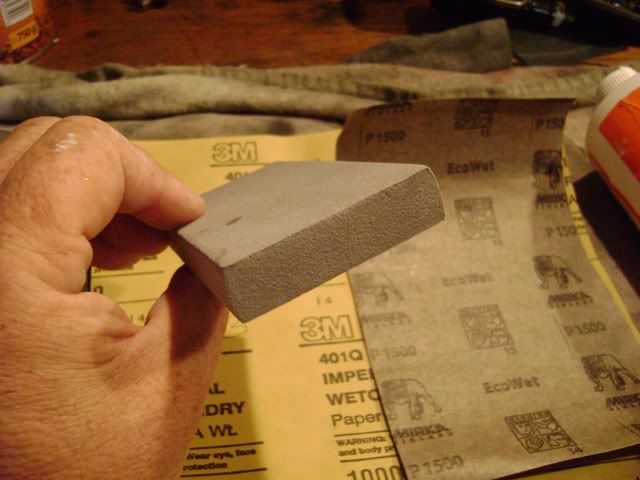
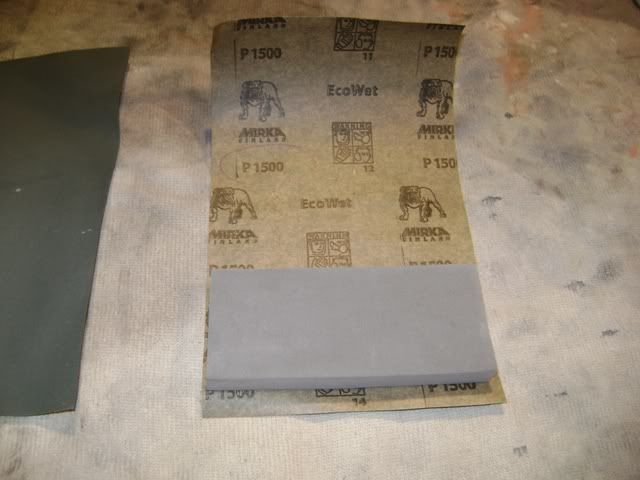
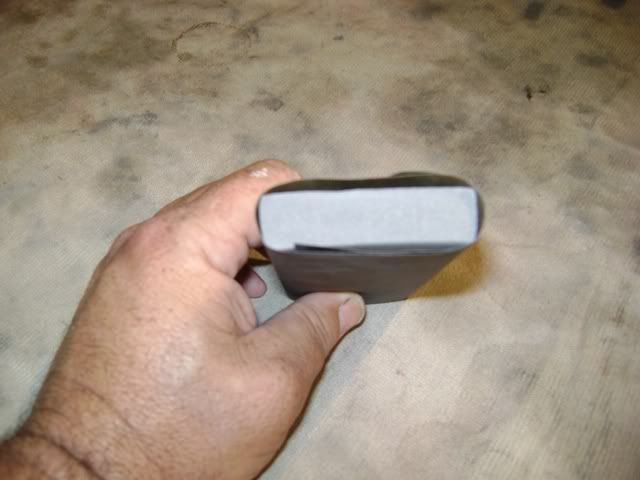
                            I use a small block of high density foam, it is sturdy enough to act as a straight edge but conforms to compound curves nicely.
                            I never, ever sand by hand, saves your fingers to.
                            If you do find any????
                            Well what is the procedure while you are prepping the tank???
                            Yep, you guessed it hey, no one said it was not a lot of work.
                            But man, is it all so worth it when it is done and it is flawless.
                            Can't wait for the pics, I have no doubt they will be stunning.

                            Comment


                              #29
                              Sci, this is what I use, and it works like a charm, most auto paint suppliers will have them, and they are dirt cheap, no more than a buck or two.
                              It is just a block of high density foam.


                              Comment


                                #30
                                You want to finish your primer coat with 600. You can start with 400, but move to 600 before you call it done.

                                Larry suggested using a guide coat - which is a very light dusting of contracting color on top of your primer. Then you sand off all the guide coat before shooting your base. If there are any low spots you will hit metal before the guide coat is all removed; that forces you to fix all the bad spots before moving forward.

                                When you have those small low spots, such as on the edge of your bondo, you can lay down extra primer layers on those spots. The idea is to fill the areas with primer, but hopefully, not too thick.

                                Good luck. Looking good so far.
                                Ed

                                To measure is to know.

                                Mikuni O-ring Kits For Sale...https://www.thegsresources.com/_foru...ts#post1703182

                                Top Newbie Mistakes thread...http://www.thegsresources.com/_forum...d.php?t=171846

                                Carb rebuild tutorial...https://gsarchive.bwringer.com/mtsac...d_Tutorial.pdf

                                KZ750E Rebuild Thread...http://www.thegsresources.com/_forum...0-Resurrection

                                Comment

                                Working...
                                X