.png "Powered by vBulletin")
I would love to use POR-15 but i cant find it in toronto, my brother has some kreem, but I've heard alot of very poor reviews.
-
-
You have to order it....they'll mail it to you.
It may be a bit more pricey to do in Canada. Larry D
1980 GS450S
1981 GS450S
2003 Heritage SofttailComment
-
screw the liner
drain the tank and fog it in the winter
i take mine inside the house
no signifigant rust in 27 yrs
kepp yer tank full in riding seasonComment
-
Screw draining the tank.
Keep it full of stabilized gas, the bike will fire right up when you decide to wake it up for the season.
.sigpic
mine: 2000 Honda GoldWing GL1500SE and 1980 GS850G'K' "Junior"
hers: 1982 GS850GL - "Angel" and 1969 Suzuki T250 Scrambler
#1 son: 1986 Yamaha Venture Royale 1300 and 1982 GS650GL "Rat Bagger"
#2 son: 1980 GS1000G
Family Portrait
Siblings and Spouses
Mom's first ride
Want a copy of my valve adjust spreadsheet for your 2-valve per cylinder engine? Send me an e-mail request (not a PM)
(Click on my username in the upper-left corner for e-mail info.)Comment
-
Just borrow a charger from a neighbor. I did not notice any real increase with the hydro bill.
Now here is a question. It is the out side or inside. If it is the inside, it will not work by placing the tank in a tub. The current has to run through the rust so to speak. And therefore you need to place the solution in the tank itself.
And make sure you have the negative charge connected to the tank and the positive to the piece on metal. The other way around will eat away at the metal.
The 1 amp will work but be slow. If you hook to a battery it may work faster. I have never tried this but heard of people who have.
It should look like this.
The cap has a bolt in it and the bolt can not touch the tank in anyway.
Just remember to plug up the petcock hole with a small piece of metal and gasket crap.

After a few hours, clean the bolt/metal and put it back in. It took 24hours for my tank.

I wouldn't bother coating the tank. It has always been a problem for me or if you ever have to fix it from dents;the coating breaks apart. Just fill it with gas or if it will sit for a while coat the inside with wd-40 and it will help.Last edited by Guest; 06-18-2010, 03:52 PM.Comment
-
Just imagine if *everyone* found their answer when they used the search option.Originally posted by Steve View Postsigpic
82 GS850
78 GS1000
04 HD Fatboy
...............................____
.................________-|___\____
..;.;;.:;:;.,;.|__(O)___|____/_(O)|Comment
-
Originally posted by Steve View Post
but it would be a fire hazard undeneath my bed!!!
I would have to take greater care when smoking there
also seals can fail and then what you find a crank full of gassy oil and a rusty tank
how can I put my shiny beautiful tank in a cold garage! its cruelty is what it isLast edited by Guest; 06-18-2010, 04:39 PM.Comment
-
Originally posted by Octain View Post
then there would be no friendly discourse
some folks cant grasp boolena logic
also there is no effective tagging of topics so slogging through material is just plain evil
I prefer the friendly well intentioned advice over the dusty tomes that some of the threads turn intoComment
-
sigpic
82 GS850
78 GS1000
04 HD Fatboy
...............................____
.................________-|___\____
..;.;;.:;:;.,;.|__(O)___|____/_(O)|Comment
-
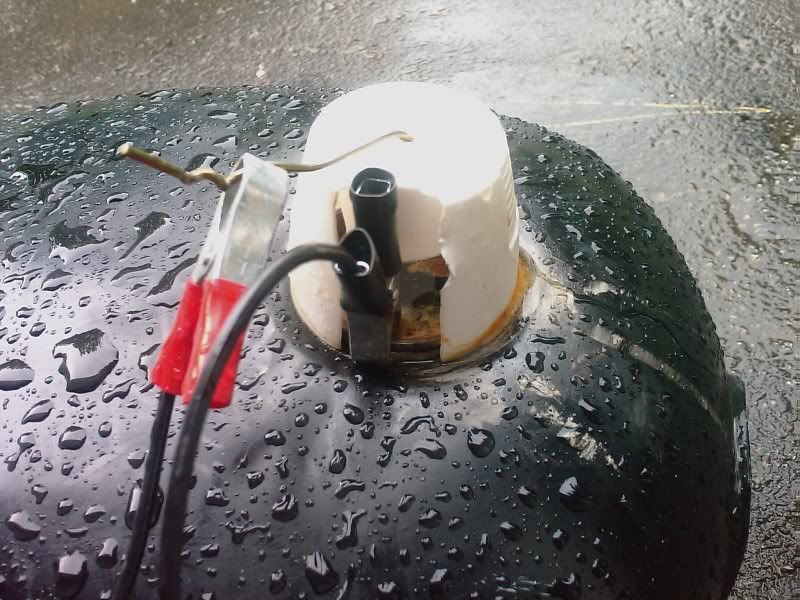
hey there, i ve been using electrolysis to derust mostly all of my parts, and it works awesome!Originally posted by Adler View Post
but back to your problem.. the negative should always be on the tank itself, and if you wanna derust the INSIDE of the tank you connect the positive to the suspended hanger INSIDE the tank, but if you wanna de-rust the OUTSIDE you put the sacrificial metal OUTSIDE, it woks point of view, what ever is facing the positive charge will be the one that will be cleaned, and trust me if you put in outside long enough the paint will come off
quick note after derusting, rinse and line it with oil or gasoline as it will rust immediately after exposure to airComment
-
alrighty, I bought a 1A charger for 20 bucks and now its working!Comment
-
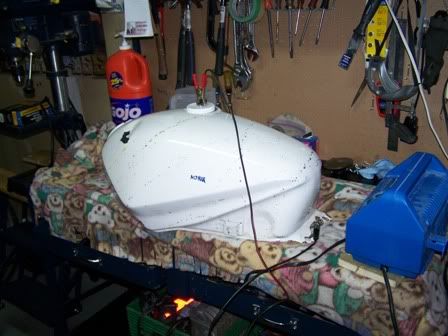
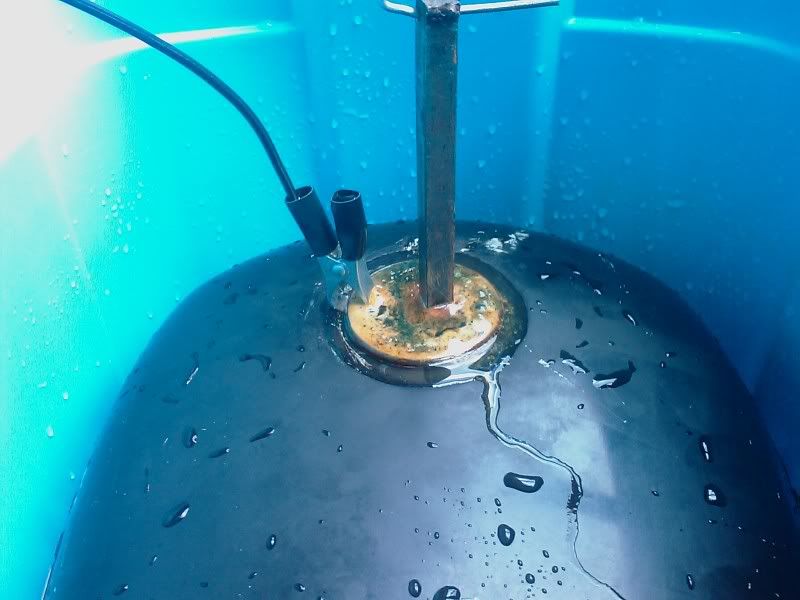
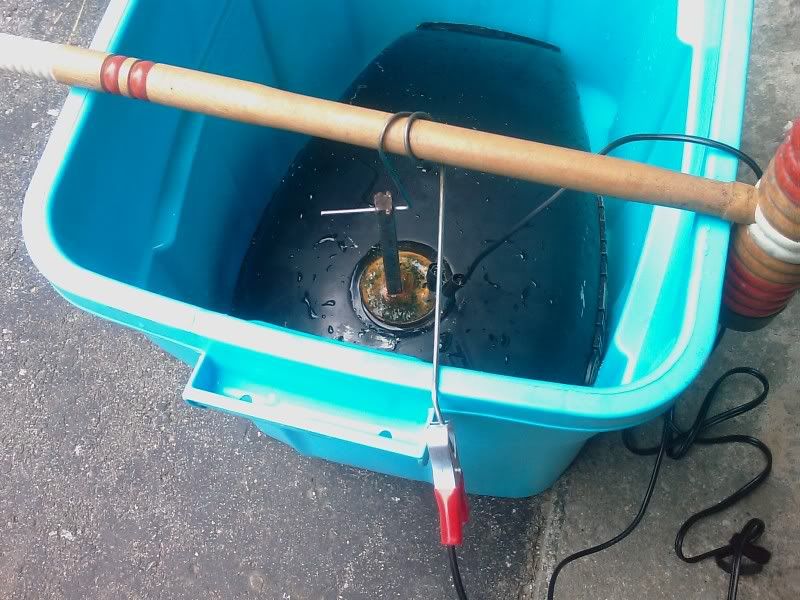
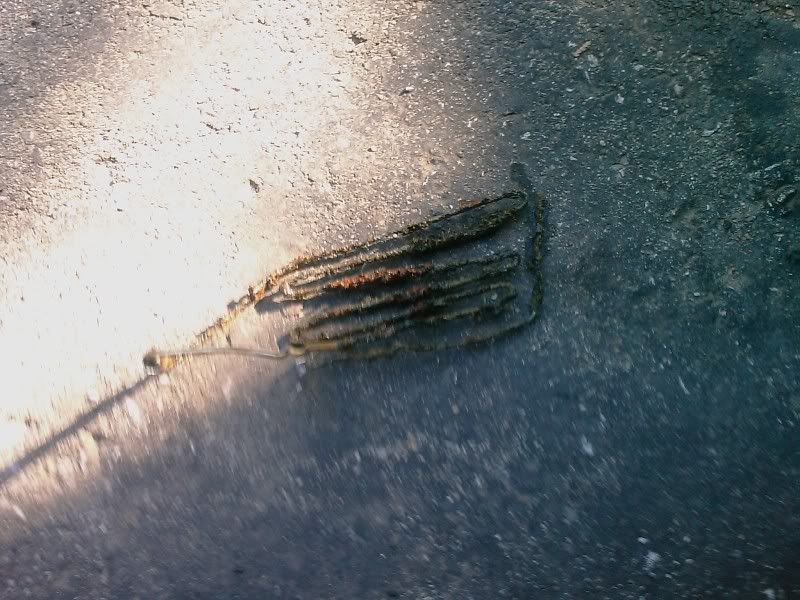
So here some pictures of the electrolysis so far, because i know you guys like pictures...
This was my first setup, bar suspended in fill hole...
You can see rust accumulating at the top
I later switched to a folded hanger style sacrificial node and here it is after a length of time in the tank
This is a midway shot of the inside of the tank, not too shabby if you ask me. you can see some of the paint came off from my acetone rinse, good thing i plan on painting anyways!
my sacrificial node went to node heaven, i made another
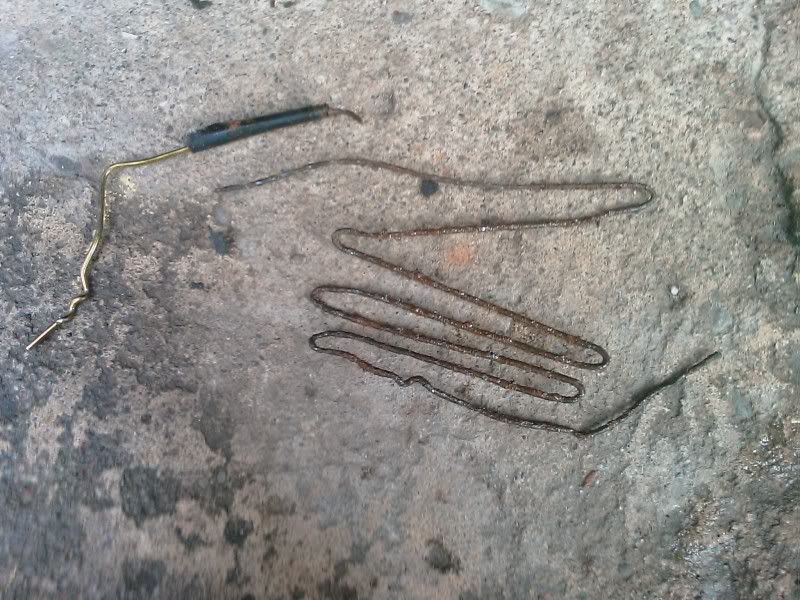
So now its sitting over night with a fresh node and hopefully by tomorrow ill have a clean tank!
I will then flush it with acetone and let it dry, then fill it with gasoline to prevent further corrosion. Then its on to repainting!Comment
-
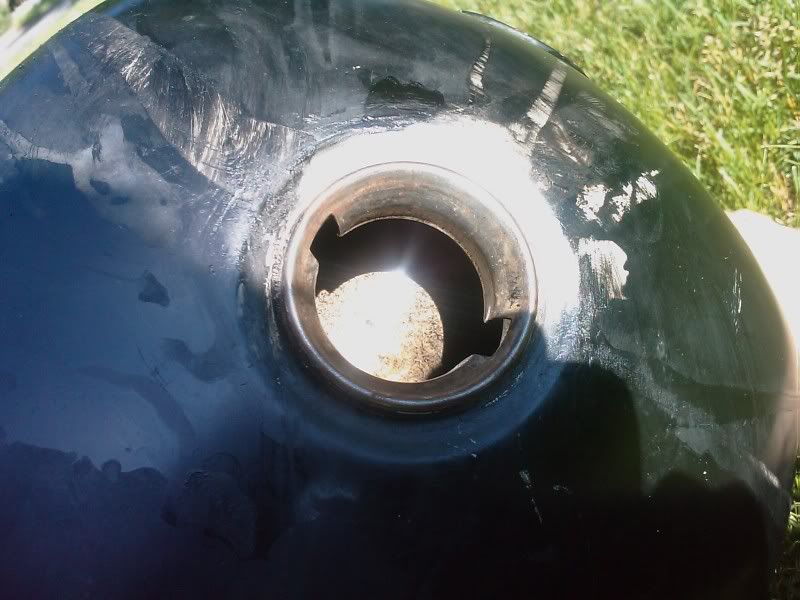
That will clean the area around the filler neck just fine.
To get the bottom and the rear part of the tank, where all the real rust is, you need an anode that reaches way back there.
Thicker more rigid steel rods work well, they can be bent so they reach the back without touching anything else.
You will need something that will hold it rigidly in the filler hole, so it can't flop around.
I like to put an anode in the other way, through the petcock opening. Bend it so it runs along the side of the tank forward, down low. That gets it really clean where it counts the most, where the fuel comes out. Then I bend another to go over the hump to the other side, if there is a fuel sender opening, I do one from there too.
It takes a while, but once it is done in all of these areas, the entire tank is spotless.Comment
-
That metal bar was only my first method, I later switched to a folded hanger that went all the way into the tank, that is what those corroded things are in pictures 3 and 5.Originally posted by tkent02 View Post
Here is another one that shows my second setup.
Comment
-
First off, in defense of not using the search method. Between not using the same spelling and not using the same terms to define meaning, searching can sometimes be frustrating.
Anyway back to the topic; I recently used this process to derust a tank. For my anode, I covered the end with tape so that I could really jam it in there without wrorying about it touching the sides. Also, when you finish, make sure you coat it ASAP, it will begin rusting again immediately. I was a little disconcerted when I saw how fast it came back.Comment
.png)


Comment