Announcement

Collapse
No announcement yet.

1980 GS1000S Carb Rebuild ( by a 1st Timer)

Collapse
X
 
  • Filter
  • Time
  • Show
Clear All
new posts

    1980 GS1000S Carb Rebuild ( by a 1st Timer)

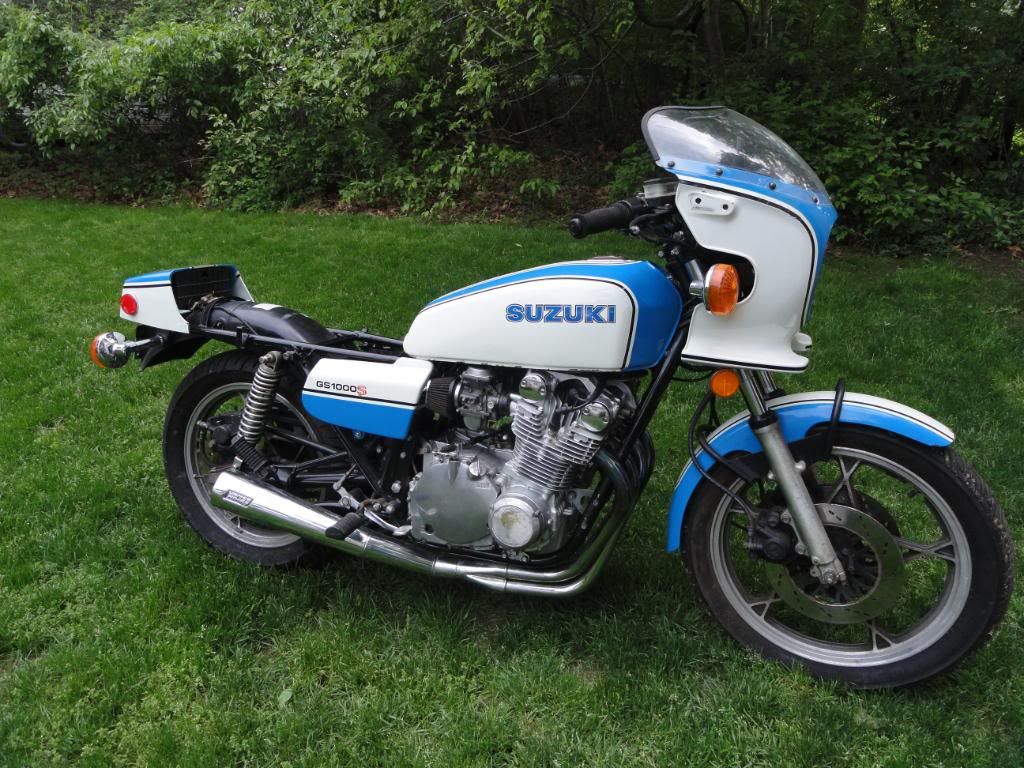
    I removed the carbs today in preperation of a rebuild. This is my 1st endeavor into a project like this.

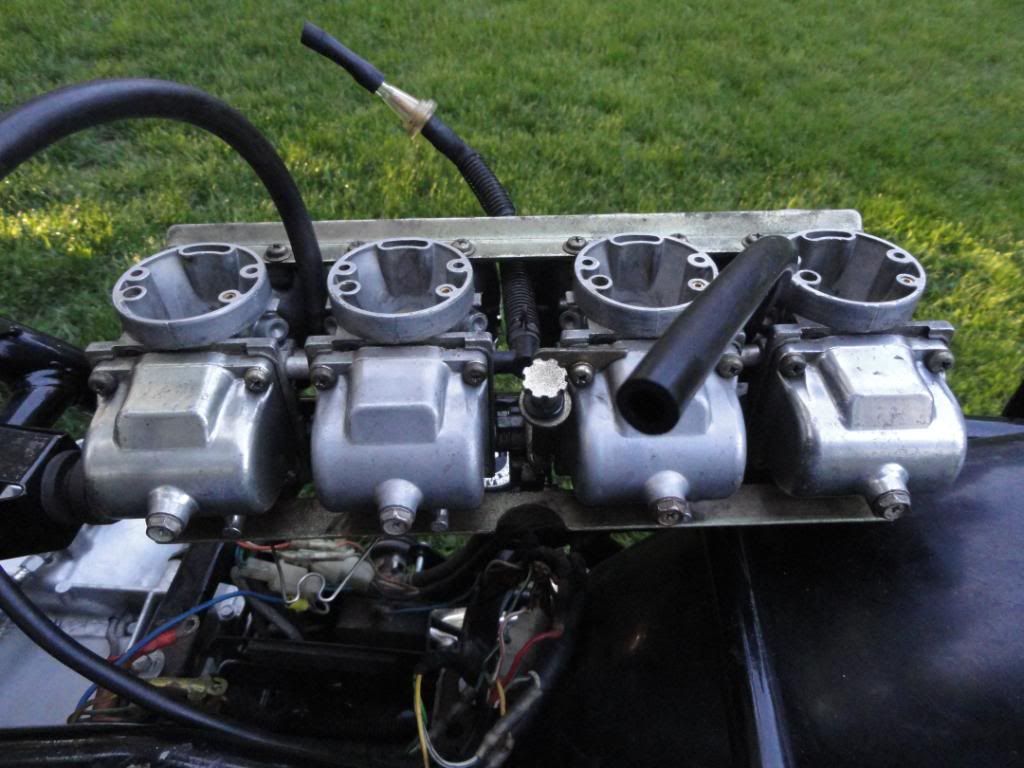
    I must say, the removal went quite well. I suspect having pods made the removal much easier than if it had the stock air box, which I have and I hope to use.

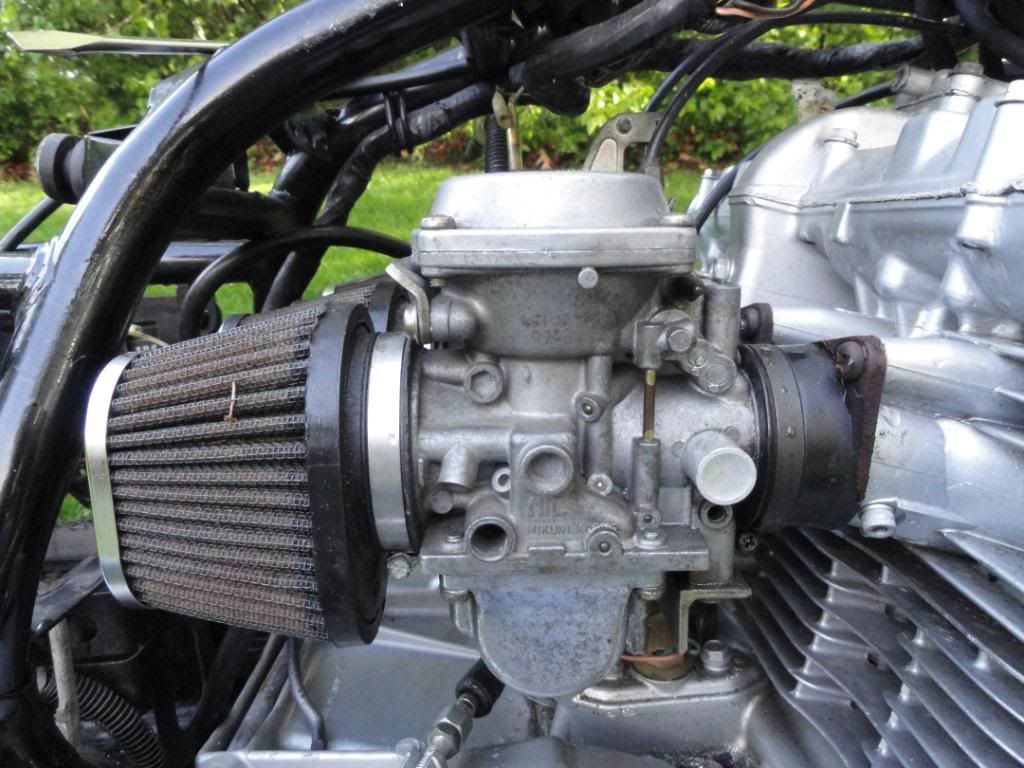
    I snapped several pictures fo rreference later.

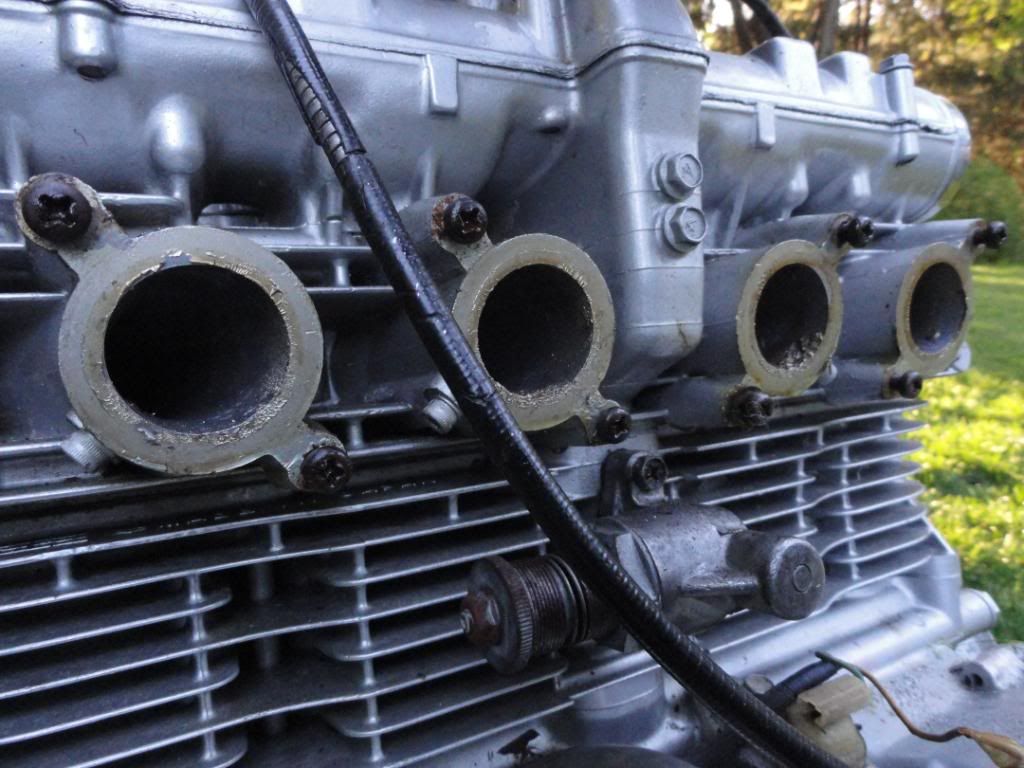
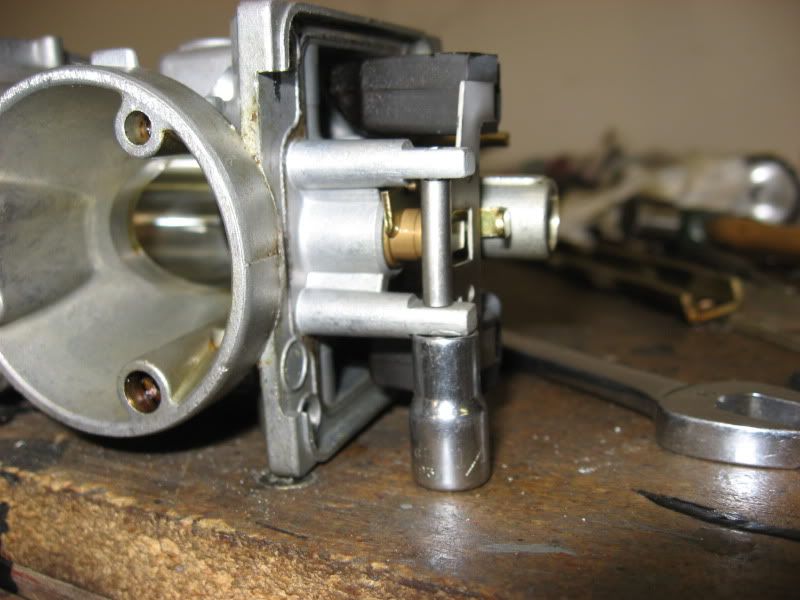
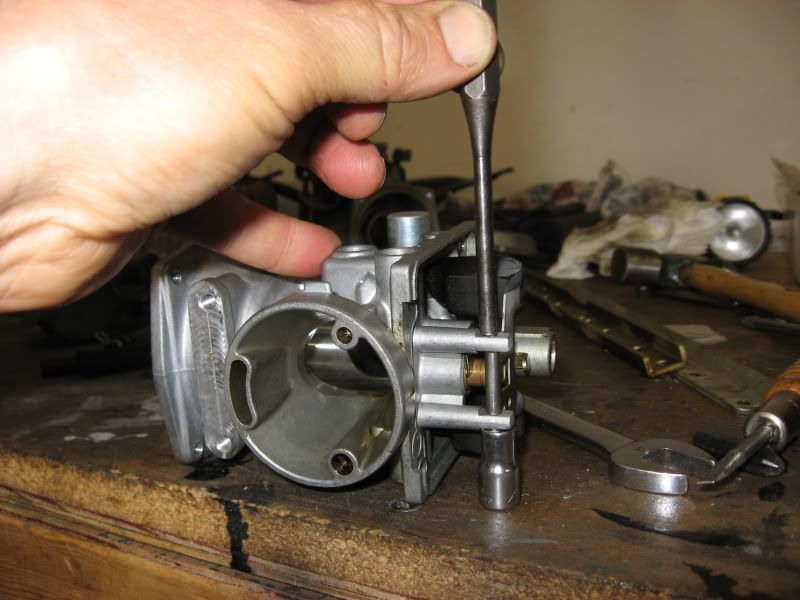
    Removing the intake boots was a snap with the recommended impact driver. Would not have been pretty without it.

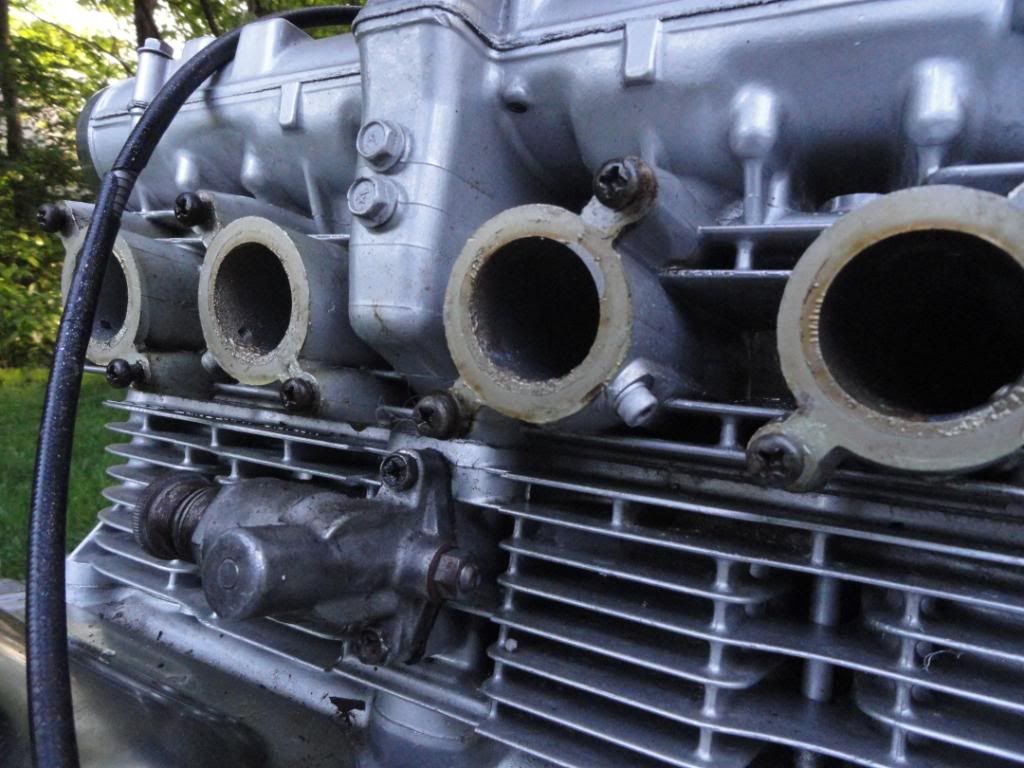
    The intake gaskets are clearly shot. Should I assume the boots are no good ( see pic)?

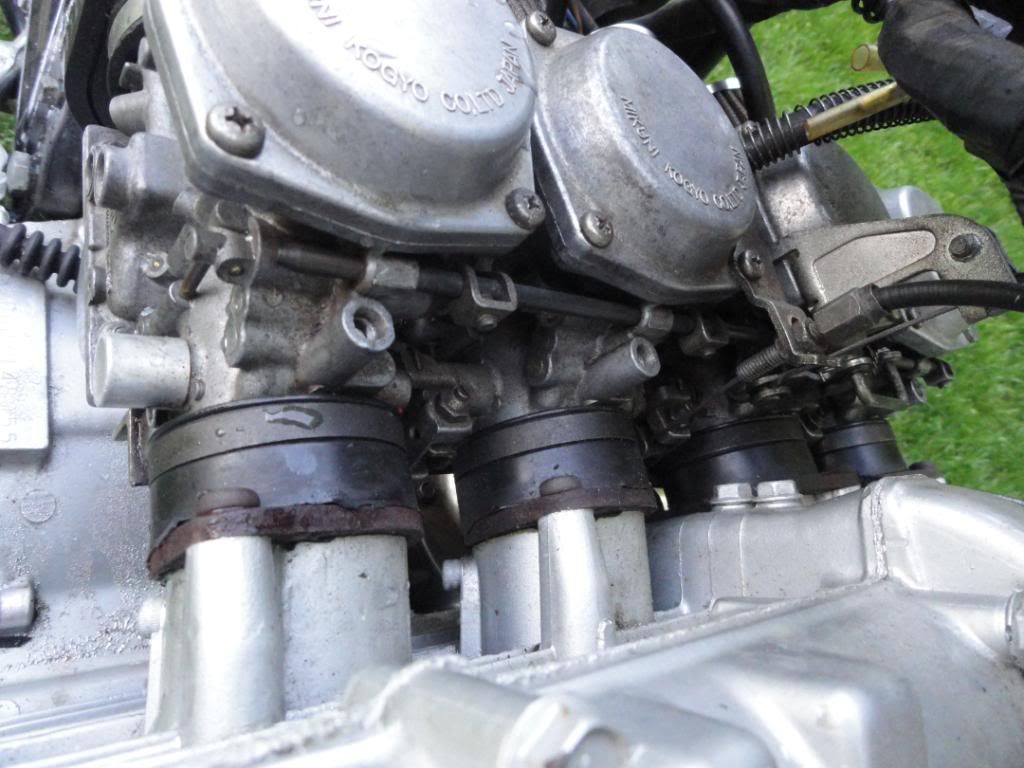
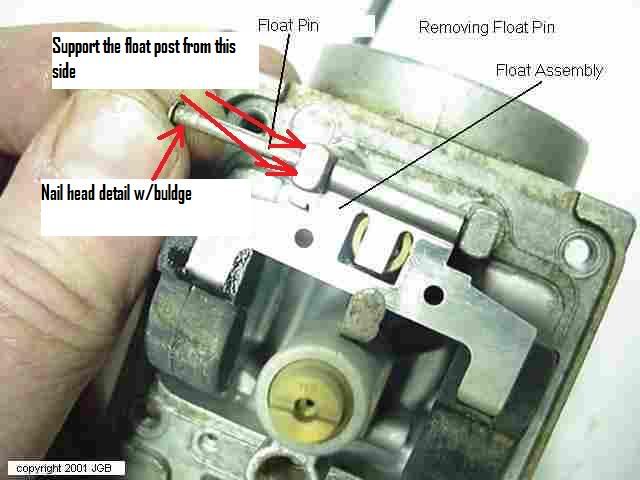
    I hope to clean the bank assemble, prior to disassembling them.

    Overall they look pretty clean. I believe they were off and cleaned shortly befor I purchaed it.

    Anyway, It was enjoyable removing them. Let's see how the rest goes......


    #2
    Couple more pics of todays progress...


    Comment


      #3
      What the hell.... a couple more.
      Let me know if you see anything that throws up a red flag?


      Comment


        #4
        Just follow the guide for carb cleaning and you'll be fine

        Cleaning the exterior is actually more labor intensive

        Chuck and Chandler have praises for Aluminator as a cleaner/etcher

        Others soda blast them. Hand scrubbing is possible

        Get the O rings and new bolts from cycle orings

        It's really hard to judge the condition of intake boots in pictures. For a bike that nice, I'd spring for the new boots
        1978 GS 1000 (since new)
        1979 GS 1000 (The Fridge, superbike replica project)
        1978 GS 1000 (parts)
        1981 GS 850 (anyone want a project?)
        1981 GPZ 550 (backroad screamer)
        1970 450 Mk IIID (THUMP!)
        2007 DRz 400S
        1999 ATK 490ES
        1994 DR 350SES

        Comment


          #5
          Will the bike be sitting outside while you have the carbs off? If so, I'd recommend wrapping a towel around the intakes to keep junk out.
          Cowboy Up or Quit. - Run Free Lou and Rest in Peace

          1981 GS550T - My First
          1981 GS550L - My Eldest Daughter's - Now Sold
          2007 GSF1250SA Bandit - My touring bike

          Sit tall in the saddle Hold your head up high
          Keep your eyes fixed where the trail meets the sky and live like you ain't afraid to die
          and don't be scared, just enjoy your ride - Chris Ledoux, "The Ride"

          Comment


            #6
            Those carb boots look done to me. Part Shark is the cheapest place for OE parts I've found.

            Please check the carb jets against the stock numbers in the service manual. Bikes with pods and a header need different jetting than stock.


            When doing the carbs please support the float posts before removing the pin otherwise they can break off.


            .


            Last edited by Nessism; 05-20-2011, 09:32 PM.
            Ed

            To measure is to know.

            Mikuni O-ring Kits For Sale...https://www.thegsresources.com/_foru...ts#post1703182

            Top Newbie Mistakes thread...http://www.thegsresources.com/_forum...d.php?t=171846

            Carb rebuild tutorial...https://gsarchive.bwringer.com/mtsac...d_Tutorial.pdf

            KZ750E Rebuild Thread...http://www.thegsresources.com/_forum...0-Resurrection

            Comment


              #7
              Originally posted by cowboyup3371 View Post
              Will the bike be sitting outside while you have the carbs off? If so, I'd recommend wrapping a towel around the intakes to keep junk out.
              Thanks V... it will be inside.

              Comment


                #8
                Stock air box is going on. I have the K & L rebuild kit, as well as the o-ring kit.

                I will order the new intake boots.

                Comment


                  #9
                  Originally posted by Vmass View Post
                  Stock air box is going on. I have the K & L rebuild kit, as well as the o-ring kit.

                  I will order the new intake boots.
                  Reuse all the OEM jets & such... the K&L stuff is not as good of quality as the original.

                  Use extreme care when removing the pilot jets - they are super easy to booger-up that slot. Best to get a brand new screwdriver that fits the slot width perfectly - might have to grind the sides of the screwdriver shaft a bit to get it down that small dia hole. And yes, you do need those rubber plugs...
                  '85 GS550L - SOLD
                  '85 GS550E - SOLD
                  '82 GS650GL - SOLD
                  '81 GS750L - SOLD
                  '82 GS850GL - trusty steed
                  '80 GS1100L - son's project bike
                  '82 GS1100G - SOLD
                  '81 GS1100E - Big Red (daily rider)

                  Comment


                    #10
                    Originally posted by hikermikem View Post
                    Use extreme care when removing the pilot jets - they are super easy to booger-up that slot. Best to get a brand new screwdriver that fits the slot width perfectly - might have to grind the sides of the screwdriver shaft a bit to get it down that small dia hole. And yes, you do need those rubber plugs...
                    And give each jet a shot of penetrating oil before attempting to remove it (proper penetrating oil - not WD40 etc).
                    79 GS1000S
                    79 GS1000S (another one)
                    80 GSX750
                    80 GS550
                    80 CB650 cafe racer
                    75 PC50 - the one with OHV and pedals...
                    75 TS100 - being ridden (suicidally) by my father

                    Comment


                      #11
                      Carb boots/orings at least. Tap the screws on the carbs with a suitable size punch first even if you are using a impact driver to remove them. Less chance of stuffing the screws and if you have the cash may i suggets some nice stainless screws and washers for assemble. If you are using the airbox for a first timer undo all the engine bolts and just leave the ones under the alt and point cover intact and loosing the chain and rear exhaust mounts and tilt the engine forward for more room when installing the carbs. DONT have to do it but saves bending the clamps and jamming home the carbs. Have a look in here for pictures and magazine scans of your model and other stuff....

                      Store your photos and videos online with secure storage from Photobucket. Available on iOS, Android and desktop. Securely backup your memories and sign up today!

                      Comment


                        #12
                        Thanks for the tips. I am hoping to do this only once. I am a little confused as to what and what not to use.

                        Here's what I think I know.. Since the bike came with pods and a pipe, it most likely does not have the stock jets and needles.

                        A couple of people suggested I find a stock air box which I did. It was also suggested that I buy rebuild kits for ZI, which I did. Then it was suggested that I buy the o rings from cyclerings, I did.

                        I was under the impression that between the rebuild/cleaning, original air box and the K & L rebuild, I would be good to go.

                        Know I am seeing suggestions that this may not be the case.

                        Should I stick with the pods and all the existing jets and needles, and replace the orings only?

                        Comment


                          #13
                          I also searched through page after page and did not find the OEM specs for my carbs.

                          Can anyone point me in the right direction?

                          Comment


                            #14
                            The factory service manual has the carb specs. If you don't have the factory manual yet you can download it for free off Basscliff's web site. http://members.dslextreme.com/users/bikecliff/ The base level GS1000 manual is applicable, plus there is a GS1000ST manual supplement in the back. The carb spec sticky should also have the specs. http://www.thegsresources.com/_forum...ad.php?t=73723 Your bike should have either identical, or very close, to the jetting of the 1000G bikes.

                            In terms of the jetting, those K & L kits should be close but you should compare the jet numbers to the stock numbers in the book, and understand that header you have may require larger main jets. Pods drastically change the jetting needs but the header will have some effect too - maybe move up one or two main jet sizes even if you have the stock airbox. Of course, doing some plug chops is the proper way to test so you might want to read up on that as well.

                            Good luck
                            Ed

                            To measure is to know.

                            Mikuni O-ring Kits For Sale...https://www.thegsresources.com/_foru...ts#post1703182

                            Top Newbie Mistakes thread...http://www.thegsresources.com/_forum...d.php?t=171846

                            Carb rebuild tutorial...https://gsarchive.bwringer.com/mtsac...d_Tutorial.pdf

                            KZ750E Rebuild Thread...http://www.thegsresources.com/_forum...0-Resurrection

                            Comment


                              #15
                              Well, I broke the 1st float post. I supported with a socket but apparently not good enough.

                              It broke below the narrow part, where the pin goes in. In other words, it broke on the thicker part of the post.

                              The pin is bent and still in the broken piece, not wanting to come out.

                              What are my options at this point?

                              Comment

                              Working...
                              X