Announcement
Collapse
No announcement yet.
Peer Review - New Carb Rebuild Tutorial
Collapse
X
-
 saltcitytattoo
so for gs1100ez bs34ss carbs ss bolts you need are 32 of m5 x 16, 8 of m5 x 12, and 8 of m6 x 16
-
 waterman
Excellent work, nothing less than I would expect from you, truly spectacular.
A couple minor notes;
1. The old tutorial showed the use of a special tool, a pick made from a wooden stick and a piece of wire used to probe the small holes in carb body as well as the needle jet emulsion tubes and pilot jets. I still find this invaluable when cleaning carbs to ensure that these passages are spotless.
2. A little discussion of the fuel valve operation, at least checking the spring rebound of the plunger and the seat for wear may be warranted. I know these are small details, but most users are only going to use one guide for reference so they may not check this out.
3. It may be important to note which jets are fully seated and which are adjustable. One would hope they paid attention to this detail when disassembling carbs but sometimes carbs were a previous owners problem.
Thanks for updating this. I predict it will downloaded worldwide.
Comment
-
 BassCliff
Hi Mr. Nessism, et al,
There is now a copy of the latest revision posted up on my little website. It's been compressed a little more and is only about 9MB in size.
Great work Ed! Thanks for sharing your expertise. You are one of the true gurus in this community. Your King-Fu is much better than mine.
Thank you for your indulgence,
BassCliff
Comment
-
 karllmt
The tutorial is great! Among other things, it's amazing how much clearer the photos are with today's technology.
I am currently re-building my carbs. ('80 GS750E) My newest tool on the workbench is my laptop, with both the old and new tutorials open. So I'm having the chance to put this to good use as you have been perfecting it. (Service manual also close at hand.)
I needed to refer to the Bloemer to be sure I had the pilot (air mixture) screw parts in the correct order. IE: screw, spring, metal washer then gasket. Might be good to add that to the new tutorial.
Question, Does the rubber gasket just hold the spring on, or does it serve another purpose?
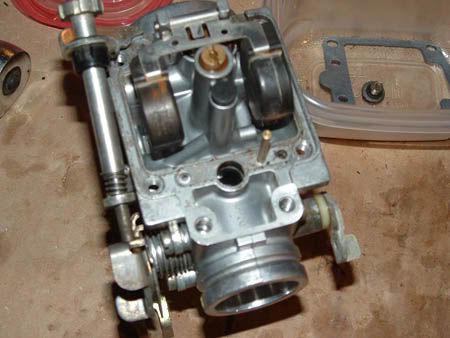
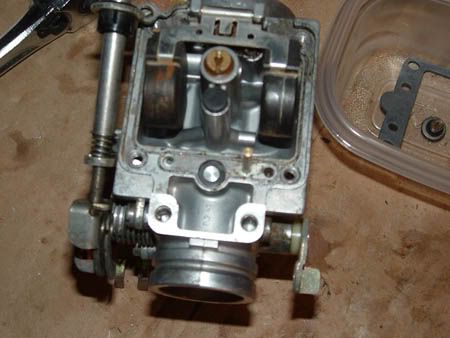
Second unanswered puzzle, don't want to hijack, maybe I should have started a new thread. During the soaking process, on 2 of my carbs, a aluminum plug fell out from the body next to the choke rod (see picture). Do I just put it back in the hole or do I need to seal it some how? Also there was (and I replaced) a rubber washer/spacer that sits on the plug. Does that need to be replaced? I don't see any reference to it anywhere. Maybe this is unique to my year/model.

 Last edited by Guest; 06-21-2011, 08:46 PM.
Comment
-
Forum LongTimerGSResource Superstar
Past Site Supporter
Super Site Supporter- Mar 2006
- 35602
- Torrance, CA
Updating to add...
- order of assembly of pilot screw (the rubber O-ring provides the seal)
- screw information
- instructions on how to inspect float needle/seat
Regarding those plugs that fell out, yes they are necessary. Clean them really well and reinstall with JB Weld or similar.Ed
To measure is to know.
Mikuni O-ring Kits For Sale...https://www.thegsresources.com/_foru...ts#post1703182
Top Newbie Mistakes thread...http://www.thegsresources.com/_forum...d.php?t=171846
Carb rebuild tutorial...https://gsarchive.bwringer.com/mtsac...d_Tutorial.pdf
KZ750E Rebuild Thread...http://www.thegsresources.com/_forum...0-Resurrection
Comment
-
 mike-s
My comments:
Page 2: BS 30 SS (30MM) carbs are used by GS 250 & 400 twin bikes.
Page 4: Maybe take a macro shot of the JIS screwdriver/screw inset on the page showing how close the fit should be.
Page 40: Maybe mention that the cross drilled holes need to be free and clear of crud as they are important for aeration of fuel.
Also perhaps consider looking into showing where each pathway goes. When fuel goes in the pilot jet, it comes out at the pilot needle taper. Same goes for the pilot air and the main emulsion air jet as they are pretty important too.
Other than that, I can't think of anything. It looks pretty thorough to me.
Comment
-
Forum LongTimerGSResource Superstar
Past Site Supporter
Super Site Supporter- Mar 2006
- 35602
- Torrance, CA
Mike,Originally posted by mike-s View PostMy comments:
Page 2: BS 30 SS (30MM) carbs are used by GS 250 & 400 twin bikes.
Page 4: Maybe take a macro shot of the JIS screwdriver/screw inset on the page showing how close the fit should be.
Page 40: Maybe mention that the cross drilled holes need to be free and clear of crud as they are important for aeration of fuel.
Also perhaps consider looking into showing where each pathway goes. When fuel goes in the pilot jet, it comes out at the pilot needle taper. Same goes for the pilot air and the main emulsion air jet as they are pretty important too.
Other than that, I can't think of anything. It looks pretty thorough to me.
Are the 30mm version the same internally? Do they take the same O-rings and such. If so, it would be easy to add them to the title page.
A photo of a phillips tip into a screw is not very descriptive. Frankly, a regular #2/#3 phillips is perfectly acceptable as well so a photo of that would look the same.
Regarding all the various passages...guess that could be added but where do I stop?Ed
To measure is to know.
Mikuni O-ring Kits For Sale...https://www.thegsresources.com/_foru...ts#post1703182
Top Newbie Mistakes thread...http://www.thegsresources.com/_forum...d.php?t=171846
Carb rebuild tutorial...https://gsarchive.bwringer.com/mtsac...d_Tutorial.pdf
KZ750E Rebuild Thread...http://www.thegsresources.com/_forum...0-Resurrection
Comment
-
Agreed. Besides, I understand there are some passages you cannot see yet must be very clean to operate correctly, right? How would a person take a picture of those?Originally posted by Nessism View PostRegarding all the various passages...guess that could be added but where do I stop?
Ed,
I'd suggest that maybe you put a deadline for accepting modifications right now and get it posted. Then, as things are found after some testing, make the changes then?Cowboy Up or Quit. - Run Free Lou and Rest in Peace
1981 GS550T - My First
1981 GS550L - My Eldest Daughter's - Now Sold
2007 GSF1250SA Bandit - My touring bike
Sit tall in the saddle Hold your head up high
Keep your eyes fixed where the trail meets the sky and live like you ain't afraid to die
and don't be scared, just enjoy your ride - Chris Ledoux, "The Ride"
Comment
-
 mike-s
As to the carbs, i'm not entirely sure about what the part #'s are and what ones are uniform and what are not, but a link to a parts schematic/list is here). It might be best for you to give it a quick check as you've gone over your document a hundred times already and are more likely to be able to get it right than i am.
Poor fit vs accurate fit, i guess i was thinking along the lines of schematic diagrams where the different angles are noticeable, etc.
As to the extra information, your a bit right about that. I was just thinking along the lines of "well my bike sucks doing x-y-z, what part do i need to re-clean to sort it?" if you get my drift. If you want to not bother with that extra bit of docco, then perhaps skip it. A suggestion I've got is to add a brief mention of having a length of 2-4lb fishing line in your bag of tricks as it is certainly softer than brass/aluminium and flexible enough to help clean pretty far into the carb passages.
Comment
-
 Matchless
Ed,
Just bumping the thread up to the top as I noticed you had updated the PDF.
Could you do a bump post after every update, then we will automatically see it, otherwise no one will know.
Thanks!
Comment
-
 JEEPRUSTY
Originally posted by Nessism View PostHave a new version with (most of) the suggested improvements. Compressed it a little too.
Will post the new link as soon as the new file is uploaded.
EDIT: deleted the old file and uploaded the new one... (see above)
Please keep the suggestions coming.
I have a a copy of Adobe that can probably do a global version of compacting the images with minimal loss of quality.
I will process the file and make it available for you if you wish.
Slide 6 Vise-Grips not Vice grips. I think the latter may be handcuffs.
Slide 21 photo is out of focus. It really sticks out from the rest.
Slide 49 makes a belated reference to the paint being removed by the dip. I know people should read the presentation fully but this should be clearly introduced in slide 48 as the mess and associated exhaustion of chemistry can be avoided.
Slide 52 Snugly not Snuggly.
Slide 59 A link to other sources for the tools should be given for those who cannot fabricate their own.
Slide 72 A side by side picture would be a better way of making a comparison. it prevents flipping from page to page and makes and instant impression.
All in all 17 meg is not huge and if this is refered to a friend on dial-up they could be assured of its quality and bite the bullet on the download.
I think you could go one step beyond and link to video snippets that show each skilled task being performed. The use of a Dremel tool and the safe removal of the float pins are a potential source for heartache.
It is a very nice piece of work. The ultimate test of its usefullness would be to observe and record the use of the document by a total newbie.
If they can perform the necessary tasks from beginning to end then the work is perfect.Last edited by Guest; 07-02-2011, 04:47 PM.
Comment
-
 BassCliff
Hi,
There is a 9 MB version of the file on my little website. It should be the latest version available. I'll update it if Ed makes any more changes.
Thank you for your indulgence,
BassCliff
Comment
.png)


Comment