Announcement

Collapse
No announcement yet.

Shelf life for old carb dip

Collapse
X
 
  • Filter
  • Time
  • Show
Clear All
new posts

    Shelf life for old carb dip

    Hey all,

    I need to replace the tensioner gasket and while I was hoping to put off the heavier work until the snowy months, I am thinking I will refresh the carbs while I have them out. (I just bought the bike in Mar, so I have no idea if/when it has been done in the last 30 years.)

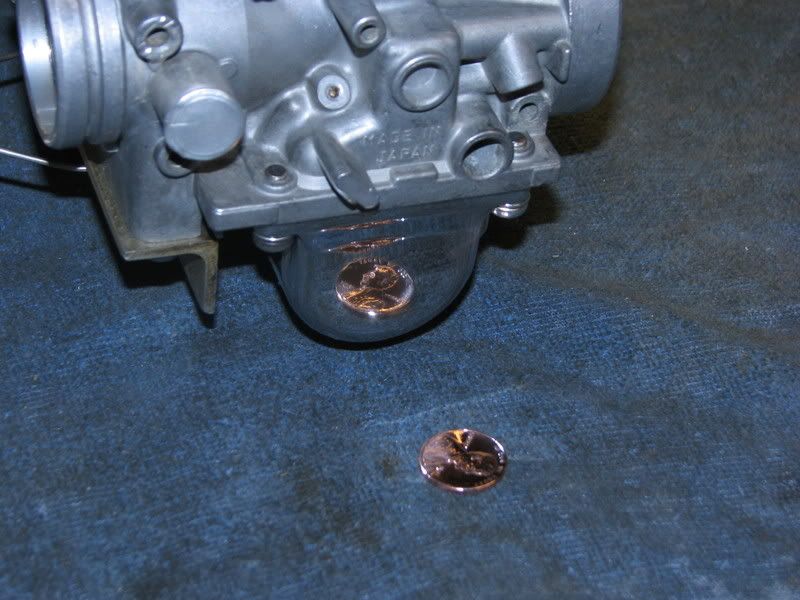
    I opened the can of carb dip last night, and it there appeared to be some brownish/copperish 'gunk' in the bottom. It is a few years old, and it has been stored in the garage since last used 3 or so years ago.

    1. Is this crap from the last carb, or has it separated?
    2. If it has separated, can I bring it back to life by stirring the hell out of it or is it no longer any good?


    Also: The bike seems to run fine, but when I got it it had a leaky petcock and there was gas in the airbox. Also, the PO said it sat for the prior year. I have replaced the petcock, but I was thinking perhaps a carb refresh might be called for as a result. I hate to give up the good riding days to come when the bike is running well. Is this overkill?

    #2
    It's supposed to be separated, don't shake it up. There is some relatively harmless stuff floating on top, to seal in the real nasty poisonous powerful stuff underneath. It should be good for several years.


    Life is too short to ride an L.

    Comment


      #3
      Thanks!
      It's almost a shame. I'll have to find something else to huff now.

      So, anyone want to talk me out of doing the rebuild until the winter arrives? I am a fan of good maintenance, but I prefer a good ride...

      Comment


        #4
        If you're still wanting to ride but believe your carbs need work you can always do what I did and clean all the components you can get to without removing them from the rack.

        My GS750 had sat for 2 years (naughty) and didn't run all that well when I bought it so I pulled the carb bank out and and cleaned everything I could get to that did not mess with synchronization. The excellent cleaning instructions written by John Bloemer made it easy.

        I ended up pulling the cv boot / throttle valve to clean the jet needles. Also pulled the main jet and the drove out the needle jet as well as the pilot jet. Pulled the floats and cleaned the choke pickup tube as well. All the tiny holes were cleaned with a homemade wire tool.

        It's not a full on cleaning but it did resolve a lot of problems and the bike can be ridden now for the balance of the season. This winter a full blown carb cleaning with be done. Again it's not a full remedy but if you want to ride the rest of the season it may help you out.

        good luck

        Comment


          #5
          Why do it twice when a good carb cleaning takes only 4 full days and that is waiting for each carb to soak properly. The actual work time on it is maybe 5 or 6 hours. The rest of the time you can be adjusting the valves, cleaning the connectors, installing the air filter, etc.

          Do it right the first time and you'll have a longer time to ride throughout the winter and well into next year.
          Cowboy Up or Quit. - Run Free Lou and Rest in Peace

          1981 GS550T - My First
          1981 GS550L - My Eldest Daughter's - Now Sold
          2007 GSF1250SA Bandit - My touring bike

          Sit tall in the saddle Hold your head up high
          Keep your eyes fixed where the trail meets the sky and live like you ain't afraid to die
          and don't be scared, just enjoy your ride - Chris Ledoux, "The Ride"

          Comment


            #6
            Thanks for the input, guys.

            I decided to bite the bullet and dive into the snowballing repairs to be done. (tensioner rebuild leads to cycleorings-style refresh for the carbs while they are out, leads to purchase of a carb sync tool, leads to carb boot/intake o-ring replacement, leads to valve shim check while the area is "open" and I'm waiting for the carbs to finish their bath...)

            I keep telling myself that this is the brunt of the maintenance and I'll be that much more "sure" the bike will get me where I want to go. Also, the reason I got a 30 year old bike (besides being a cheap ass) was to learn on. My dream has come true!

            Comment


              #7
              Well, the tensioner went in well enough, but the carbs definitely need cleaned. There was a large amount of brown **** in the float bowl (I've only torn one apart right now). There was so much that nothing even came out when I pulled the plug in the bottom. I'll try to post a pic when I get my crap in one sock for the day.

              However, on one of the writeups on BassCliff's site, it recommends against dipping the outer 2 bowls, because it would strip the protectant that is on them. How are these normally cleaned, then? After seeing all of the gunk in there, I want to make sure it is clean, but I don't want to ruin the bowl's appearance in the process. I was thinking of carb cleaner (spray) but I'm not sure that isn't the same thing. I also though about degreaser, or WD-40.

              Thanks for any tips you guys can share.

              —Chris

              Comment


                #8
                Dip them, the choke feed passage in the bowl needs to be clear for the choke to work. You can polish the bowl later if you are so inclined, but they usually come out fine.
                It probably cloud be cleaned well enough with spray carburetor cleaner, unlike the carb bodies.


                Life is too short to ride an L.

                Comment


                  #9
                  Originally posted by glenlloyd View Post
                  If you're still wanting to ride but believe your carbs need work you can always do what I did and clean all the components you can get to without removing them from the rack.
                  ... I pulled the carb bank out and and cleaned everything I could get to that did not mess with synchronization. The excellent cleaning instructions written by John Bloemer made it easy. ... It's not a full on cleaning but it did resolve a lot of problems and the bike can be ridden now for the balance of the season.
                  You are correct, it's NOT a "full on cleaning". In fact, it's only COSMETIC cleaning, as it won't do a single thing to make it run any better.


                  Originally posted by Gibbelstein View Post
                  However, on one of the writeups on BassCliff's site, it recommends against dipping the outer 2 bowls, because it would strip the protectant that is on them. How are these normally cleaned, then?
                  They are cleaned by dipping them, like everything else. The only difference in treatment would be after you get them out of the "dip".

                  My float bowls usually make a detour past the buffing wheel.


                  Then, if the carbs get painted, too, they might look like this:

                  sigpic
                  mine: 2000 Honda GoldWing GL1500SE and 1980 GS850G'K' "Junior"
                  hers: 1982 GS850GL - "Angel" and 1969 Suzuki T250 Scrambler
                  #1 son: 1986 Yamaha Venture Royale 1300 and 1982 GS650GL "Rat Bagger"
                  #2 son: 1980 GS1000G
                  Family Portrait
                  Siblings and Spouses
                  Mom's first ride
                  Want a copy of my valve adjust spreadsheet for your 2-valve per cylinder engine? Send me an e-mail request (not a PM)
                  (Click on my username in the upper-left corner for e-mail info.)

                  Comment


                    #10
                    Well, the parts (except for the bowl) are soaking right now. I may end up dipping it separately. I don't have access to a buffing wheel, so I'd have to make due with a hand polish, or I'd just deal with the appearance. They will just look like the middle 2, correct? It's not quite a show bike.

                    Also, here is a pic of the bowl in question. That lump of stuff was a tightly packed "cake" in the drain plug area.


                    It felt kind of like clay. Is this sediment from the gas tank? The inside (what little I can see) did not look that rusty when I pulled it off to change the petcock. Anyone have anything similar in their carbs?

                    Thanks again for the input, all.

                    —Chris

                    Comment


                      #11
                      Put it in the dip to soak as it will chew up most of that. Then you can spray it out with a can and clean up from there.
                      Cowboy Up or Quit. - Run Free Lou and Rest in Peace

                      1981 GS550T - My First
                      1981 GS550L - My Eldest Daughter's - Now Sold
                      2007 GSF1250SA Bandit - My touring bike

                      Sit tall in the saddle Hold your head up high
                      Keep your eyes fixed where the trail meets the sky and live like you ain't afraid to die
                      and don't be scared, just enjoy your ride - Chris Ledoux, "The Ride"

                      Comment


                        #12
                        Argh.

                        OK, well I made some progress and had a setback. I foolishly put the choke plunger in the carb dip. (The piece that moves in and out to open and close the choke). This, of course caused the rubber 'bushing' in the end to swell and come apart. I am looking at the partshark fiche and I cannot seem to make out what part this is. Has anyone done this before? Can I just replace the rubber insert, or do I need a whole new plunger? Can anyone point me in the right direction for this piece either way?

                        Ooh! Also: Are the floats a solid foam-type-stuff? the float in #2 appears to have a decent sized hole ( actually looks like a casting goof). I assumed the floats were hollow, but with a hole that size, I think it would have run extremely rich, if at all.
                        Last edited by Guest; 08-09-2011, 10:03 PM.

                        Comment


                          #13
                          Still not able to identify the part number, but I did find a few on ebay. $20, seriously?
                          Last edited by Guest; 08-10-2011, 09:19 AM. Reason: Terrible Spelling

                          Comment

                          Working...
                          X