.png "Powered by vBulletin")
At under 1000 miles, you'll likely find clean fuel bowls, and you will be lulled into thinking all is well so why bother! Clean the carbs properly now , keep stabilized fuel in them during downtimes, and you probably won't have to clean them again EVER. This does not apply if the feds mandate 15% ethanol.
-
1981 gs650L
"We are all born ignorant, but you have to work hard to stay stupid" Ben Franklin -
You are correct sir...
Yep..Originally posted by tom203 View Post
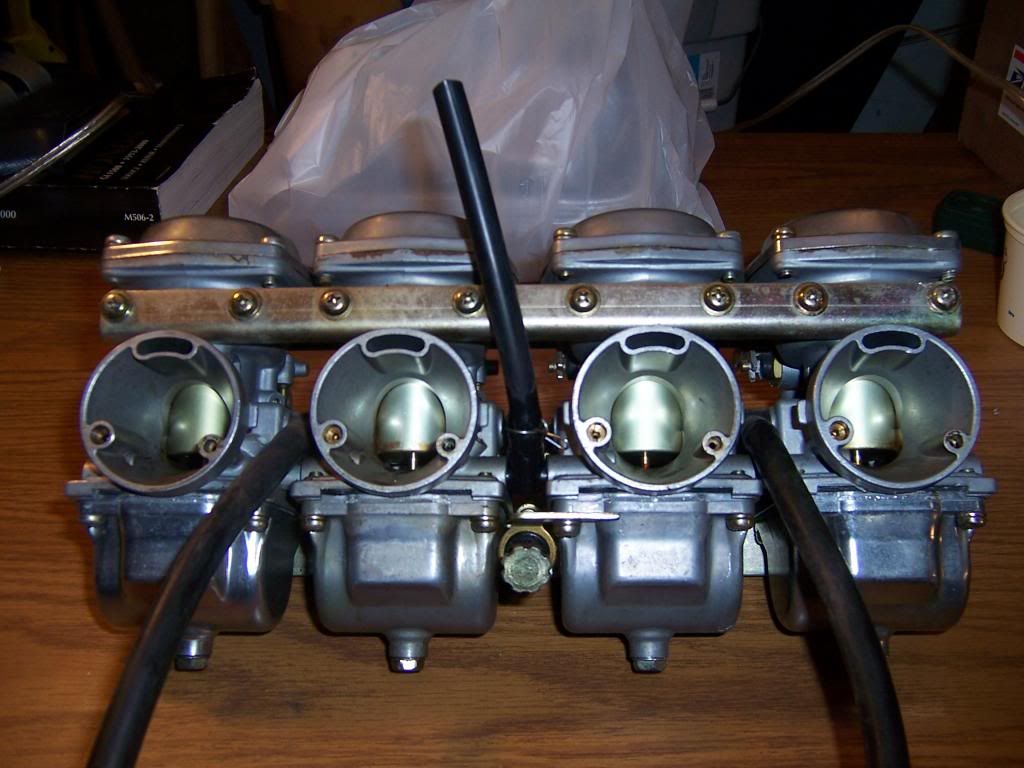
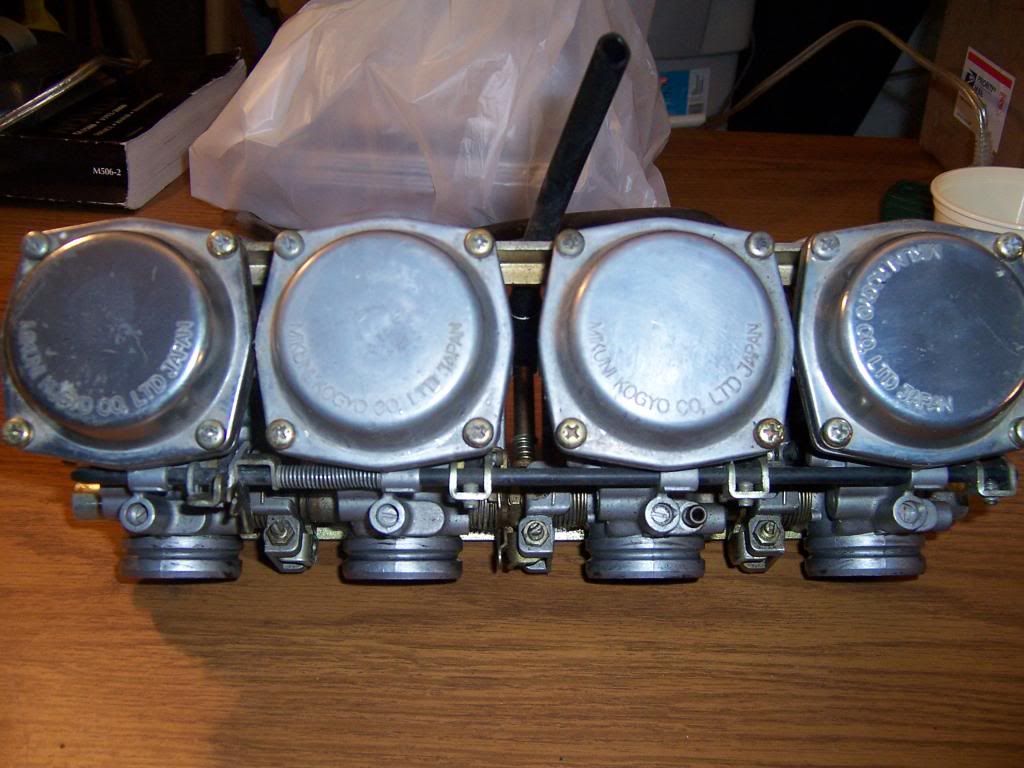
I found some pretty clean fuel bowls...
And I was thinking...Maybe I won't have to break these carbs apart...
But the slides were ALL stuck with some varnish like stuff...
And I know I will now learn how to take these carbs all the way down and clean them properly..
The orings and new screws are on order and on the way. The carb dip is standing by. All I need to do it get them torn down and then back together...
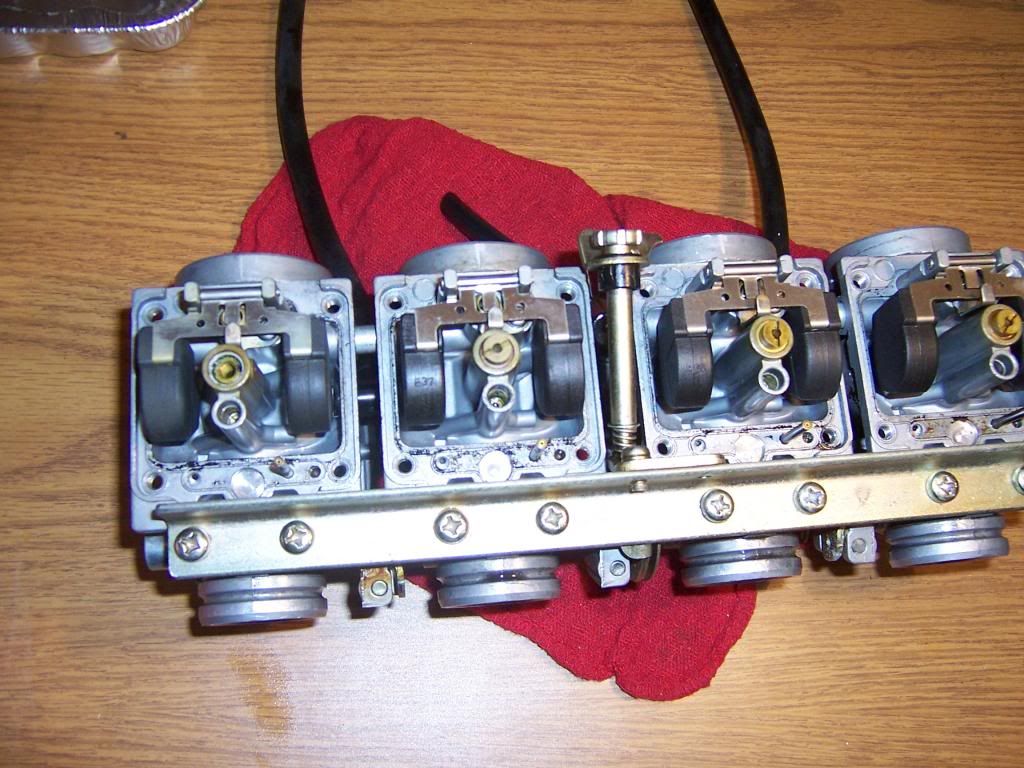
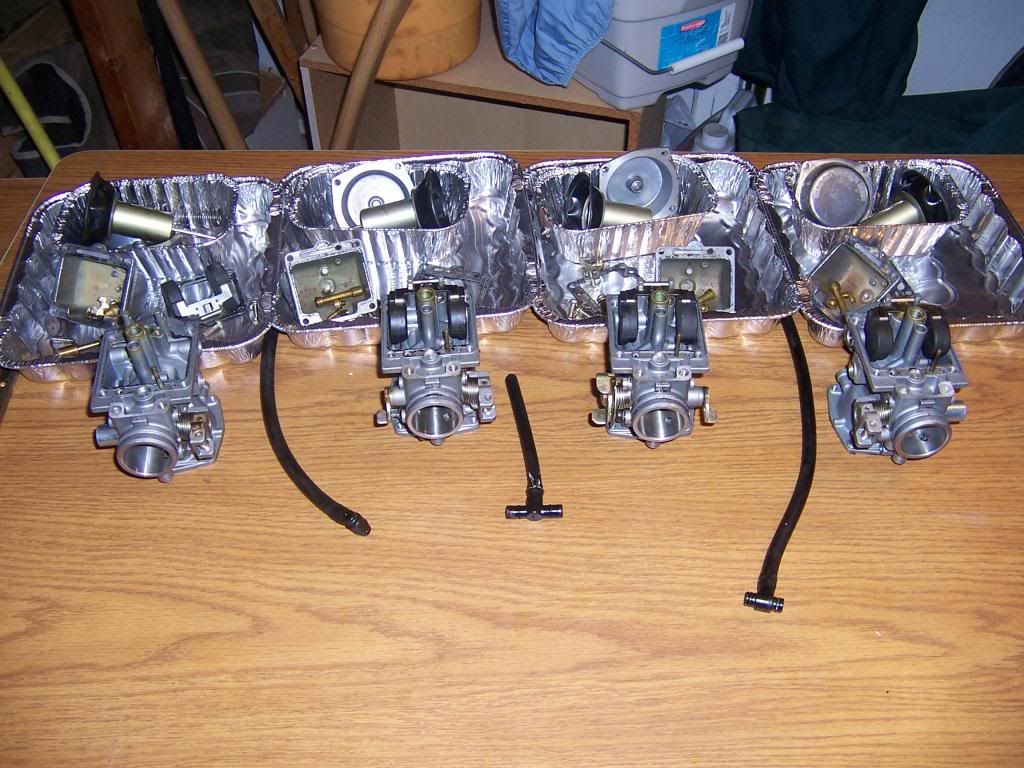
Pictures as promised --
Comment
-
Did you leave those idle mixture screws in there to test us ? and did you find little rubber plugs over pilot screws?1981 gs650L
"We are all born ignorant, but you have to work hard to stay stupid" Ben FranklinComment
-
Originally posted by tom203 View Post No test -- that's as far as I got last night...
I work a full time job, and a paart time job, and a 1/4 time job as well as have a family who want to se me once in a while...LOL..
My time is limited at best...So I plan to chip away at this a little at a time (2-3 hours in the evening) over the next week or so...
It's 39 degrees and raining all this week anyway so I have no riding yet...
I also have a Goldwing in pieces in the garage waiting for parts that come soon ( I hope) so I at least have 1 rider - the other Wing is running but it is my sons bike...")
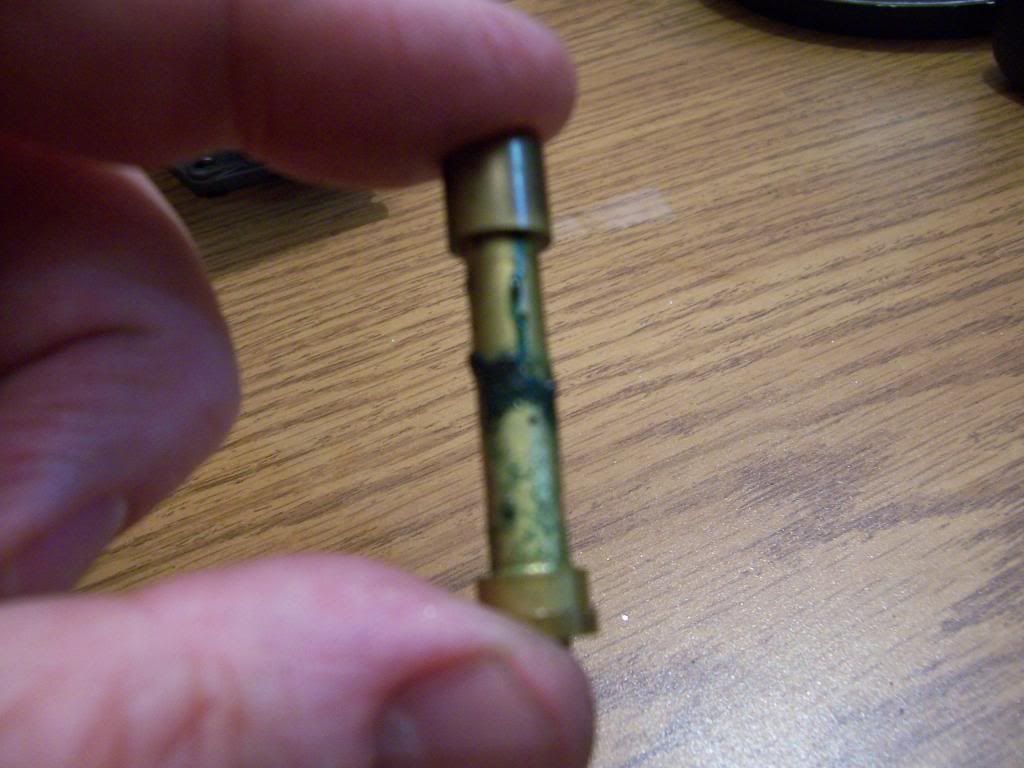
I DID find the rubber plugs...and pulled them out...I need a new smaller screw driver to access inside the hole to remove the jet in there...going to the store later today...
Are the screws schown in the 4th picture (idle screws?) the oines that would be behind the cap that needs to be screwed out..? Becasue what you see is how it was ...
Comment
-
Notice the color
If you look closely at the pictures you can see the golden brown patina from the old varnished fuel ...ever slide was stuck in place by this stuff...
Comment
-
Hi,
I know a little of what it's like to work three jobs and find time for family and everything else you want to do.
Keep up the good work. There are two good carb cleaning guides on my website. They are PDF format so you can download them for local viewing and/or printing. Those carbs should clean up cery nicely. Be very careful when removing the float bowl pins.
Thank you for your indulgence,
BassCliffComment
-
The "idle mixture control screws" sometimes mistakenly referred to as "air screws" or "pilot screws", are the ones at the bottom of the picture. When the carbs are installed on the bike, they are directly over the outlet of the carbs. Yes, they are normally under caps to seal them, but somebody has already saved you the effort of removing them.Originally posted by Wingsconsin View Post
It is going to take 10 or 15 turns to get them out, so don't give up. There will be the screw, a spring, a very small washer and an o-ring. Very likely, only the screw will come out, everything else will be stuck inside the carb. The easiest way to remove them is with a drywall screw. Push it in lightly, give it about 1/8 turn, pull it out. You will likely only get the spring the first time, and will have to repeat for the washer and o-ring.sigpic
mine: 2000 Honda GoldWing GL1500SE and 1980 GS850G'K' "Junior"
hers: 1982 GS850GL - "Angel" and 1969 Suzuki T250 Scrambler
#1 son: 1986 Yamaha Venture Royale 1300 and 1982 GS650GL "Rat Bagger"
#2 son: 1980 GS1000G
Family Portrait
Siblings and Spouses
Mom's first ride
Want a copy of my valve adjust spreadsheet for your 2-valve per cylinder engine? Send me an e-mail request (not a PM)
(Click on my username in the upper-left corner for e-mail info.)Comment
-
Okay - This is making more sense to me...Originally posted by Steve View Post
The previous owner said "We had it running 2 years ago" but didn't elaborate. I think they tinkered with the carbs and screws but never cleaned them properly. The slide were stuck, a float needle is stuck and the varnish from 30 years old gas is coating everything making it sticky and difficult to operate..
 I would bet they took off the old caps and fiddled with the pilot screws to try to get it running - I found evidence of the carb slide tops haveing been removed as 1 scew was badly stuck and stripped --I worked on that one scew for 1/2 an hour - It took a vise-grips to get it started to back out...
It seems the P.O. wasn't willing to do the carb clean up correctly - so I bought it cheap as a non-runner -
Thanks BassCliff & Steve for the words of encouragement . I am learning every minute as I do this carb cleaning. I downloaded the tutorials to my tablet today so tonight I will have the ready reference nearby. I did most of the disassembly so far from memory of reading these previously.
Tonight I will break them apart fully and get on with the carb dip soaking...Is there any advantage to getting an ultrasonic cleaner machine..? That seems be something others like to do to really clean the carb parts...?
Next question - IN the carb dip chemical - Is there any problem dipping brass parts and aluminum carb bodies at the same time..? Will they interact and discolor..?
Comment
-
Don't just grab any screwdriver to attack the pilot jet and the idle mixture screws- you need one that fits them completely (all the way across slot), so you will likely have to grind off the heel of screwdrivers to fit inside the "tunnels".
Consider soaking them with decent rust penetrant (not wd-40), before you attack. Heat might also help if they don't appear to budge as carb body will expand more than brass screw.1981 gs650L
"We are all born ignorant, but you have to work hard to stay stupid" Ben FranklinComment
-
No problem dipping different metals at the same time, just make sure you have no rubber pieces in there that you plan to re-use.Originally posted by Wingsconsin View Post
Give me a call in the evening (after 4:30 EDT) if you need help (with the carbs ).
).
.sigpic
mine: 2000 Honda GoldWing GL1500SE and 1980 GS850G'K' "Junior"
hers: 1982 GS850GL - "Angel" and 1969 Suzuki T250 Scrambler
#1 son: 1986 Yamaha Venture Royale 1300 and 1982 GS650GL "Rat Bagger"
#2 son: 1980 GS1000G
Family Portrait
Siblings and Spouses
Mom's first ride
Want a copy of my valve adjust spreadsheet for your 2-valve per cylinder engine? Send me an e-mail request (not a PM)
(Click on my username in the upper-left corner for e-mail info.)Comment
-
Why not WD-40 ..?Originally posted by tom203 View Post
What are the recommendations instead...?
Thanks for following this thread also and your input...
Comment
-
The classic fluid that everybody knows as WD-40 is not really a rust penetrant or a penetrating fluid in general.Originally posted by Wingsconsin View Post
It is designed, and sold, as a product that displaces water, hence its hame: Water Displacement - 40th forumula.
However, they have a new line of products that does include a rust penetrant.
Until someone tries one of them and reports it here, we will probably continue to recommend PB Blaster, Kroil and a few others, including a home-brew mix that is a 50-50 mix of ATF and acetone.
.sigpic
mine: 2000 Honda GoldWing GL1500SE and 1980 GS850G'K' "Junior"
hers: 1982 GS850GL - "Angel" and 1969 Suzuki T250 Scrambler
#1 son: 1986 Yamaha Venture Royale 1300 and 1982 GS650GL "Rat Bagger"
#2 son: 1980 GS1000G
Family Portrait
Siblings and Spouses
Mom's first ride
Want a copy of my valve adjust spreadsheet for your 2-valve per cylinder engine? Send me an e-mail request (not a PM)
(Click on my username in the upper-left corner for e-mail info.)Comment
-
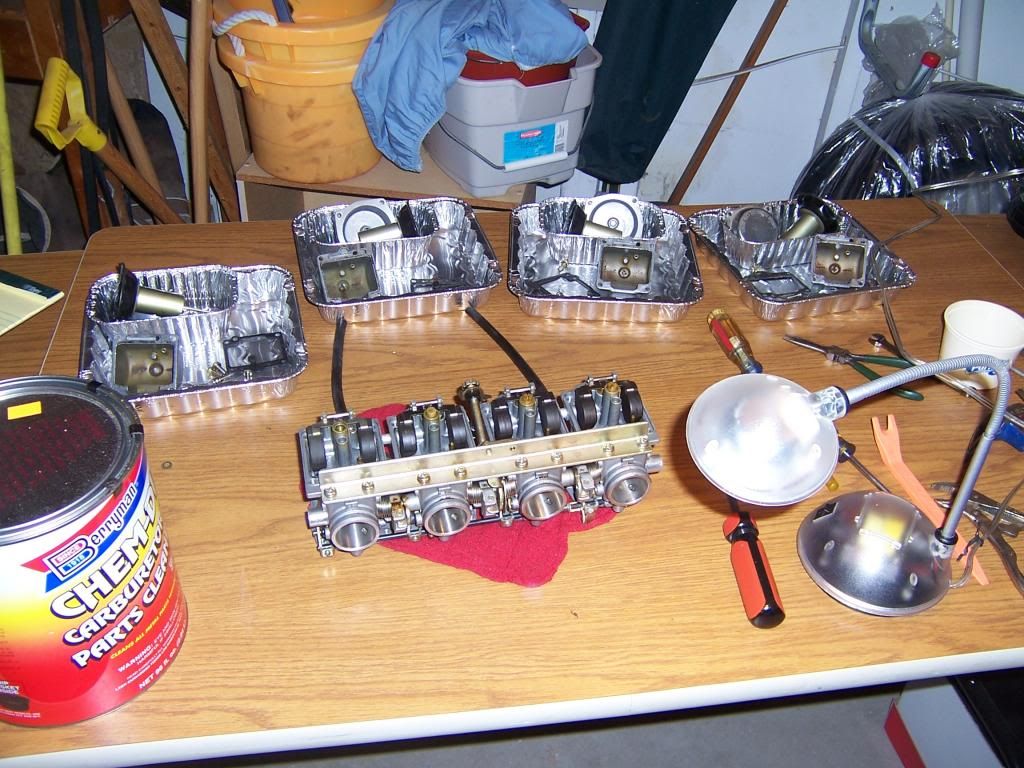
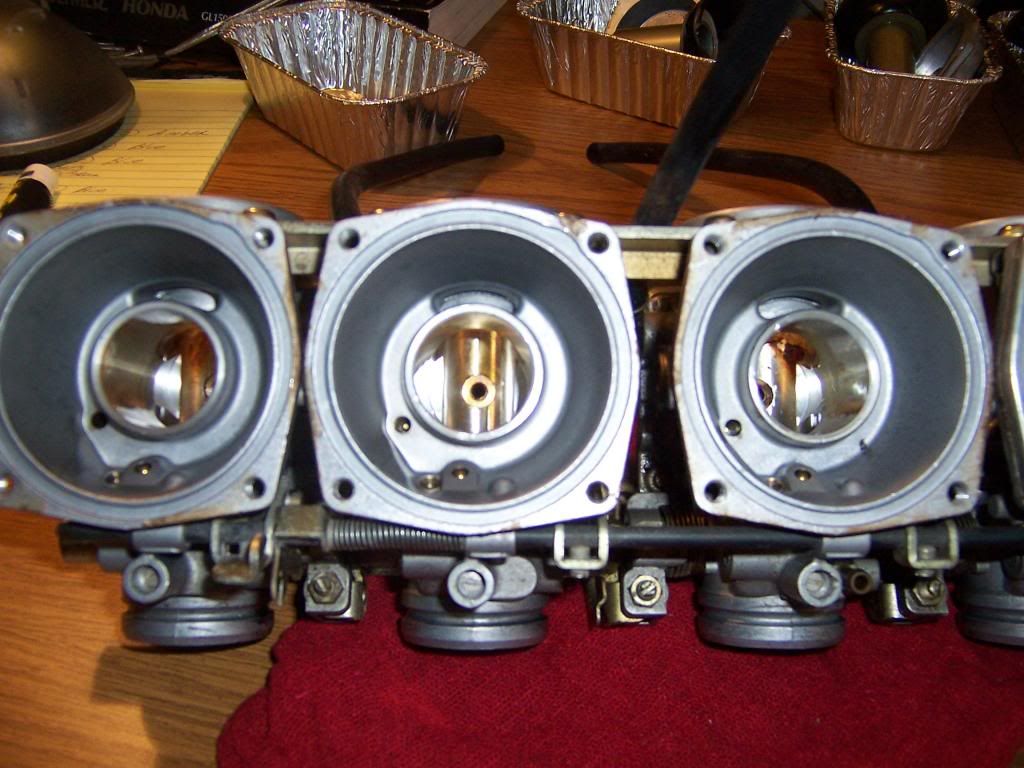
Tonights progress - Made some headway
Thanks to the advice here and my ability to read the great tutorials found on GS Resources I was able to seperate the carbs, and have #1 entirely taken apart at this time. Found some pretty ugly green stuff on the needle jets ...Lots of fine varnish like golden brown patina on metal parts...and some black goo (?) that I think was once fuel or ...
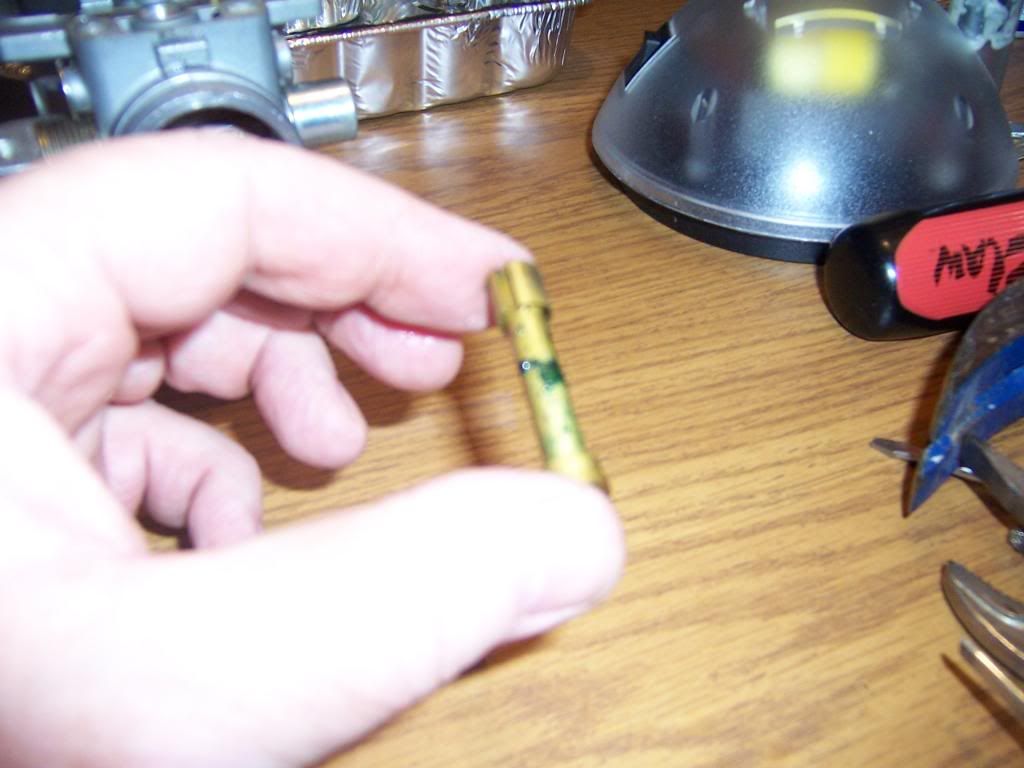
Question -- The brass "straw" sticking up - Does it stay or come out for cleaning..? Right now it is still in the carb body...
Pictures -
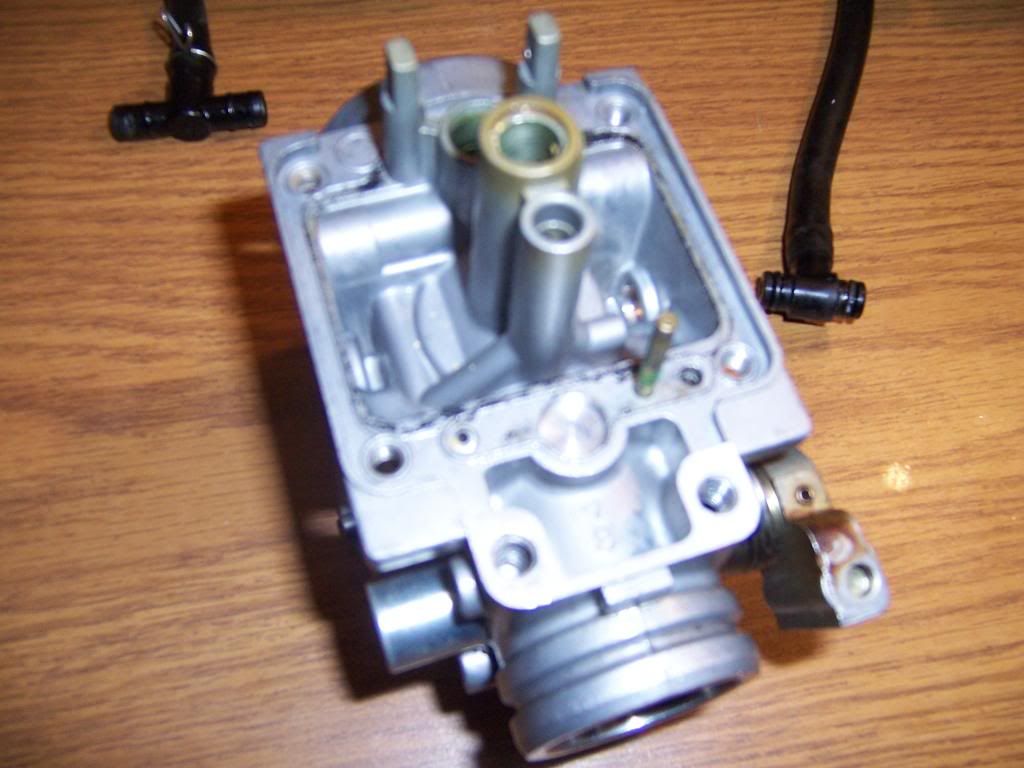
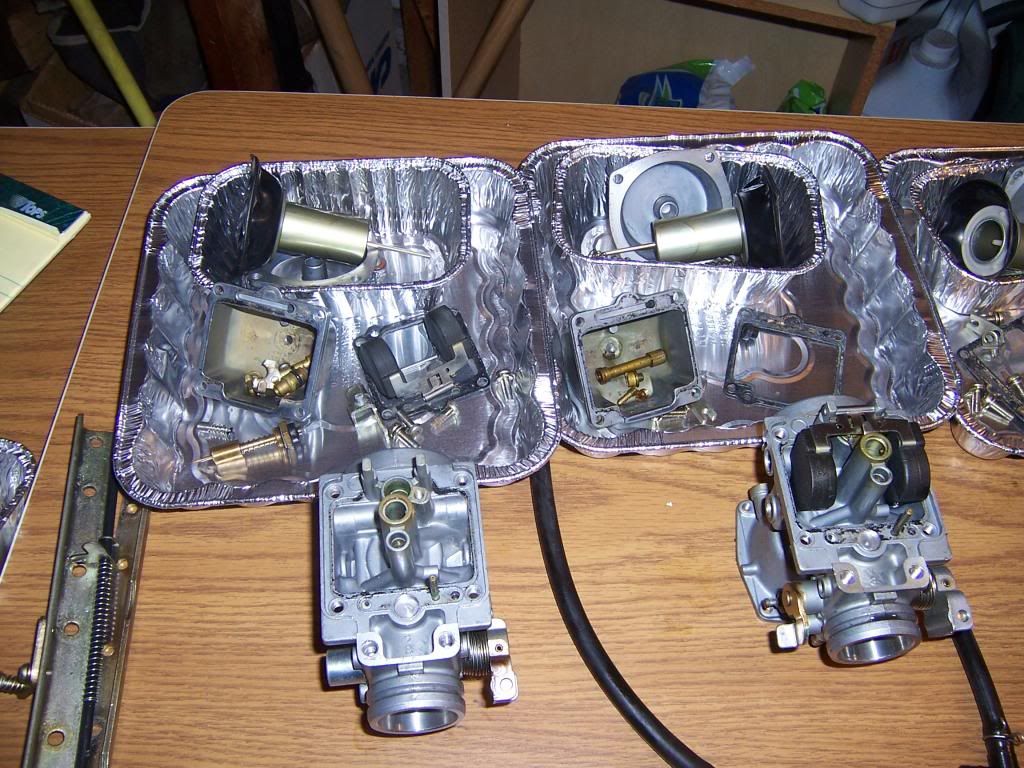
Notice how I am trying to stay as organized as possible - I even am taking pictures as I disassemble t in hopes to aid my reassembly process if needed...A few more days at this pace and I will have a running 650..!
For anyone looking this thread over - This is MY FIRST ever carb cleaning. So that is why I am so cautious. But thanks to the gang here I am confident I will get it done properly.
I hope all these pictures don't annoy anyone...
Comment
-
If it's metal....dip it! Organization is a good thing when it comes to carbs.
cgsigpic
83 GS1100g
2006 Triumph Sprint ST 1050
Ohhhh!........Torque sweet Temptress.........always whispering.... a murmuring SirenComment
-
I might be a little late with these, but Eric asked me to post a few video links he made that might help you out.
http://www.youtube.com/watch?v=N3jDHEoevZg
http://www.youtube.com/watch?v=peZx6UeOVmI
http://www.youtube.com/watch?v=asz2-qbbv9E:cool:GSRick
No God, no peace. Know God, know peace.
Eric Bang RIP 9/5/2018
Have some bikes ready for us when we meet up.Comment
Comment