Announcement

Collapse
No announcement yet.

23 year old tank with gas still in it...gas cap stuck! (Solved!)

Collapse
X
 
  • Filter
  • Time
  • Show
Clear All
new posts

    #16
    Originally posted by mikerophone View Post
    Another great tip, thanks. I've heard of people using toilet bowl cleaner, but never have, does it harm paint?
    I don't know !
    Of all the times I used it , I was very cautious, with gas cap on , and other assorted orifices plugged up, so I didn't get any on the paint.
    I would think that yes, it might do something to the paint if you get it on there....? But honestly, the stuff works better than anything else I 've used from tumbling in the dryer wrapped in blankets ( no the wife was NOT HOME), to nails and gravel with solvent etc etc.

    Comment


      #17
      Throw a bit on your worst neighbors truck paint and test it first....LOL
      MY BIKES..1977 GS 750 B, 1978 GS 1000 C (X2)
      1978 GS 1000 E, 1979 GS 1000 S, 1973 Yamaha TX 750, 1977 Kawasaki KZ 650B1, 1975 Honda GL1000 Goldwing, 1983 CB 650SC Nighthawk, 1972 Honda CB 350K4, 74 Honda CB550

      NEVER SNEAK UP ON A SLEEPING DOG..NOT EVEN YOUR OWN.


      I would rather trust my bike to a "QUACK" that KNOWS how to fix it rather than a book worm that THINKS HE KNOWS how to fix it.

      Comment


        #18
        Hi, im with the previous replys who have said, push down hard on the gas cap while gently turning the key, it works for me!

        Comment


          #19
          Hope for success or at least more soaking tomorrow!

          Originally posted by chuck hahn View Post
          The only way to get a solvent to the two latches that grip the inside of the filler neck is to take out the sending unit and the petcock ( so said solvents dont ruin either one ) and dump in a bunch and set the tank on its top.

          Now what solvent?? Cant be anything that will eat plastic as the bottom cap part of the cap is plastic. I would use 8% vinegar of it was me. Eats the crud and rust but will not harm plastics, rubber, or paint. Dump in half a gallon and set the tank on its top for a few days.

          And vinegar is a great soak for the sending unit once its out. Cover it with vinegar and soak over night. Remove the cover and GENTLY clean the contacts with a soft tooth brush and Qtips.

          EDIT...if youre gonna replace the cap..which is probably a good idea seeing the seals are hard to find..then some acetone will eat the plastic inside cap and the entire thing will fall apart in maybe 15 minutes or so. remove rest of cap. Be sure to not get acetone on the paint though..
          Thanks Chuck, I hope I can just go the vinegar route, and not have to go to the acetone extent!

          Originally posted by barnbiketom View Post
          I 've used from tumbling in the dryer wrapped in blankets ( no the wife was NOT HOME), to nails and gravel with solvent etc etc.
          Thanks Tom, BTDT! (Been There Done That) Just don't tell the wife, but she somehow found out anyway, now I just take it to the laundromat, people give a few funny looks when it's banging around and the scraping sounds of the bolts, screws and/or ball bearings inside.

          Originally posted by Chromedome View Post
          Hi, im with the previous replys who have said, push down hard on the gas cap while gently turning the key, it works for me!
          Thanks Chromedome, this tank hasn't been opened in 23 years, pushing down works great on less "aged" tanks that have been opened in at least the last decade. Both of my older 750 (project bikes) tanks came with old gas in them, but they had been registered/run in the last 7 years and opened with the standard amount of pushing down and turning of the key. This key won't turn more than 45 degrees, it needs to turn 90 (1/4 turn) to disengage the spring loaded tangs.
          ----------------------------------------------------------------
          2014 BMW F800GSA | 1981 GS850GX | 1982 GS750T (now the son-in-laws) | 1983 GS750ES | 1983 Honda V45 Magna (needs some love) | 1980 Yamaha GT80 and LB80 "Chappy" | 1973 and 1975 Honda XL250 projects

          Comment


            #20
            Didn't get the chance to upload these pics yet, been busy, but I got it open. Vinegar, tapping and more tapping, lube in the key slot and a couple of days soaking and more tapping wiggling and soaking and it started to budge.

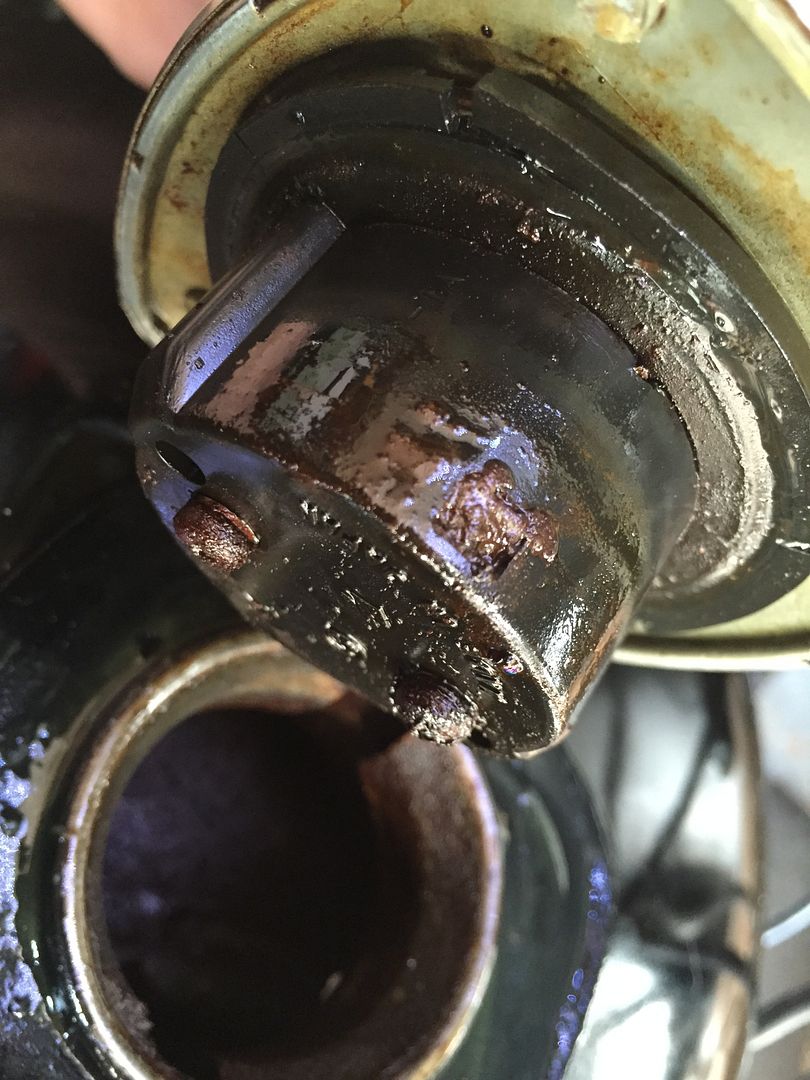
            Here's what the inside of the cap looked like when I finally got it off, not as bad as Frank Z's above but it was gummed up pretty good:

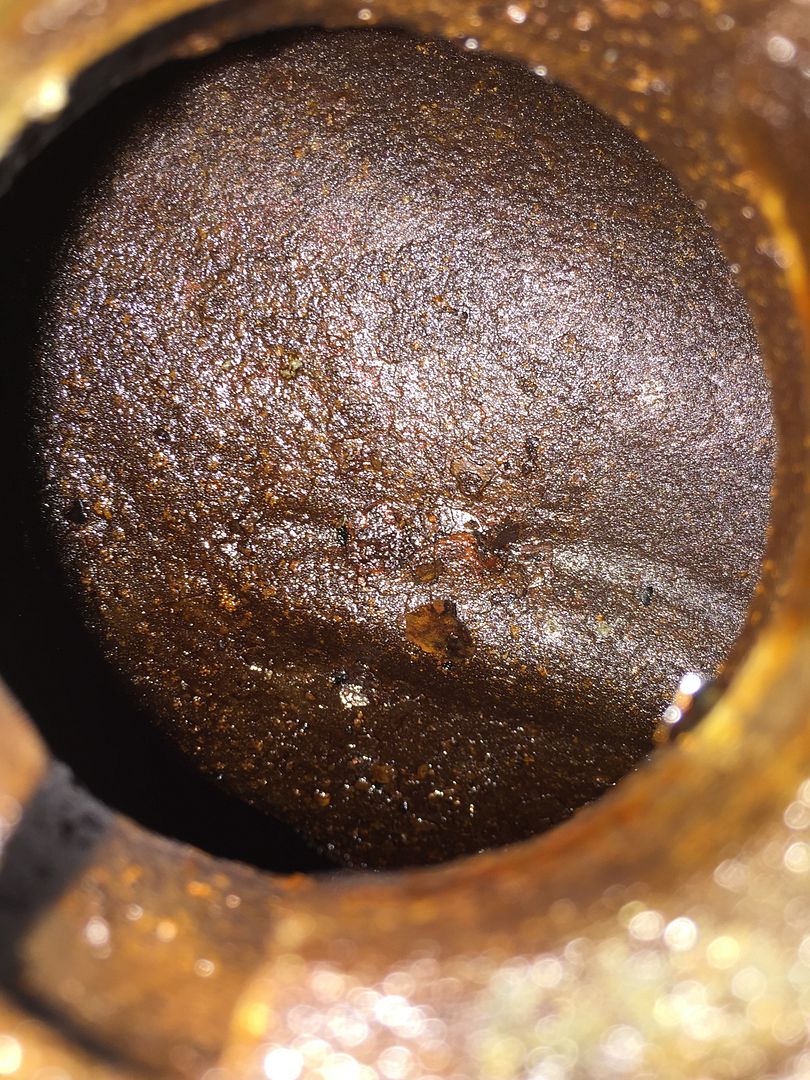
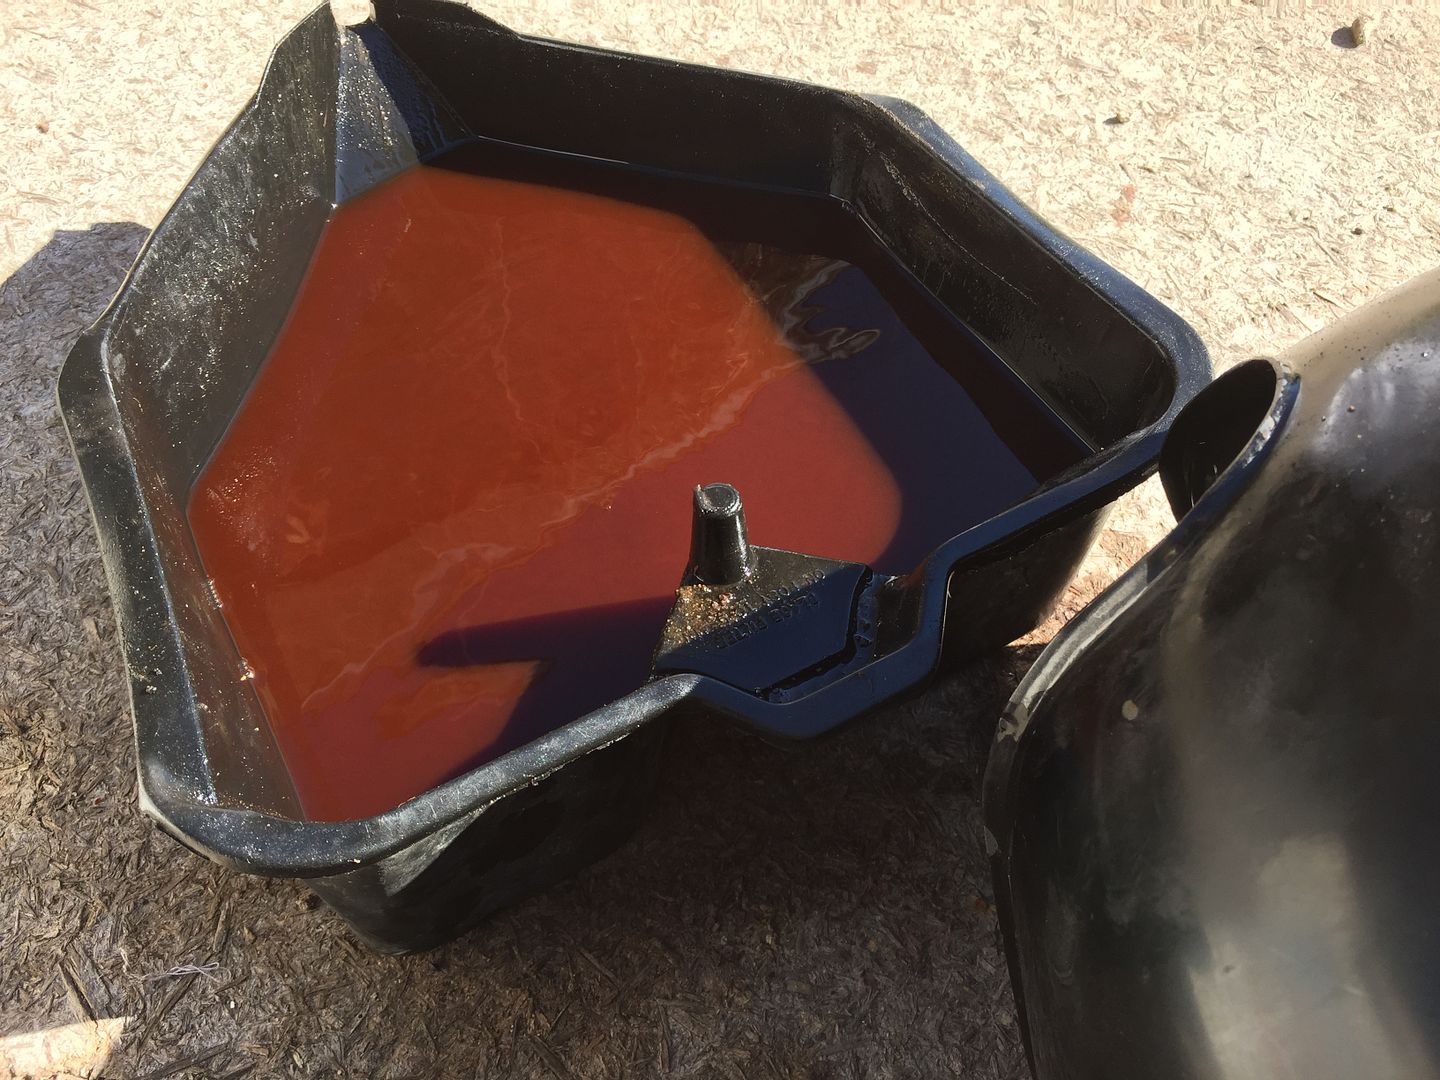
            The inside of the tank was nasty with no visible metal surface and smells like 23 year old turpentine, but I only got about a quart of think nasty aged gas out:


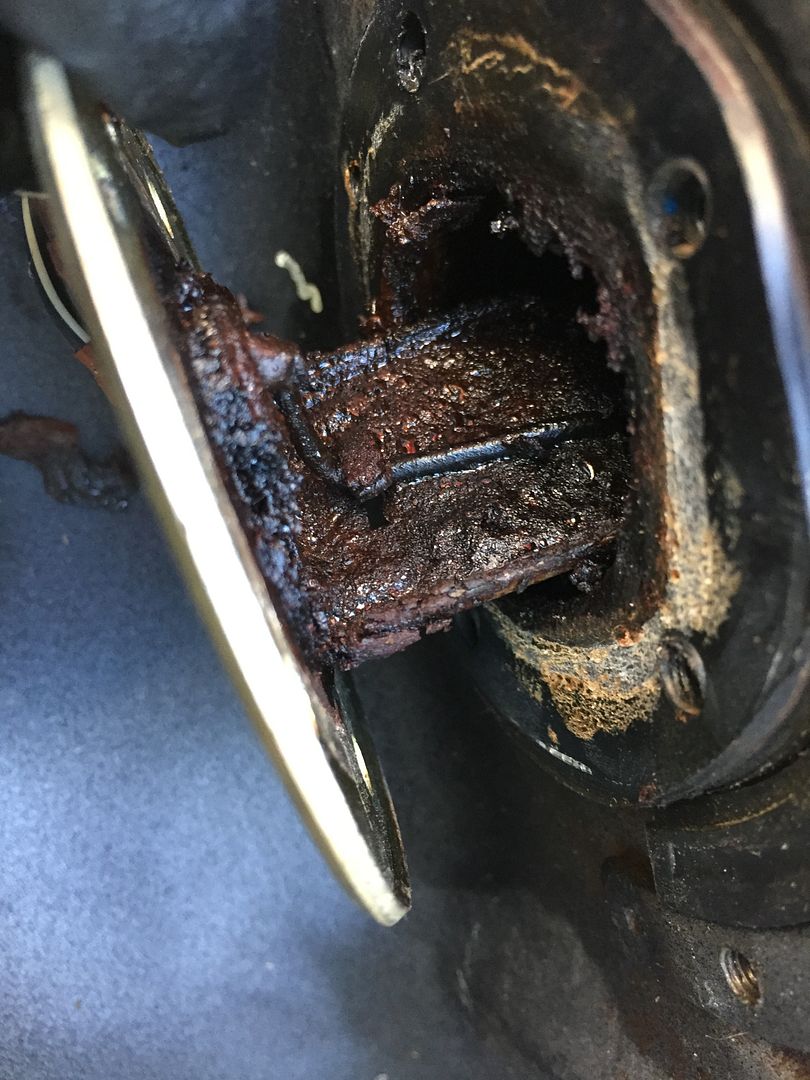
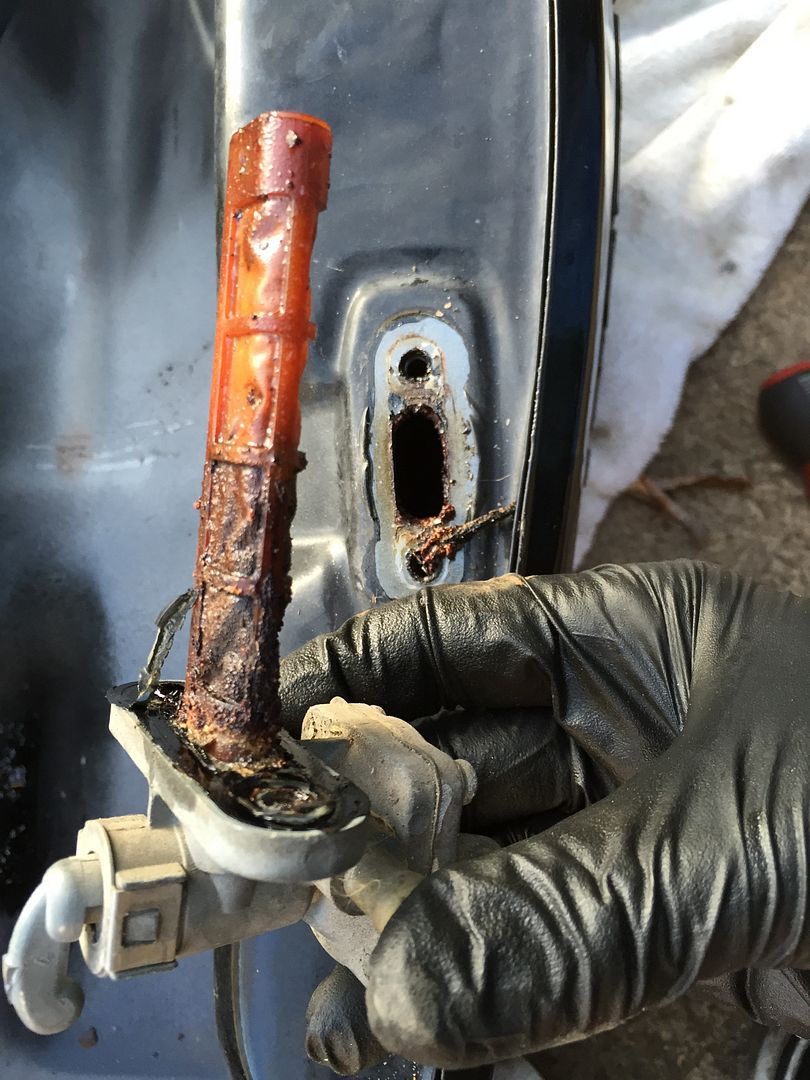
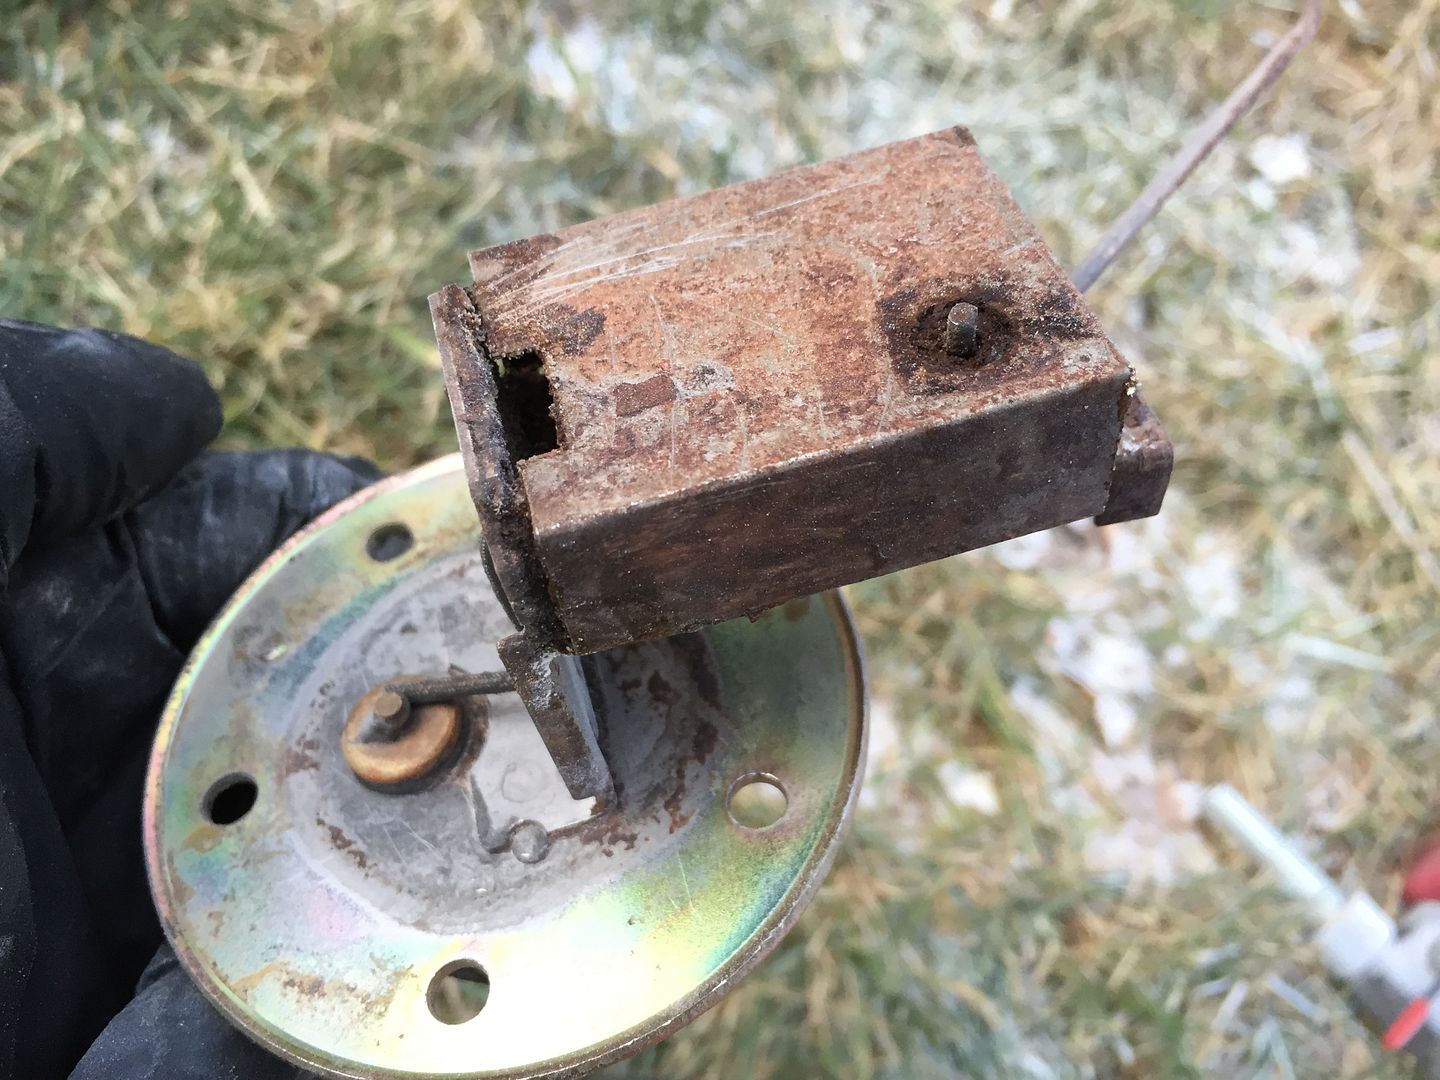
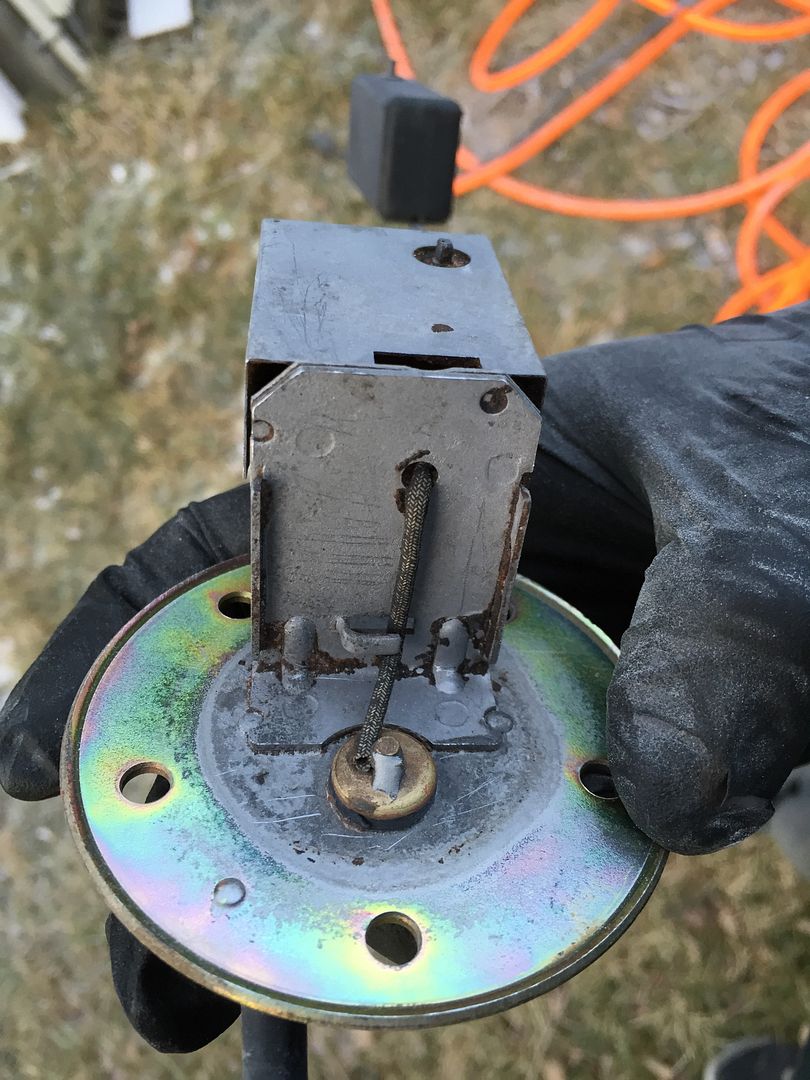
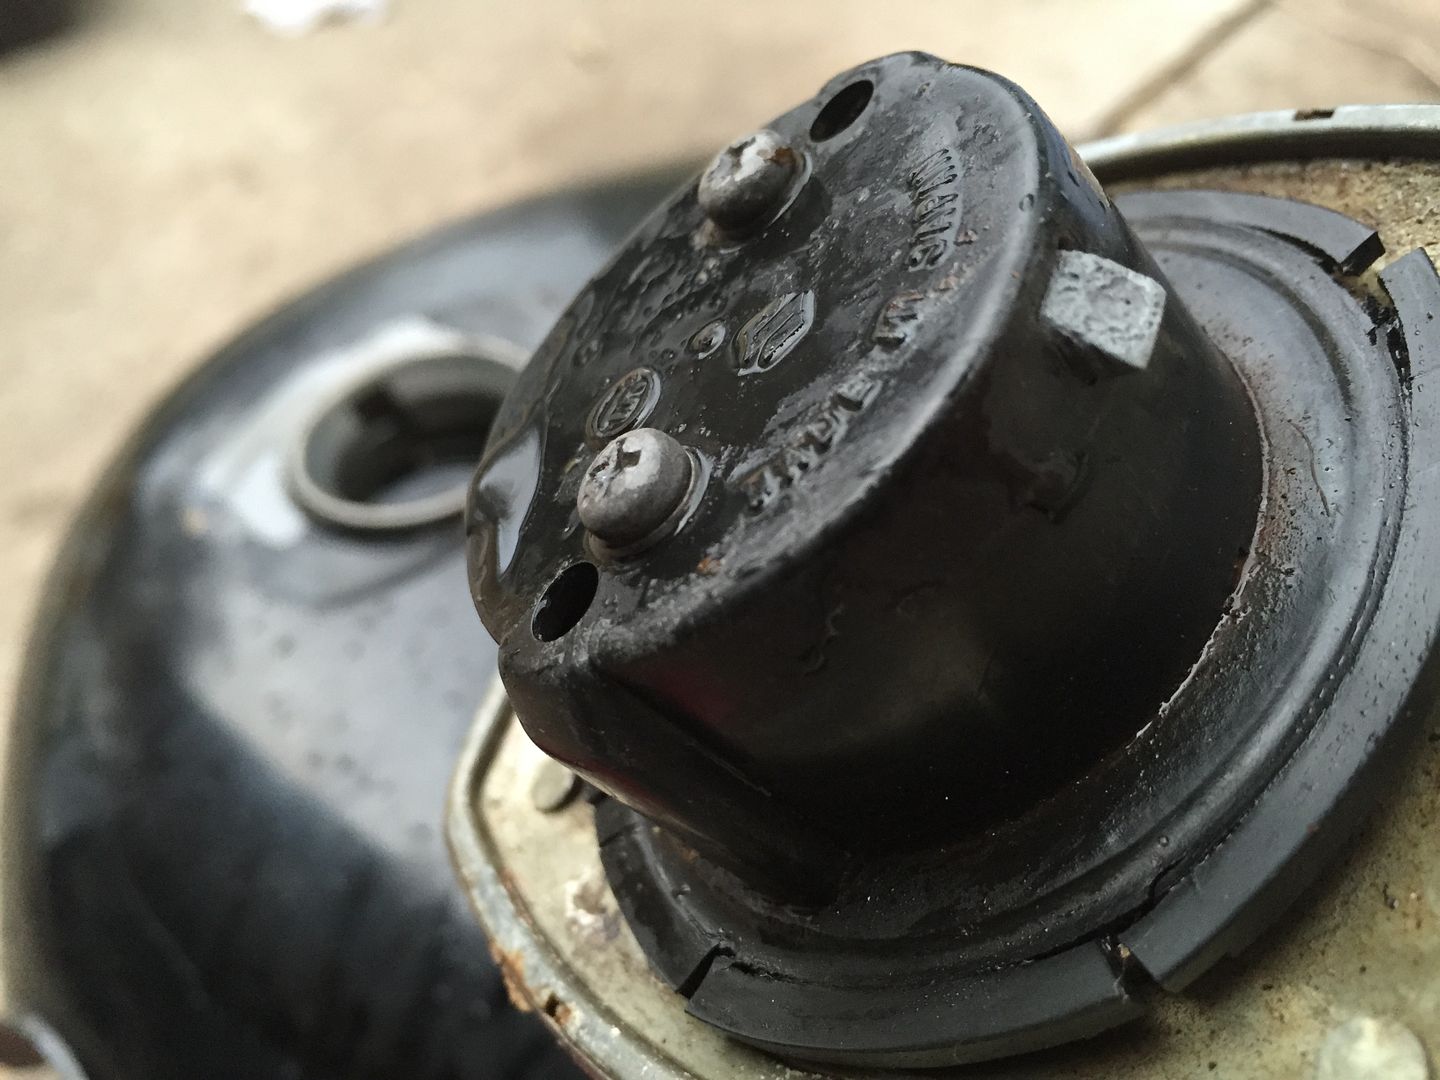
            Sending unit nastiness:


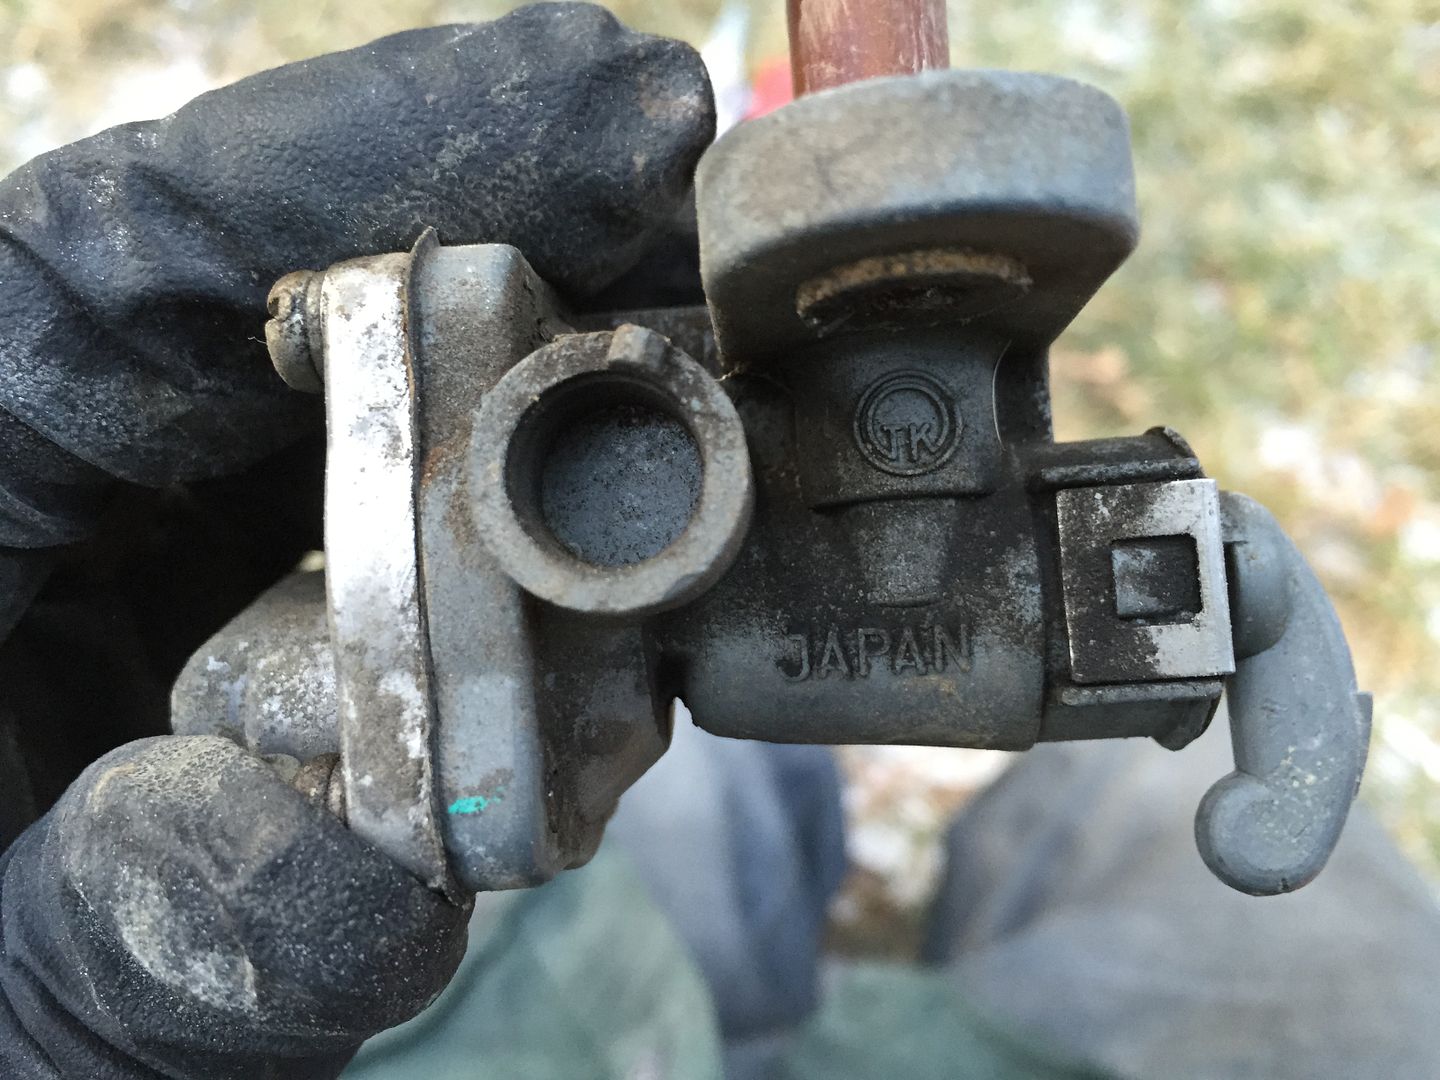
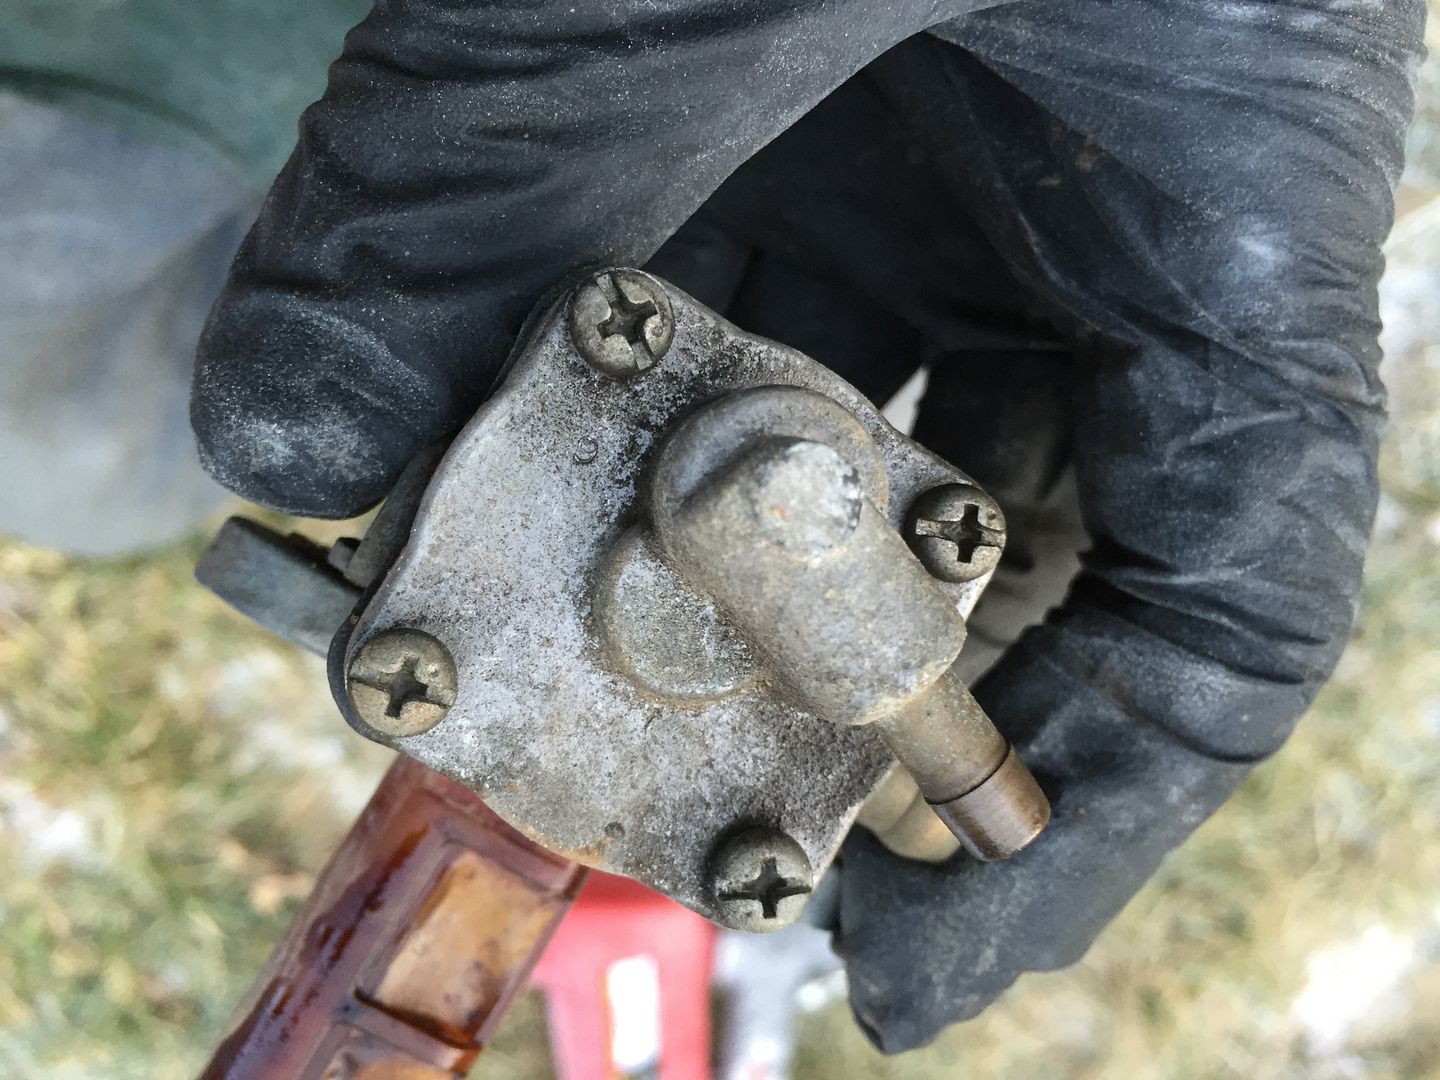
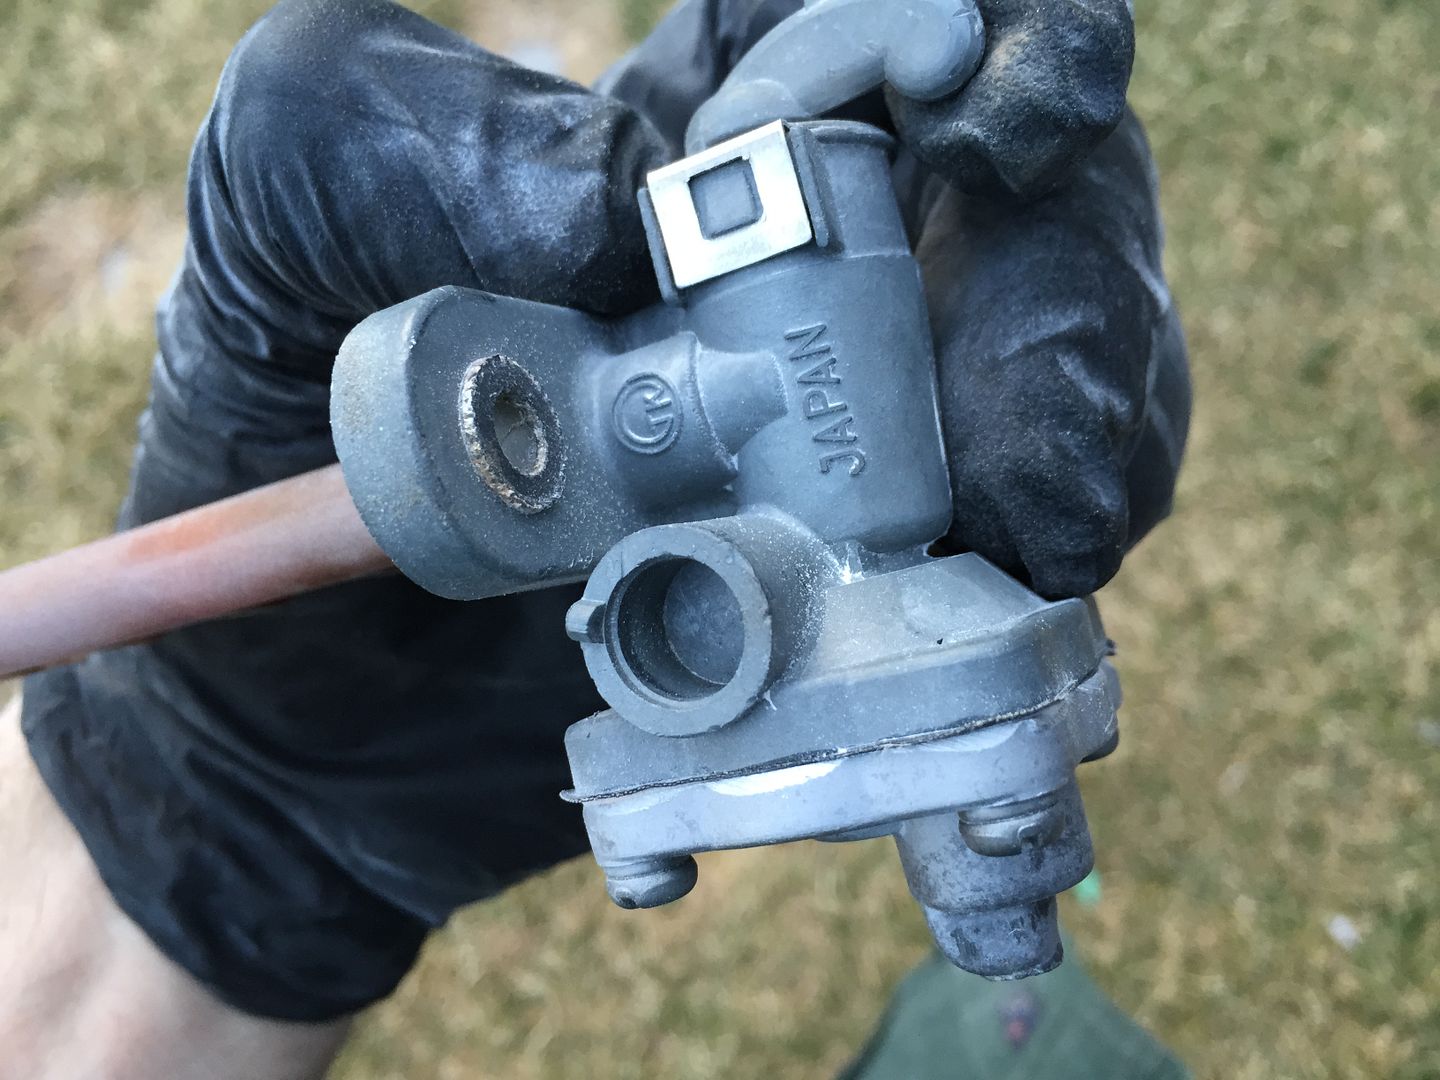
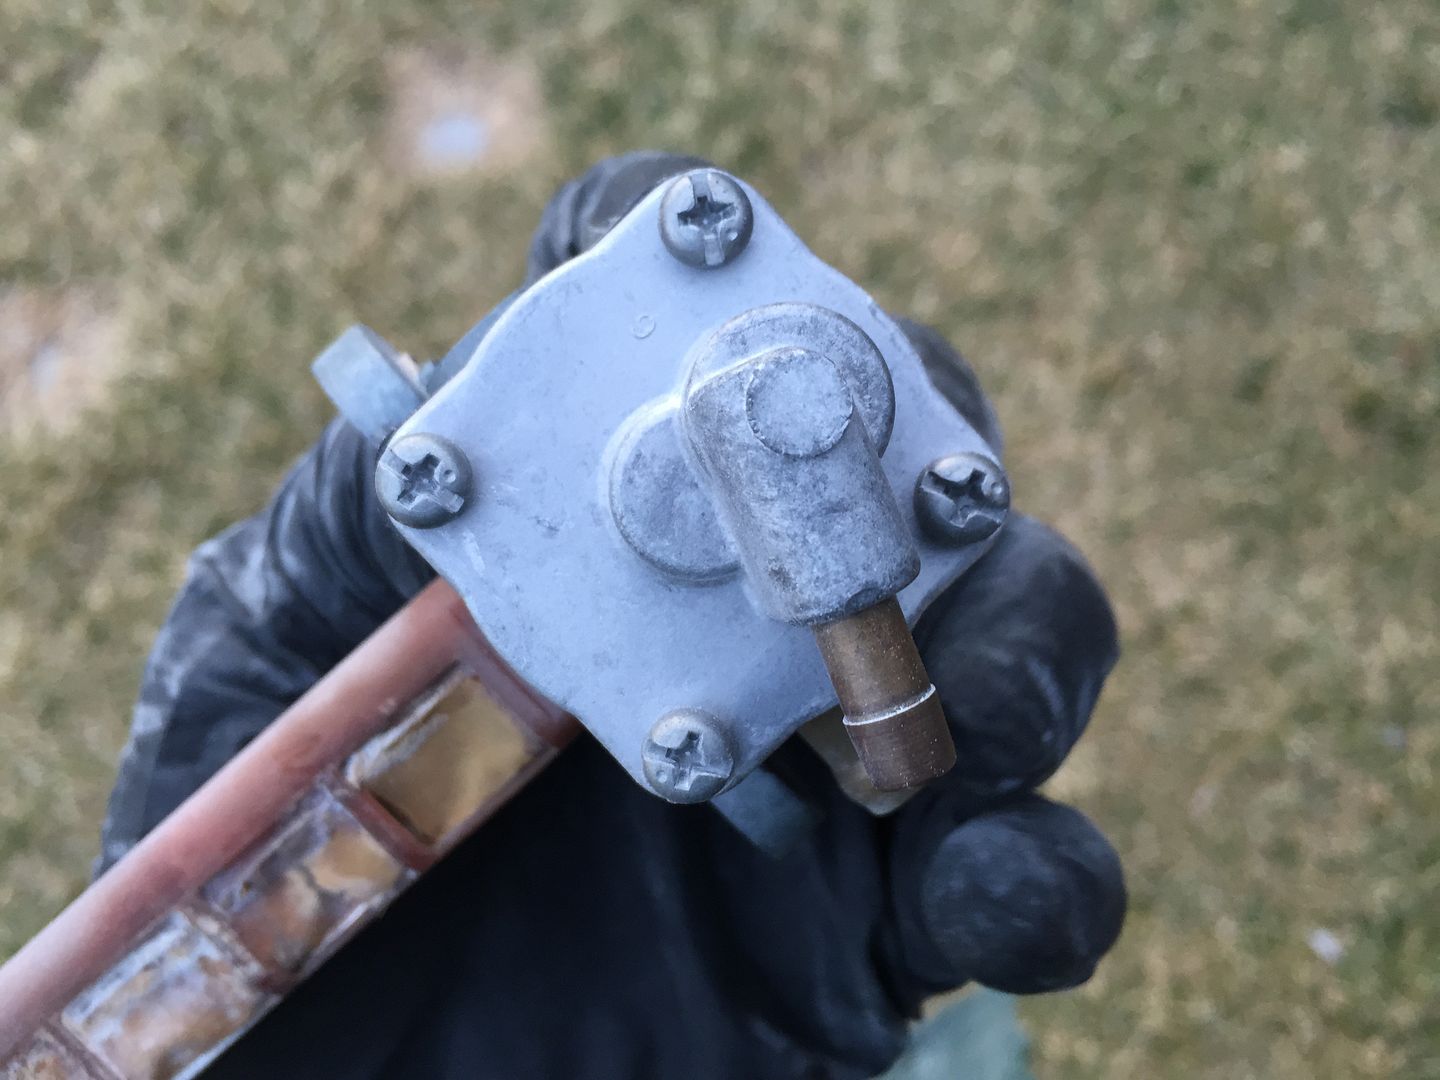
            Petcock full of dried up sludge and rust particles:


            Ed (Nessism) recently posted about his HF soda blaster so I picked one up, along with a 50lb bag of soda - on the bike! Good thing I had a bungee under the seat!!! Before blasting:


            And after:


            Bought a couple of gallons of unleaded and sloshed, filtered crud out through a funnel with gauze stuffed in it, re-sloshed, re-filtered, filled with nuts, bolts, screws and a chain and shook, drained, filtered, and shook till I got a nice upper body workout for a few hours - tank is too big to fit in the dryer at home and didn't feel like running to the laundromat, the weather was nice outside. Here's a shot of the crud that came out after repeated rinsing and filtering the brown, nasty gas, I ended up with about a half gallon of rust particles powder:


            After that I rinsed, dried and filled with almost 4 gallons of vinegar and am already seeing the rust particles floating away, metal looks smooth and nice underneath, appears to be only surface rust, I'll post more pics this weekend of how that turns out.

            Only problem I had was that I tore one of the seams of the plastic filter mesh on the petcock, wondering if anyone has ever successfully repaired that - maybe some fuel safe glue or epoxy right along the seam where it meets the filter body will reconnect it...

            More recovery pics to come - thanks to everyone's suggestions I was able to crack this nasty tank!
            ----------------------------------------------------------------
            2014 BMW F800GSA | 1981 GS850GX | 1982 GS750T (now the son-in-laws) | 1983 GS750ES | 1983 Honda V45 Magna (needs some love) | 1980 Yamaha GT80 and LB80 "Chappy" | 1973 and 1975 Honda XL250 projects

            Comment


              #21
              A few more shots

              Here's a shot of the nasty brown gas:


              And some more of the sending unit scraping with a flat blade wasn't proving real productive, that's when I went to get the soda blaster:


              Still needs another once over, but here is a shot after a quick soda blast:


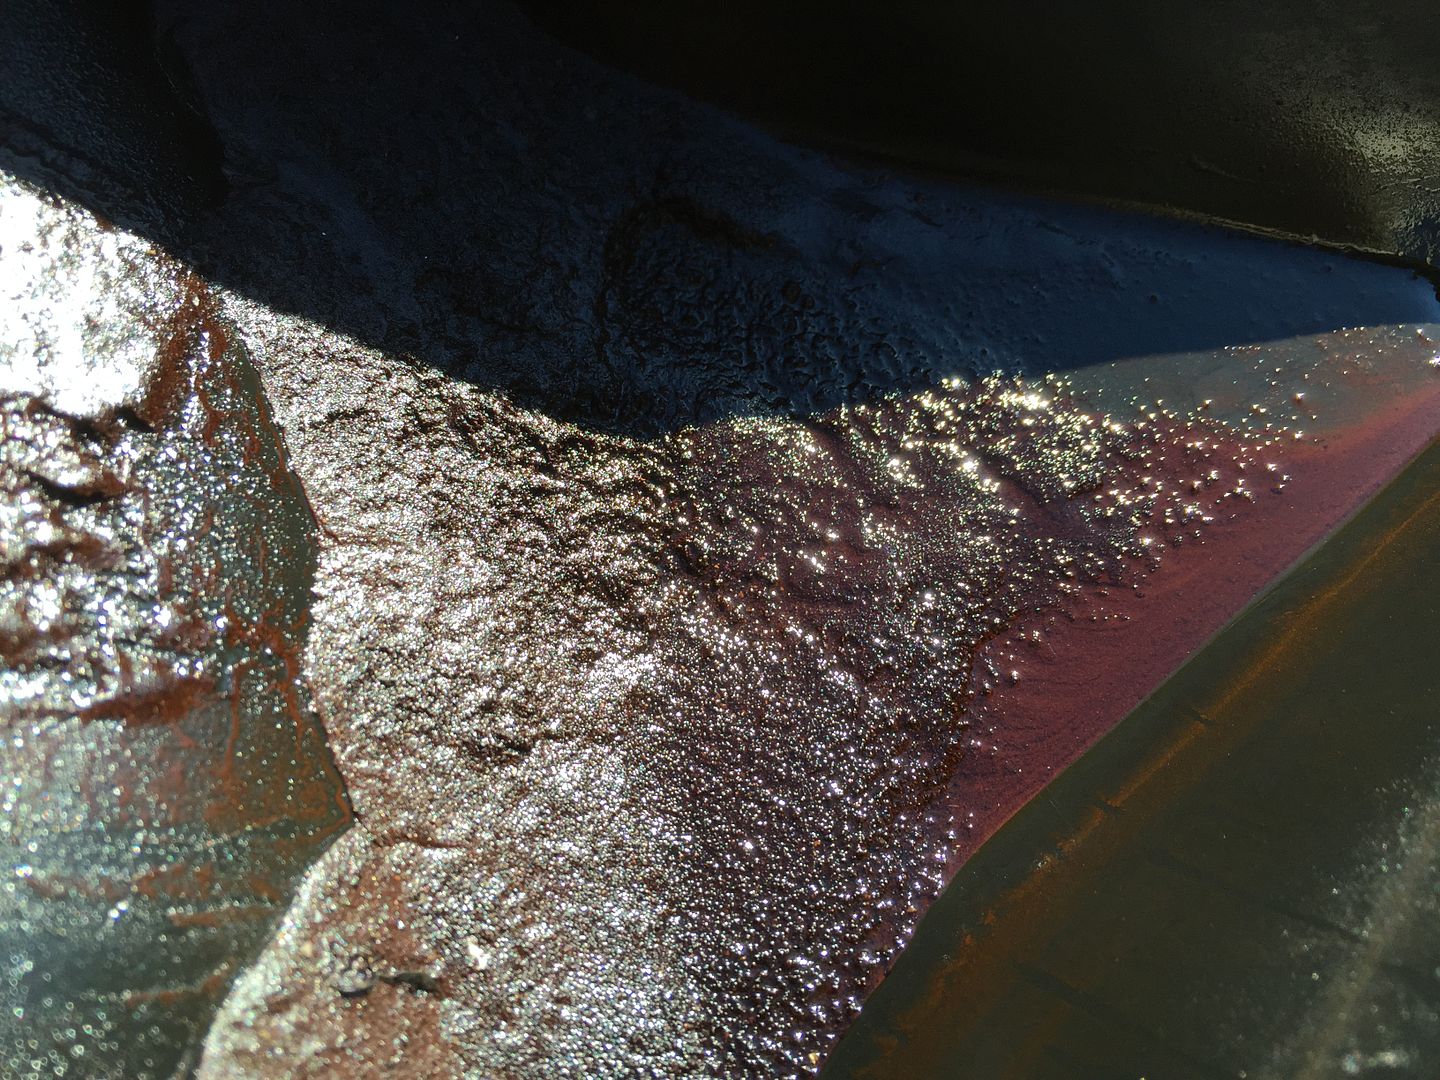
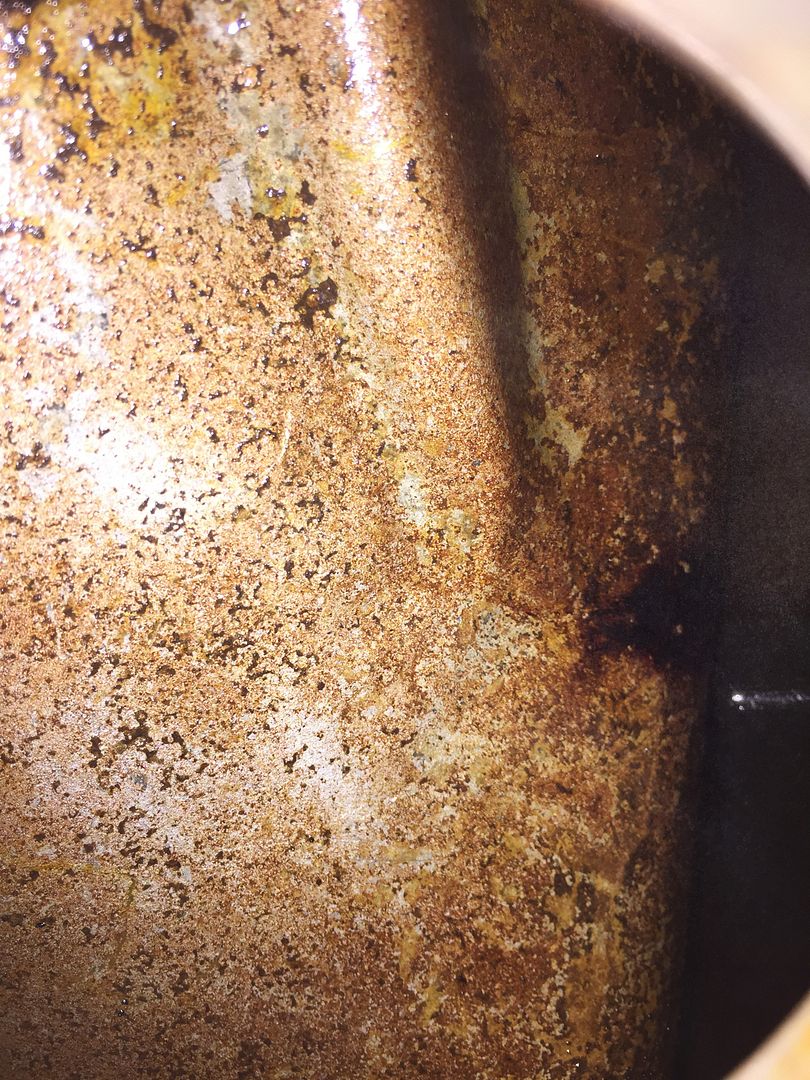
              And here's how the inside of the tank looks before the vinegar soak - there is metal under all that rust:


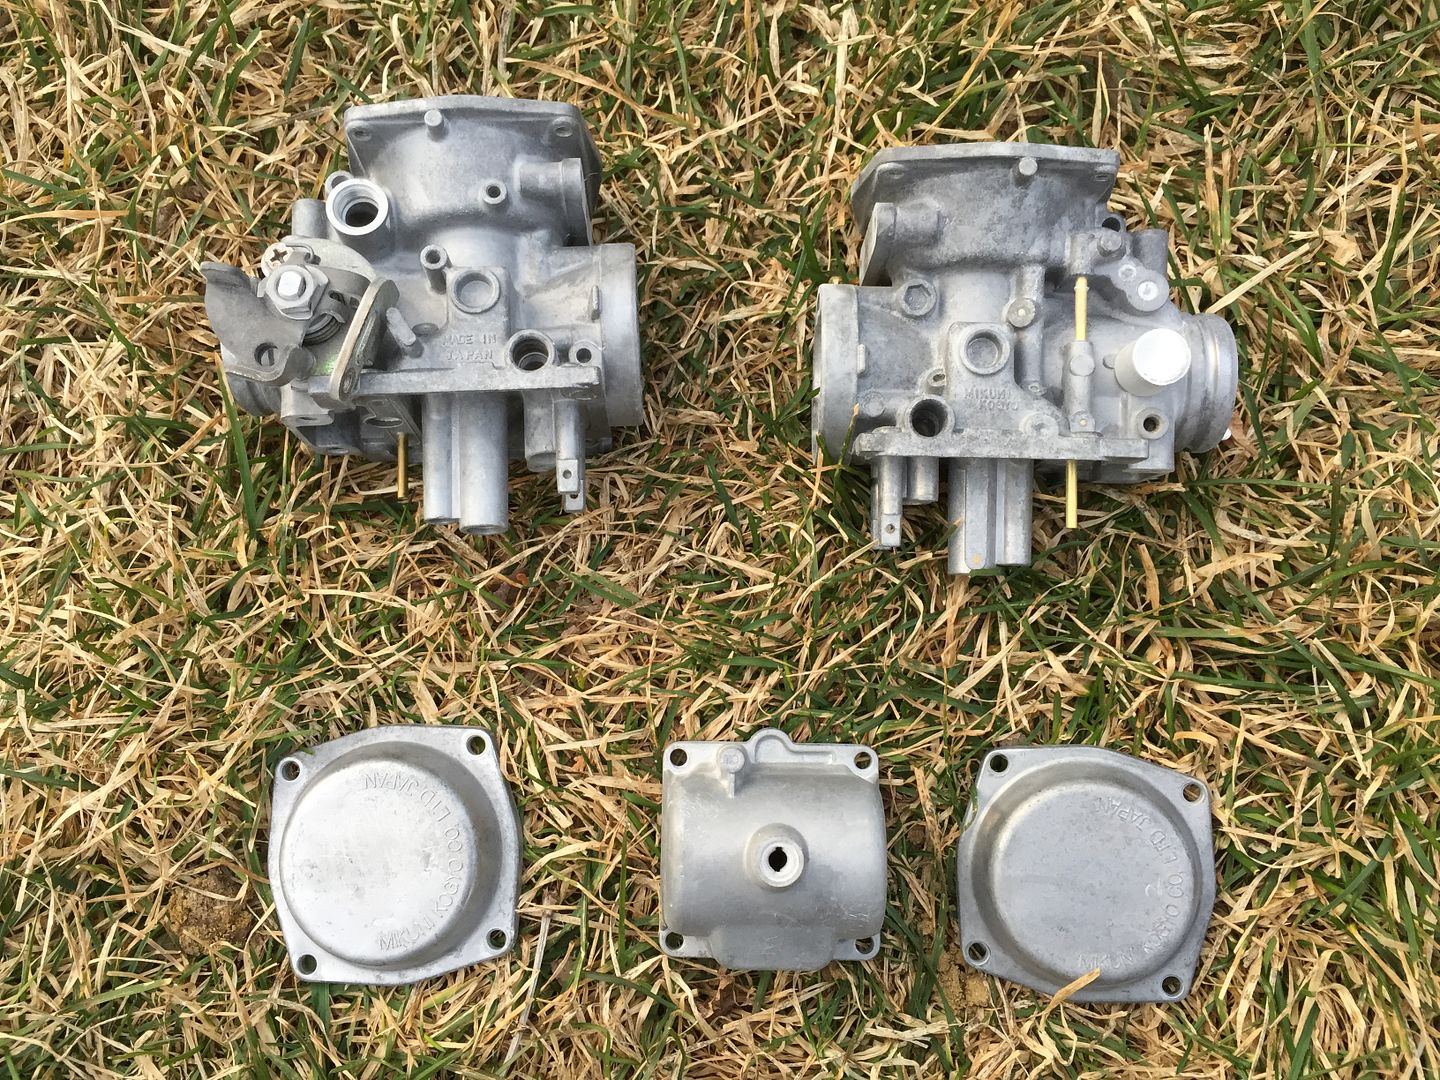
              And while I was getting my soda blast on, I hit the carbs bodies on my other 850. I'll be putting up a separate post of the strip, dip and sonic clean of these:

              ----------------------------------------------------------------
              2014 BMW F800GSA | 1981 GS850GX | 1982 GS750T (now the son-in-laws) | 1983 GS750ES | 1983 Honda V45 Magna (needs some love) | 1980 Yamaha GT80 and LB80 "Chappy" | 1973 and 1975 Honda XL250 projects

              Comment


                #22
                Persistence pays. Thought for one minute I was looking at some marine archeology forum. I hope I remember this thread the next time I start to lose patience.
                97 R1100R
                Previous
                80 GS850G, 79 Z400B, 85 R100RT, 80 Z650D, 76 CB200

                Comment


                  #23
                  There are 3 little tabs bent over that hold the cover on the sending unit. Bend them up and this allows access to the waffle board and contacts inside for cleaning. If the tabs break just use wire and go around the cover to hold it back in place. The internals will need a good cleaning also.
                  MY BIKES..1977 GS 750 B, 1978 GS 1000 C (X2)
                  1978 GS 1000 E, 1979 GS 1000 S, 1973 Yamaha TX 750, 1977 Kawasaki KZ 650B1, 1975 Honda GL1000 Goldwing, 1983 CB 650SC Nighthawk, 1972 Honda CB 350K4, 74 Honda CB550

                  NEVER SNEAK UP ON A SLEEPING DOG..NOT EVEN YOUR OWN.


                  I would rather trust my bike to a "QUACK" that KNOWS how to fix it rather than a book worm that THINKS HE KNOWS how to fix it.

                  Comment


                    #24
                    Originally posted by Brendan W View Post
                    Persistence pays. Thought for one minute I was looking at some marine archeology forum. I hope I remember this thread the next time I start to lose patience.
                    Indeed it does, as does the great help from the forum once again!

                    Originally posted by chuck hahn View Post
                    There are 3 little tabs bent over that hold the cover on the sending unit. Bend them up and this allows access to the waffle board and contacts inside for cleaning. If the tabs break just use wire and go around the cover to hold it back in place. The internals will need a good cleaning also.
                    Thought about bending those open when I had it out, it's soaking in the vinegar filled tank right now, but I will pop it out and open and clean the contact - thanks Chuck!!

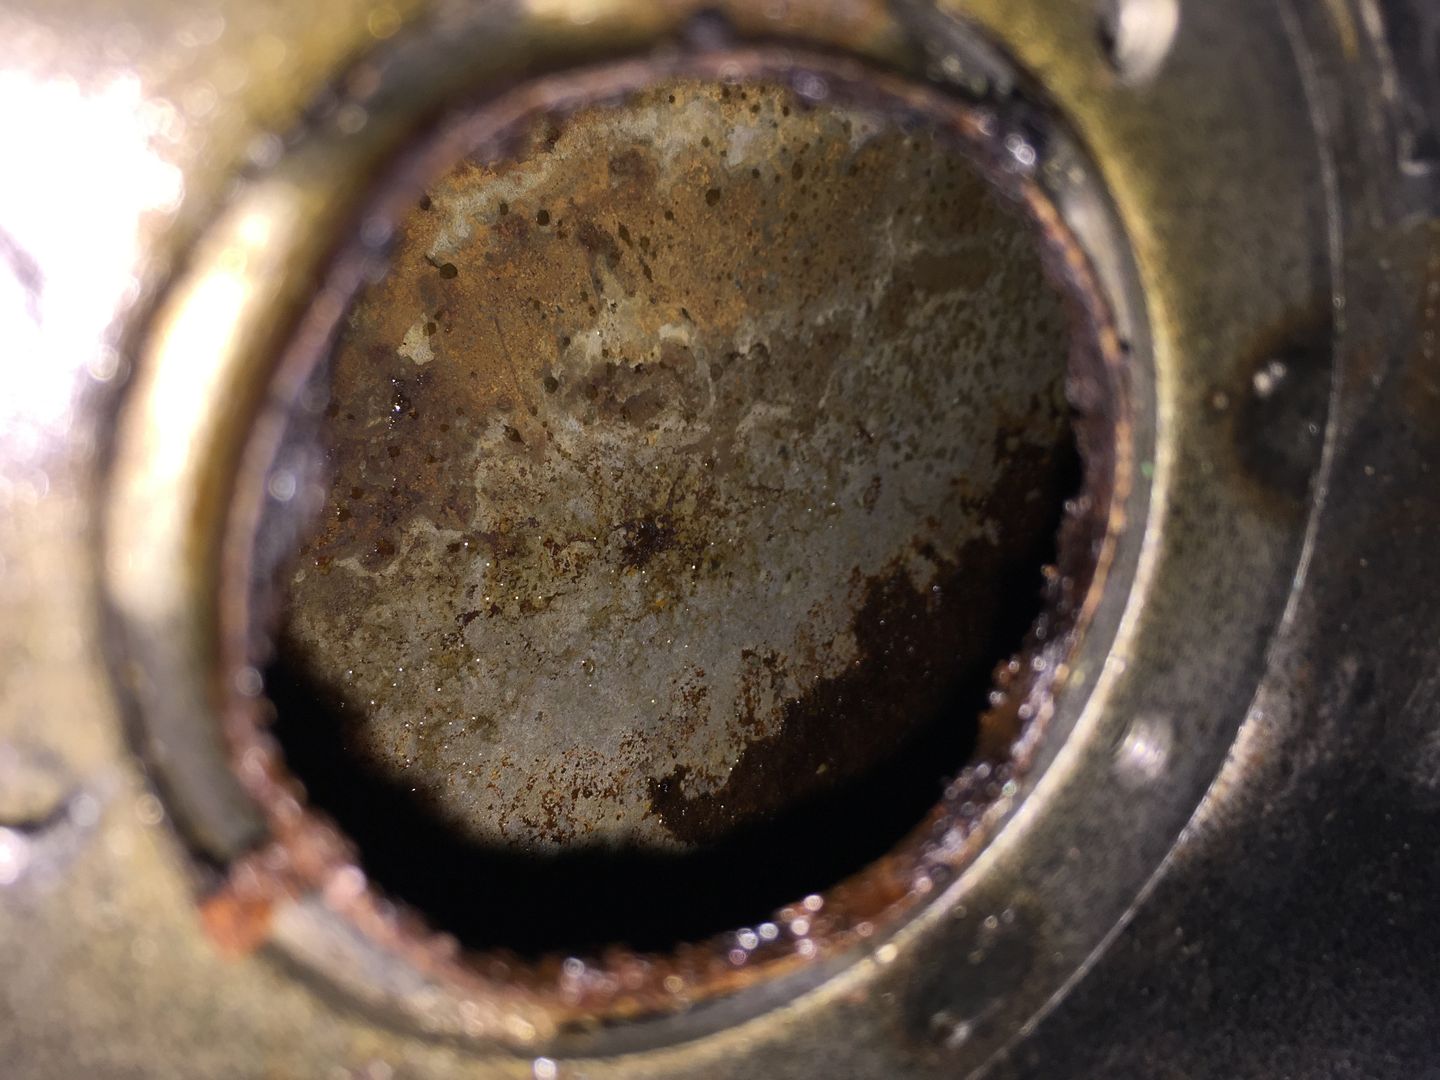
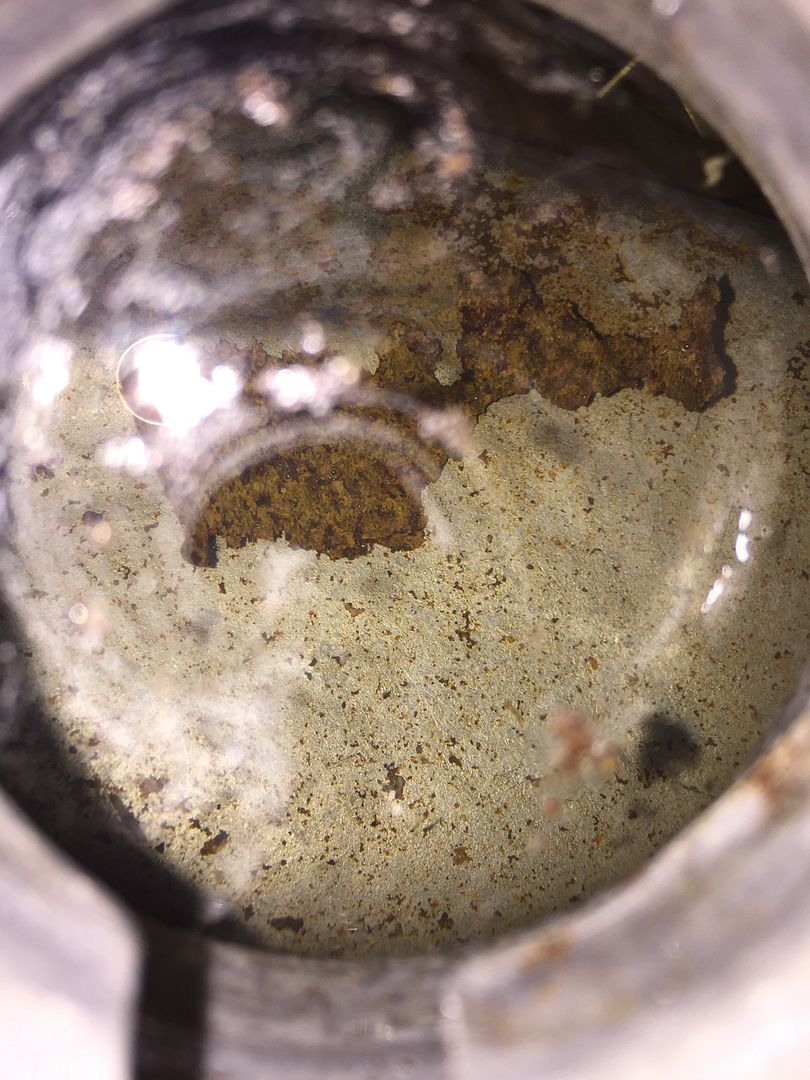
                    It's looking pretty good in there this morning - lots of loose rust dislodged in the vinegar:


                    Here's the before:


                    And the after - the vinegar does a great job, those were screws after all, not some marine algae encrusted wreckage:


                    Going to let it soak a few more days, then I'll clean the contacts in the sending unit box and probably take it to the laundromat depending on how it looks.
                    ----------------------------------------------------------------
                    2014 BMW F800GSA | 1981 GS850GX | 1982 GS750T (now the son-in-laws) | 1983 GS750ES | 1983 Honda V45 Magna (needs some love) | 1980 Yamaha GT80 and LB80 "Chappy" | 1973 and 1975 Honda XL250 projects

                    Comment


                      #25
                      Just looking at what looks like severe pitting on one of the ears under the cap. It might be fair to assume that the internals are in a similar state and close to total failure if something lets go. I would certainly like a closer look at what's going on inside the cap.
                      97 R1100R
                      Previous
                      80 GS850G, 79 Z400B, 85 R100RT, 80 Z650D, 76 CB200

                      Comment


                        #26
                        I'd be concerned, with that much rust, that some of the pitting in the tank will eventually begin to leak. I'd do an internal coating as a minimum. Do a real good inspection for rust bubbles un the underside of the tank. Especially along any seam lines. The rubber seal on that cap is in pretty bad shape as well.

                        Personally I'd be looking for a newer tank, petcock, and cap. Sending unit can't be in great shape either.
                        Last edited by JTGS850GL; 02-20-2015, 01:09 PM.
                        http://img633.imageshack.us/img633/811/douMvs.jpg
                        1980 GS1000GT (Daily rider with a 1983 1100G engine)
                        1998 Honda ST1100 (Daily long distance rider)
                        1982 GS850GLZ (Daily rider when the weather is crap)

                        Darn, with so many daily riders it's hard to decide which one to jump on next.;)

                        JTGS850GL aka Julius

                        GS Resource Greetings

                        Comment


                          #27
                          Originally posted by Brendan W View Post
                          Just looking at what looks like severe pitting on one of the ears under the cap. It might be fair to assume that the internals are in a similar state and close to total failure if something lets go. I would certainly like a closer look at what's going on inside the cap.
                          Thanks Brendan, there was a crusted gel/varnish type material that definitely eroded some of the soft aluminum ears as I scraped it off and it's much more apparent now that it's clean. The top face/edge that contacts the underside of the flange is in better shape but I'll surely keep an eye on it. I've never opened up a cap, is there more aluminum inside? The steel elements seem pretty intact other than surface rust throughout.

                          Worst case, I have a spare cap that I could swap the key cylinder over to, but chances are I'll be cleaning this bike up, swapping this 12k 850L engine over into my 50k 850G frame and vice versa then selling this L bike once I go through it. We'll see. I have to sell either this L or my trusty old v45 Magna, I don't need 4 possible daily riders. 3 is more than enough...

                          Good catch either way. I'll take the cap apart Sunday and get a better look inside. Any special things to watch for like flying springs upon opening that you know of?
                          ----------------------------------------------------------------
                          2014 BMW F800GSA | 1981 GS850GX | 1982 GS750T (now the son-in-laws) | 1983 GS750ES | 1983 Honda V45 Magna (needs some love) | 1980 Yamaha GT80 and LB80 "Chappy" | 1973 and 1975 Honda XL250 projects

                          Comment


                            #28
                            Originally posted by JTGS850GL View Post
                            I'd be concerned, with that much rust, that some of the pitting in the tank will eventually begin to leak. I'd do an internal coating as a minimum. Do a real good inspection for rust bubbles un the underside of the tank. Especially along any seam lines.

                            Personally I'd be looking for a newer tank, petcock, and cap. Sending unit can't be in great shape either.
                            Thanks JT, seams look good, from the outside anyway, wish I had an inspection camera. I'm considering a POR-15 coat or the Eastwood version but if I flip this bike, I'll just mention the concern to the buyer and let them decide. I don't want to end upside down on this. I got a good deal but not a great one, most of my investment between now and then will be cleaning, polishing and testing electrical to make sure it's a solid runner. I will likely have to do the R/R and have to find a headlight and front signals as well, this bike came with an old Pacifico fairing - I'll be posting up a thread on it when I pick it up next week and start the cleaning process but it'll be slow, have 2 motor swaps to do in my truck and daughters SUV, plus I have to move this motor over to my G like I mentioned in the thread were you commented about the G and L engines and shafts being the same other than the ignition... Got my work cut out for me and it's not even spring yet!
                            Last edited by mikerophone; 02-20-2015, 01:09 PM. Reason: Spelling
                            ----------------------------------------------------------------
                            2014 BMW F800GSA | 1981 GS850GX | 1982 GS750T (now the son-in-laws) | 1983 GS750ES | 1983 Honda V45 Magna (needs some love) | 1980 Yamaha GT80 and LB80 "Chappy" | 1973 and 1975 Honda XL250 projects

                            Comment


                              #29
                              Originally posted by mikerophone View Post
                              Good catch either way. I'll take the cap apart Sunday and get a better look inside. Any special things to watch for like flying springs upon opening that you know of?
                              Haven't opened one of those but.......... there are always flying springs
                              97 R1100R
                              Previous
                              80 GS850G, 79 Z400B, 85 R100RT, 80 Z650D, 76 CB200

                              Comment


                                #30
                                Heres the skinny on the cap.

                                Take the two screws off and remove the plastic cap. The latches will come off with the cap There is a spring that forces the two halves apart when you remove the key and make the latches extend and latch the cap closed. That spring usually doesnt come out easily but remove the cap slowly in case.

                                Next youll see a kidney bean shaped plastic deal with a screw at each end..has a big ball bearing in there. Remove the plastic cap and observe the ball bearing sits on a metal cup thing. Just note the order so it goes back the same way.

                                Now youll see the oring that seals the lock cylinder so gas doesnt come out the key hole..its gonna need replaced so take it out. now if you out the key in youll see the bottom of the lock cylinder turns under there. Look and youll see a retainer about 3/16 inch wide that holds the lock cylinder in. Get a utility knife blade and depress that retainer in and apply a little pressure to the bottom of the cylinder at the same time. The lock cylinder will slide up a tad. At this point you can push the lock cylinder out the top of the cap. NOTE::::: The waffers are spring loaded and wont ..or should I say "shouldnt" come flying out. But be gentle and you can use some carb cleaner and a tooth brush to GENTLY clean the cylinder. To reinsert the cylinder simply depress the bottom retainer and get it past the rim of the cap and slide it in and it will click itself back in.

                                The cap vent is actually a channel milled in to the base metal and is covered by the chrome cap bezel. Once its all apart soak the cap in carb dip or vinegar overnight to eat the rust and debris from the venting channel. If you look at the bottom of the cap where you took off the kidney beak shaped cap and ball bearing youll see a hole in the base metal...this is the vent hole. Blow compressed air into that hole and the crud inside the channel will come out around the outer edges of the chromed beauty cap. Some carb spray a few times and air will ensure the venting channel is clear.
                                MY BIKES..1977 GS 750 B, 1978 GS 1000 C (X2)
                                1978 GS 1000 E, 1979 GS 1000 S, 1973 Yamaha TX 750, 1977 Kawasaki KZ 650B1, 1975 Honda GL1000 Goldwing, 1983 CB 650SC Nighthawk, 1972 Honda CB 350K4, 74 Honda CB550

                                NEVER SNEAK UP ON A SLEEPING DOG..NOT EVEN YOUR OWN.


                                I would rather trust my bike to a "QUACK" that KNOWS how to fix it rather than a book worm that THINKS HE KNOWS how to fix it.

                                Comment

                                Working...
                                X