Announcement

Collapse
No announcement yet.

Aluminum Oxide Inside Carbs - Best Practices for Removal?

Collapse
X
 
  • Filter
  • Time
  • Show
Clear All
new posts

    Aluminum Oxide Inside Carbs - Best Practices for Removal?

    Hi guys,

    Picked up a rusty parts bike during the off season and just starting with the carbs now. This will be my first full disassembly and clean. I've made good progress with penetrating oil, apple cider vinegar, and brass brushes on the assembly and mounting hardware and now down to individual carbs. Exterior was really clean save for some old pine needles and spider nests. Inside of the first carb was shocking:
    Rust (dust) and pretty heavy aluminum oxidation (which is visible crystals at this point). I managed to get the various pieces out without damaging anything and am down to the crusty bit. I was able to clean out the float bowl (bottom) pretty easily with a brash brush on dremel but with all the topography on the top side it's going to be much more difficult. From what I understand most solutions that I could bathe the carb body in would not discriminate between the aluminum and the oxide and would eat away at the entire carb body.

    Any advice on how to attack this? My default would be to try and jam a brass end brush in there as best I can but there's no way I'll be able to clean every surface smooth. Is it good enough if I just remove all of the crust that is likely to fall off and clog the various orifices? Is there a risk of "over-brushing" the metal and causing performance issues? Is there a soak I should explore?

    Thanks in advance.

    #2
    Looks like its had water in it. All you can do is soak it in carb cleaner & wire brush what you can off it then run it. If theres another fix I don't know about it. Ive run them like that and never had any problems with them

    Comment


      #3
      That needs to be blasted - probably with Aluminum oxide, then soda. Wet blasting might work also

      Chuck used something called aluminator once. Chuck would that take off this stuff?
      1978 GS 1000 (since new)
      1979 GS 1000 (The Fridge, superbike replica project)
      1978 GS 1000 (parts)
      1981 GS 850 (anyone want a project?)
      1981 GPZ 550 (backroad screamer)
      1970 450 Mk IIID (THUMP!)
      2007 DRz 400S
      1999 ATK 490ES
      1994 DR 350SES

      Comment


        #4
        I glass beaded mine and they came out really nice. You can pick up a small cabinet from Harbor Freight pretty reasonably.
        sigpic
        09 Kaw C14 Rocket powered Barcalounger
        1983 GS1100e
        82\83 1100e Frankenbike
        1980 GS1260
        Previous 65 Suzuki 80 Scrambler, 76 KZ900, 02 GSF1200S, 81 GS1100e, 80 GS850G

        Comment


          #5
          Before you do anything, make a careful note of the position of the air and fuel idle screws. Scratch a mark or a small centre punch dot then count the turns IN carefully, don't torque them in tight just a slight nip (You can easily break the tip off the fuel screw if you do). That will give you the best starting position to retune when you reassemble. (Theoretically it will be the exact position)
          sigpic

          Don't say can't, as anything is possible with time and effort, but, if you don't have time things get tougher and require more effort.

          Comment


            #6
            Originally posted by Big T View Post
            That needs to be blasted - probably with Aluminum oxide, then soda. Wet blasting might work also

            Chuck used something called aluminator once. Chuck would that take off this stuff?
            Soda blast them. Aluminium oxide will destroy them.
            1978 GS1085.

            Just remember, an opinion without 3.14 is just an onion!

            Comment


              #7
              Heres my prescription..

              --24 hr dip in the Berrymans. Remove basket and do 2 bodies at the same time.
              --Rinse in hot water soon as they come out of the dip.use pliers or wear protective gloves. Dip is nasty if it gets absorbed thru the skin.
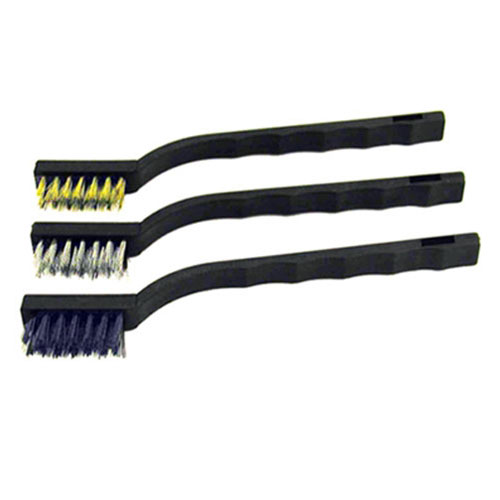
              --Get some of the mini brushes like those in the below link and use them to scrub the float recess and the nooks and crannies on nthe ouitside of the bodies.
              --Have some 000 steel wool and some hemostats around. Use balls of steel wool and hemos to get around the towers and suchn that you cant egt with the brushes.
              -- Use the steel wool and hemos to go down the slide towers and the throats and clean them good.
              --IF the choke plungers feel sticky in the holes ( put them in and pull the plungers out and see if they snap back in EASILY ) roll up a green dish scrubbie piece into a roll that will fit down the plunger hole and use some carbs spray. Twist the scrubbie around in the hole to remove scale and smooth off the bores. Receheck plunger operation.
              --For the outside of the bodies, i use a soft fine wire wheel on the bench grinder and clean them as well as i can then finish the tough spots with the mini brushes. You end up with this as the finished product. you can clear the bodies if you want to..they will start to fade and turn dark as they again get exposure to the elements.

              Mini Brushes...


              Carbs after wire wheel treatment...


              MY BIKES..1977 GS 750 B, 1978 GS 1000 C (X2)
              1978 GS 1000 E, 1979 GS 1000 S, 1973 Yamaha TX 750, 1977 Kawasaki KZ 650B1, 1975 Honda GL1000 Goldwing, 1983 CB 650SC Nighthawk, 1972 Honda CB 350K4, 74 Honda CB550

              NEVER SNEAK UP ON A SLEEPING DOG..NOT EVEN YOUR OWN.


              I would rather trust my bike to a "QUACK" that KNOWS how to fix it rather than a book worm that THINKS HE KNOWS how to fix it.

              Comment


                #8
                As for the bottom pilot screws..dont worry about counting anything. Set them at 3/4 to 7/8 out from lightly seated when reassembling and leave them there.

                Look here for the service manual and scroll down the right side and youll find some carb rebuild tutorials..

                MY BIKES..1977 GS 750 B, 1978 GS 1000 C (X2)
                1978 GS 1000 E, 1979 GS 1000 S, 1973 Yamaha TX 750, 1977 Kawasaki KZ 650B1, 1975 Honda GL1000 Goldwing, 1983 CB 650SC Nighthawk, 1972 Honda CB 350K4, 74 Honda CB550

                NEVER SNEAK UP ON A SLEEPING DOG..NOT EVEN YOUR OWN.


                I would rather trust my bike to a "QUACK" that KNOWS how to fix it rather than a book worm that THINKS HE KNOWS how to fix it.

                Comment


                  #9
                  I was going to leave this and let mr 550b make up his own mind as to advice to his question. That photo is showing what looks to be an unmolested carb with screws crisp and unmangled. Why dismiss out of hand an excellent factory starting point for the idle adjustments? Just beats me.
                  sigpic

                  Don't say can't, as anything is possible with time and effort, but, if you don't have time things get tougher and require more effort.

                  Comment


                    #10
                    Because the EPA in its infinite wisdom way back when made Japaneses bikes run so lean or they werent importable under the regulations...so what we have found is the actual best settings that take care of dead spots and possible valve and piston overheating. This is why i made the post.
                    MY BIKES..1977 GS 750 B, 1978 GS 1000 C (X2)
                    1978 GS 1000 E, 1979 GS 1000 S, 1973 Yamaha TX 750, 1977 Kawasaki KZ 650B1, 1975 Honda GL1000 Goldwing, 1983 CB 650SC Nighthawk, 1972 Honda CB 350K4, 74 Honda CB550

                    NEVER SNEAK UP ON A SLEEPING DOG..NOT EVEN YOUR OWN.


                    I would rather trust my bike to a "QUACK" that KNOWS how to fix it rather than a book worm that THINKS HE KNOWS how to fix it.

                    Comment


                      #11
                      Maybe, but those two screws that we are talking about here are only used for the primary circuit essentially tune the idle to 1/4 throttle opening. The manual says do not adjust them.
                      The throttle openings where heat might become an issue are not adjustable through those screws.
                      sigpic

                      Don't say can't, as anything is possible with time and effort, but, if you don't have time things get tougher and require more effort.

                      Comment


                        #12
                        Easy to adjust, no point bickering over crap that doesn't matter. Also very easy to clean with an ultrasonic cleaner.
                        http://img.photobucket.com/albums/v5...tatesMap-1.jpg

                        Life is too short to ride an L.

                        Comment


                          #13
                          In my experience, if you have no original datum to set the fuel pilot screws to, 1 full turn out from lightly seated is the optimum setting for adjustment on the VM carbs. If the tips are worn then you may need to screw them in an extra 1/16 or 1/8 but all the carbs i have rebuilt and tuned on the bike work best with the screw at 1 turn. The air screws are ALWAYS at middle of the range settings then
                          1978 GS1085.

                          Just remember, an opinion without 3.14 is just an onion!

                          Comment

                          Working...
                          X