Announcement

Collapse
No announcement yet.

I got my POR-15

Collapse
X
 
  • Filter
  • Time
  • Show
Clear All
new posts

    I got my POR-15

    So if I understand correctly:
    1. Empty tank by riding spiretedly in whatever direction has the least amount of snowing
    2. Take tank off (don't loose the loose rubber parts that magically dissapear)
    3. Remove petcock and fuel gauge
    4. Use some sort of witchcraft to plug the holes for the petcock and fuel gauge (please advise)
    5. Pour the first liquid in with hot water (as directed), swosh about and move tank intermittendly
    6. Pour out first liquid, and do second liquid, swosh about, and move tank intermittendly
    7. Fill with isopropanol and use hair dryer to dry (need to borrow one). Some said heat gun is too warm
    8. Pour thrid liquid in, move about constantly, pour it out through the fill gas hole after an eternety and all parts are covered
    9. Remove whatever is plugging holes, leave tank upside down, let dry, preferably in the sun (realistically inside the garage, Im not leaving it in the snow). For at least 96 hours
    10. Reassemble, fill with fuel, and ride about?


    Is any of my steps off? Did I misunderstand anything? Am I lacking steps? If any have any good tips or tricks. I especially need help with step 4.

    I think the weather will be meh, and I will be swamped with work (two month backlog...) so I might as well do it this weekend (unless the temps are above freezing, or the roads are dry). Then it can cure for three, four or five days.
    GS1000G 1981

    #2
    You've got it... I would be inclined to add some loose nuts & bolts or screws to the first cleaning cycle to help scour off the rust. Hole blockers... Easy to build some plates & use RTv to seal.
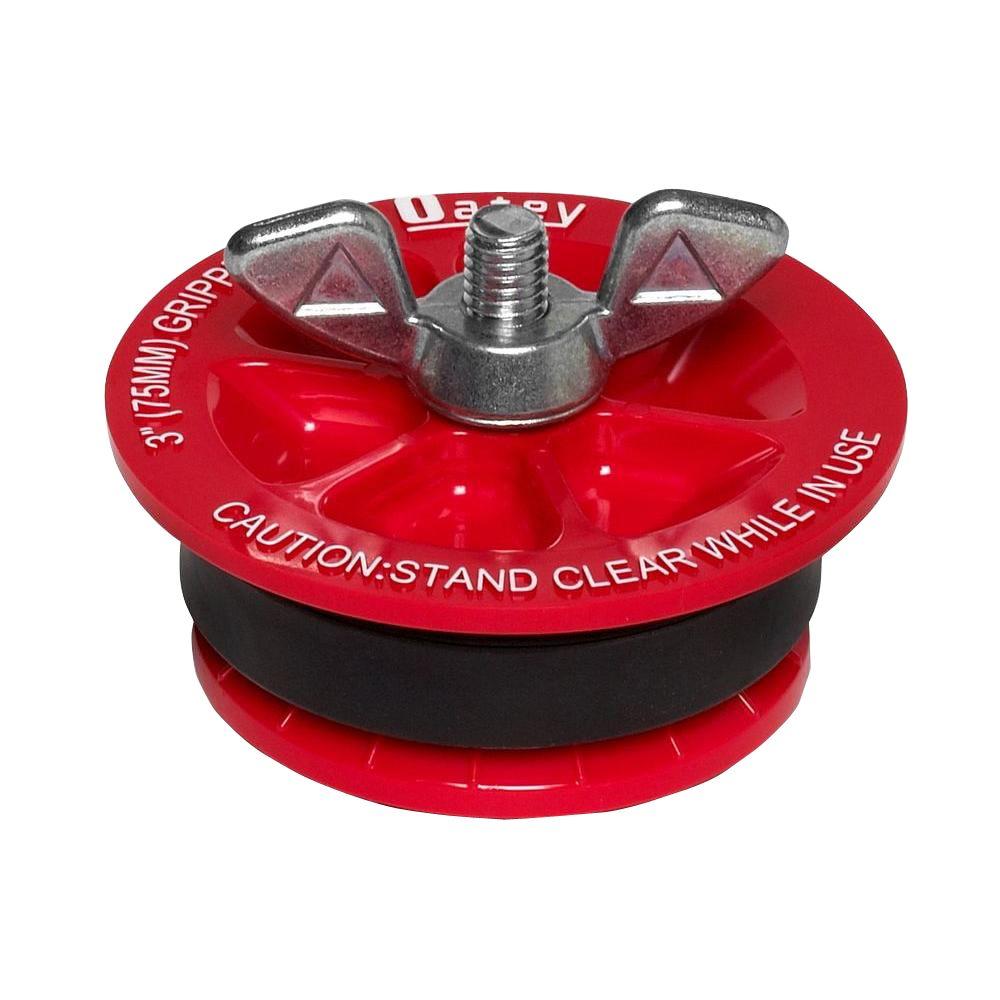
    For the tank top a 2" plumbers expanding plug works well... You will have to sand down the diameter a bit but it's not a big job even by hand

    1980 GS1000G - Sold
    1978 GS1000E - Finished!
    1980 GS550E - Fixed & given to a friend
    1983 GS750ES Special - Sold
    2009 KLR 650 - Sold - gone to TX!
    1982 GS1100G - Rebuilt and finished. - Sold
    2009 TE610 - Dual Sporting around dreaming of Dakar..... - FOR SALE!

    www.parasiticsanalytics.com

    TWINPOT BRAKE UPGRADE LINKY: http://www.thegsresources.com/_forum...e-on-78-Skunk/

    Comment


      #3
      Originally posted by salty_monk View Post
      You've got it... I would be inclined to add some loose nuts & bolts or screws to the first cleaning cycle to help scour off the rust. Hole blockers... Easy to build some plates & use RTv to seal.
      For the tank top a 2" plumbers expanding plug works well... You will have to sand down the diameter a bit but it's not a big job even by hand
      RTv?

      The plumbers expanding plug is a brilliant idea, that will simplify it a lot.

      Can you expand on build some plates? And I assume you mean keep the nuts and bolts and screws for step one and two?
      GS1000G 1981

      Comment


        #4
        if the tank is badly rusted, sure, a few metal objects tossed in and shaken about can remove scale...but objects should be of sizes that can't get themselves jammed in the narrower lower portions of the tank.(though I don't know how narrow YOUR tanks get-not so much as the tank I did..... steel shotgun pellets or steel washers would be good if they can't settle and stick sideways. I tossed a short piece of chain in too.
        The lower portions were by far the rustiest on mine but you can get a long-necked flashlight and/or a dental mirror or similar to peek into the corners to see for yourself. Also helps to get an idea of coverage and the inevitable puddling when you pour the goo. Mine took a long time to set so check it even after the first pour -and-motion

        Personally, I'd wait for low-humidity days of summer -never the dampish spring but if you're in a hurry....
        I used a hair dryer blowing through but just keeping the tank warmer than the ambient air is enough to help evaporation...say near the heating in your workplace since outdoors is useless where you are now.
        Speaking of that, don't hurry. Pick low humidity days in a row. What feels dry on a rainy day really isn't...the air is saturated and stuff doesn't dry well. Let the goo REALLY dry. it might be days longer than instructions to really harden. If you want to fill the tank on the day it should be dry, force yourself to wait another day at least. The stuff is expensive and hard to get of so you don't want fails.

        Plugging holes...those above are nice -plates bolted or even just silicone on are a good idea. shouldn't be too hard to find some metal scrap to hacksaw and drill..it's been awhile since I did this but it wouldn't suprise me if I just used lots of making tape -overpatching smaller patches with bigger ones...I don't think the acid will attack plastics or rubber certainly not wood so plugging with dowels or blocks ,wrapped with saran-wrap or plastic bags then double taped over should do it. Or silicone plugs made. Pour some deruster in and watch if it leaks before going whole hog.

        Comment


          #5
          Be sure to remove ALL the rust. Do NOT believe the crappy Por-15 literature which says their sealer works over rust. It doesn't.

          The sealer kit comes with something like a quart of phosphoric acid which is very stingy. I'd go down to Home Depot and buy a gallon of Kleen Strip Concrete Etch and Prep. It's the same stuff, only stronger, and there is a gallon of it. Leave it in long enough to eat all the old rust off. It might take a couple of days. Only then should you go to the next step. If you get some light flash rusting when rinsing it's not a huge big deal because the sealer WILL seal over very light rust like that.

          When sealing this is my advice (cut and paste from an older thread on this topic)

          Stir up that Por-15 stuff and dump the full can inside your tank. Move it around for a good half hour then dump out the majority through the petcock hole. Put your plug back in and look inside the tank because there will still be a good size puddle moving inside. Move the puddle around and coat the tank again. You will be able to get a couple of extra coats inside the tank before the sealer fully kicks off and stops flowing. Don't put the tank down until it stops flowing. It takes about one hour. Just get yourself a cold beverage and take your time and focus on getting that sealer to coat the entire tank several times before it's all done.
          Ed

          To measure is to know.

          Mikuni O-ring Kits For Sale...https://www.thegsresources.com/_foru...ts#post1703182

          Top Newbie Mistakes thread...http://www.thegsresources.com/_forum...d.php?t=171846

          Carb rebuild tutorial...https://gsarchive.bwringer.com/mtsac...d_Tutorial.pdf

          KZ750E Rebuild Thread...http://www.thegsresources.com/_forum...0-Resurrection

          Comment


            #6
            Pick up nuts and bolts with a magnet as you put them in the tank..so your sure to be able fetch them out. I made block off plates out of a 4x4 electrical junction box cover. Home Depot has 1/8 inch thick rubber squares in the plumbing section for gasket material. Use the black gasket with the 5 holes from the sending unit hole as the pattern for the plate.

            If its gonna be repainted, i use muriatic acid and skip all the other stuff. Dump in a quart, roll up a red shop rag and stuff it in the filler neck to prevent splashing out as you shake the tank. Shake it about every 5 minutes or so for a minute or two. After 20 minutes or so carefully remove the petcock block off plate and drain it into a bucket. Rinse with water and inspect tank. If it needs another round of acid do it. Object is to burn all the rust out, rinse with water and dry as quickly as possible. Take it easy taking rag out of filler neck so you dont splash acid on yourself..and eye protections a darn good idea as well.

            Shake as much water out the petcock hole as you can then take off the sending unit cover and soak up remaining water with paper towels. For the final dry i use my heat gun and go all over the tank to heat all the metal and speed up evaporate residual water. It is imperative there is absolutely no water left before adding the POR15. Roll the tank around a LOT. Stuff another rolled up rag in te filler neck so liner doesnt come out when you turn tank upside down to do the top.


            NOTE::: Have a big box of baking soda handy to neutralize the acid in the bucket..dump it in slowly as you gently stir the acid...wearing eye protection. AND another point. Be up wind..or have a crosswind when using the acid. It has very harsh fumes. Its pretty nasty stuff and you dont want to breath the fumes.
            Last edited by chuck hahn; 05-07-2020, 08:09 PM.
            MY BIKES..1977 GS 750 B, 1978 GS 1000 C (X2)
            1978 GS 1000 E, 1979 GS 1000 S, 1973 Yamaha TX 750, 1977 Kawasaki KZ 650B1, 1975 Honda GL1000 Goldwing, 1983 CB 650SC Nighthawk, 1972 Honda CB 350K4, 74 Honda CB550

            NEVER SNEAK UP ON A SLEEPING DOG..NOT EVEN YOUR OWN.


            I would rather trust my bike to a "QUACK" that KNOWS how to fix it rather than a book worm that THINKS HE KNOWS how to fix it.

            Comment


              #7
              post 44 here shows the 78 GS1000 tank i rehabbed last weekend..

              Are you doing a restoration project of some kind on a GS? Let everyone see what you are doing by posting the details here.
              MY BIKES..1977 GS 750 B, 1978 GS 1000 C (X2)
              1978 GS 1000 E, 1979 GS 1000 S, 1973 Yamaha TX 750, 1977 Kawasaki KZ 650B1, 1975 Honda GL1000 Goldwing, 1983 CB 650SC Nighthawk, 1972 Honda CB 350K4, 74 Honda CB550

              NEVER SNEAK UP ON A SLEEPING DOG..NOT EVEN YOUR OWN.


              I would rather trust my bike to a "QUACK" that KNOWS how to fix it rather than a book worm that THINKS HE KNOWS how to fix it.

              Comment

              Working...
              X