Announcement

Collapse
No announcement yet.

550 Igniter interchange part 2

Collapse
X
 
  • Filter
  • Time
  • Show
Clear All
new posts

    550 Igniter interchange part 2

    Well I hacked up the signal generator plate some more today and repositioned it so the 1-4 pickup is facing the TDC mark on the rotor. The bike now runs and revs correctly so I declare this a done deal.


    Please excuse the hack job on the plate which wouldn't have happened if I had properly located TDC on number 1 and positioned the plate accordingly in the first place.

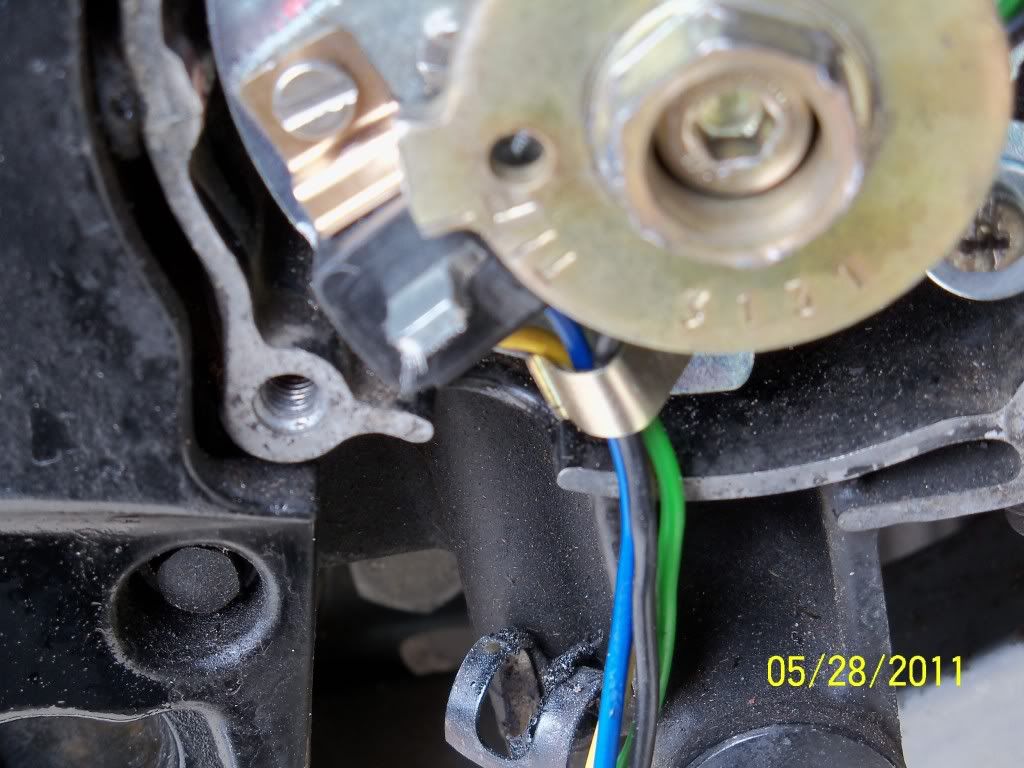
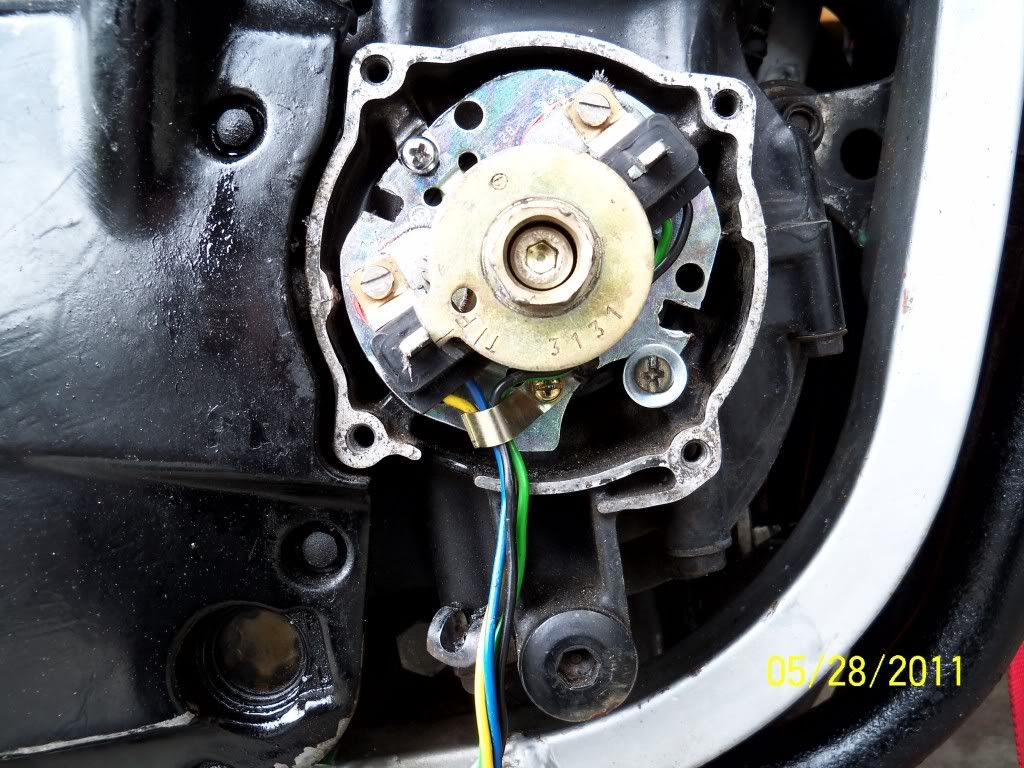
    To repeat, the plate has to be positioned so the "blade" of pickup 1-4 ( i.e. left side) is on the mark next to T on the rotor. That is TDC on piston one.

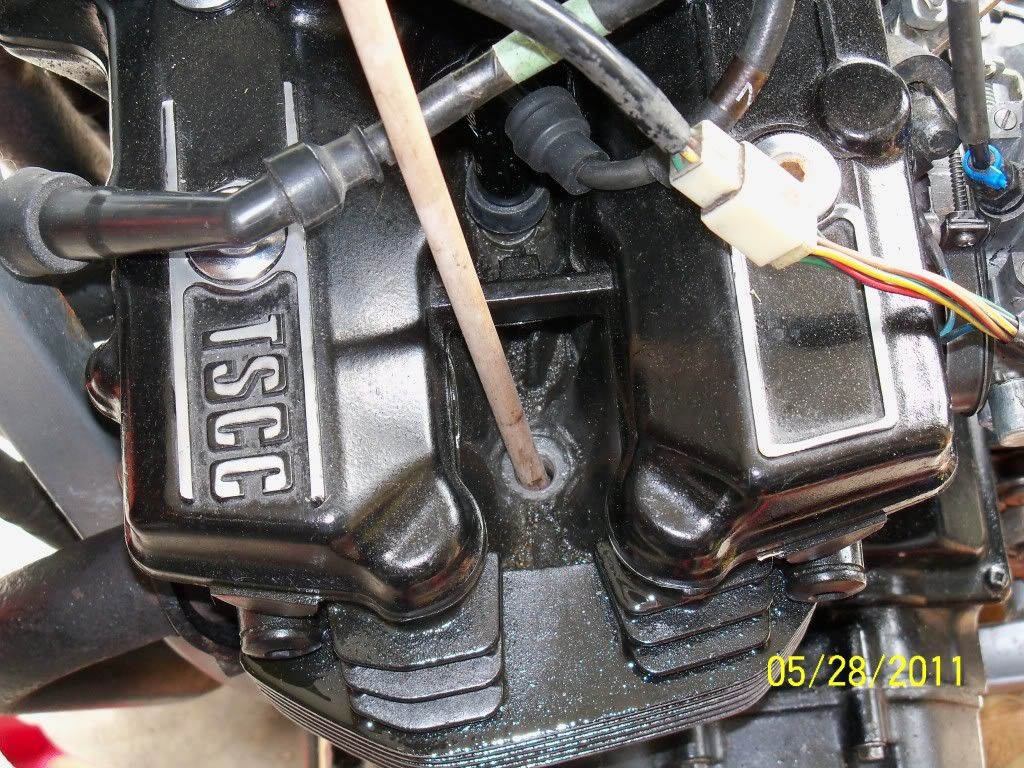
    To find TDC on piston 1, remove the plug from cylinder one and insert a piece of dowel long enough that you can see it move up and down as you turn the crank. Turn the rotor nut with a 19mm wrench and watch the dowel move up then back down. Move it up to its highest point and that is TDC. Where the mark on the rotor falls, move the s/g plate so the "blade on the 10-4 pickup lines up with it. Bingo you are timed as close as your going to get it.


    I think the next time I do this, I might make up my own plate and attach the pickups to it. The cutting down of the 750 plate is fiddly and time consuming, it also leaves a missing portion at the 5 o'clock fastening position ( see the washer at that position). While the plate is securely fastened its not as workman like as I would prefer.

    Well there is video of the bike running and I am attempting to figure out how to load it so stay tuned and I'll prove its running.

    Cheers all,
    Spyug

    #2
    Here is another view of the repositioned plate. Note the notch at the upper left side attachement point, that is the original hole from the stock setting.


    Video will follow soon.

    Spyug

    Comment


      #3
      I bet you would be ready willing to remove the whole works and scan the plate to create a template. One correctly marked so anybody can bolt on and have a proper swap.

      Sure you would. I have a spare undamaged OEM 550 plate if you want to make your setup cosmetically perfect. Say yes and avoid a postal strike.

      I will send it free

      Fantastic job BTW nice to see the naysayers bite one yet again.

      Oh will this clear the stock cover?
      Last edited by Guest; 05-28-2011, 06:07 PM.

      Comment


        #4
        Mate I don't care how messy that is, I can sum that whole operation up in one word... SUCCESS!!!!
        1982 GS450E - The Wee Beastie
        1984 GSX750S Katana 7/11 - Kit Kat - BOTM May 2020

        sigpic

        450 Refresh thread: https://www.thegsresources.com/_foru...-GS450-Refresh

        Katana 7/11 thread: http://www.thegsresources.com/_forum...84-Katana-7-11

        Comment


          #5
          Oh, and the hole at about 10 o'clock could still be slotted for fine tuning the timing too...
          1982 GS450E - The Wee Beastie
          1984 GSX750S Katana 7/11 - Kit Kat - BOTM May 2020

          sigpic

          450 Refresh thread: https://www.thegsresources.com/_foru...-GS450-Refresh

          Katana 7/11 thread: http://www.thegsresources.com/_forum...84-Katana-7-11

          Comment


            #6
            Agree with Pete, slot that hole so you can adjust the timing just right. You will need some sort of degree wheel and a timing light. Good fun!
            Ed

            To measure is to know.

            Mikuni O-ring Kits For Sale...https://www.thegsresources.com/_foru...ts#post1703182

            Top Newbie Mistakes thread...http://www.thegsresources.com/_forum...d.php?t=171846

            Carb rebuild tutorial...https://gsarchive.bwringer.com/mtsac...d_Tutorial.pdf

            KZ750E Rebuild Thread...http://www.thegsresources.com/_forum...0-Resurrection

            Comment


              #7
              Thanks guys. I appreciate the kind words. I didn't get a chance to get a timing light on it today but tomorrow is another day and I'll give it a whirl.

              One thing I should mention is that it is fiddly getting the center hole to line up so that the rotor can turn without fouling it and also not rub on the pickups. I actually had to skim a tad off the rotor to make sure it cleared the pickup blades. This is why it might be best to use the stock plate and retro fit the pick-ups to it.

              Jeep thank you for your kind offer but I have a couple of plates that i can hack on already. If I botch those I'll get back to you. Cheers man.

              In my previous thread I had mentioned the 750 signal generator has 2 leads per pick-up and one green/yellow line with a "fork" connector. On investigation, I find that lead is from an oil sensor. As an oil sensor is not fitted on the 550 it is an extraneous line and can be removed. It is not a ground as I previously thought.

              I'll see what the timing light turns up tomorrow.


              Cheers all,
              Spyug
              Last edited by Guest; 05-28-2011, 07:46 PM.

              Comment


                #8
                Excellent! This deserves full marks
                This paves the way for similar possibilities!
                Do I see a full pictorial as a sticky in the foreseeable future?
                Well done again.

                Comment


                  #9
                  Thanks Matchless. I am honoured that you would say so. I'm working on a tutorial for Cliff's site at the moment but have been waiting to complete it until I was able to have the engine running correctly. I also want to make it as precise and clear as I can so I keep rewriting. Hopefully I'll get it done fairly soon.

                  I am about to sort out the airbox and clean up the wiring today then get on with getting it ready for the road. I won't be fully satisfied until I prove that the street performance is acceptable.

                  My original concept with this project was just to get the bike back running as inexpensively as possible and resell it. I'm now changing my mind a bit and I'm thinking of making it a bit of a test bed for other igniters. I'm now thinking of rounding up 850 and 1000 igniters to see what (if anything) can be done with them. If I can prove they all work it would make retrofitting a bit easier for folks perhaps.

                  We'll see if time and circumstances permit.

                  Stay tuned, more to come I'm sure.

                  Cheers,
                  Spyug

                  Comment


                    #10
                    Spyug,
                    Your quest made me think that using '83 and later ignitors (carburetor only) with advance curves built in, may also be useful on earlier bikes by eliminating the mechanical advance!
                    A rough graph of the advance curve can always be plotted, with the tacho and timing light, for comparison, without one having to be a rocket scientist and without the need for expensive equipment.
                    Very, very interesting discovery you have made and I am looking forward to the road test results as well!

                    Comment


                      #11
                      Congrats on the successful completion. I havent been able to work on mine in a while.
                      1984 GS550ES
                      Rebuild in progress....

                      1983 GS750ES
                      4700 miles

                      1978 GS1000E...Resto-mod to come

                      Comment


                        #12
                        Thanks. I won't really consider it a success until I get it out on the road which is still going to be a few weeks away I think ( too many things on the go) to test for performance.

                        I was intending on doing more finer checking on the timing yesterday but got side tracked with all the wiring spaghetti and where things were mounted. There was no mounting plate for the igniter and the R/R was bolted to the frame behind the battery box where it wouldn't get any airflow I thought so I fabbed up a mounting plate for the the left side next to the battery box to hold them both.

                        I was also going to remount the airbox but there doesn't seem anyway to do that without pulling off the rear suspension mounting bracket. There is just not enough clearance to do it any other way it seems so I gave up and am turning my thoughts to pods. One of the new guys posted something about these recently I recall.

                        Anyway like all projects its one step forward and one or two back but we'll get there eventually I know.

                        Sorry to hear your project is stalled. What is the hangup? Anything I can help with?

                        Comment

                        Working...
                        X