Announcement

Collapse
No announcement yet.

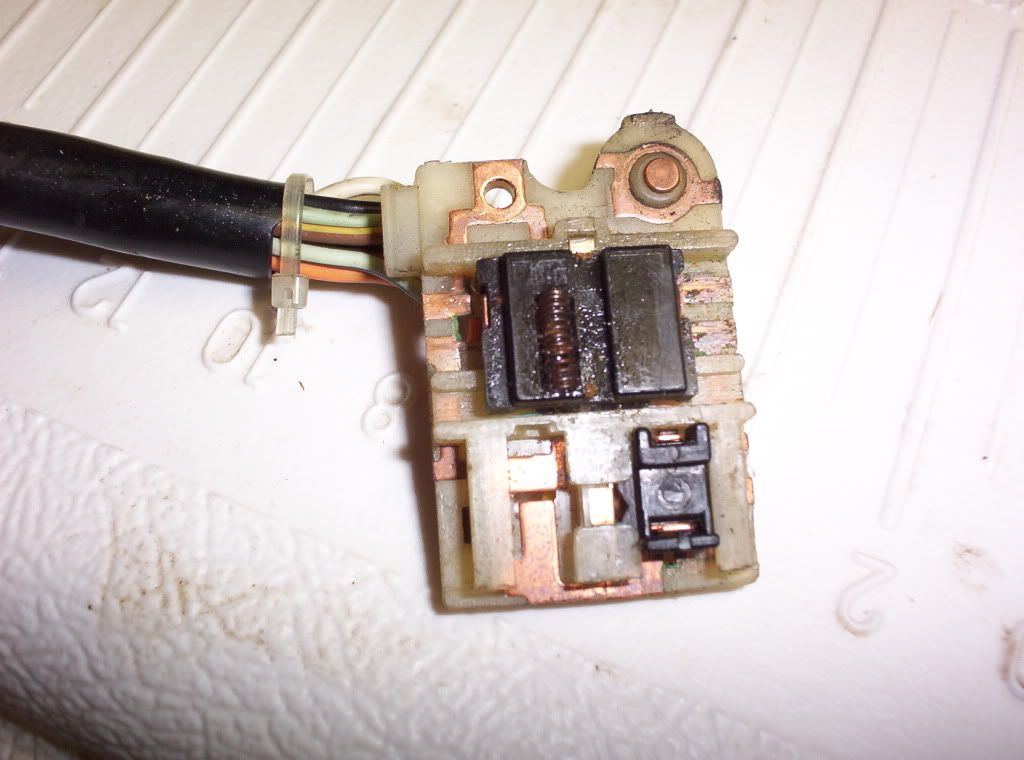
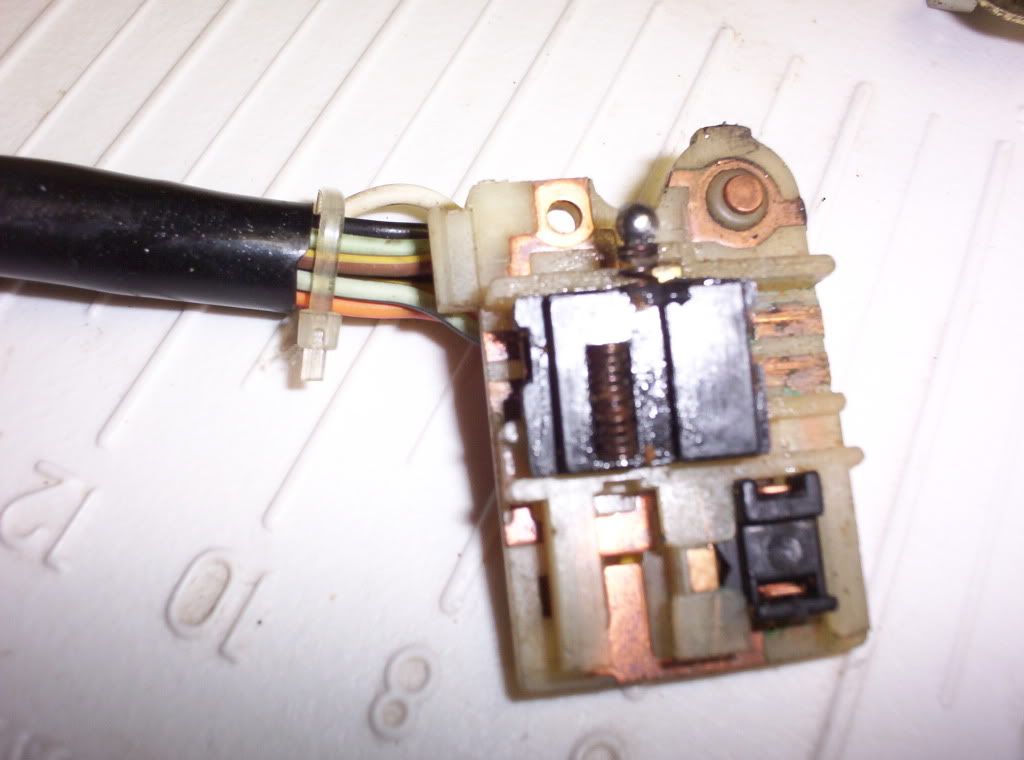
I took apart my turn signal and horn assembly.

Collapse
X
 
  • Filter
  • Time
  • Show
Clear All
new posts

    #16
    Wow, I can't believe I found it. It's smaller than what I was thinking. I used one of those little telescopic magnetic things for working on cars like a small metal detector.

    Whew, ok, I have all the parts now, but I'm going to have to actually put it together now. Can anyone tell me which spring goes to which area? I don't think it was quite clear to me in the thread that goes over this. I have been attempting to fit them into their places, but I'm not sure I have it right. I do have all 6 springs; it's just these three that are giving me trouble. The three springs that I have in place are the two for the turn signal contacts, and the one for the horn.
    Last edited by Guest; 04-25-2012, 05:47 PM. Reason: spring clarification

    Comment


      #17
      Ok, I think I have it figured out now. The small fat one in the middle goes with the ball-bearing, the long thin one on the bottom in the picture goes under the top of the turn signal switch and the other one on top in my pic goes on the switch itself in that little space in the middle. Am I right? I don't know, but I'm about to attempt a re-assemble.

      Comment


        #18
        Originally posted by frijoles-and-beans View Post
        Ok, I think I have it figured out now. The small fat one in the middle goes with the ball-bearing, the long thin one on the bottom in the picture goes under the top of the turn signal switch and the other one on top in my pic goes on the switch itself in that little space in the middle. Am I right? I don't know, but I'm about to attempt a re-assemble.
        Beans and Beans...is everybody out of hibernation in New Mexico now? Good to see you back on here.

        I don't know the answer, but I'm going to pay attention to what you do. Took the 650 out for it's first ride in a long time last night, and I hadn't noticed when I brought it home, but either the springs in my controller have seized/broken or were taken out by a PO.
        '83 GS650G
        '83 GS550es (didn't like the colours in the 80's, but they've grown on me)

        Comment


          #19
          Originally posted by frijoles-and-beans View Post
          Ok, I think I have it figured out now. The small fat one in the middle goes with the ball-bearing, the long thin one on the bottom in the picture goes under the top of the turn signal switch and the other one on top in my pic goes on the switch itself in that little space in the middle. Am I right? I don't know, but I'm about to attempt a re-assemble.
          Great job. Now take it back apart and scrub down those crusty metal contacts with a scotchbrite to remove the corrosion. When reassemblying use some dielectric grease.
          Ed

          To measure is to know.

          Mikuni O-ring Kits For Sale...https://www.thegsresources.com/_foru...ts#post1703182

          Top Newbie Mistakes thread...http://www.thegsresources.com/_forum...d.php?t=171846

          Carb rebuild tutorial...https://gsarchive.bwringer.com/mtsac...d_Tutorial.pdf

          KZ750E Rebuild Thread...http://www.thegsresources.com/_forum...0-Resurrection

          Comment


            #20
            This forum contains old posts which may have information which may be useful. It is a closed forum in that you can not post here any longer. Please post your questions in the other technical forums.


            F&B take a look at post #9. There are some pictures that might help.

            cg
            sigpic
            83 GS1100g
            2006 Triumph Sprint ST 1050

            Ohhhh!........Torque sweet Temptress.........always whispering.... a murmuring Siren

            Comment


              #21
              Boom! I did it! It's all back together again.


              The horn is sounding good. The signals and the headlights are working fine, and the switch is springing back like it should. Nessism, I'll be a little more thorough next time maybe. I know where everything goes now, so it wouldn't be a big deal anymore.

              I did use a wire brush to scrub the contacts. I even took that little switch out that's part of the high-beams and scrubbed out the contacts on either side there.

              I have it back together and I'm happy for now.

              Comment


                #22
                Good Job........

                Comment


                  #23
                  You know, the only reason I even thought about doing this is because I was messing with the right side of the handlebars with the start button and the kill-switch. There was some corrosion on the contacts that I got rid of, so I thought that the other side of the handlebars would be just as easy. I thought wrong. It was a lot more tedious.

                  Well, I'm glad that's over with, whew!

                  Comment


                    #24
                    Originally posted by frijoles-and-beans View Post

                    Well, I'm glad that's over with, whew!
                    Hey, congratulations!

                    Next time, break out (or borrow!) the Dremel tool with a miniature cloth buffer wheel. The secret weapon to reworking bike electrics. It turns the copper (or brass, or whatever it is) shiny, brand new looking.

                    I did the same thing with the earlier bar control, from the '79 or so. Photos here:
                    and God said, "Let there be air compressors!"
                    __________________________________________________ ______________________
                    2009 Suzuki DL650 V-Strom, 2004 HondaPotamus sigpic Git'cha O-ring Kits Here!

                    Comment


                      #25


                      82 1100 EZ (red)

                      "You co-opting words of KV only thickens the scent of your BS. A thief and a putter-on of airs most foul. " JEEPRUSTY

                      Comment


                        #26
                        Is everyone telling me what a mediocre job I did?! Argh!

                        Naw, I know I did a quick job of it, but it really was a nice job on the contact area. Ok, so don't look back at the pic I posted of the circuit board. hehe

                        Comment


                          #27
                          On topic of these switches, does anyone know if replacement parts can be obtained? The horn button and parts are missing on my bike - I bought the bike this way.

                          Comment


                            #28
                            Someone a year or two ago was making the little plastic buttons on a garage lathe.

                            cg
                            sigpic
                            83 GS1100g
                            2006 Triumph Sprint ST 1050

                            Ohhhh!........Torque sweet Temptress.........always whispering.... a murmuring Siren

                            Comment


                              #29
                              Originally posted by frijoles-and-beans View Post
                              Is everyone telling me what a mediocre job I did?! Argh!

                              Naw, I know I did a quick job of it, but it really was a nice job on the contact area. Ok, so don't look back at the pic I posted of the circuit board. hehe
                              I thought it was a good job, and am glad you tackled it with success.

                              I have never had to open the horn. It may, apart from the ignitor, be the only part on the bike that I never disassembled.


                              For future reference, here is a bit of advice I have offered more than once over the years:

                              Get a large, clear, plastic bag.

                              Put the switch/part inside the bag, along with necessary tools.

                              Move the part to the closed end of the bag

                              Put your hands inside and work on it.


                              Simple? Yes, but when springs and bearings decide to part company with the original members of the cast, and utterly abandon their role(s) in the play, this works to keep them within arms reach and you can coax them into another performance.
                              Bertrand Russell: 'Men are born ignorant, not stupid. They are made stupid by education.'

                              Comment


                                #30
                                Originally posted by argonsagas View Post
                                For future reference, here is a bit of advice I have offered more than once over the years:

                                Get a large, clear, plastic bag.

                                Put the switch/part inside the bag, along with necessary tools.

                                Move the part to the closed end of the bag

                                Put your hands inside and work on it.
                                You should've seen me taking the thing apart. I started on the right side with the start button and the kill-switch, so I assumed that the other side was in similar form. I didn't realize how many small pieces were in there. The pieces just popped out all over the driveway. I can't believe I even found all them all. Some of those pieces were pretty tiny.

                                Thanks to everybody that helped me to put it back together. I'd still be on it, no doubt.

                                Comment

                                Working...
                                X