Announcement

Collapse
No announcement yet.

PO hacked up the wiring. Anyone want to teach me electrical?

Collapse
X
 
  • Filter
  • Time
  • Show
Clear All
new posts

    PO hacked up the wiring. Anyone want to teach me electrical?

    Alright so my electrical knowledge is very limited but I am willing to learn. I took the battery out today to put on the trickle charge (yes it seems my bike may have a charging issue but that's not why I am here at the moment) and I can tell someone's been through the wiring before. Some things have been cut and just left dangling and I have no idea what they were for and how to go about correctly fixing or removing them.

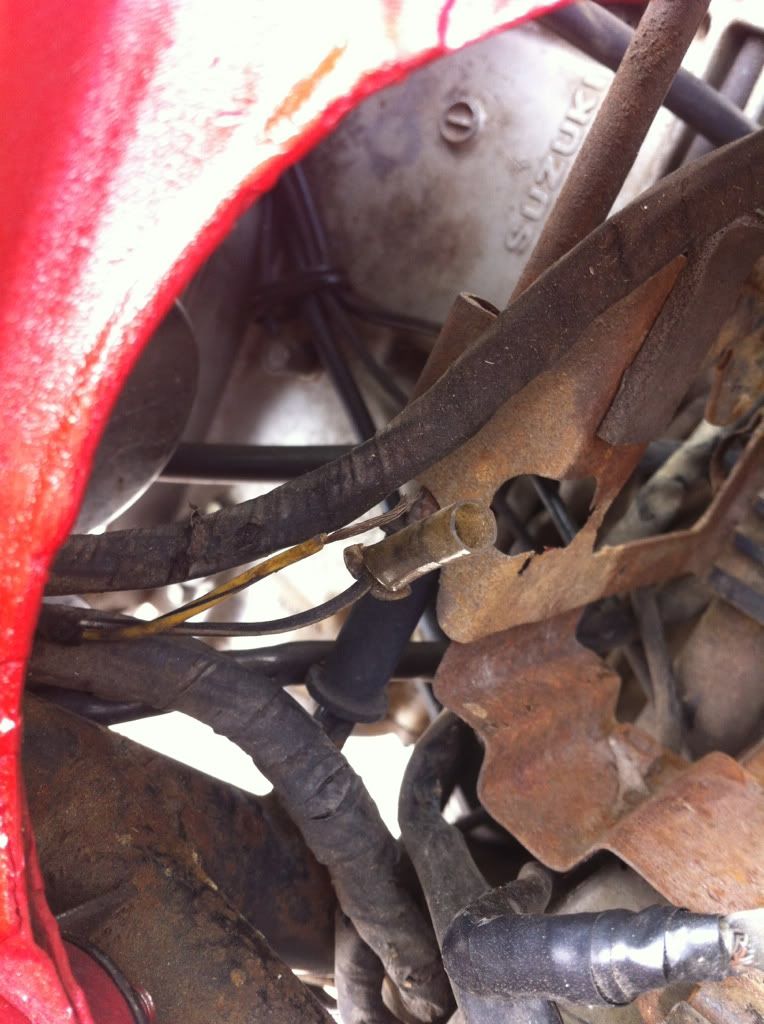
    Here are two I noticed:


    On this (yes I do not know what "this" is) it looks like it was cut completely off then re wired.


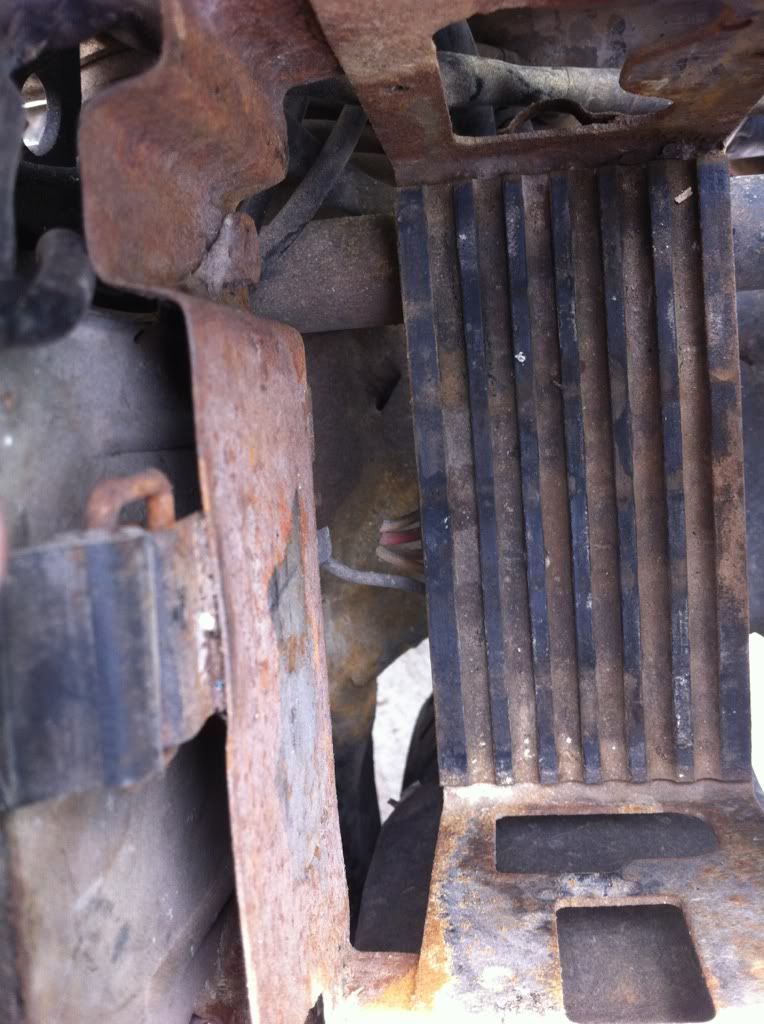
    Under the battery tray there are a few cut wires as well


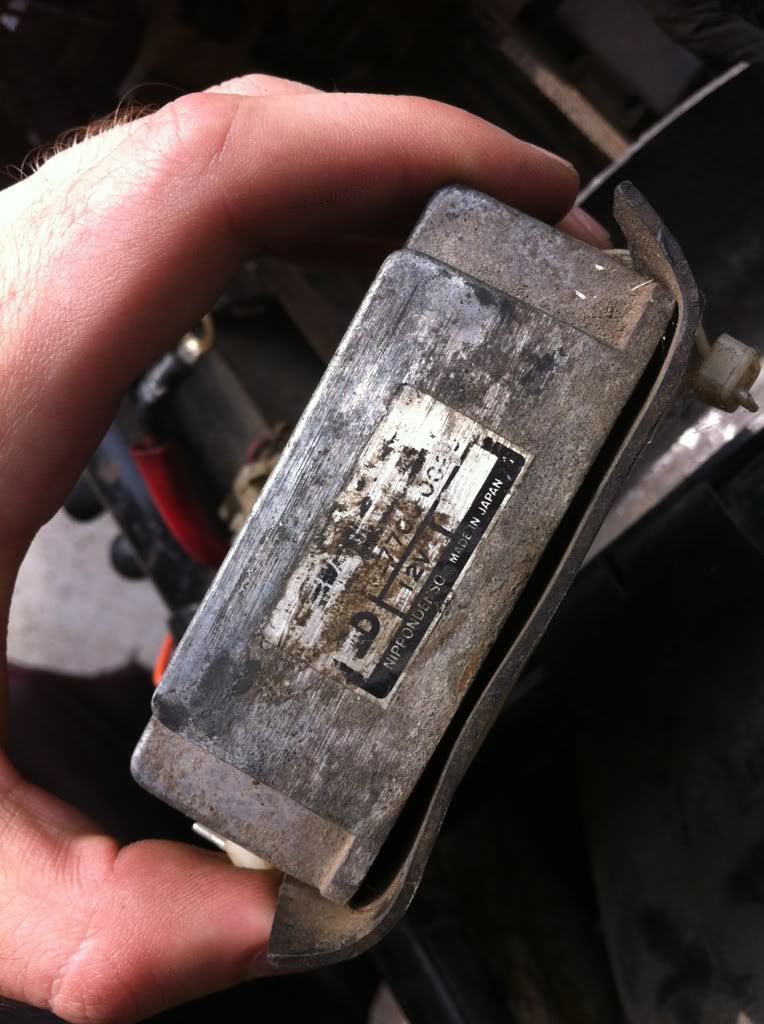
    Here the side of the "thing" again. Maybe it'll help determine if it is the correct part or not


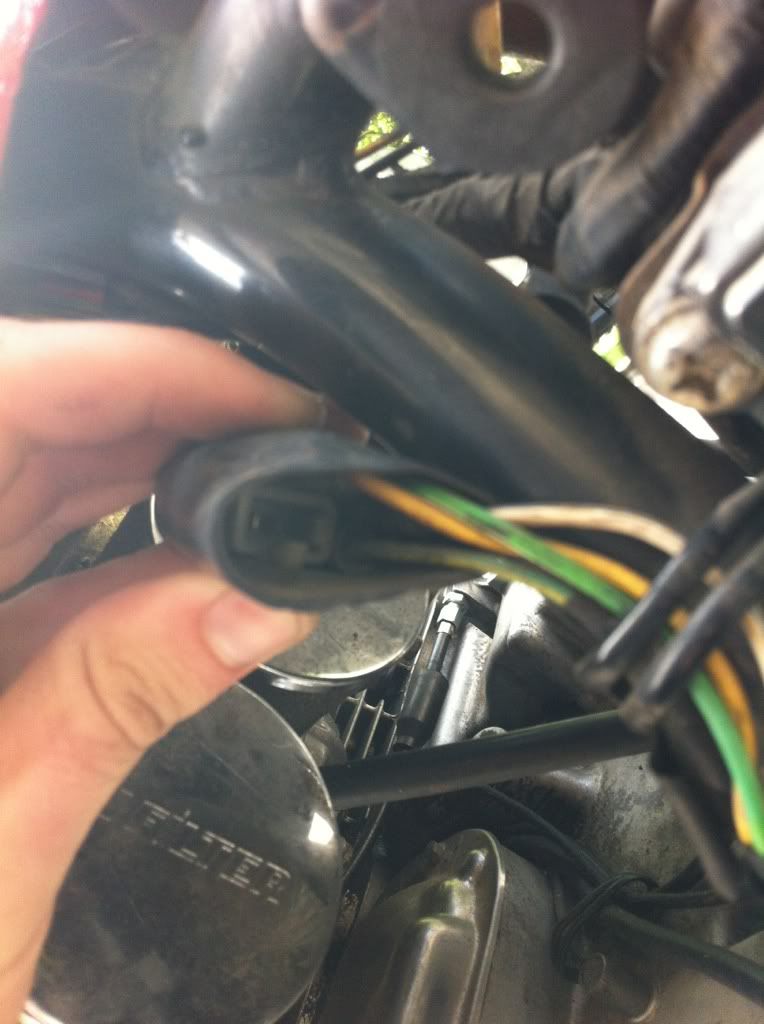
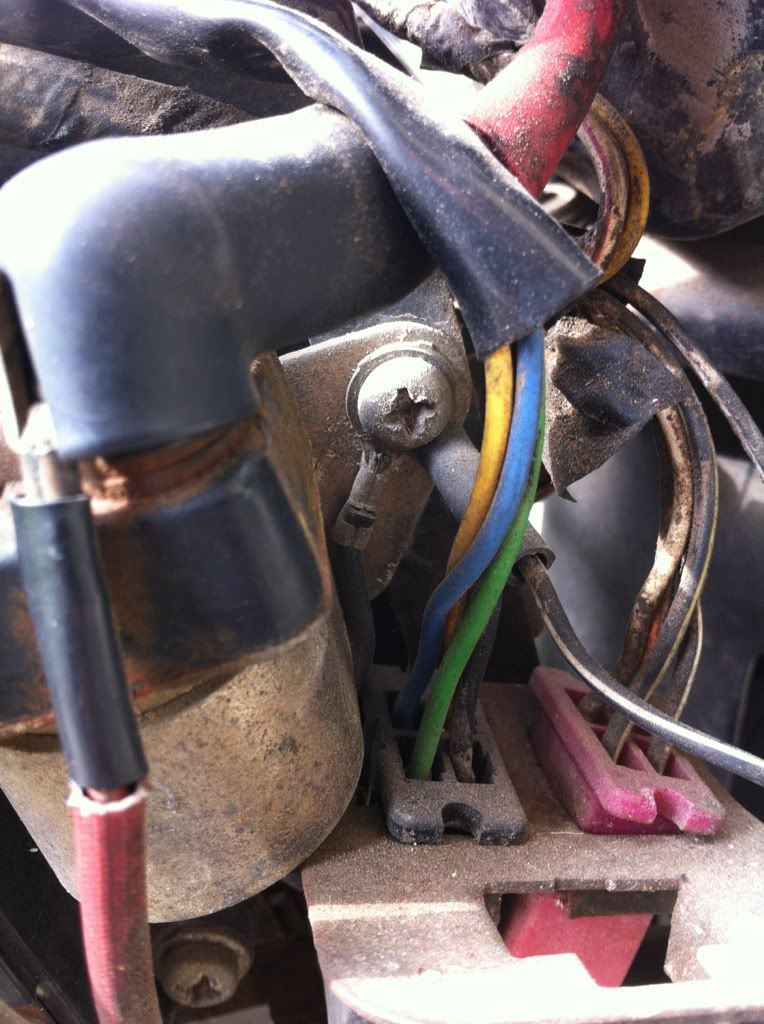
    Loose connector to something


    More of the entire mess


    And lastly some grounds that don't seem like they should be at this spot


    So if anyone cares to explain any of this and help out that would be extremely helpful and greatly appreciated.

    #2
    You need to pick up this book: http://www.amazon.com/Motorcycle-Ele.../dp/0760327165

    The best source of m/c specific electrical training IMHO. Easy to read with lots of pictures and diagrams. It will turn you into an electric wizard in no time.

    Good luck with the project.

    Cheers,
    Spyug

    Comment


      #3
      Hi,

      Before we begin, do you have a wiring diagram? There should be one on my website either as a stand-alone unit or in a service manual.

      The first picture looks like the wires for the fuel gauge. I can't tell if they are coming from the fuel gauge send unit or from the fuel gauge itself.

      The second picture looks like the regulator/rectifier unit that somebody wired in very haphazardly.

      Third picture: I don't know what those wires are. Where do they go?

      Forth picture is your regulator/rectifier unit.

      Fifth picture: I don't have enough reference to take much of a guess, but probably wires feeding the instrument panel from the oil pressure sensor, side stand switch, flasher relay, and stuff like that.

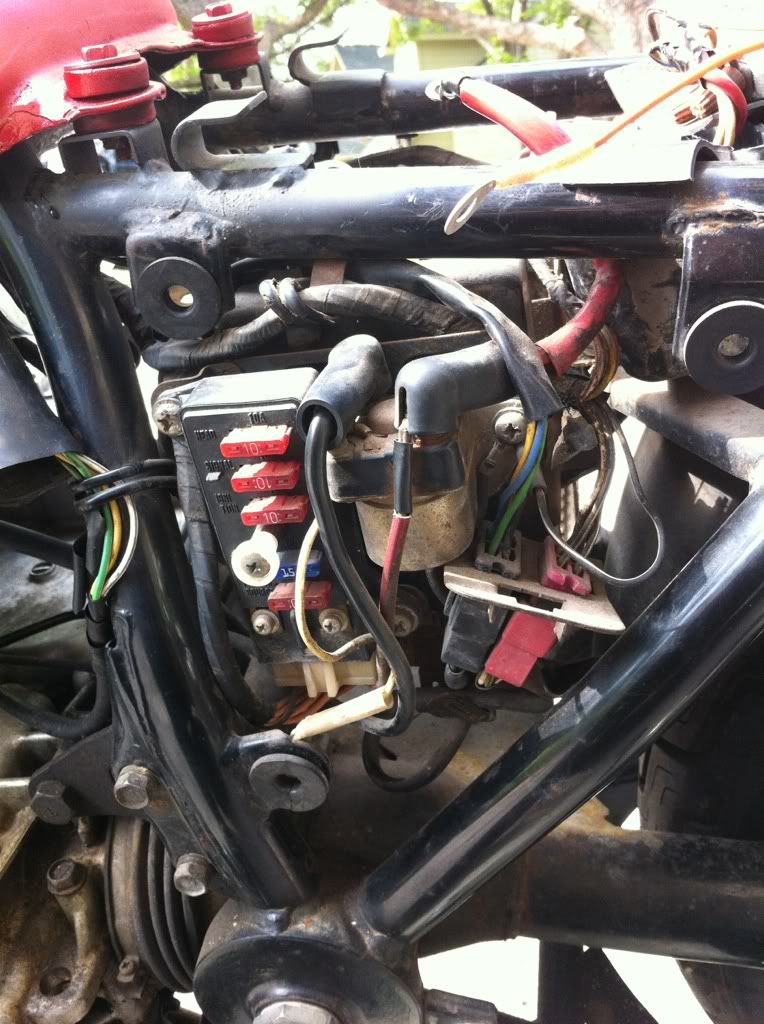
      Sixth picture: I'm sure you recognise the fusebox on the left, the starter solenoid in the middle, and a couple of molex connectors on the right. one connector probably connects the stator to the r/r unit (actually, it looks like that one is missing due to the hack job wiring nuts on the r/r unit). The others are for various lights, gauges, sensors, and ignitor.

      Seventh picture: A common frame ground is a good thing. You also have a big ground strap from the negative battery post to the bottom of the engine.

      You will find a wiring diagram here: GS1100G '82 Wiring Diagram (Color)

      You will find the wire and cable routing diagram on page 302 (section, 10 page 22) of the manual on my site. Just right-click and save >>> GS1100G/GL/GK/GD/GLD/GKD/GKE Service Manual (40MB).

      Thank you for your indulgence,

      BassCliff


      Last edited by Guest; 05-22-2012, 06:50 PM.

      Comment


        #4
        You are correct to be concerned, that is a mess.
        First, here is a link to a color wiring diagram: Color wiring diagram
        Second, download a factory service manual from here: BikeCliff's web site
        As to the pics:
        First one, hard to say what those wires went to.
        Second one, that is your rectifier/regulator. Looks like it has been replaced and rewired with wire nuts. A must fix situation.
        Third pic, you will need to trace the wire colors to figure out what happened. If a stock part is replaced with an aftermarket part, that can happen. If you don't need them, you need to cover them with shrink tubing (best) or at least a good quality electrical tape.
        Fourth pic, I can't read all the numbers but it is a NipponDenso. Most consider the Shindengen units to be far superior (and inexpensive).
        Fifth pic, you will have to trace the wires. It may not be needed anymore.
        Sixth and seventh pic, yuch. You will have to clean all the ground wires, run more to the battery, and clean all the connectors. You also need to look in your headlight shell for any melted/damaged connectors.
        Best of luck.
        Edit: Ahh, BassCliff beat me to it by seconds. Ah well.

        Comment


          #5
          The first two loose wires are probably at the left rear corner of your gas tank, they are for the fuel sending unit.

          The "thing" appears to be your Rectifier/Regulator. Can't tell if the wiring job to it is any good or not.

          The cut wiring under the battery box looks like it used to go to the R/R,

          Can not readily identify the loose connector in the fifth picture. What color are the wires that go to it?

          Those groundng wires are probably fine. Some devices are mounted to the panel, which is rubber-mounted.
          There should be a wire that goes from somewhere on that panel to a chassis ground or the negative terminal of the battery.

          .
          sigpic
          mine: 2000 Honda GoldWing GL1500SE and 1980 GS850G'K' "Junior"
          hers: 1982 GS850GL - "Angel" and 1969 Suzuki T250 Scrambler
          #1 son: 1986 Yamaha Venture Royale 1300 and 1982 GS650GL "Rat Bagger"
          #2 son: 1980 GS1000G
          Family Portrait
          Siblings and Spouses
          Mom's first ride
          Want a copy of my valve adjust spreadsheet for your 2-valve per cylinder engine? Send me an e-mail request (not a PM)
          (Click on my username in the upper-left corner for e-mail info.)

          Comment


            #6
            Thank you all for the information! Makes a LOT more sense now and Ill download the wiring diagram.

            I am no longer with my bike so I am not sure what color wires are going to that connector and the two in the first picture seem to run up the left hand side of the tank with a bunch of the other wires and all the electrical stuff from my tank is on the right hand side.

            The wires under the battery box I was guessing they were originally wired into the r/r but I did not trace them to anything. Ill see what I can find out tomorrow.

            Would it be wise to look into a different r/r?

            Comment


              #7
              It is highly recommended to replace the R/R, especially since you need to rewire it anyway.

              Comment


                #8
                Figure all the wires out first, connect everything properly (not nut caps), get the r/r hooked up and clean up all connections, hook red wire from r/r directly to battery with inline fuse in between, and hook neg. from r/r directly yo the battery. Then get the "stator papers" test on Basscliff's site, then you'll know what you need to replace. terrylee

                Comment


                  #9
                  Search Ebay for a Honda Regulator -fuel -window SH-232 SH-532 and buy one for about 30 bucks,
                  Then read the link at the bottom of my sig line to learn how to modify it for your bike. And you'll never have a RR problem again.
                  1981 GS650G , all the bike you need
                  1980 GS1000G Power corrupts, and absolute power corrupts absolutely

                  Comment


                    #10
                    Like this one! connectors are a little short but you got to cut and splice anyway. Plenty of others on ebay


                    1981 gs650L

                    "We are all born ignorant, but you have to work hard to stay stupid" Ben Franklin

                    Comment


                      #11


                      figured this one out today haha. the PO left the old r/r under there and just snipped the wires off and put them on the new one. So thatll need to come out.

                      also started my journey of going through all the wires. I took the headlight off, opened it up and was shocked at the mess in there haha. wow.

                      no pictures right now but maybe tomorrow or monday when I continue going through it.

                      Comment

                      Working...
                      X