Announcement

Collapse
No announcement yet.

Stator Papers Clarification

Collapse
X
 
  • Filter
  • Time
  • Show
Clear All
new posts

    Stator Papers Clarification

    Hi All,
    I recently replaced the stator in the 850 and it does not seem to be charging. I am trying to run through the Stator Papers and I need a little clarification. I had the meter on the battery and it is reading 11.7 at all rpm, so I am thinking that it is just running off the battery because it was reading 12.3 the other day when I tested it but didn't have time to tear into it.

    I am trying to check resistance across the three yellow wires but when I installed it, I used the butt splices that came with the kit I got at RoadsterCycle.com (I also installed a Shindengen SH775 at the same time because I guess I like to complicate things where possible.)

    My clarification is: When I checked the resistance, I get a 0.00 for all three tests and I am wondering if that might be because it is 'backtracking' through the R/R instead of going through the stator? I am going to put blade connectors on instead anyway so I can test it properly soon enough, but I was wondering whether the outcome for when I put on the new connectors was a foregone conclusion so I could start planning accordingly.

    On a related note, I was able to test the old stator because it was out already and I got the same result (no resistance on all three pairs). Am I correct in thinking that this means the old one is completely bad?

    Thanks for any insight you can give.

    —Chris
    Last edited by Guest; 04-02-2013, 12:25 AM. Reason: Finished a thought.

    #2
    Hi,

    There is a stator testing "how to" guide on my little website.


    Thank you for your indulgence,

    BassCliff

    Comment


      #3
      My clarification is: When I checked the resistance, I get a 0.00 for all three tests and I am wondering if that might be because it is 'backtracking' through the R/R instead of going through the stator? I am going to put blade connectors on instead anyway so I can test it properly soon enough, but I was wondering whether the outcome for when I put on the new connectors was a foregone conclusion so I could start planning accordingly.
      The resistance should be checked with the stator disconnected from the R/R. Take your measurements at the three wires that come off the stator. You want to see a value between 0.5 - 2 ohms. If you are really showing 0 ohms then your stator is defective.

      Before you start any testing you need a fully charged battery. 12.3 volts is not fully charged. I would want to see a voltage closer to 12.6 for a fully charged battery.

      I use this flow chart and have found it helpful
      http://www.electrosport.com/media/pd...ng-diagram.pdf

      Comment


        #4
        Check your multimeter - some units can't read resistances this low- and low batteries also can produce strange readings.
        1981 gs650L

        "We are all born ignorant, but you have to work hard to stay stupid" Ben Franklin

        Comment


          #5
          Resistance is ALWAYS checked with the part(s) isolated.

          Disconnect it or you will be reading dead shorts because the diodes in the rect/reg are being read also...

          Comment


            #6
            Do a quick test first:


            Revised Phase B to improve probability of finding the problem.

            And here are some updates with background to the Phase B tests that focus on the stator alone.

            A revised test is at this link; The actual test is on Page 6 of 9. We added the leg to ground AC voltage test as this helps isolate insulation breakdowns to ground using the relatively high 60-80 VAC stator voltage when it is open loop.

            Link to Revised PHASE B of Stator Pages with discussion of testing methods:

            Comment


              #7
              Hey, thanks, gang. That pretty much confirms what I was thinking.
              1) I will test the new stator when I put the new connectors in.
              2) My old stator is dead (I'll try to check my meter to make sure it's accurate)
              3) Posplayr: That was the beginning test I as trying to do. The battery is charging right now, so I'll write down all of the readings. I didn't do the full test, but I do know this time that the readings were all 11.7 at idle, 2500, and 5000.

              Thanks again guys,
              Chris

              Comment


                #8
                Just wanted to add that it's critical to bypass the old factory wiring when installing your new stator and R/R. Wire the stator directly into the R/R, do NOT connect to the old GS harness connectors since the current path is convoluted and indirect (lots of harnesses melt down due to too much path resistance). Also make sure the R/R has a solid frame or battery ground path. Never ground to the battery box or the rubber mounted electrical side panel like Suzuki sometimes did on the GS's.
                Ed

                To measure is to know.

                Mikuni O-ring Kits For Sale...https://www.thegsresources.com/_foru...ts#post1703182

                Top Newbie Mistakes thread...http://www.thegsresources.com/_forum...d.php?t=171846

                Carb rebuild tutorial...https://gsarchive.bwringer.com/mtsac...d_Tutorial.pdf

                KZ750E Rebuild Thread...http://www.thegsresources.com/_forum...0-Resurrection

                Comment


                  #9
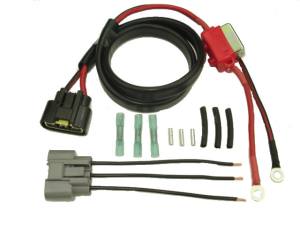
                  Thanks, Nessim. That's most of the reason that I got the Roadster Cycle kit (pic here: or here: http://roadstercycle.com/images/Supe..._cb_wb_irf.jpg

                  The stator is wired directly to the grey harness and the black and red leads are connected directly to the battery. I hadn't considered making an additional path to ground, but I think I will add another ground to make sure that the grounding is sufficient for all purposes, not just this. So, Thanks.

                  It does make me wonder whether insufficient grounding could be preventing it from charging properly?

                  Side note: I am going to have to pull off the cover again to replace the gasket. Is there any more thorough testing that I can do when I get in there, besides just a visual inspection? Or is checking resistance externally the only test that can be done to a stator anyway?

                  Thanks for the great help, as always.

                  Chris

                  Comment


                    #10
                    I have seen improved grounding restore marginal charging to excellent charging. I have also seen improved grounding make no change to marginal charging performance.

                    I normally run a wire from the battery box ground to the battery and the frame.
                    sigpic Too old, too many bikes, too many cars, too many things

                    Comment


                      #11
                      Originally posted by Gibbelstein View Post
                      Side note: I am going to have to pull off the cover again to replace the gasket. Is there any more thorough testing that I can do when I get in there, besides just a visual inspection? Or is checking resistance externally the only test that can be done to a stator anyway?
                      Externally, you can check resistance and voltage output.
                      For both of these tests, the stator needs to be disconnected from the R/R.

                      Internally, it's just a visual inspection.

                      .
                      sigpic
                      mine: 2000 Honda GoldWing GL1500SE and 1980 GS850G'K' "Junior"
                      hers: 1982 GS850GL - "Angel" and 1969 Suzuki T250 Scrambler
                      #1 son: 1986 Yamaha Venture Royale 1300 and 1982 GS650GL "Rat Bagger"
                      #2 son: 1980 GS1000G
                      Family Portrait
                      Siblings and Spouses
                      Mom's first ride
                      Want a copy of my valve adjust spreadsheet for your 2-valve per cylinder engine? Send me an e-mail request (not a PM)
                      (Click on my username in the upper-left corner for e-mail info.)

                      Comment


                        #12
                        Originally posted by Gibbelstein View Post
                        Hey, thanks, gang. That pretty much confirms what I was thinking.
                        1) I will test the new stator when I put the new connectors in.
                        2) My old stator is dead (I'll try to check my meter to make sure it's accurate)
                        3) Posplayr: That was the beginning test I as trying to do. The battery is charging right now, so I'll write down all of the readings. I didn't do the full test, but I do know this time that the readings were all 11.7 at idle, 2500, and 5000.

                        Thanks again guys,
                        Chris
                        A low battery will hold the R/R charging voltage down, which is why it is recommended to always test with a fully charged battery. On the other hand when the R/R output basically flatlines as your is then it appears to not be charging at all. Even though it is not a complete Quick test, you should probably move to Phase A.

                        A quick check using the Modified Phase A of the stator pages will confirm if there is any current flow from the R/R. If there is, then there will usually voltage drops at the ground and + side of the battery (see the flow chart). If the battery voltage is low and there are no voltage drops then there is no current flowing from the R/R.

                        Moving to the Phase B stator tests, even though generally inconclusive it is high likely the stator is bad and you are just looking for a confirmation of the same.

                        Comment


                          #13
                          additional test

                          Hi,

                          Another test you could do is an unloaded stator test. This test is done by disconnecting the plug closest inline to the stator. Start your bike and Set your meter on V/AC and check the AC output, on the stator side of harness, put one probe on one lead and one on another and test each leg of stator, should be three tests. I would assume the V/AC should be over 90 V/AC o neach leg, if one or more of your stator leads are not producing 90 or over id say your charging system is not performing to the max.

                          Also while do the test you want to raise RPM up to about 3-5,000 RPM, different stators produce different outputs at different RPM

                          Do not touch them together, you will get a good spark, the test is done using V/AC because the current produced is AC until it gets the The rectifier which converts it to DC then goes to the battery.

                          Thanks, Jesse
                          Last edited by Guest; 04-03-2013, 09:26 PM.

                          Comment


                            #14
                            Well, damn. I got to put the new connectors on the stator wires today, but before I could check the VAC on any of the legs, I checked the resistance on the three stator legs and got the same result: zero for all three checks. So, no point in me checking the output, I guess.

                            I was going to pop off the cover to replace the now leaking gasket anyway, so I'll be in there to check out the 'new' stator. This is a bummer, because I bought it from the Caltric ebay store in December so it is not brand new, but it probably has less than 2hr of use on it and I now suspect that none of that time has it been producing any juice. I contacted them about warranty info.

                            Thanks again for the input, guys.

                            —Chris

                            Comment


                              #15
                              Before condemning the stator,try another multimeter.

                              Comment

                              Working...
                              X