Announcement

Collapse
No announcement yet.

Planning to wire in GSXR750 handlebar controls to a GS1100E

Collapse
X
 
  • Filter
  • Time
  • Show
Clear All
new posts

    #16
    Originally posted by CivilRock View Post
    Oh, you can be sure I will be testing everything. I'm already pre-testing each step just to make sure I'm going the right direction.

    So I can delete the check panel black box completely? I've already removed 1/2 the wires from it. The only hesitation I have is that on the microfiche that black box is described as a "Head Lamp Relay". Although that's not a full description of what it does, it makes me think there is a headlight relay in there. Does the SSPB have enough output to directly power the headlight? Or am I going to use the O/R feed out of the SSPB to signal a relay for the headlight?

    10 amps x 12v = 120 watts right? What's the headlight? 50-60 watts?

    So the < 5 amps for the headlight is fine. I think I just answered my own question.

    -Kevin
    Yes and Yes you did.

    Not sure about the headlamp relay in the check box. If you look at the schematic

    O to Fusebox
    O/R from Fusebox to RH control connector
    Y/W loops out from connector to HL Switch
    R/Y and R/W go to the Check BOX
    Y and W exit the Check Box to power the HL H/L respectively.

    There would need to be an O/R input to the Check box if it had a headlamp relay in it. There is none.

    There is an O/G input to the check box and so there could be a brake light relay. The R/Bl is the common signal from either the F or R brake switch. A current amp would be needed to see if those brake switches are carrying the whole light current or just enough to switch a relay.

    Comment


      #17
      I could really use a good wiring diagram schematic of this bike.

      For some reason all the ones I have don't show this black box check panel box thingy.

      Do you have one you could send me? Either way, I'm cuttin' more stuff out. And for a guy that just knows enough to be dangerous, those are dangerous words. I know it, but I'm still going to do it.

      -Kevin

      Comment


        #18
        Originally posted by CivilRock View Post
        I could really use a good wiring diagram schematic of this bike.

        For some reason all the ones I have don't show this black box check panel box thingy.

        Do you have one you could send me? Either way, I'm cuttin' more stuff out. And for a guy that just knows enough to be dangerous, those are dangerous words. I know it, but I'm still going to do it.

        -Kevin
        Check your email.

        Comment


          #19
          Almost done.

          OK, everything works. It didn't work first try, but close. Worked from 9:30p-2:30am on this, and sorted out all the problems, but went to bed before I buttoned everything up.

          1. My new flasher was in backwards. Had to move the pins in the connector. Removing the TSCU (Turn Signal Control Unit) was as easy as unplugging it and cutting all the wires out. All I had to do was ground the (-) side of the connector. Easy.

          2. I spent way too much time soldering together diodes for the single indicator light on the Bandit dash. Turns out they're built into the dashboard already, and that mystery (matching) black lead was for the other set of blinkers. That wasted a bunch of my time, but was a relief to figure out.

          3. Bought a smaller starter relay at Lowes for $12.99 yesterday and fits much better in the space. (and doesn't hang down below the trim anymore). I know the Suzuki one would be a better match, but I'm taking easy over authentic.

          4. I didn't exactly follow the kill switch relay mod posplayr describes because for some reason I had already changed/removed some of the harness. And the whole thing was open, so I could do it the cleanest way I could figure out. The way the SSPB works is brilliant, and what I did is effectively the same. Now the power for the Dyna 2000 (ignition) comes directly from the SSPB (solid state power box) and the Kill Switch merely is the switch side of the relay in the SSPB.

          5. Removing the CPCU (Check Panel Control Unit) was pretty easy once I understood it's function. That involved me physically tracing the wires in and out of it. Most of the lights on the bike won't work with it unplugged, so it's a matter of just bypassing the connector. This also removed a fist full of wires. I would explain how this works if I could in a simple way, but I don't know how.

          Again, the route I took on this whole wiring adventure is probably not typical. I removed a lot of handy functions, but I also removed the GS1100 Dash, so much of those features were useless anyway. My auto cancel never worked, and the "Headlight" check light would intermittently light up when clearly the headlight was working. Deleting all that stuff is a relief to me. I've also deleted the kickstand disable switch, the clutch interlock switch, and probably a few other safety items that a responsible citizen should just leave in place.

          I did leave 2 wires that ran the whole harness and were doing nothing just for any future modifications I do, but other than that, I removed anything not necessary.

          As always, thanks for all the help. And I always like pictures with my posts, so here ya go.

          -Kevin

          My new fancy garden tractor starter relay:


          A pile of stuff I removed from the bike:


          It's hard to make out what's going on here, but at this point I've finished testing everything and I'm starting to wrap up the harness. I'm going to follow Suzuki's method by doing a little pre-wrap, then add a couple of the harness protector tubes, then wrap the whole thing. It was 2:30am by the time I was taking this picture, and I was ready for bed:


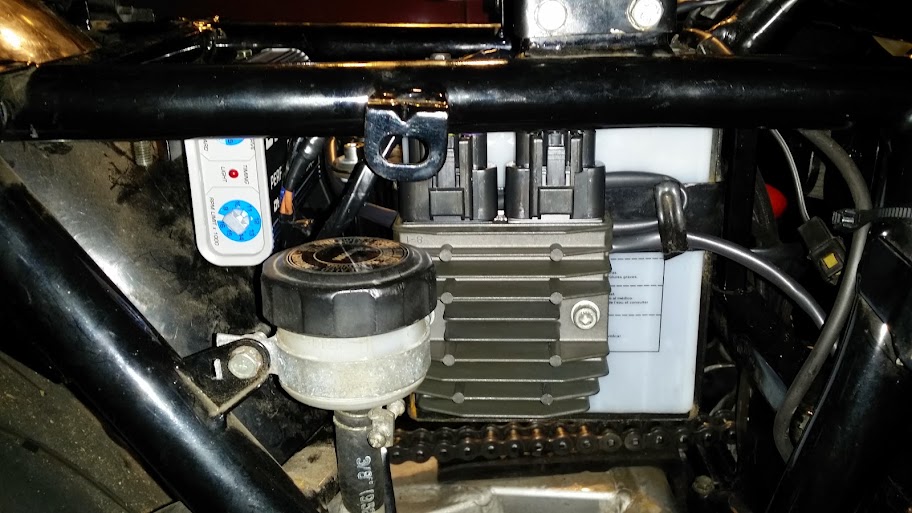
          This is not pretty, but basically how it looks during testing. I'm still waiting for my Series R/R to show up. Should be here this week. Once it gets here I'll make this area nice and neat:
          Last edited by Guest; 02-26-2014, 02:10 PM.

          Comment


            #20
            She's alive!!!

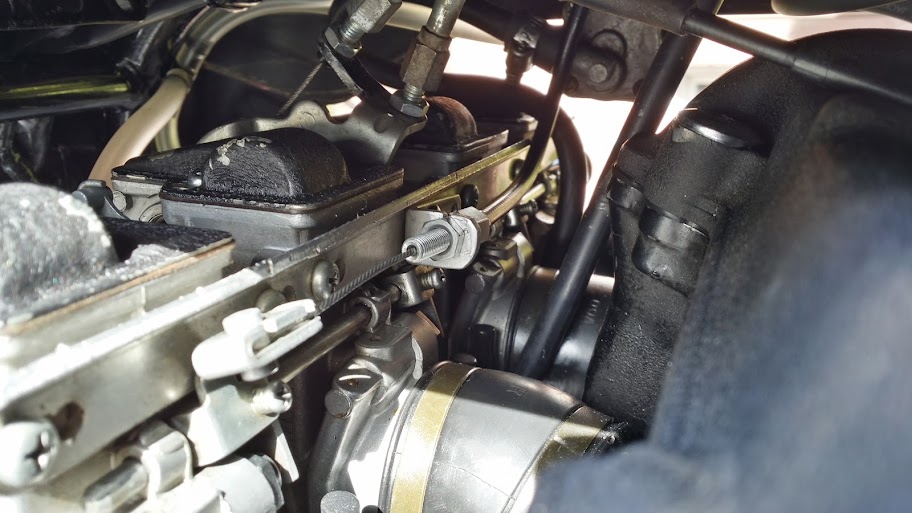
            Got her all buttoned up this morning and rode the bike to work. Carbs aren't perfect, but for all the changes I've made, it was pretty fun. The GSXR controls are just so much better and easier to use than the crap GS ones I had. I even incorporated the choke control using the (newer) throttle cable from my old GS controls. I had to make a little bracket on the carbs, and make a little retainer for the hand controls, but that's par for this project.

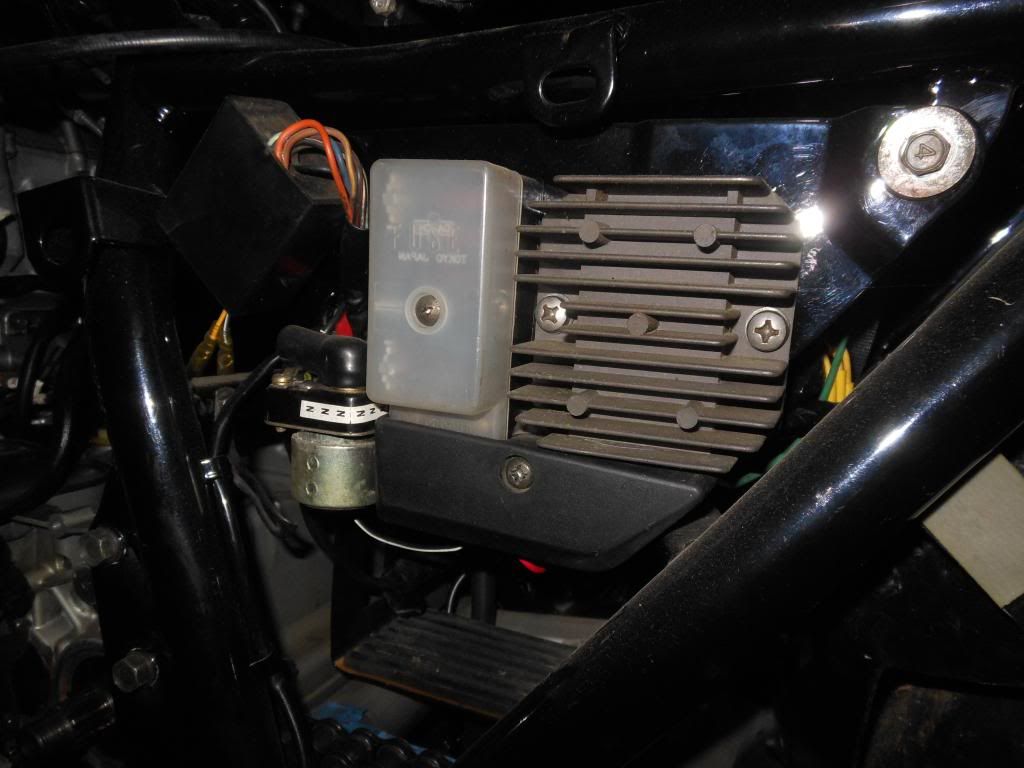
            I hope to pick up my new Series R/R today, but it's not in yet, so I'm still using the Electrex one I bought as an upgrade 9 years ago. Once that's in, I'll be done with all the electrical. That's not true, I have a tiny gear indicator coming from China, and I'm going to wire in a Headlight Kill switch as well. I also want to add a digital oil temp gauge if I can find one I like.

            -Kevin

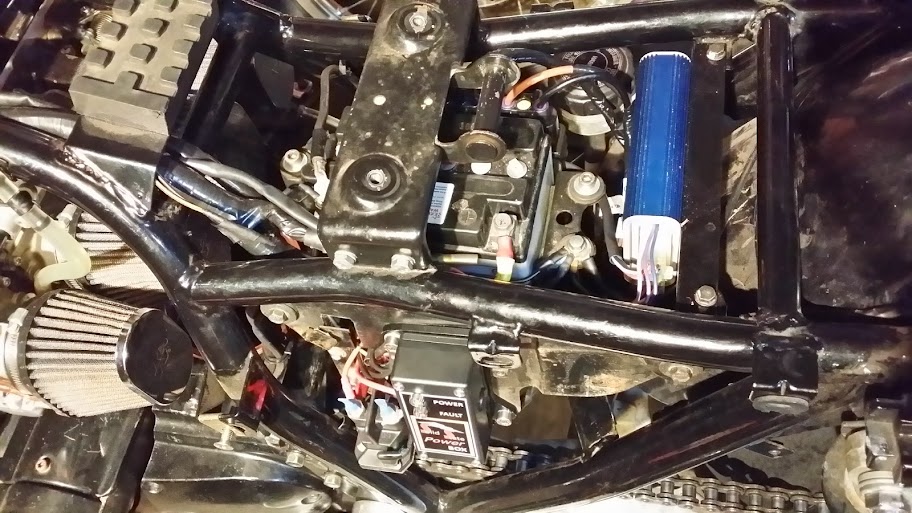
            This is the trick SSPB


            Glory shot. Needs a bath. I need a 90 deg fitting coming out of the R MC to clean up that supply line. My used Corbin seat needs to be replaced. I need to re-polish all the shiny bits... the list goes on forever.


            The space between the Bandit cluster and the triple clamp will be the home of a new panel with some custom stuff.


            This little clip took me waaaaaay too long to make. Made it 3 times. Aluminum didn't work, crappy sheet metal didn't work. Finally a scrap piece of steel worked well.


            Same thing with this little hanger. I mounted it 4 times before it was perfect. Just took me forever to fabricate and instal such a simple part.
            Last edited by Guest; 02-28-2014, 04:22 PM.

            Comment


              #21
              Looks good Kevin, For that switch you might look at this. They are a little cheap looking but it is small and mounts right to the handle bar with three controls. If you spend a little more you will find one with symbols on the button rather than the plastic. I'm going to mount one upside down on my left had side.

              The bar mount is solid so you have to slid it over, then there is a small set screw that holds it in place. All in all it is well made if not quite to the level of an OEM finish.


              You could also get this , or try and make something similar.

              Last edited by posplayr; 02-28-2014, 05:26 PM.

              Comment


                #22
                Finally went to pick up my SH775 R/R from the Polaris dealer ($64.99)
                Then rode over to the Triumph dealer and got the connector ($9.49)

                The new Series R/R was not going to fit without some work, especially with the connector. I'd have to move all the mounting spots on the panel and make room. Without the airbox, I have all sorts of room, and with the Dyna 2000 in use, the stock igniter spot was the perfect place for the new R/R. With just a little tweak of the mounting, it bolted right in place. This also opened up a little more space in the already crowded space between the battery and the electrical panel.


                I buttoned everything up last night, confident I had done it all well. I even found a perfect connector and used one of the Triumph connectors. The 3 yellow from the 1150 stator plugged right into the male plugs once they were removed from the triumph connector. It made for a tidy and sturdy connection without having to hard wire it in.


                This morning I clipped my DMM (digital multi meter) to the battery and it read 12.6v Then I started up the bike and in about 60-90 seconds it leveled off at 14.30v with the bike between 3,000-3,500 RPM (on choke).

                I assume everything is working the way it's supposed to. And although I don't fully understand the benefit of a Series R/R, I trust posplayr that it will benefit the bike. (I do understand the non-shunt, and heat reduction, and stator longevity, but I just don't fully understand how the new R/R is able to do it) I did do some googling trying to confirm the wiring for the Triumph connector and I found instructions/threads on just about every major brand of bike that are now doing this mod. It's kind of an amazing underground knowledge base that is correcting all these bad R/R with new technology. Hopefully I'm not redoing it in another 9 years for the next best thing.

                -Kevin

                Comment


                  #23
                  It is quite possible to mount the SH-775 in close to the stock position, you just have to eliminate that huge connector. I don't know where there is a How-to-do-it, but I suspect crimping and soldering spades to the end of the wires, sliding them onto the made spades coming from the SH-775 and then soldering that, and then fill the whole thing with RTV or other potting.

                  Generally I would not have relocated the R/R to the other side of the battery box as you surely had to extend the Red R/R(+) from the SSPB to the R/R. As long as it is less than 2 foot it should be OK, even if the voltage is a little lower than should.

                  If you relocate the SH-775 mounting holes to move it up, then it might even fit with the bulky connector. So if you did more teh SH-775 back, then your Dyna 2000 would be happier on the shock insulated battery box (where the ignitor was). If not make sure the Dyna 2000 is mounted in rubber so it doesn't see all the frame vibration. It will last longer that way.

                  Mounting it to the battery box gives you the opportunity for a double shock isolation with the added weight of the battery
                  1. Rubber mount between frame and battery box (which is heavy and that is a good thing)
                  2. Rubber mount between the battery box and the Dyna 2000.


                  Last edited by posplayr; 03-13-2014, 03:35 PM.

                  Comment

                  Working...
                  X