.png "Powered by vBulletin")
Options
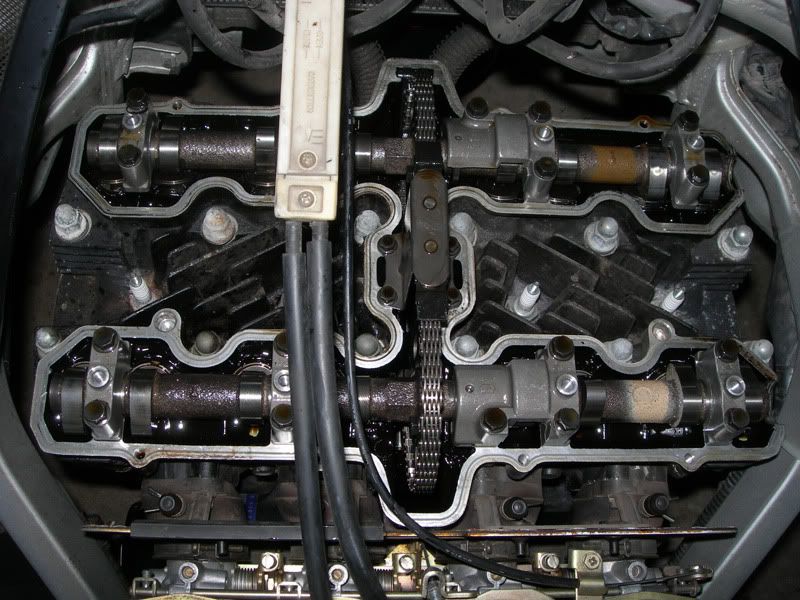
So I played around with the measurements I have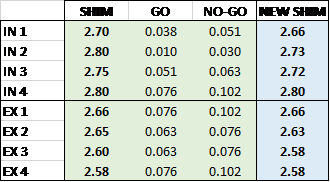
and I got three options:
I already bought the 4 shims from Z1 for option 3 because it covers both options 1 and 3 and was cheap enough that I thought I would try it. Worst case I end up with shims to trade more easily with the shim club. They should be here Friday. I am just wondering what everyone's thoughts are.
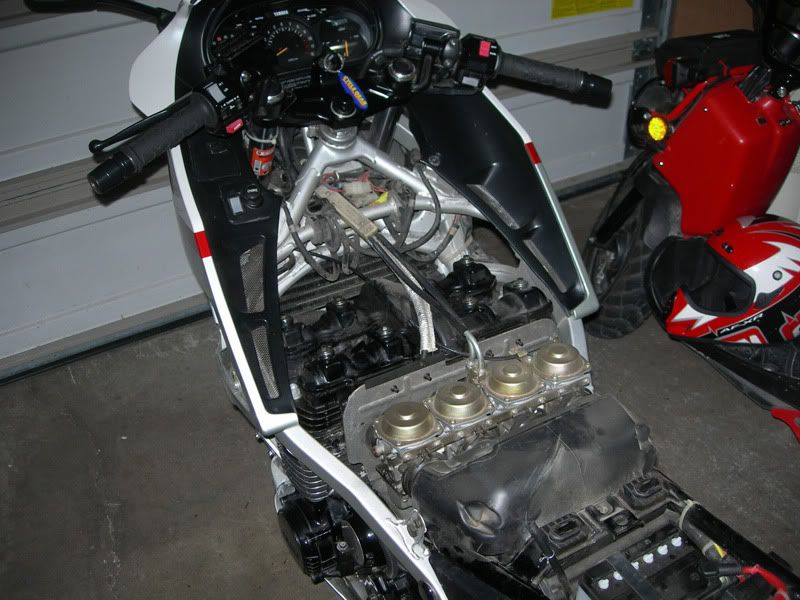
Also I am unsure if this makes much difference but the engine was rebuilt 6k miles ago and was bored to 850cc using a wiseco kit. At the time a number of valves seats were lapped and some valves were replaced etc. This was done by a professional mechanic. This is the second clearance check since the rebuild and the first one I am doing instead of a professional.
So I played around with the measurements I have

and I got three options:
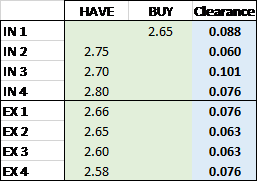
Option 1 -
The simplest option only requires buying/trading a single shim. The exhaust is left as is while the intake is loosened up by shifting shims around. Two valves slightly out of spec, one more than the other. The tight valve stays the tightest but moves to nominal.
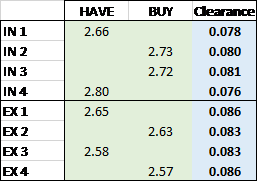
Option 2 -
Very nearly .080 on all valves. Requires buying/trading 4 valves which are each an X size, meaning it is likely only possible if in stock with the shim club.
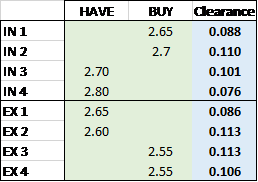
Option 3 -
This option opens everything up as I noticed a number of people in other posts saying you should aim for as high as .10mm, in particular on the exhaust. This involves buying/trading 4 shims but they are all standard sizes. Cylinders 2 and 3 end up more open than the outside cylinders not sure that it matters but I could see this being beneficial from a heat flow perspective though I really doubt it makes a difference if everything else is balanced like it should be.

I already bought the 4 shims from Z1 for option 3 because it covers both options 1 and 3 and was cheap enough that I thought I would try it. Worst case I end up with shims to trade more easily with the shim club. They should be here Friday. I am just wondering what everyone's thoughts are.
Also I am unsure if this makes much difference but the engine was rebuilt 6k miles ago and was bored to 850cc using a wiseco kit. At the time a number of valves seats were lapped and some valves were replaced etc. This was done by a professional mechanic. This is the second clearance check since the rebuild and the first one I am doing instead of a professional.

Comment