Announcement

Collapse
No announcement yet.

1981 GS550T Oil Cover Studs and Nuts - Also first post as a new member!!

Collapse
X
 
  • Filter
  • Time
  • Show
Clear All
new posts

    1981 GS550T Oil Cover Studs and Nuts - Also first post as a new member!!

    Hello there GSResources community! This is actually my first post although I've been scouring the boards for the past couple weeks for technical info after picking up a nice 1981 Suzuki GS550T a couple weekends ago.

    (A little background) I took a few motorcycle classes at my local community college over the past year before purchasing a bike in the hopes that I would be able to find an older bike (aka affordable) I could work on myself without being completely clueless and paying someone else for labor I can easily do myself with a little extra research and effort. Nine months ago a neighbor of mine was trying to get rid of a 91 Honda ST1100 b/c it had been knocked over and had started spitting out gas from the exhaust pipes. Which instantly sounded like a broken petcock or vacuum diaphragm to me (which it was.) Also disassembled and pulled carbs on this one but there were super clean and this bike starts and idles so casually its almost alarming. Anywhoo I got the ST for $800 but when I tried riding it or even just moving it it felt so heavy and just overwhelming in general for a new rider like me (5'11" 160lbs) that I really haven't done too much with it. We live in an area with a lot of traffic and even more a lot of $hitty and unforgiving drivers that I just haven't wanted to chance it. Besides that after sitting for the winter its developed a slight drag on the right front brake (dual disc) which is very noticeable and honestly kinda alarming for a new rider like me sitting on a V4 with 100hp. Soooo a few months after that I came across a 125cc SYM scooter that someone had left sitting for a few years and couldn't turn over. Bought for $500, disassembled and cleaned the carb and brought it back to life. (This scooter has since passed to the GF but is still a snappy little ride for SF).

    Which brings me to the newly acquired GS!! Found it on Craigslist with a clean title for $800. Running, but rough. PO thought the issue had to do with a carb sync but didn't have a set of vacuum gauges and didn't want to put any more money into it because of other projects. Despite the rough running condition (def seems like a carb sync issue since you can hear them ramping up at different speeds into the idle/off-idle/main circuit) I managed to ride it for a good 20 miles before it died at a light and start leaking gas from i thiiiink the inline fuel filter (which I've read is not even supposed to be a part of this fuel system) from what I'm assuming is a clog pilot jet circuit. Btw, COMPLETELY FELL IN LOVE WITH MY GS ON THAT RIDE!!!! The tires were balding enough that I could feel some slicker parts of the road and didn't want to push it too much...but when I found some nice pavement with no cars around me, she pulled strong with that 50%+ throttle main circuit. It really kinda was kicking it into third gear on the test ride that sold me. Haha. But anyways...

    So far I've begun collecting needed tools and parts. I've bought a vacuum gauge to sync the carbs but first want to pull the carbs off for disassembly and inspection/cleaning. After that I'm planning to remove the valve cover (gasket and half-moon plugs already in the mail) to inspect valve clearance. There's a shop near me called KC Engineering (San Francisco) which I've called and seems to have some 29.5mm shims in stock so I'm hoping to be able to inspect/adjust on the same day. From everything I've read carb sync cannot be done until valve clearances have been confirmed as good but after that I'll already have the tools ready to go happily.

    However before I even pulled the carbs I decided to do something even more basic which ended up being a lot more involved that I had previously imagined. Nevertheless I'm really happy I was able to identify the problem with the bike at home in front of our house instead of one the side of the road in the middle of nowhere.

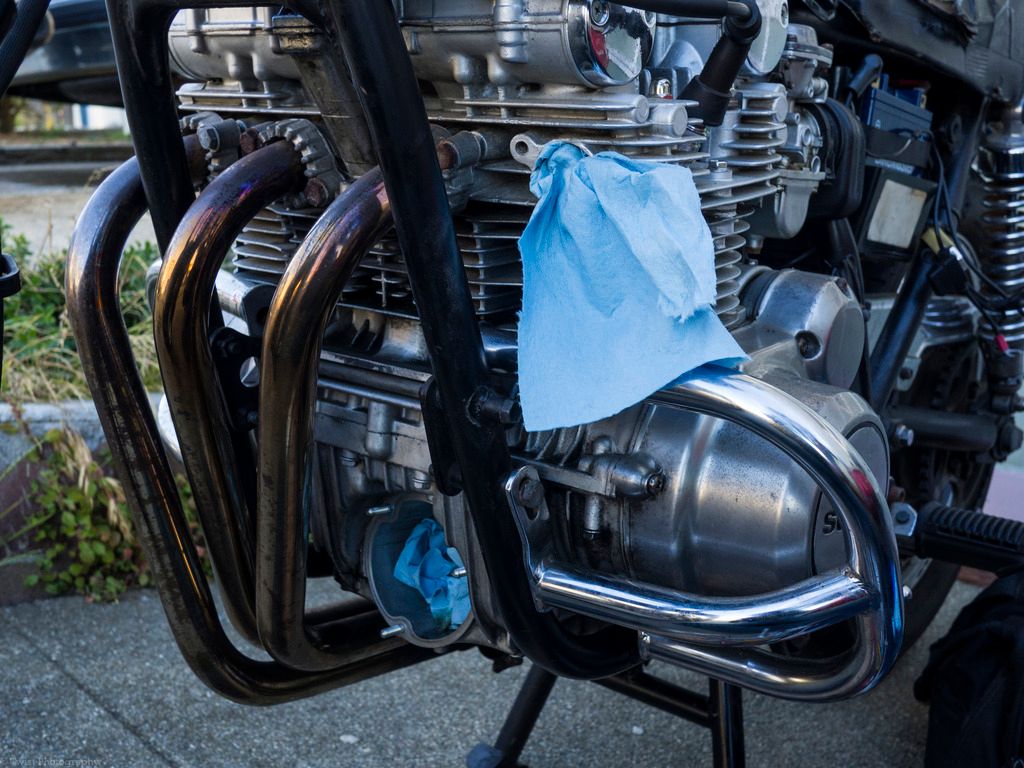
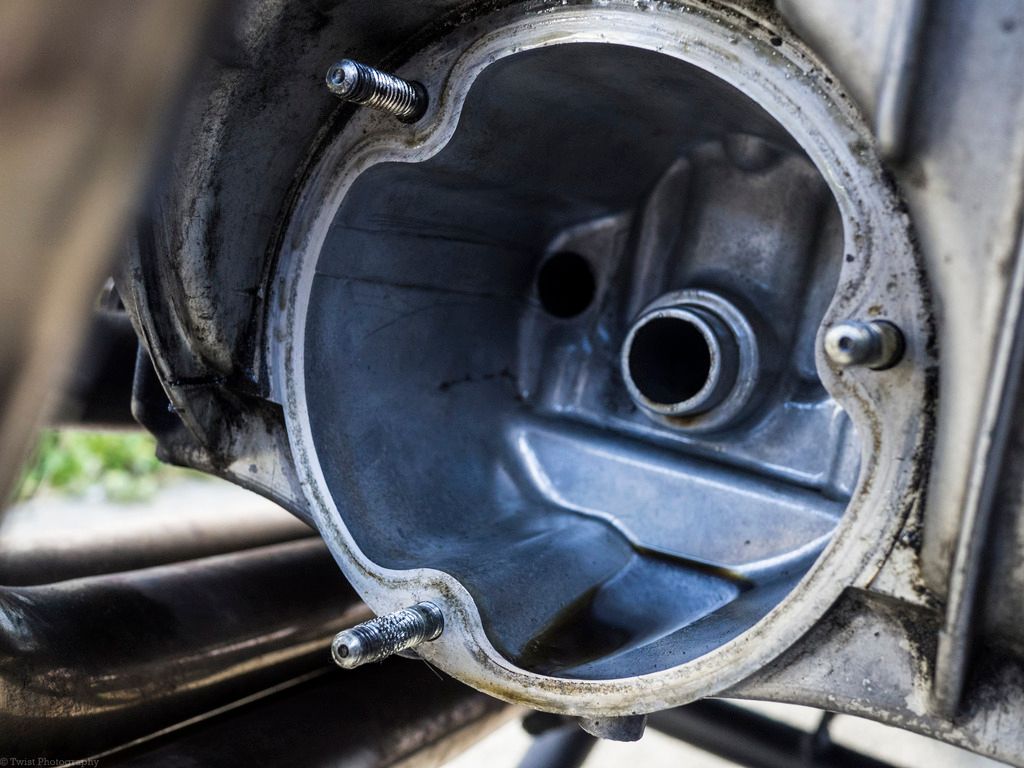
    Soo I thought I was just doing a quick oil and filter change on the 1981 Suzuki GS550 I acquired 10 days prior. Imagine my surprise when I realized I was actually setting out to replace the oil cover studs which are responsible with keeping the engine oil inside and are definitely showing their age. Two of the three acorn nuts which had been holding the cover on had NO THREADS at all after I removed and tried reinstalling!!


    For the time being I threw a couple lock washers and nylon lock nuts on just to hold the cover in place. Two of the three nuts tighten down alright but one just keeps on spinning (just keep spinning...). Remembered the words of my departed Father, "Anything worth doing is worth doing right" and decided not to refill the oil and just call it done when really I had only applied a temporary band-aid.


    Instead, I'm now waiting on a pack of five new threaded studs and five new acorn nuts from BikeBandit by using their online fiche. I'm thinking about taking a dremel cutting wheel to the old studs and knocking them out with an impact driver when the new ones come, but have read some people saying vice grips may be enough. Please let me know if you have personal experience with removing these studs. Not too sure what i'm in for but am determined to get it done without damaging the block.


    Sooo to recap; I started out doing some pretty routine stuff. Instead identified a significant problem on the old bike I've set out to restore. A problem which would have needed to be addressed at some point or other regardless of my efforts today. However I now find myself with the luxury of performing the repair with it parked in our driveway instead of stuck somewhere on the side of the road.

    All in all a good day (Although i definitely need to figure out how to take pictures the next time i work on it by myself)

    #2
    Most of us get lost reading long posts ! Anyways, you are on the right track- lots of issues will surface. It's nice that it sorta runs - this is an incentive to keep at it. Have a look at Basscliff's library for info overload about common issues...

    1981 gs650L

    "We are all born ignorant, but you have to work hard to stay stupid" Ben Franklin

    Comment


      #3
      During my engine repair I noticed my studs had coarse nuts on the fine threaded studs (one studs had to come off to split the cases). Took the first one off using 2 nuts locked together. When I decided to replace them I got half way through the second before the threads gave out. I used a vice grips to finish the job.

      Edit: I may have the fine vs course mixed up.
      Jordan

      1977 Suzuki GS750 (My first bike)
      2000 Kawasaki ZRX1100
      1973 BMW R75/5

      Comment


        #4
        Yep, that post definitely got away from me..sorry peoples. Haha

        In other news I should be receiving the replacement studs and acorn nuts for the oil filter cover today. From what I've seen in other threads it looks like I'll want to put a small amount of blue loctite on the stud threads that'll be mating to the engine block. I know it takes 24hrs for a full cure but i'm hoping to be able to get the cover locked down well enough to at least keep debris out and if they appear to be holding firmly maybe even fill the engine with some oil.

        Wish me luck!

        Comment


          #5
          The Locktite curing is not an issue, as you're tightening the studs a bit when you torque down the acorn nuts. You'll be good to go right away.

          Read thru the Basscliff pages linked above
          1978 GS 1000 (since new)
          1979 GS 1000 (The Fridge, superbike replica project)
          1978 GS 1000 (parts)
          1981 GS 850 (anyone want a project?)
          1981 GPZ 550 (backroad screamer)
          1970 450 Mk IIID (THUMP!)
          2007 DRz 400S
          1999 ATK 490ES
          1994 DR 350SES

          Comment


            #6
            A whole lot of my prep so far has just been scouring Basscliff/Bikecliff's site for any and all info that I can apply to my 550 honestly. So far I only have pdfs of a couple service manuals but his photos and instruction have definitely been waaay more clear and straightforward. Any suggestion about which is better btw in terms of a physical Haynes/Clymer manual for the GS?

            Also I managed to do the stud replacement today! The first two (approx 7 o'clock and 10 o'clock position) came out like butter after getting a good bite on it with the vice grips. That third stud however just started slipping and shearing off any remaining threads the moment i started using the vice grips on it. After struggling without any success I eventually turned to a drill and extractor set to at least get the stud moving. Spent some time on that without any success. Eventually removed the exhaust pipe from the #1 chamber and loosened the pipe on #2. It allowed just enough space for me to attack the stud from a new angle with the vice grip. After a few more probing attempts it finally bit down and found pay dirt. After that threading in the new stud was no trouble at all.


            Note: To screw the new studs in I had originally planned to use the acorn nut along with a regular nut to create a locking nut condition. Buuut i couldn't find a regular nut in the right size in my spares bin. Decided to try it with just the new acorn nut which worked well enough. Although it turns out the acorn nuts you receive from BikeBandit actually have thinner caps than the oem acorn nut. Found this out by tightening one down a little too far and seeing the stud come out the other side. Aside from that I used a set of small needle nose locking plier with some tape wrapped around the jaws to hold the stud in place on another when the acorn nut got a little too tight. So i guess what I'm saying is buy a few spares if you're doing this. They're cheap enough and personally I just really hate having to walk away from something that's incomplete because of small hangups like this.

            All in all a great day though! I got to refill the oil and fire her up again! I've also received a new valve cover and breather gasket in the mail so I'm looking to do a valve inspect/adjust next!


            Last edited by Guest; 07-25-2017, 01:08 AM.

            Comment


              #7
              Must be a woman. blokes dont talk that much.

              Comment


                #8
                It's refreshing to see a newcomer doing his research, aspiring to do a proper job, and writing coherently.

                So by all means, write as much as you want. Personally I enjoy posts which have some meat to the bone.

                (...)personally I just really hate having to walk away from something that's incomplete because of small hangups like this.
                Word of caution: You will encounter many small hangups, especially when starting out. As you said yourself; it's better to walk away in than to take risky shortcuts - though this time it only cost you an acorn nut.

                The 550 will bring you an immensely great deal of joy. Like you, one of these was/is my first bike ever. In my opinion, they are the best starter bikes, light enough for a beginner to handle and not dangerously powerful, but at the same time heavy and powerful enough to act as introduction to bigger bikes later on (if one whishes so at all).

                Since you seem to be doing your research, I suppose I don't need to highlight the Top 10 Newbie mistakes thread. So when you finished working through that, I recommend doing the following stuff:

                - Inspect spark plugs and caps. Make sure that resistor is in either spark plug or cap, but not both. Resistor must not exceed 5kΩ. Caps do wear out.
                - Replace engine case screws (stainless steel hex recommended, but ultimately that's down to personal preference IMO. anti-seize is a must though)
                - Inspect/Lube clutch cable, do not hesitate to replace completely.
                - Inspect Tires, primarily age. Consider replacing if 5yrs+ before riding more seriously (i.e. outside parking lots and training jaunts).
                - Inspect chain and sprocket wear - ideal to do when you have the cover off to replace the clutch cable (of course, includes chain tension).
                - Check brake fluid condition, if bad, new fluid will make a huge difference.

                That's all that comes to mind for now. Enjoy your bike!
                #1: 1979 GS 550 EC "Red" – Very first Bike / Overhaul thread        New here? ☛ Read the Top 10 Newbie mistakes thread
                #2: 1978 GS 550 EC "Blue" – Can't make it a donor / "Rebuild" thread     Manuals (and much more): See Cliff's homepage here
                #3: 2014 Moto Guzzi V7 II Racer – One needs a runner while wrenching
                #4: 1980 Moto Guzzi V65C – Something to chill

                Comment


                  #9
                  @Sharpy I'm full bloke. you seem like an old Australian man from the profile (aka the side and also the link connected to your name). I've worked with a few of you so I won't hold that against you.

                  But thanks for the words of encouragement about the 550 @Roeme! I've already been through the newbie list, made some notes and have been acting on them appropriately.

                  In no uncertain order:

                  -The chain tension needs adjustment, it rubs against the center stand enough to have made a small gouge in the steel. The tires need replacing (more on that) so I'm sure i'll get to chain tension adjustment at that time. Haven't checked either sprocket but that'll also come when the wheel comes off.
                  -The tires have to be at least 20 years old so they're both going. There's a moto shop here in the Bay Area that will mount and balance tires for 30$ provided you bring the wheel in off the bike if its over 30+ years old. Recommendations on tires are welcomed since I haven't ordered any yet otherwise I'll just follow OEM orders.
                  -I've also found a shop in town that has the 29.5mm valve shims "not quite in stock" since it's their own shop stock, but after talking to them on the phone they said they would put it "in stock on reserve" when I needed to make the swap. Which was pretty cool.
                  -After valves come carbs! I've done a few carb rebuilds on other bikes that weren't mine in the past so I think i know what to expect and am hoping it goes well. The PO def fiddled with the sync screws w/o knowing what he was doing. You can hear two carbs hit the off idle circuit at completely different times and then the last two join them. If nothing else a bench sync will probably do wonders but i've got a vacuum gauge set now as well for the dynamic sync so i'm hoping to get that done in the next week or two.
                  -Also I can look for it in the manuals and BassCliff but what do I look for in a failing clutch cable?? The action seemed fine at the lever. Wasn't soft or overly hard like it was recently tightened to compensate. Just kinda felt like an old clutch that could come in a half a turn or two.

                  These should all turn into new threads. Hoping to have the time and the hands to take photos along the way. I guess just wish me luck and perseverance guys.
                  Last edited by Guest; 07-26-2017, 12:43 AM.

                  Comment


                    #10
                    There is a Shim Club listed under the GS Services forum here which is run by one of our forum members GhostGS. A good inexpensive but very capable tire will be the Shinko Tourmaster 230
                    Cowboy Up or Quit. - Run Free Lou and Rest in Peace

                    1981 GS550T - My First
                    1981 GS550L - My Eldest Daughter's - Now Sold
                    2007 GSF1250SA Bandit - My touring bike

                    Sit tall in the saddle Hold your head up high
                    Keep your eyes fixed where the trail meets the sky and live like you ain't afraid to die
                    and don't be scared, just enjoy your ride - Chris Ledoux, "The Ride"

                    Comment

                    Working...
                    X