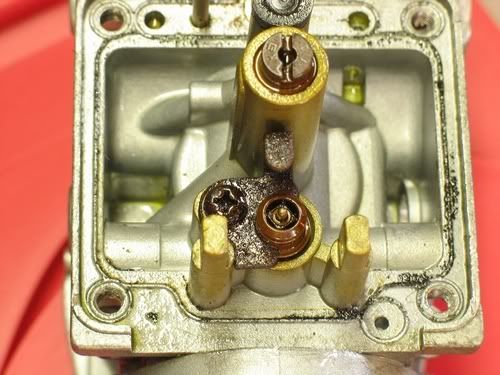
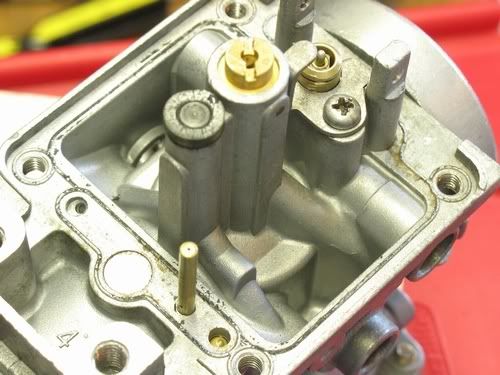
Announcement

Collapse
No announcement yet.

Carb rebuild qusetions

Collapse
X
 
  • Filter
  • Time
  • Show
Clear All
new posts

    #16
    Carb cleaning cont.

    Thanks guys for you valued input. I think since I'm only gaining access to the interior of the fuel connecting tubes that I will just leave the connecting tubes in place and save myself the possiblity of having the headaches of fuel leaks later. I know the fuel connection tubes between carbs must be open because I don't seem to have any problems with the system filling all four bowls.
    Regarding the fuel filter issue: I read somewhere where it was not recommended that an aftermarket in-line fuel filter be added between the tank and the carbs. The authors reasoning was that there is only one fuel line feeding all four carbs and any possibility of any additional restriction to fuel flow could possibly starve the carbs. I agree that it seems that a lot of junk could still get by the in-tank filter and on into the carbs causing problems and wondered why an in-line filter was never a factory installed item.
    I would like to know if any other GS'rs out their have ever experienced any problems with fuel starvation as the result of installing an aftermarket fuel filter. I could understand that happening if the filter were getting dirty and plugged. If they do work it would be a nice addition to have in order to keep the carbs cleaner longer and greatly lengthen the time between carb teardown.
    Thanks again guys!! It is sure great to be a part of a group that is just as interested in this as I am. MY WIFE JUST DOESN'T SEEM TO CARE FOR SOME REASON.:-D
    Last edited by Guest; 10-24-2006, 01:01 PM. Reason: Corrected spelling

    Comment


      #17
      I had a small fuel filter in my gas line for years, apparently without any problem. But after seeing the in-tank filter, I think it should do an acceptable job all by itself. The fuel passages in the carbs look to be larger than the screen material in the tank filter, so any very fine particles that might get through the filter, should pass through the carb as well.

      So after cleaning my carbs, I left the extra filter off. If the fuel was delivered by a fuel pump, I think the extra filter would be fine. But seeing that the fuel on the bike is gravity fed, and from a short distance at that, we're not talking about a lot of pressure. I don't want any extra restrictions that I don't really need.
      Last edited by Guest; 10-25-2006, 01:01 AM.

      Comment


        #18
        Originally posted by denydog View Post
        I had a small fuel filter in my gas line for years, apparently without any problem. But after seeing the in-tank filter, I think it should do an acceptable job all by itself. The fuel passages in the carbs look to be larger than the screen material in the tank filter, so any very fine particles that might get through the filter, should pass through the carb as well.

        So after cleaning my carbs, I left the extra filter off. If the fuel was delivered by a fuel pump, I think the extra filter would be fine. But seeing that the fuel on the bike is gravity fed, and from a short distance at that, we're not talking about a lot of pressure. I don't want any extra restrictions that I don't really need.
        I agree. Fuel filters aren't necessary and can cause fuel flow problems. If the reason for a filter is a rusting tank, I suggest sealing the tank, not extra filtering.
        And on the seventh day,after resting from all that he had done,God went for a ride on his GS!
        Upon seeing that it was good, he went out again on his ZX14! But just a little bit faster!

        Comment


          #19
          Bench sync.

          Thanks!! All of you have been very helpful. Keith, can you please tell me how to find the detailed bench sync info that you mention above?
          Thanks!!
          GS750GUY

          Comment


            #20
            I've been out of town and not checking the forum as closely as I usually do so I missed this thread. A few comments etc...

            Thanks for your kind words about the VM write-up. It was a lot of work, but also a lot of fun to do. I keep thinking about adding some info to it, but other things are taking my time. Maybe this winter...

            Regarding the tee and other fuel connectors between the carbs. Maybe I got lucky, but I have the non-o-ring type and after a complete disassembly, I have had no problems in two years and 9,000 miles. There are several ways to deal with them if they do leak, the best I've heard (from someone on the forum) is to take an exacto knife and cut slots in the sleeve where the o-rings should go and then use the standard o-rings (with the rest of the sleeve to keep them in their place). I haven't tried it but it seems like a good way to go. Although I like to get the carbs completely stripped down for cleaning, I did notice that the spray carb cleaner seems to be much stronger than the dip (Berryman's in my case), so you might be able to do a sufficient job without dipping.

            If the rubber sleeves have shrunk from being dry for a long time, try soaking them in gas for a day or so. They may swell enough to seal again. That was an issue for this guy -http://www.ronh.org/mcpage.htm . First check out his collection (that includes several GSs) then his writeup about getting them out of storage and running again. The biggest problem he has is with rubber fuel seals that have shrink.

            As far as using wire to clean the jets and passages, if you really have to, I'd get some brass wire. It is much less likely to enlarge the extremely precise holes in the carbs.

            I've haven't had much difficulty putting the carbs and airbox back on. I put the carbs on the head, then slide the airbox in. The main issue I've had is snagging a wire with the tab where the side covers bolt on. You do have to squish the rubber intake on the back of the airbox a lot but it goes in fairly easily for me.

            The bench sync info is in the write-up, but it's probably not as clear as it should be. As Keith says, do a search on the forum and you will find several explanations. You should also get a factory shop manual. If you can't find one, PM me. I have a spare I can get to you for a reasonable cost.

            Thanks again for the compliments on the write-up, I'm glad it's been useful. Good luck getting your bike running - it's a sweet machine once it's sorted!

            Comment


              #21
              Here's the bench sync write-up from Keith:

              http://www.thegsresources.com/_forum...ad.php?t=80632

              text below...


              Quote:
              Originally Posted by KEITH KRAUSE
              The VM bench synch.
              FULLY CLOSED POSITION first ('78/79 GS1000): Take the tops off the carbs. Throttle return spring INSTALLED. Be sure the throttle valve arms and throttle pulley are torqued to the throttle shaft and the throttle shaft stopper plate is tightened.
              Turn the idle adjuster knob to make a good clearance between its tip and the throttle pulley. Above each slide is the slotted adjuster screw and its holding nut. Loosen the holding nuts. Hold the carbs with the ENGINE side facing you. Look at the small nick at the bottom of the slide. When done, you want these to all look as close to uniform as possible. On the 1000, you can start with any carb. Turn the slotted screw to fully close or seat, the throttle valve. Don't tighten it down. Just seat the valve. When you see the valve stop dropping, stop turning the screw. You'll find that the screws are very sensitive. It does take decent eye sight and a careful hand. Once the valve is fully closed, hold the adjuster screw STILL and tighten the holder nut to 3.5 ft/lb. NO MORE. Repeat to the others. When done, the small nicks should look uniform.
              Now the FULLY OPEN POSITION: There's a slotted screw under spring tension mounted on the carb bracket. When you open the throttle fully, the pulley will stop when it hits this screw. Turn the carbs so the FILTER side is facing you. Raise the valves by pushing up the throttle pulley until it stops and hold it. Look up and inside the bore. Note the bottom of each valve. The bottom of all the valves must be between .5mm and 1mm above the top of the intake chamber. Turn the slotted screw in to decrease the gap, out to increase. It usually only takes a 1/2 turn or so, if needed.
              Now turn up the idle adjuster knob enough so the bike will idle when you do the vacuum tool synch.
              A good bench synch will make the vacuum synch easier/quicker.
              Use two fans. Stop if you think the motor's getting too hot. Remember to adjust the side air screws by using the highest rpm method before the synch. This is to be done on a warmed up engine. The ignition timing, tappet clearances, and throttle cable slack must be correct too. Clean and oil those K&N's with K&N filter oil and mount.
              Note the initial vacuum levels at start up. I synch at about 3,000 rpm's. Don't rev the bike suddenly or you'll suck up mercury. Easy on the throttle. Adjust the higher level(s) to match the lower levels. Don't over tighten the adjuster screws. Get the levels as close as possible. If you can get them so the difference between the highest and lowest level is about 1/2", that's good. Double check all adjustments by slowly opening/closing the valves. It takes practice. You can do it.

              Comment


                #22
                Thanks Paul for posting that for me. I made a more recent reply about synching that was part of Hoomgars long thread titled something like: GS1K bad fuel mileage, re-jet attn Keith Krause?
                I swear this time if someone will just type out the "click this, click that" procedure so I can remember how to post a link, I'll write it down.
                I don't know why this computer stuff is so hard for me to remember.
                And on the seventh day,after resting from all that he had done,God went for a ride on his GS!
                Upon seeing that it was good, he went out again on his ZX14! But just a little bit faster!

                Comment


                  #23
                  Here's Keith's newer description from this thread http://www.thegsresources.com/_forum...ad.php?t=80632

                  The pertinent text:
                  The VM bench synch.
                  FULLY CLOSED POSITION first ('78/79 GS1000):
                  Take the tops off the carbs. Throttle return spring INSTALLED. Be sure the throttle valve arms and throttle pulley are torqued to the throttle shaft and the throttle shaft stopper plate is tightened.
                  Turn the idle adjuster knob to make a good clearance between its tip and the throttle pulley. Above each slide is the slotted adjuster screw and its holding nut. Loosen the holding nuts. Hold the carbs with the ENGINE side facing you. Look at the small nick at the bottom of the slide. When done, you want these to all look as close to uniform as possible. On the 1000, you can start with any carb. Turn the slotted screw to fully close or seat, the throttle valve. Don't tighten it down. Just seat the valve. When you see the valve stop dropping, stop turning the screw. You'll find that the screws are very sensitive. It does take decent eye sight and a careful hand. Once the valve is fully closed, hold the adjuster screw STILL and tighten the holder nut to 3.5 ft/lb. NO MORE. Repeat to the others. When done, the small nicks should look uniform.
                  Now the FULLY OPEN POSITION:
                  There's a slotted screw under spring tension mounted on the carb bracket. When you open the throttle fully, the pulley will stop when it hits this screw. Turn the carbs so the FILTER side is facing you. Raise the valves by pushing up the throttle pulley until it stops and hold it. Look up and inside the bore. Note the bottom of each valve. The bottom of all the valves must be between .5mm and 1mm above the top of the intake chamber. Turn the slotted screw in to decrease the gap, out to increase. It usually only takes a 1/2 turn or so, if needed.
                  Now turn up the idle adjuster knob enough so the bike will idle when you do the vacuum tool synch.
                  A good bench synch will make the vacuum synch easier/quicker.

                  Comment


                    #24
                    Thanks!

                    Thanks Paul and Keith!! You have both been very helpful.
                    I'm afraid it's going to be a looooooong winter. I'll be counting the days when it will be nice riding weather again. I've been reading all I can find about the "78" GS750EC and how many of the cycle writers back then raved about the machine. I do like it's appearance and styling much better than many of the newer bikes today. I realize that in today's bike standards the bike is probably not overly impressive however I can't wait until it's road worthy.
                    Thanks again!! You guys are the best!!
                    GS750GUY. (HAROLD)

                    Comment


                      #25
                      Carb cleaning question

                      Here I am again guys.
                      I'm now inside the carbs of my "78" GS750 and have started the cleaning process. I notice there is a tan colored, hard, thin residue all over the inside covering the float bowls, the floats themselves, and everything that seems to have come in contact with the two years of stagnant gasoline exposure. I also notice that the several different kinds of carb cleaner I have tried to use does not even budge the stuff. When I carefully use an exacto knife on flat areas it either flakes off in hard flat chunks or scrapes off as a powder residue but the carb cleaners seem useless in removeing the stuff. It seems the only way to remove it is to physically scrape the stuff off. If this being the case, I'm wondering how in the world carb cleaner is going to clean this crud from all of the small passages within the system without physically removing it some how. What is the best spray carb cleaners to use? And do these seem to disolve this stuff? Someone said it seems the cleaners that come in spray cans seem to be more concentrated than the dips.
                      Thanks,
                      GS750GUY

                      Comment


                        #26
                        My bike sat for thirteen years. Two years is nothing

                        I think you must dip. I used Gunk brand Small Parts Cleaner. A one gallon can with basket, at my local autoparts store, cost just under $20 if I remember correctly. It will remove those solid deposits. I soaked for a little longer than the recomended 25 minutes, May 45 or so. I think even longer might have been better, but they look and work great now.

                        I used spray choke cleaner as a follow up, just to blow out any of the loosend particles. From my experience, spray cleaner alone will not do the job, as you seem to be finding out. PS, I had to use the choke cleaner and some extra time to get the spring loaded tips of the float needles free'd up. I found out about this on my 5th go around with the carb disassembly

                        NOT DIPPED __________________________________________________ __DIPPED

                        Last edited by Guest; 03-08-2007, 05:53 PM.

                        Comment


                          #27
                          More carb challenges

                          A lot of good information being posted on cleaning those old carbs. The closer I look, the more complex my task seems to become. I'm working on a '78 GS750 that sat dormat since 1981. At some point the tank and carbs were removed and drained. Each carb was placed in its own coffee can for many years. Apparently, there was enough gas left to leave a substantial amount of sticky gum with the slow evaporation. I now have new o-rings, gaskets, etc. and my gallon can of gunk. I started on carb 1 last night and quickly realized that the slide is frozen (gummed) in the carb body. A quick inspection indicates that all four have this problem. Rather than using brute force, I'm thinking that I should remove all the screws, o-rings, and other rubber parts and immerse the entire carb in the gunk until the slide can be removed. Is there any problem with leaving parts in the gunk for hours or even days?

                          Does this make sense???

                          rickt

                          Comment


                            #28
                            My Cv carb slides were frozen. I sprayed liberally with choke cleaner and let them sit. I sprayed and sit, sprayed and sit, prayed and sit... for two days. They wouldn't budge. Finally I applied a constant firm pressure for about three minutes. And finally, like a glacial flow, they began to move.

                            If you don't have any re-usable rubber parts involved, I don't think hours(?) in the dip will harm the metal surfaces.

                            Side note- Today is my birthday, and it's raining out, so I can't ride. I have been riding every day that I can since putting it back on the road in early September. I can think of nothing better to do today than discuss my newest/ oldest favorite hobby, GS motorcycles! My wife and family are taking me out to dinner tonite, and my wife gave me some money to buy some real motorcycle boots. Riding my GS after 13 years of not, makes me feel like a kid again. What better gift than that!
                            Last edited by Guest; 11-02-2006, 06:38 PM.

                            Comment


                              #29
                              In answer to the question about which spray carb cleaner, I'd say Berrymans is the strongest I've encountered.

                              And I'll echo the sentiment that you've got to DIP!

                              Also, I feel blowing out all the passages with a compressor is also a big part of the job. Lots more power behind a compressor than a spray can of carb cleaner. Dip, spray, blow out with compressor.

                              Comment


                                #30
                                I agree you should dip them. Even with the possibility of problems with the rubber sleeves on the fuel tee and connectors, I'd take them apart and let them soak for a while. Even if the dip doesn't take it all off, it should soften the muck enough for the spray to finish it off. Even with the spray - don't be in too much of a hurry to wipe or blow it off. It evaporates pretty quickly, and you don't want it to dry, but you can leave it for 30-45 sec to let it work its magic.

                                The only possible issue with leaving them in the dip for a long time is the epoxy that is used to cover the brass plugs. When manufacturing the carbs they often have to drill all the way through them even if they only need the hole on one side. On the other side where the hole shouldn't go through they put in a brass ball to plug the hole and that is covered with epoxy. The dip will soften the epoxy and it comes off. I left mine without it, but if that makes you nervous, you can mix up some epoxy when after they're clean and put a dab on the plugs.

                                There is also a plastic/nylon looking ridge in each body that fits in a slot in the side of the slides to guide them. I left my carbs in the dip for several hours and it had NO effect on the guide. I don't know what it's made of, but even though it's not metal, it doesn't seem to mind the dip.

                                Comment

                                Working...
                                X