Announcement

Collapse
No announcement yet.

Any Cheap Touch up ideas?

Collapse
X
 
  • Filter
  • Time
  • Show
Clear All
new posts

    Any Cheap Touch up ideas?

    And I mean Cheap $$.

    The ZZR is stored at my sister's house over an hour away. Due to my current situation, I need to touch up the plastic as cheaply as possible for the time being.

    I'm coming off of memory right now, but after my wreck, I remember 3 fairly large scrapes on my fairing.

    What I'm thinking is this:

    1. Obviously, I'll assess the damage.
    2. Remove the lower fairing.
    3. Sand and smoothe out the 2 spots on this section. (I'm thinking 400 grit - then maybe 600 grit final wet sand?)
    4. Primer the sanded areas. (Idea of cheapo rattle can primer?)
    5. Wet sand primer with 600 grit?
    6. Rattle can touch up. How many coats? Wet sand w/ 600 grit in between?
    7. Wet sand OR scotch brite final coat. Then apply rattle can Clear Coat. How many coats and scotchbrite OR wet sand in between coats?
    8. Repeat process on the Cowling.

    I guess what I'm asking is that I need to do this for no money. I realize that this won't be very good looking. However, it will be better than 3 or 4 big black scrapes. I have some patience and think it may look ok for a temp fix. Also, while moving - you may not be able to tell. Unless you have a much faster bike and can take the time to analyze my ZZR from the side.... :-D

    Thanks.

    P.S. THere is NO compressor OR paint sprayer available. Also, cheap means less than $30.00. Not $400.

    #2
    fuzzy fur, all the squids are doing it! Come on Dave join em.

    78 GS1000 Yosh replica racer project
    82 Kat 1000 Project
    05 CRF450x
    10 990 ADV-R The big dirt bike

    P.S I don't check PM to often, email me if you need me.

    Comment


      #3
      Rattle cans can look alright....

      Originally posted by DMPLATT View Post
      And I mean Cheap $$.

      The ZZR is stored at my sister's house over an hour away. Due to my current situation, I need to touch up the plastic as cheaply as possible for the time being.

      I'm coming off of memory right now, but after my wreck, I remember 3 fairly large scrapes on my fairing.

      What I'm thinking is this:

      1. Obviously, I'll assess the damage.
      2. Remove the lower fairing.
      3. Sand and smoothe out the 2 spots on this section. (I'm thinking 400 grit - then maybe 600 grit final wet sand?)
      4. Primer the sanded areas. (Idea of cheapo rattle can primer?)
      5. Wet sand primer with 600 grit?
      6. Rattle can touch up. How many coats? Wet sand w/ 600 grit in between?
      7. Wet sand OR scotch brite final coat. Then apply rattle can Clear Coat. How many coats and scotchbrite OR wet sand in between coats?
      8. Repeat process on the Cowling.

      I guess what I'm asking is that I need to do this for no money. I realize that this won't be very good looking. However, it will be better than 3 or 4 big black scrapes. I have some patience and think it may look ok for a temp fix. Also, while moving - you may not be able to tell. Unless you have a much faster bike and can take the time to analyze my ZZR from the side.... :-D

      Thanks.

      P.S. THere is NO compressor OR paint sprayer available. Also, cheap means less than $30.00. Not $400.
      It just takes time and effort.
      Dupli-Color High temp clear resists gas somewhat.

      This is rattle can:

      Rattlecan primer worked for me, both Dupli color and Krylon.
      Some rattle primers don't stick, I peeled paint from a tank with a hose and nozzle this morning. All the way to bare metal. Saved me some work.
      320 or so under the primer is good.
      600 or thereabouts to wet sand the primer before color.

      I used 1000 to wet sand the color before the clear.

      Or you can go without sanding, just continue right into clear without waiting for it to dry.
      Check the instructions on the can. If it dries you may have to wait a week to do the clear.

      Do a lot of light coats on the clear, thick coats tend to run more with clear.

      Wet sanding with 2000 or 1500 after it dries, a day or so.

      Then polish with the 3M stuff after it cures a week or so.

      Wax it after a month or more.

      You can ride it between stages but don't spill any gas on it.
      Last edited by tkent02; 03-20-2007, 06:46 PM.
      http://img.photobucket.com/albums/v5...tatesMap-1.jpg

      Life is too short to ride an L.

      Comment


        #4
        I had some bad scratches on my Windjammer that needed fixing. They actually make ABS filler thats cheap and works just like bondo if your scratches are deep. I can't remember the stuff I used, got it at Home Depot and it worked perfect.

        Other than that, I sanded the area as you suggested, primed it rattle canned it, clear coated it, then 2000 grit, light buffing compound and wax. Came out perfect and cost next to nothing. I don't know what color your fairing is, mine was black and so easy to match paint to.

        It helps to paint on a day without too much humidity of course.

        Comment


          #5
          I am not sure of the type plastic you'll be painting, but most plastic surfaces do not carry enough surface tension to allow the bonding properties of regular primer or paint to adhere properly.

          The best option is to use a coat of adhesion promoter on your plastic or fiberglass & let dry about 10 minutes before you prime. Sand with 600 grit prior & make sure there are no "glossy" spots remaining.

          Duplicolor makes a self etching primer that will do the job too, but isn't always the best choice on some plastics.

          If you use lacquer based paint, you can recoat anytime and can wet sand then buff after you are done to get a nice smooth finish. It is easier to repair your mistakes using laquer, but you'll sacrifice durability due to chemicals. Typically you'd use a laquer clear coat too, but you can actually use an enamel clear to increase chemical resisitance - just make sure you give the laquer a couple of weeks for a good hard cure.

          Comment


            #6
            Originally posted by first timer View Post
            fuzzy fur, all the squids are doing it! Come on Dave join em.

            Not a bad look. Thanks. :-D

            Comment


              #7
              Thanks.


              I stopped by an Auto store today. I did't see any "Plastic" primer or paint per se, but some of the paint said "Excellent for Trim work". Isn't all trim plastic now-a-days? I also saw the Laquer paint. Wasn't sure of the difference?

              Also, I don't know what type of plastic my fairings are. However, chemical (as in fuel) won't be a concern. Only chemical might be wax or plastic cleaner.

              Comment


                #8
                The more I think about the self-etching primer, I don't think you are going to have any problem with the plastic parts of our bikes. Generally, the one plastic that poses the most problem is Polypropylene, but it wasn't really used much until 6 or 8 years ago. Fiberglass won't be a problem & most other plastic on my GS is ABS type. It is is more resilient than PP.

                Either way, if your not sanding down to bare plastic, the primer will adhere to the existing paint, which is not a problem as long as it is not peeling to begin with.

                Keep in mind, you don't need a thick layer of the self etching primer. If you want to sand the primer to get a decent, smooth painted finish just put two light coats of self-etch primer down, after it drys put down a couple of coats of regular grey primer. After it drys, lightly sand with 400 grit, wipe off the dust and wet sand with 800 or 1000. Wash the part in a mild dish soap & your ready to paint.

                When I use Lacquer spray cans, I put light coats down 10 minutes apart until I see areas where paint is building up, or getting an orange peel look. Then I put one coat on a little heavier and let it dry overnight. The next day, I sand with 800 grit until it looks smooth (it won't be glossy) just smooth & make sure you don't remove all the paint (especially the edges). Then I wet sand with 1500grit. If it still looks pitted or rough in texture, just give it one "medium to wet" coat, wait a day & sand it again. That's the beauty of lacquer; you can fix your mistakes!

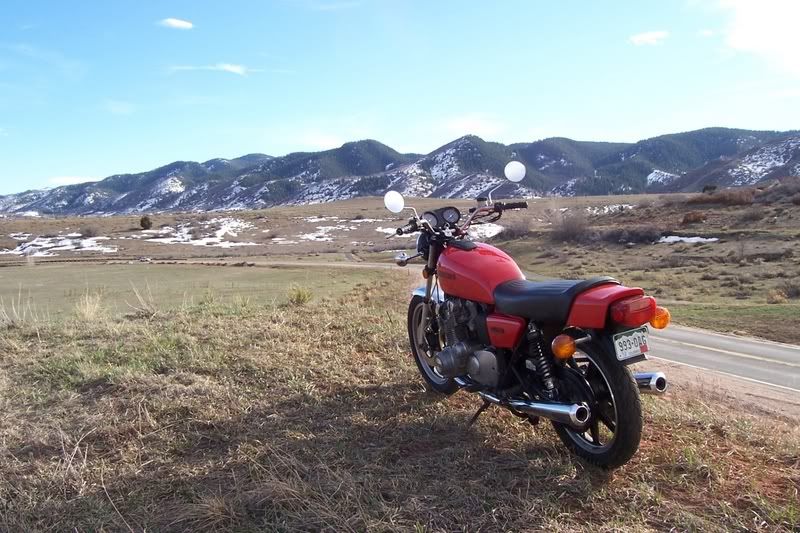
                To get the gloss in the paint, use a quality rubbing compound, that is not abrasive. If your really in a pinch, you can get away with a lot - See the pic for what you can do with Mother's Aluminum polish when you run out of rubbing compound. :?-
                This is Duplicolor Victory Red lacquer without clear-coat.
                Last edited by dardoonk; 03-22-2007, 11:23 PM.

                Comment


                  #9
                  Dave go here, 2 excellent sources of info.


                  You know you didn't have to go too far.
                  Doug aka crag antler

                  83GS1100E, gone
                  2000 Kawasaki Concours
                  Please wear ATGATT

                  Comment

                  Working...
                  X