.png "Powered by vBulletin")
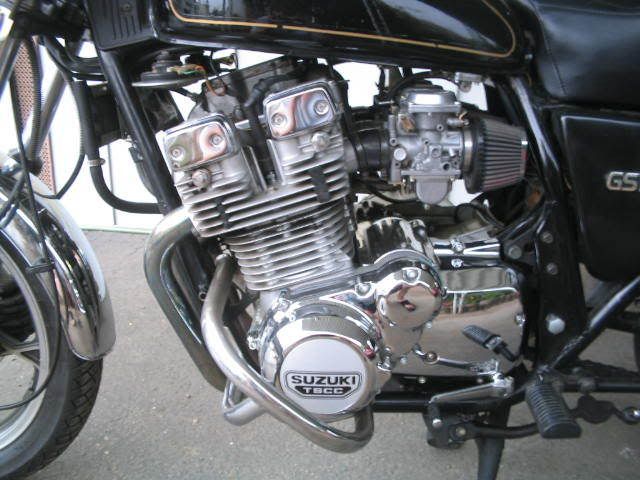
I have spent a total of about 15 hours trying to get these things installed. I already read through quite a few posts that indicate how difficult this is and hints on how to get them on. No problem getting airbox in, then sliding carbs in. Can get carbs attached to motor intake boots fairly easily too. But can't get that damn airbox on. Airbox is not bolted to frame. I've tried:
These things will just NOT go on. Definitely the worst thing i've ever come across in my years of wrenching. Whoever designed this setup was sadistic. Seriously. Its an absolutely horrible design.
Anyways, are there any final tips before I sell this thing? I will not go to pods (not that I think they are bad...I'm just not putting tuning time into this bike). And I'm not going to the trouble of unbolting the motor...rather sell it. The only other thing I've read was to get new velocity stacks. The rubber is somewhat hard, but I'm not sure if new ones will make a difference (they did install fine when i pulled them out of the airbox and stuck them on the carbs individually). If they are highly recommended, I may try 'em. And if so...where can I find them (P/N and price)?
- lubing the velocity stacks
- heating them
- removing velocity stacks from airbox and installing onto carbs prior to pushing carbs in place (hoping that I could press the stacks into the airbox). Carbs were impossible to install this way however.
- pressing the airbox through the air filter attachment hole w/ a long screw driver
- prying the stacks w/ a screw driver
These things will just NOT go on. Definitely the worst thing i've ever come across in my years of wrenching. Whoever designed this setup was sadistic. Seriously. Its an absolutely horrible design.
Anyways, are there any final tips before I sell this thing? I will not go to pods (not that I think they are bad...I'm just not putting tuning time into this bike). And I'm not going to the trouble of unbolting the motor...rather sell it. The only other thing I've read was to get new velocity stacks. The rubber is somewhat hard, but I'm not sure if new ones will make a difference (they did install fine when i pulled them out of the airbox and stuck them on the carbs individually). If they are highly recommended, I may try 'em. And if so...where can I find them (P/N and price)?

Comment