Announcement
Collapse
No announcement yet.
Spider removal from gauge
Collapse
X
-
 Ironriot
Spider removal from gauge
How do you take off the gauage face? A spider took up residence and then died in there. I want him out. Is there anyway to do it without destroying anything?Tags: None
-
 crazedfooter
thats funny cuz i have the same thing goin on, he bounces around like he's having seisures..lol! Ill be interested in the responses on this one
nick
-
 SabreJim
Opening the guages is a pain but can be done. There are several methods that I have seen, one of which was posted on here but has been removed. It involved cutting the orange case with a dremal tool, do what ya gotta do then glue it back togeather. I have pried the metal lip carefully all the way around laboriously with a large flat tip screw driver.
When you have pried it away enough then remove the metal ring and you have access to the inside. You can immagine how messed up the metal lip looks but when you put it back togeather and carefully tap the metal back in place to hold the ring on its not so bad. When the foam/rubber piece is put on it covers up what you have done.
Bottom line.... I would advise against going through all this trouble unless you have no choice.
Can you blast the little guys exoskeleton and web with air maybe8-[
Comment
-
I have one smashed on my 7 in the tens. :-D1983 GS 1100E w/ 1230 kit, .340 lift Web Cams, Ape heavy duty valve springs, 83 1100 head with 1.5mm oversized SS intake valves, 1150 crank, Vance and Hines 1150 SuperHub, Star Racing high volume oil pump gears, 36mm carebs Dynojet stage 3 jet kit, Posplayr's SSPB, Progressive rear shocks and fork springs, Dyna 2000, Dynatek green coils and Vance & Hines 4-1 exhaust.
1985 GS1150ES stock with 85 Red E bodywork.

Comment
-
 Ironriot
Hmm I was hoping I wasn't gonna hear that. I think I'll take the dremel route as it can be easily repaired and no one can see what its gonna look like. I figured that prying up the lip was gonna be on of the few options and yeah I think I shant be doing that. The lip is a little visible in a few places and I'd prefer it to not look screwed up. Thanks anywaysOriginally posted by SabreJim View PostOpening the guages is a pain but can be done. There are several methods that I have seen, one of which was posted on here but has been removed. It involved cutting the orange case with a dremal tool, do what ya gotta do then glue it back togeather. I have pried the metal lip carefully all the way around laboriously with a large flat tip screw driver.
When you have pried it away enough then remove the metal ring and you have access to the inside. You can immagine how messed up the metal lip looks but when you put it back togeather and carefully tap the metal back in place to hold the ring on its not so bad. When the foam/rubber piece is put on it covers up what you have done.
Bottom line.... I would advise against going through all this trouble unless you have no choice.
Can you blast the little guys exoskeleton and web with air maybe8-[
Comment
-
Somebody here had a good method for cutting the speedo open with a Dremel cutting wheel. They either put the Dremel in a vise or used the Dremel cutting wheel in a drill press. Then they spun the gauge around on the workbench against the cutting wheel. This gave them a nice straight cut. When the gauge was glued back together it looked like a seam that was supposed to be there.
JoeIBA# 24077
'15 BMW R1200GS Adventure
'07 Triumph Tiger 1050 ABS
'08 Yamaha WR250R
"Krusty's inner circle is a completely unorganized group of grumpy individuals uninterested in niceties like factual information. Our main purpose, in an unorganized fashion, is to do little more than engage in anecdotal stories and idle chit-chat while providing little or no actual useful information. And, of course, ride a lot and have tons of fun.....in a Krusty manner."
Comment
-
 Ironriot
Hmm well I was gonna lay some tape along the line where I was gonna cut and just follow that. But your method works too lol. Man i hate that spider. Had he not died in there everything would be hunky dory
Comment
-
 Suzuki_Don
Ironriot try this.
Cheers
Don
Comment
-
 Ironriot
 -
Thanks Don. That's exactly what I was talking about...........Originally posted by Suzuki_Don View PostIronriot try this.
Cheers
Don
JoeIBA# 24077
'15 BMW R1200GS Adventure
'07 Triumph Tiger 1050 ABS
'08 Yamaha WR250R
"Krusty's inner circle is a completely unorganized group of grumpy individuals uninterested in niceties like factual information. Our main purpose, in an unorganized fashion, is to do little more than engage in anecdotal stories and idle chit-chat while providing little or no actual useful information. And, of course, ride a lot and have tons of fun.....in a Krusty manner."
Comment
-
Forum LongTimerGSResource Superstar
Past Site Supporter
Super Site Supporter- Mar 2006
- 36210
- Torrance, CA
Cutting open the gauge is WAY more difficult than just bending the ring back. I did both the gauges on my old 450 and they turned out perfectly. Far less intrusive to the gauge than cutting the plastic.
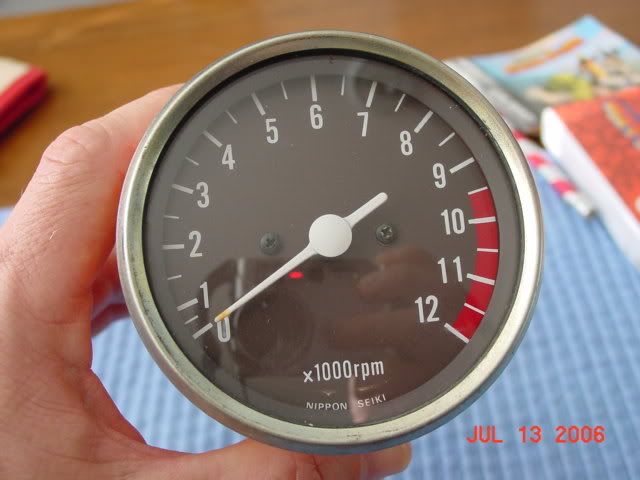
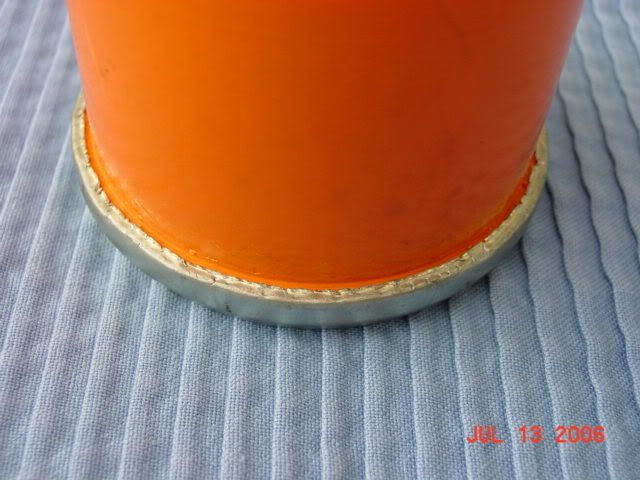
Key is to use a small flat blade screwdriver and work slowly around the gauge. Bend a little at a time and work around; takes about three revolutions. To bend the lip back down, use a small punch and hammer. Place the gauge face down on a firm work surface and work slowly and tap a little at a time.
A couple of photos showing the final results - screw was loose in the tach.

 Ed
Ed
To measure is to know.
Mikuni O-ring Kits For Sale...https://www.thegsresources.com/_foru...ts#post1703182
Top Newbie Mistakes thread...http://www.thegsresources.com/_forum...d.php?t=171846
Carb rebuild tutorial...https://gsarchive.bwringer.com/mtsac...d_Tutorial.pdf
KZ750E Rebuild Thread...http://www.thegsresources.com/_forum...0-Resurrection
Comment
-
I recently did the gauges on my 1100G using the dremel mthod. Since I don't have a drill press, I used a large hose clamp on the body as my guide. Both gauges came apart easily enough, I tightened up the screws and cleaned the inside of the faceplates with alcohol (they were so smeared and clouded up you could barely see through them),a nd then glued and taped them back together.
Once the gauges were removed, the whole process for both of them took about an hour. I'm very pleased with the results. The gauges look almost new, and you can't tell that I was ever in them.GS450E GS650E GS700ES GS1000E GS1000G GS1100G GS1100E
KZ550A KZ700A GPZ750
CB400T CB900F
XJ750R
Comment
-
My twopennorth..
If the clock rings are hidden under a plastic cover (mainly earlier models in the UK), removing the ring is the way to go - dead easy bending back with a screwdriver.
However, if your a bit cack handed and rush things you can bend the ring. Therefor, where the ring isn't hidden (but the clock body is) I'd cut the plastic body. Again dead easy - you don't need a dremel - a hacksaw will do as all the marks are hidden so it doesn't have to be neat. Make a couple of marks across where you intend to cut (with marker pen) so that you can line everything up again on reassembly. Fibreglass resin works fine as the cement. Just take a bit of care with the cutting as you only want to cut the shell and not the inside mechanism.79 GS1000S
79 GS1000S (another one)
80 GSX750
80 GS550
80 CB650 cafe racer
75 PC50 - the one with OHV and pedals...
75 TS100 - being ridden (suicidally) by my father
Comment
-
Forum LongTimerGSResource Superstar
Past Site Supporter
Super Site Supporter- Mar 2006
- 36210
- Torrance, CA
Sorry to sound grumpy toward the cutting advocates, but why in the world would anyone cut the plastic when you can easily bend the bezel back with a screwdriver? As long as you aren't totally ham fisted, there won't be any reference distortion on the forward facing surfaces of the bezel. Cutting the gauge open is a far more risky process in my opinion.Ed
To measure is to know.
Mikuni O-ring Kits For Sale...https://www.thegsresources.com/_foru...ts#post1703182
Top Newbie Mistakes thread...http://www.thegsresources.com/_forum...d.php?t=171846
Carb rebuild tutorial...https://gsarchive.bwringer.com/mtsac...d_Tutorial.pdf
KZ750E Rebuild Thread...http://www.thegsresources.com/_forum...0-Resurrection
Comment
.png)

Comment