Announcement

Collapse
No announcement yet.

Cleaning out an engine

Collapse
X
 
  • Filter
  • Time
  • Show
Clear All
new posts

    #46
    Originally posted by uudfourty View Post
    Hammer and a chisel looks more appropriate for the job.

    .

    ...or dynamite!:shock:

    Honestly, you had better do a gut check before going any further. That engine is in BAD shape and it's going to cost a LOT of money to get it running properly. At minimum you are looking at a bore and ring job, and full head rebuild. It would be best to split the crankcase to see how that looks as well.

    Good luck.
    Ed

    To measure is to know.

    Mikuni O-ring Kits For Sale...https://www.thegsresources.com/_foru...ts#post1703182

    Top Newbie Mistakes thread...http://www.thegsresources.com/_forum...d.php?t=171846

    Carb rebuild tutorial...https://gsarchive.bwringer.com/mtsac...d_Tutorial.pdf

    KZ750E Rebuild Thread...http://www.thegsresources.com/_forum...0-Resurrection

    Comment


      #47
      Originally posted by Nessism View Post
      ...or dynamite!:shock:

      Honestly, you had better do a gut check before going any further. That engine is in BAD shape and it's going to cost a LOT of money to get it running properly. At minimum you are looking at a bore and ring job, and full head rebuild. It would be best to split the crankcase to see how that looks as well.

      Good luck.
      I am in luck. There is a tiny "interior engine view" (thingy mabob) that I discovered is only accesible to the elements when the head is pulled.

      I poured lucas gear oil into the intake before I cracked the head for two reasons 1) to see if the valve was actually open and 2) to see if oil leaked anywhere

      There isn't a spot of rust inside the engine \\/The only gunk that I could see was inside the combustion chambers. The outside wall of the combustion chambers was completely rust free too\\/
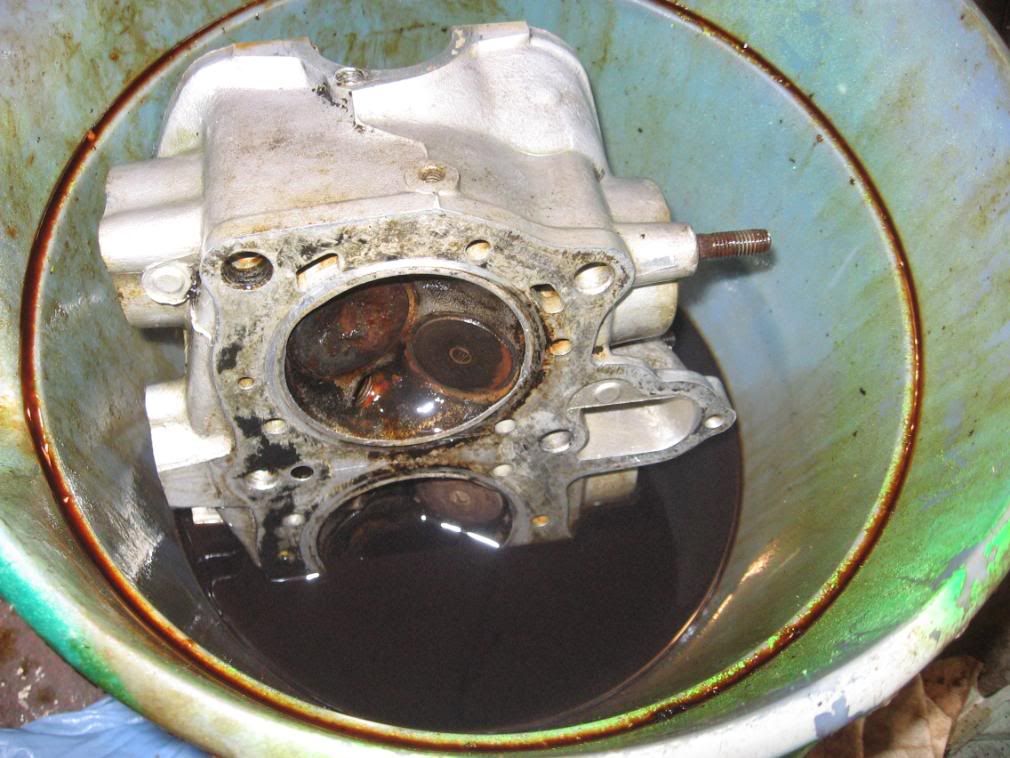
      I am dunking the valves in parts cleaner. The stuff is cleaning right off.

      Comment


        #48
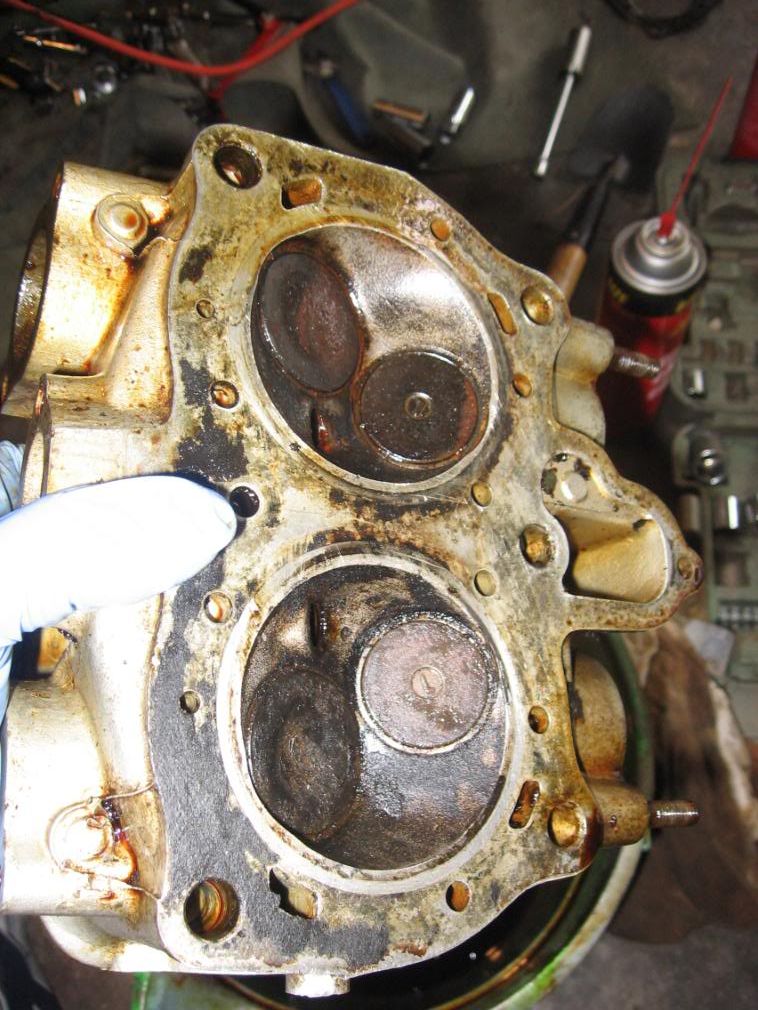
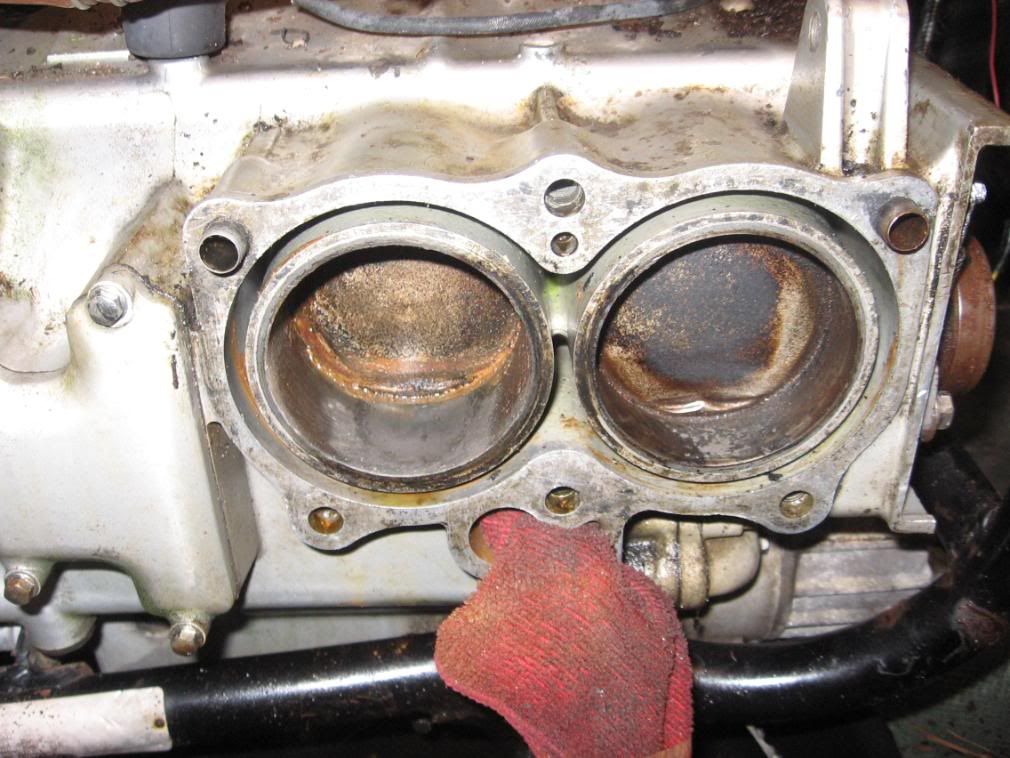
        Its starting to look better - the rag is blocking the thingymabob mentioned earlier so junk doesn't get in the engine while I am cleaning:

        Notice around the chambers is NOT existing rust, its where I tried to clean the rust that poured out of the chambers when I pulled the head.

        Comment


          #49

          Comment


            #50

            Comment


              #51
              everything is super clean now.

              It came with a metal type gasket, can it be reused? Or, can I just make a high temp gasket with sheets of gasket material?

              Comment


                #52
                Originally posted by Schweisshund View Post
                everything is super clean now.

                It came with a metal type gasket, can it be reused? Or, can I just make a high temp gasket with sheets of gasket material?
                Run a torch over the metal gasket.
                1983 GS 1100E w/ 1230 kit, .340 lift Web Cams, Ape heavy duty valve springs, 83 1100 head with 1.5mm oversized SS intake valves, 1150 crank, Vance and Hines 1150 SuperHub, Star Racing high volume oil pump gears, 36mm carebs Dynojet stage 3 jet kit, Posplayr's SSPB, Progressive rear shocks and fork springs, Dyna 2000, Dynatek green coils and Vance & Hines 4-1 exhaust.
                1985 GS1150ES stock with 85 Red E bodywork.

                Comment


                  #53
                  Originally posted by chef1366 View Post
                  Run a torch over the metal gasket.
                  Heating up copper gaskets used to be the standard process for two stroke engines. Not sure this is appropriate for steel head gaskets though. My guess is that the gasket is okay to reuse. Scrub it real good with scotchbrite so get any gunk off of it, and if there are any scratches or creases in it, junk it. Rebuilt an EX500 Kawasaki a while back and reused the steel headgasket after talking to a race tuner. Engine ran strong and never had any issues.
                  Ed

                  To measure is to know.

                  Mikuni O-ring Kits For Sale...https://www.thegsresources.com/_foru...ts#post1703182

                  Top Newbie Mistakes thread...http://www.thegsresources.com/_forum...d.php?t=171846

                  Carb rebuild tutorial...https://gsarchive.bwringer.com/mtsac...d_Tutorial.pdf

                  KZ750E Rebuild Thread...http://www.thegsresources.com/_forum...0-Resurrection

                  Comment


                    #54
                    Man... you are making some Suzuki engineer somewhere a happy man bringing that mess back to life and onto the road. Hats off to you!

                    I have a set coming from off ebay (40 bucks shipping and all) that I plan to make a project for eventual replacement onto my bike (after boring etc...) I'm hoping they are in better shape, we shall see. I'll look to your lessons here.

                    Comment


                      #55
                      Originally posted by doctorgonzo View Post
                      Man... you are making some Suzuki engineer somewhere a happy man bringing that mess back to life and onto the road. Hats off to you!

                      I have a set coming from off ebay (40 bucks shipping and all) that I plan to make a project for eventual replacement onto my bike (after boring etc...) I'm hoping they are in better shape, we shall see. I'll look to your lessons here.
                      I restored a GS 550 E and the engine I am cleaning out is a Goldwing 1100 (by far the biggest project I have undertaken).


                      Thanks guys for the torch tip. I have a butane microtorch.

                      I still cannot believe the inside of the engine is rust free ........ at one point I was standing over the engine with a hammer ..... scary .... :shock:

                      Comment


                        #56
                        mmmmmmm ...... torch good :-D me likey.

                        Comment


                          #57
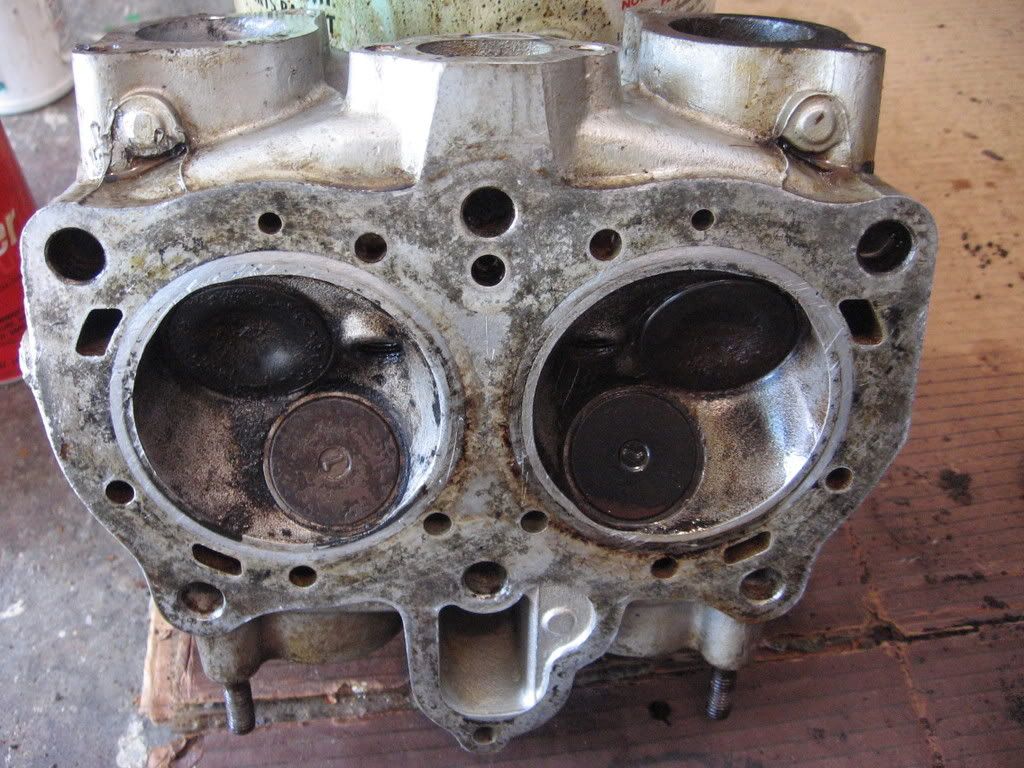
                          Here are pics of the cleanup (and those tiny scratches buffed out with 1000 grit fine sandpaper):

                          Comment


                            #58


                            Those "crinkles" I found out are actually valve rests and these have been properly cleaned according the the folks at Steve Saunders Goldwing Page.

                            However, getting the heads off was possible due to the tech savvy folks here at the gs resources :-D (as well as getting them back on - the metal gasket was reusable.

                            Comment


                              #59
                              I took the other head off and it was much much cleaner. However, I think I damaged the metal head gasket.

                              Now for a possibly stupid question..... Can I make a metal head gasket using aluminum sheets? How would I go about cutting out the circles?

                              The sheets I have are just a tad bit thicker than the gasket that is damaged.

                              Comment


                                #60
                                Ok .... here are a few things I learned that I am sure many members already know but maybe, possibly, might be new information to others.

                                You CAN unseize a frozen rusty engine with little (snicker .... yeah right) difficulty.

                                1st, fill up the entire engine with ATF
                                2nd take spark plugs OUT, fill combustion chambers completely with 50/50 mixture of Marvels Mystery Oil and Acetone.

                                Let it sit for a few days. If it leaks, at least you know where its leaking and quite possibly the location of where the rust is

                                Put bike on Center stand (if you haven't done so already) and put the bike in 4th or 5th gear. Try to rock the rear tire and see if the motor will turn. If not .... YOU HAVE ANOTHER OPTION

                                FUN FUN FUN

                                Put bike in neutral

                                take timing belt/chain off

                                drain fluids

                                take heads off

                                get a 2x4 and trim it to fit inside the piston cylinders and then on the other side of the 2x4 grab a hammer and knock those pistons into the next century

                                it works ... oh yeeeahhh ... it works my friends. \\/

                                remember to get a drill bit to use as a boring/honing kit to smooth those cylinder walls and clean as you go. You dont want those shiny cleaned up pistons to back over the rust again.


                                purpose of atf fluid? relubricates and cleans rod and crankshaft bearings


                                DON'T GET IN A HURRY LIKE I DID AND BREAK CRANKSHAFT BOLT CLEAN OFF

                                or you will be very sorry (like me).

                                I now how a cleaned out engine that moves freely and have to drill out and replace the front crankshaft bolt.

                                Comment

                                Working...
                                X