Announcement

Collapse
No announcement yet.

Speedo drive ghetto fix (with pix)

Collapse
X
 
  • Filter
  • Time
  • Show
Clear All
new posts

    Speedo drive ghetto fix (with pix)

    My speedo gave out before winter and I thought my recently replaced cable had gone. That was not the case as I could get about 50 km/h from an electric drill to the cable end. I peered into the cable hole while spinning the front wheel and could see the little feller wasn't moving. Searching this forum I found the best advice was to replace it but it could in theory be fixed. Sent an email to the trusty junkyard, they wanted too much for a drive that was probably no better than what this was last July and their minimum shipping costs added too much for my greedy wallet.

    So today I took it off and decided to have a go. Got a chance to play with macro mode on the camera as well, in addition to showing the insides of this thing which I don't think has been posted here. After some fiddling with the clip I got it open.


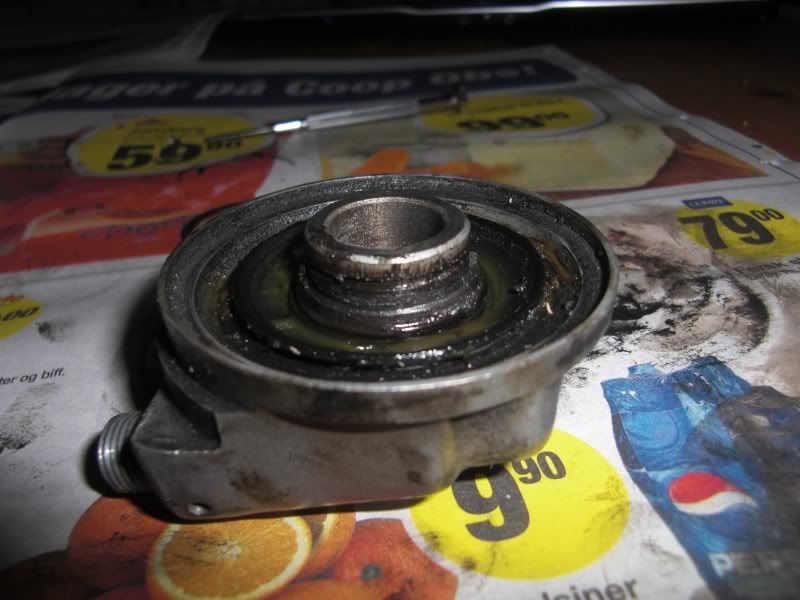
    Yuck! This is after taking the top disc off. If I save some money on this it looks like there's a sale on oranges and I can spend some money on that instead.


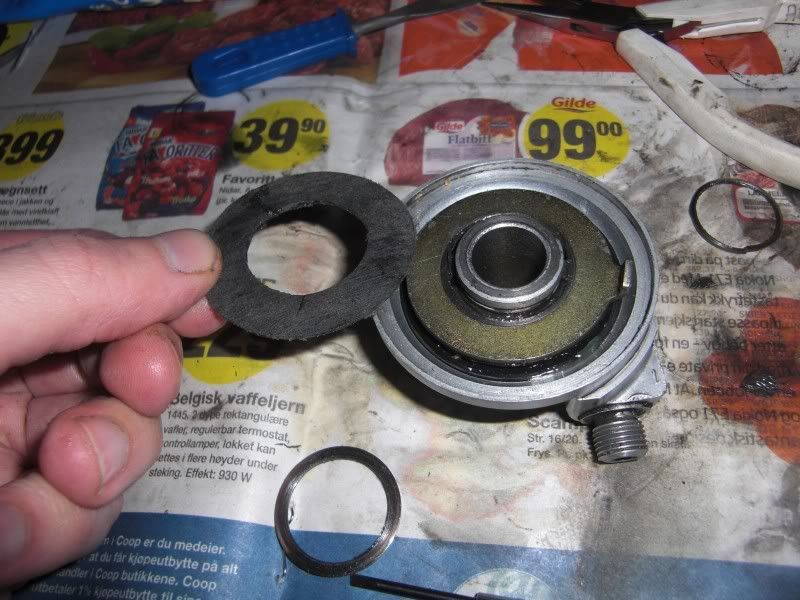
    Locking ring and washer.


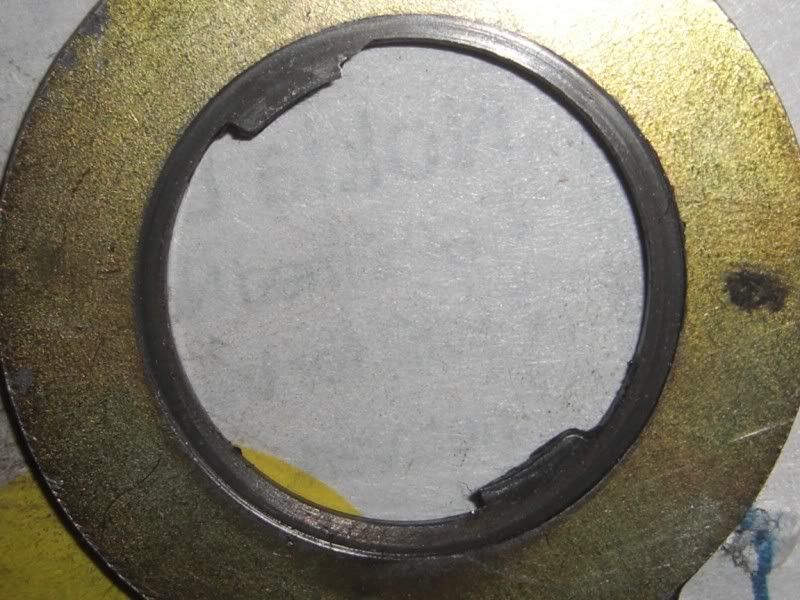
    Here you can see the wear. The dogs (that's what they're called right?) were worn off diagonally. They're supposed to transfer movement to the grooves in the hub, but in this condition they just slip off. They're also supposed to be as thick as the disc itself I think.


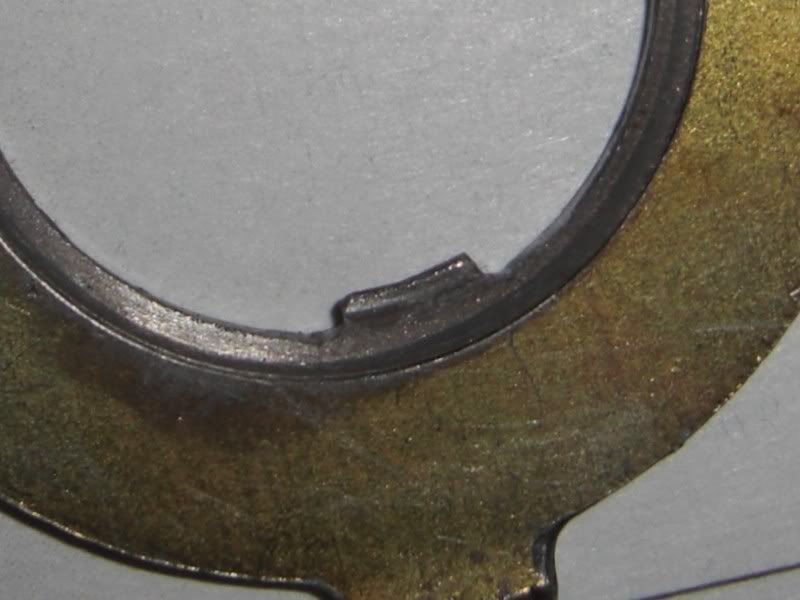
    Worn dogs from above, note how the worn material makes a nice ramp for the dog to slide itself out of the groove.
    Last edited by Guest; 03-06-2009, 02:03 PM.

    #2
    (split post for image rule)


    I cleaned it up and took a file to the dogs. This is during the process, I got them pretty square I suppose.

    The hub was also really hard to rotate and would bind up every rotation. The rubber gasket below the hub seems unserviceable and unremovable, so I just dunked it with WD40, let it penetrate, dunked some more, cleaned off etc. Finally it spun just fine. I probably shortened the life of the rubber gasket and nicely dissolved whatever grease was left in there, but this isn't exactly a mint restoration project is it?

    Put it back together while whistling a happy tune, but no luck. Since the dogs are so thin now, the play in the assembly makes them simply skim over the top of the grooves. I needed another washer to push the dog disc further down but the hardware store didn't have anything with wide enough diameter.


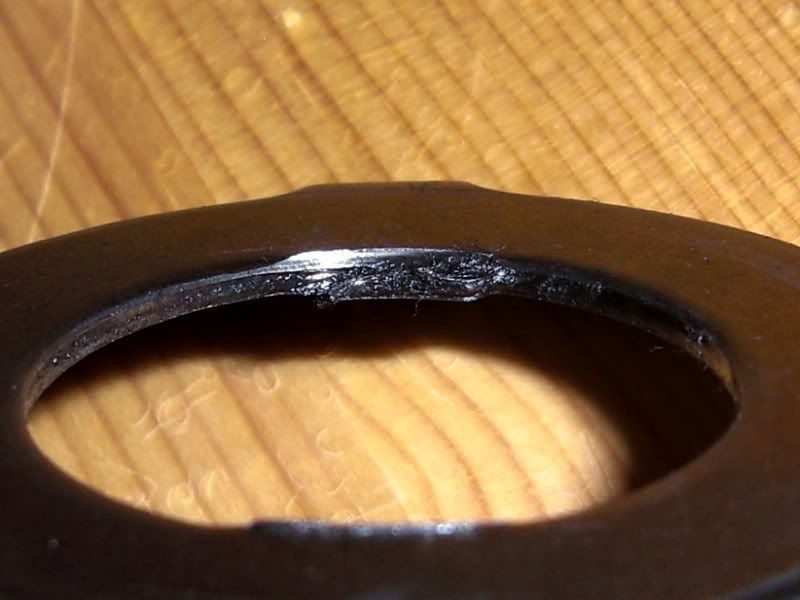
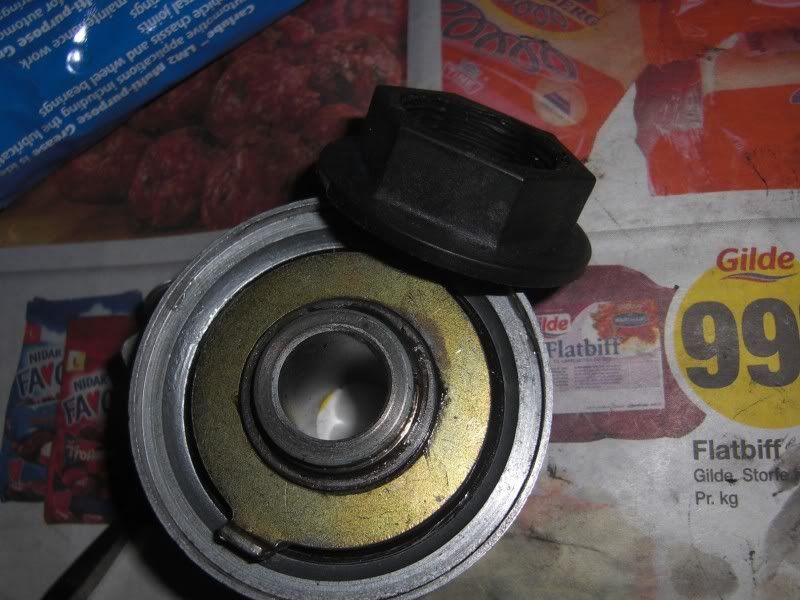
    So I looked around the basement for, as Robert Pirsig would say, an object with suitable qualities. This plastic nut thing from a lamp should do nicely, it was almost exactly the same inner and outer diameter as the drive disc.

    *insert sawing, filing and sanding noises*


    During the boring sanding phase, it was a bit too thick at first. Got enough material off and it fit perfectly. Not too tight to bind, but just right to keep the dogs in the groove (as they say).


    All lubed up and assembled. Put it on the bike, spun the wheel, lo and behold the needle nudged upward. Too much slushy stuff on the road to test it properly but it looks like a good fix. Only thing I'm worried about is the tiny bit of friction left melting and igniting the plastic and causing a horrific accident which kills me in small tiny pieces but hey...it'll probably be fine right?

    Should hold me up fine until I come across a NOS one for chump change on ebay. Any idea on how these interchange between bikes? Mine's a 1986 GSX750ES, euro edition. Should be identical to the US GS700ES.

    I might also drop the entire thing and replace my bulky instrument cluster with something from these guys: http://www.motogadget.com/

    But that's a different story...
    Last edited by Guest; 03-06-2009, 02:10 PM.

    Comment


      #3
      Nice work.
      You should also pull the pinion and grease it. You have to pull out the threaded bit to do this. I haven't figured out a better way to do that than with vise grips, which does mangle the threads a bit. It is an unusual thread. I had two speedo drives fail before I figured out that I needed to do that.

      Comment


        #4
        Hi Mr. Ola,

        Very nice work! Thanks for sharing! There are more than a few of us who love cheap fixes using "objects with suitable qualities". Thank you for your contribution to the GSR hive-mind.

        Would you care to join the illustrious ranks of contributors to the BikeCliff website and let me host a how-to guide for your repair?


        Thank you for your indulgence,

        BassCliff

        Comment


          #5
          Originally posted by p_s View Post
          Nice work.
          You should also pull the pinion and grease it. You have to pull out the threaded bit to do this. I haven't figured out a better way to do that than with vise grips, which does mangle the threads a bit.
          I will do that, I removed the little screw but couldn't figure out how to remove it. You just yank it out? I think I still have the old speedo cable for some reason, I suppose I could screw on the old cable cap and yank on that to save the threads. I bet whatever's in there is pretty nasty.

          Also...that is probably why the speedo drives on ebay don't have the threads but mine does...it's a thing you keep?


          Originally posted by BassCliff View Post

          Would you care to join the illustrious ranks of contributors to the BikeCliff website and let me host a how-to guide for your repair?
          I'd be happy to! It's just a little hack job, but it's not an uncommon issue right? Do you just copy as-is or should I rewrite it a bit?

          Comment


            #6
            Originally posted by Ola View Post
            I will do that, I removed the little screw but couldn't figure out how to remove it. You just yank it out? I think I still have the old speedo cable for some reason, I suppose I could screw on the old cable cap and yank on that to save the threads. I bet whatever's in there is pretty nasty.
            Just yank it out. I had thought of using the speedo cable end to do it, but the cable isn't cheap either. I put a rag under the vise grips so the threads weren't really that bad afterwards, just a little bit bent.
            Also...that is probably why the speedo drives on ebay don't have the threads but mine does...it's a thing you keep?
            Hmm... I bought 2 on ebay that came with the threads. Suzuki only sells the entire unit.

            Comment

            Working...
            X