Announcement

Collapse
No announcement yet.

changing fork seals

Collapse
X
 
  • Filter
  • Time
  • Show
Clear All
new posts

    changing fork seals

    So, my fork seals are leaking, there was a puddle under the bike after it sat overnight.
    Is it possible to change the seals with out disasembling them?
    My manual just shows how to take them apart. I have never taken forks apart before and I would rather not start now.

    #2
    ive never done them before but i do believe you have to.
    I didnt do it I swear !!

    --------------------------
    http://i1210.photobucket.com/albums/...Picture003.jpg 1982 GS850G

    http://i1210.photobucket.com/albums/...n1/Picture.jpg 1980 GS1100L

    Comment


      #3
      Originally posted by gearhead13 View Post
      So, my fork seals are leaking, there was a puddle under the bike after it sat overnight.
      Is it possible to change the seals with out disasembling them?
      My manual just shows how to take them apart. I have never taken forks apart before and I would rather not start now.
      Its NOT hard at all. In your case, Yes, you do have to completely disassemble them to remove the seal and replace it. I just did 2 sets, one just like yours, and one of the more modern forks in the GS line. YOURS are cake, the others....not so much, but still not horribly tough.

      Comment


        #4
        Ok, thanks for clarifying that. The manual shows a hex allen at the bottom and a bolt? inside that you have to turn. How far down is it to the inside bolt (or allen)? Can I use several 3/8" extensions to reach it? Anyone know what size it is? Should I replace the "anti friction guide thingys" as well?

        Comment


          #5
          19mm from memory. You need the reverse end of a Craftsman plug socket on some extensions or some all thread with the right size nut locked onto it at each end (one for the fork one for your wrench). Some just jam it up with a broom handle down the fork but I've never tried that.

          If you have air forks you can actually release the clip & pump in so much air the seal pops out - did both my 1000's this way. needed about 170psi (put in with a bicycle track pump by hand in my case).

          The bush you're talking about is not normally worn out.. if you have no play in the forks then it's unlikely you need a new one.

          Dan
          1980 GS1000G - Sold
          1978 GS1000E - Finished!
          1980 GS550E - Fixed & given to a friend
          1983 GS750ES Special - Sold
          2009 KLR 650 - Sold - gone to TX!
          1982 GS1100G - Rebuilt and finished. - Sold
          2009 TE610 - Dual Sporting around dreaming of Dakar..... - FOR SALE!

          www.parasiticsanalytics.com

          TWINPOT BRAKE UPGRADE LINKY: http://www.thegsresources.com/_forum...e-on-78-Skunk/

          Comment


            #6
            Originally posted by salty_monk View Post
            19mm from memory...
            Correct, 19mm.

            Originally posted by salty_monk View Post
            Some just jam it up with a broom handle down the fork but I've never tried that ...
            The broom handle trick works, but best if it's hard wood. Someone I know welded a 19 mm hex nut onto an extension.

            Comment


              #7
              Originally posted by TheCafeKid View Post
              Yes, you do have to completely disassemble them to remove the seal and replace it.
              Cant you just slide the forks down out of the tree. Pry out the old seals and then slip in a new ones.
              82 1100 EZ (red)

              "You co-opting words of KV only thickens the scent of your BS. A thief and a putter-on of airs most foul. " JEEPRUSTY

              Comment


                #8
                Isuppose you COULD do that, but trying to pry that seal out without messing up the upper fork tube will be a little tricky. They're in there pretty good, as Dan pointed out it took 170PSI to push it out (the MAX amount of air that should ever be in a fork in use is 35PSI, so you see there) I had to use a seal puller on mine but mainly because i was worried about Fing up the fork lower. The 550 ones i did you just sort of use the fork as its own slide hammer and popped em out, but the ones this gent is working on dont work like that i dont think.

                Comment


                  #9
                  Originally posted by salty_monk View Post
                  ... the reverse end of a Craftsman spark plug socket on some extensions...
                  +1 on the "reverse" spark-plug-socket-on-an-extension trick. Worked like a charm on my 850GLZ front forks.

                  Another tip I learned here - keep the old seals & put them on top of the new ones while you press them in place; it will keep the new seals from getting buggered.

                  good luck,

                  mike
                  '85 GS550L - SOLD
                  '85 GS550E - SOLD
                  '82 GS650GL - SOLD
                  '81 GS750L - SOLD
                  '82 GS850GL - trusty steed
                  '80 GS1100L - son's project bike
                  '82 GS1100G - SOLD
                  '81 GS1100E - Big Red (daily rider)

                  Comment


                    #10
                    Originally posted by TheCafeKid View Post
                    trying to pry that seal out without messing up the upper fork tube will be a little tricky.
                    So R U telling me thats why I got one that leaks......

                    Im gonna put some air in the fork and squirt some soapy water on the seal to see if I can tell if its leaking on the inside or the outside.....
                    82 1100 EZ (red)

                    "You co-opting words of KV only thickens the scent of your BS. A thief and a putter-on of airs most foul. " JEEPRUSTY

                    Comment


                      #11
                      Originally posted by salty_monk View Post
                      19mm from memory. You need the reverse end of a Craftsman plug socket on some extensions or some all thread with the right size nut locked onto it at each end (one for the fork one for your wrench). Some just jam it up with a broom handle down the fork but I've never tried that.
                      I have not done the reversed plug socket, it looks like it might work.
                      I have done the broom handle bit, but only succeeded in splitting the end of the broom handle and putting splinters in the fork tubes.

                      What worked best for me was the all-thread rod and jammed nuts.
                      5/8" rod, 2 feet long, works very well. Here is what it looks like when done:


                      Leave some rod sticking out at one end, it helps center the tool in the piece you are trying to remove:

                      .
                      sigpic
                      mine: 2000 Honda GoldWing GL1500SE and 1980 GS850G'K' "Junior"
                      hers: 1982 GS850GL - "Angel" and 1969 Suzuki T250 Scrambler
                      #1 son: 1986 Yamaha Venture Royale 1300 and 1982 GS650GL "Rat Bagger"
                      #2 son: 1980 GS1000G
                      Family Portrait
                      Siblings and Spouses
                      Mom's first ride
                      Want a copy of my valve adjust spreadsheet for your 2-valve per cylinder engine? Send me an e-mail request (not a PM)
                      (Click on my username in the upper-left corner for e-mail info.)

                      Comment


                        #12
                        I just replaced the seals on my '82 1100E, it really wasn't hard at all. I used the tool that Steve has picture of in the above post. In my case, I used 1/2" threaded rod. The 1/2" (inner diameter) nuts were pretty much a perfect 19mm on the outer diameter. Here's what I did:

                        -Remove wheel, fender, and calipers
                        -Loosen the fork caps, for me it was 22mm
                        -Loosen bolts on triple-clamps and pull forks out by twisting
                        -Remove fork caps and springs
                        -Hold upside-down and drain oil
                        -Put lower leg in vise (use the caliper mounts)
                        -remove allen key from bottom of fork - 8mm, this is where you use the tool
                        -remove the dust cap, circlip, and washer from above the seal
                        -grab inner leg with both hands and yank a few times until the entire fork comes apart
                        -I've read in the manual (and on here) that the seal should go in next, before the inner leg, but I didn't do that. I actually reassembled the fork, then inserted the seal right over the inner leg. I used a piece of PVC pipe to drive the seal.
                        -Fill with oil

                        That was pretty much it. I also cleaned everything with mineral spirts.
                        1983 GS1100E

                        Comment


                          #13
                          Originally posted by Glen View Post
                          That was pretty much it.
                          What did U do about the brake lines ?
                          82 1100 EZ (red)

                          "You co-opting words of KV only thickens the scent of your BS. A thief and a putter-on of airs most foul. " JEEPRUSTY

                          Comment


                            #14
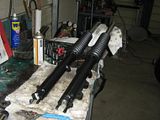
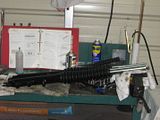
                            My GS750 was so easy, even I could do it. And I guess I got lucky. No special tools were needed. The Allen head bolts in the axle saddle area broke free nice and easy with the help of my impact screwdriver. The service manual wasnt really needed but was nice for reference purposes. The measuring bottle in the pic came from a beauty supply store here local. It was marked in mL, so that made adding oil easier.

                            Comment


                              #15
                              Originally posted by Glen View Post
                              I used the tool that Steve has picture of in the above post. In my case, I used 1/2" threaded rod. The 1/2" (inner diameter) nuts were pretty much a perfect 19mm on the outer diameter.
                              Yeah, 1/2" it is, for Zooks. I forgot that my tool, with the 5/8" rod was what we used for my son's Venture Royale.

                              I also used a piece of PVC pipe to drive the new seals in. I think it was 1 1/2" pipe. It almost just barely fits over the 35mm fork tubes, so I cut a slit along the entire length so it could expand a bit. If the PVC pipe is longer than the upper fork tube (only takes about an 18" piece) and the end is cut square, you will have absolutely no problem driving the seals into place squarely, with no chance of damaging the upper tubes.

                              .
                              sigpic
                              mine: 2000 Honda GoldWing GL1500SE and 1980 GS850G'K' "Junior"
                              hers: 1982 GS850GL - "Angel" and 1969 Suzuki T250 Scrambler
                              #1 son: 1986 Yamaha Venture Royale 1300 and 1982 GS650GL "Rat Bagger"
                              #2 son: 1980 GS1000G
                              Family Portrait
                              Siblings and Spouses
                              Mom's first ride
                              Want a copy of my valve adjust spreadsheet for your 2-valve per cylinder engine? Send me an e-mail request (not a PM)
                              (Click on my username in the upper-left corner for e-mail info.)

                              Comment

                              Working...
                              X