Announcement

Collapse
No announcement yet.

Patience

Collapse
X
 
  • Filter
  • Time
  • Show
Clear All
new posts

    Patience

    It's winter. It's raining. It's time to . . . what the hell. Remove the oil pan and replace the sump screen on my '78 GS1000.


    The pan came off after a few raps on a wooden dowel with a rubber mallet. The bottom of the pan looked pretty good, for thirty-two years on the job. What little sludge had accumulated there came up with a paper towel wrapped around an index finger. I sprayed the cooling fins with Simple Green, then went to the coin-op car wash and blasted away with the high-pressure spray. Came home and watched the Jets manhandle the Chargers while working the nooks and crannies with Q-tips and Mother's polish. That was the easy part. That was the fun stuff.

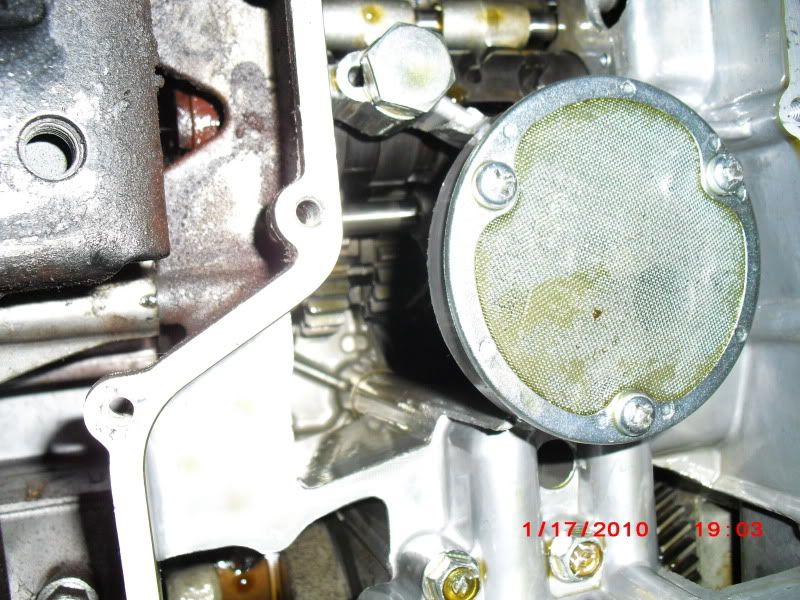
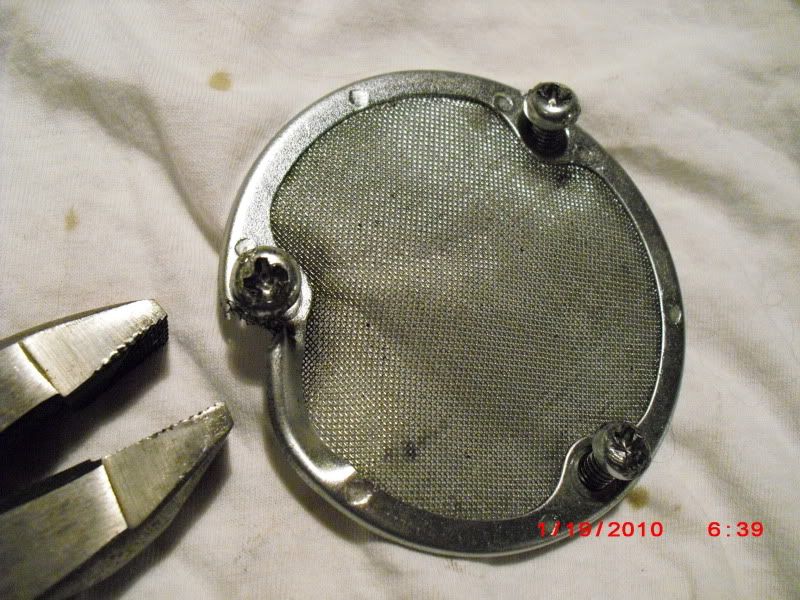
    Taking off the sump screen (see photo) will require patience. I know. I've done it before. The engineers at Suzuki chose to fasten it with three soft Phillips head screws that feel welded to the screen. Why not a hex-head or socket-head bolt? Something you can get leverage on. Lying on my back with an impact driver underneath the engine, I can deliver only abbreviated strikes. Spray some Seafoam on the screws, hoping the solvent will wick upwards into the threads (osmosis?), tap the screws, then jam the phillips head driver up while torquing with both hands. A good pump in the wrists and hands. Last time it took me about a week to get the job done, and when it was over I had a grip like a python. Some jobs you just can't rush . . . oh well, it's raining
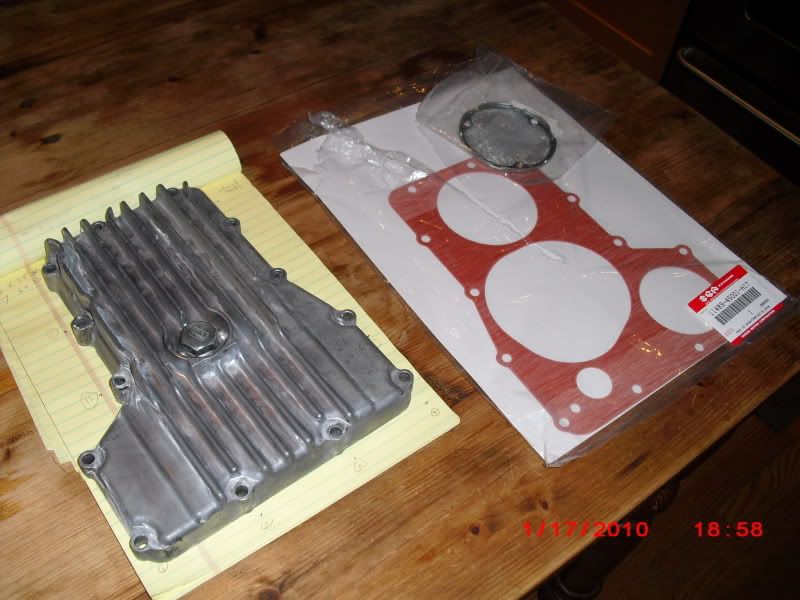
    1978 GS1000 http://i88.photobucket.com/albums/k1...6/P1010050.jpg

    #2
    1978 GS1000 http://i88.photobucket.com/albums/k1...6/P1010050.jpg

    Comment


      #3
      Can you get some Vise-grips or Channel-locs on them?

      Or are they above the level of the oil pan ledge?

      The extra leverage would loosen them up so you can throw them away quicker.

      .
      sigpic
      mine: 2000 Honda GoldWing GL1500SE and 1980 GS850G'K' "Junior"
      hers: 1982 GS850GL - "Angel" and 1969 Suzuki T250 Scrambler
      #1 son: 1986 Yamaha Venture Royale 1300 and 1982 GS650GL "Rat Bagger"
      #2 son: 1980 GS1000G
      Family Portrait
      Siblings and Spouses
      Mom's first ride
      Want a copy of my valve adjust spreadsheet for your 2-valve per cylinder engine? Send me an e-mail request (not a PM)
      (Click on my username in the upper-left corner for e-mail info.)

      Comment


        #4
        Those screws have loctite from the factory so try some heat on them.
        1983 GS 1100E w/ 1230 kit, .340 lift Web Cams, Ape heavy duty valve springs, 83 1100 head with 1.5mm oversized SS intake valves, 1150 crank, Vance and Hines 1150 SuperHub, Star Racing high volume oil pump gears, 36mm carebs Dynojet stage 3 jet kit, Posplayr's SSPB, Progressive rear shocks and fork springs, Dyna 2000, Dynatek green coils and Vance & Hines 4-1 exhaust.
        1985 GS1150ES stock with 85 Red E bodywork.

        Comment


          #5
          good luck;


          If you use the little picture icon between the letter and caption icons you can directly insert those hosted pics

          P.S. I use a ratchet with a #2 screw socket attachment; If the bike is high enough you can leverage your elbow against the floor and drive the socket up. Turn with the ratchet handle; Tap the screw driver socket deep into the Phillips head before trying to turn it.

          I never use impact wrenches instead use this method. If that fails I get out the hack saw. It is almost never required.


          Last edited by posplayr; 01-18-2010, 10:06 PM.

          Comment


            #6
            That screen is clean. I'd leave it alone.
            Ed

            To measure is to know.

            Mikuni O-ring Kits For Sale...https://www.thegsresources.com/_foru...ts#post1703182

            Top Newbie Mistakes thread...http://www.thegsresources.com/_forum...d.php?t=171846

            Carb rebuild tutorial...https://gsarchive.bwringer.com/mtsac...d_Tutorial.pdf

            KZ750E Rebuild Thread...http://www.thegsresources.com/_forum...0-Resurrection

            Comment


              #7
              Originally posted by Nessism View Post
              That screen is clean. I'd leave it alone.
              Yea but he has a new one

              Comment


                #8
                Originally posted by posplayr View Post
                Yea but he has a new one
                That screen is clean, I'd leave it alone.
                Ed

                To measure is to know.

                Mikuni O-ring Kits For Sale...https://www.thegsresources.com/_foru...ts#post1703182

                Top Newbie Mistakes thread...http://www.thegsresources.com/_forum...d.php?t=171846

                Carb rebuild tutorial...https://gsarchive.bwringer.com/mtsac...d_Tutorial.pdf

                KZ750E Rebuild Thread...http://www.thegsresources.com/_forum...0-Resurrection

                Comment


                  #9
                  I dont remember having to use an impact driver on it. If you get a good screw driver with the right tip, you can take it off by hand. I use a screwdriver with interchangeable bits for these type of screws. If they made it a hex, many guys would crank down too hard and strip the thing.

                  Oh yeah, the screens are washable.

                  Comment


                    #10
                    The screen is pristine, I agree. But it's coming out, because I need something strenuous to do while it's still raining . . . and as posplayer pointed out, I got a new one. The old screws will become blunderbuss ammo if Al Qaeda invade Oakland . . .

                    So, thanks for the advice. The new order of battle is as follows:

                    - heat to loosen the threadlocking compound

                    - set the impact driver to the side, bring burly screwdriver into play

                    Hope to report success by this evening . . . and hope to see some of you So Cal boys at Reno Bruce's in July.
                    1978 GS1000 http://i88.photobucket.com/albums/k1...6/P1010050.jpg

                    Comment


                      #11
                      Victory . . . it's not always pretty. Step one, attack the threadlocker. Bic lighter on the screws; a couple of light taps with a mallet. Dinner, plus gin and tonic for morale. Step two. #2 phillips screwdriver, two hands, maximum effort. Defeat. Step three, #2 phillips on a socket, brace for maximum upward pressure, apply torque. Feel the bit chewing up the head. I've eaten steaks tougher than these screws. Rest. Return to house. Another gin and tonic. Inspiration. What about the lineman's pliers?
                      1978 GS1000 http://i88.photobucket.com/albums/k1...6/P1010050.jpg

                      Comment


                        #12
                        crude but effective

                        Man reading your thread I'm getting thuursty... Anybody Seen Jose

                        Comment


                          #13
                          Phillips screws. Truly one of the worst inventions ever.
                          I was going to suggest leaning the bike over to get a better angle at using the impact. Never actually tried it but it could work. Of course you'd need a friend and a strategically placed spare car tire would help.
                          I thought the "leave it alone" suggestion had some merit to it.
                          And on the seventh day,after resting from all that he had done,God went for a ride on his GS!
                          Upon seeing that it was good, he went out again on his ZX14! But just a little bit faster!

                          Comment


                            #14
                            I read somewhere on GSR that those arent even philips, they are JIS - japanese industrial standard, i may have it wrong, but i think thats what they are called. I wonder if you had a set of those screwdrivers if that would help? I will be looking for a set for myself sometime.

                            Comment


                              #15
                              Vice Grip pliers coming in from the side would have taken those screws right out assuming there is enough room to get at them. At any rate, glad they are out so you can move forward.
                              Ed

                              To measure is to know.

                              Mikuni O-ring Kits For Sale...https://www.thegsresources.com/_foru...ts#post1703182

                              Top Newbie Mistakes thread...http://www.thegsresources.com/_forum...d.php?t=171846

                              Carb rebuild tutorial...https://gsarchive.bwringer.com/mtsac...d_Tutorial.pdf

                              KZ750E Rebuild Thread...http://www.thegsresources.com/_forum...0-Resurrection

                              Comment

                              Working...
                              X