Announcement

Collapse
No announcement yet.

beergood is back in the garage

Collapse
X
 
  • Filter
  • Time
  • Show
Clear All
new posts

    beergood is back in the garage

    Well, I am back from a two month hiatus. In early July I was riding one of my bicycles after liberally applying beer and whiskey to my blood stream. As I am well aware, not all my decisions are of the genius caliber. Anyway, coupling my blood chemistry with a patch of wet curvy downhill and my desire to go faster than I should resulted in me heading over the handlebars and rolling around on someone's front lawn.

    My bike was mostly okay, but I did a number on my shoulder. Before anyone feels the need to give me a lecture, you can rest assured that I received the full version of the riot act from several other sources. I would like to say that I learned my lesson, but only time will decide that (oh, I did start to feel good enough to ride the bicycle a few weeks after the injury, and was almost immediately involved in a car/bike accident. A young woman pulled into an intersection without seeing me coming, panicked at the last minute, slammed on her brakes in front of me, and I hit the side of her car. If she hadn't stopped I probably could have safely gone behind her, but instead I was launched over her trunk. Good Times.)

    So, with my shoulder a little soft I didn't feel confident on a moto-bike. Couple that with the recent home purchase, which keeps me busy, and the recent acquisition of a project car, my time free time/money is stretched pretty thin.

    Three weeks ago I felt I had healed enough to be confident on the GS, so I backed her out of the garage. As I was grabbing some brake to bring the bike to a halt, I lovely spray of fluid arched out from behind my light bucket. Wonderful.

    I had been wanting to replace my lines with stainless steel for two years now, but I always found some other project to do first. Well, the joke's on me.

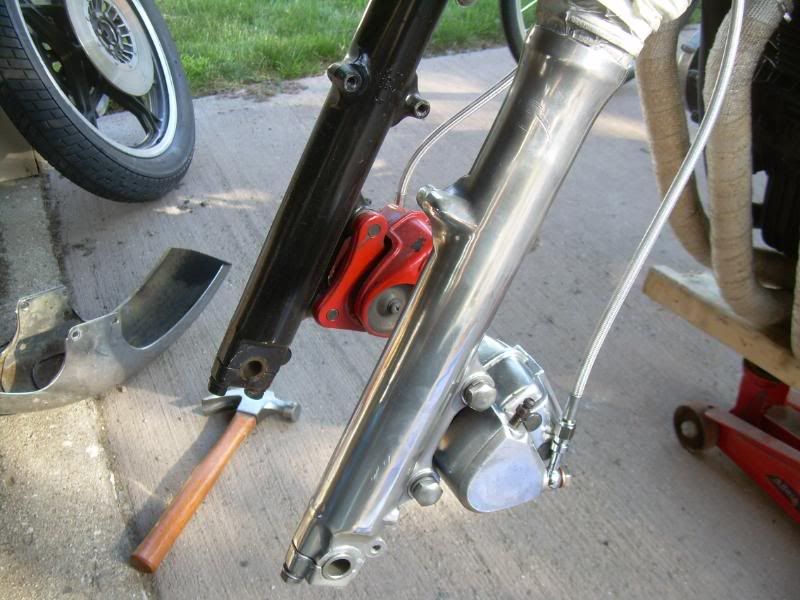
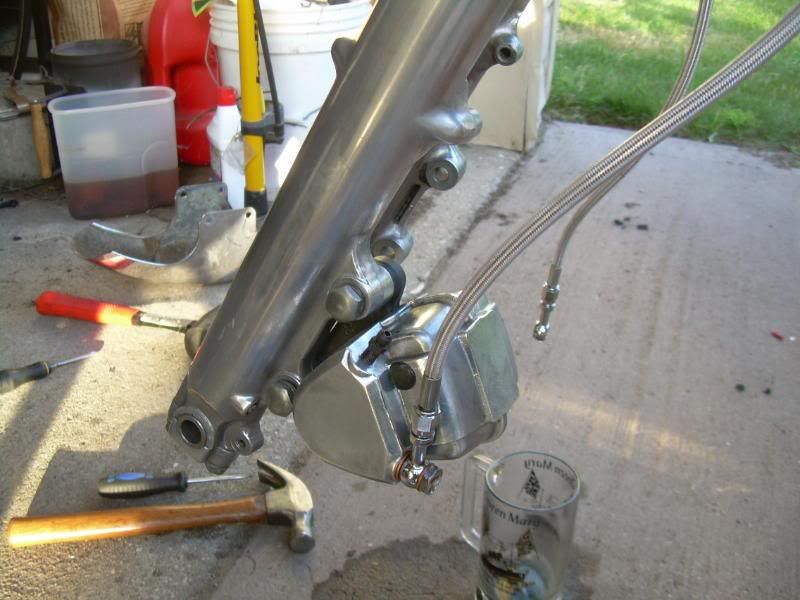
    Last week I ordered some lines from Z1, and as is typical they were here in three business days. I opted to ditch the stock line splitter design in favor of two lines that run the full length from each brake to a double banjo at the master. It ended up being way easier to bleed, and is a much nicer setup.

    Then I hit the road. Wow, everyone should do this conversion. I now have handfuls of brake, and the feel/feedback is tremendous.

    And my first ride in two months was almost two miles long before it started to rain. Well, Har-Dee-Har-Har. I finally got some decent riding in yesterday, and halfway into it my speedo cable broke. Gotta love these old bikes. Well, time for another order from Z1.

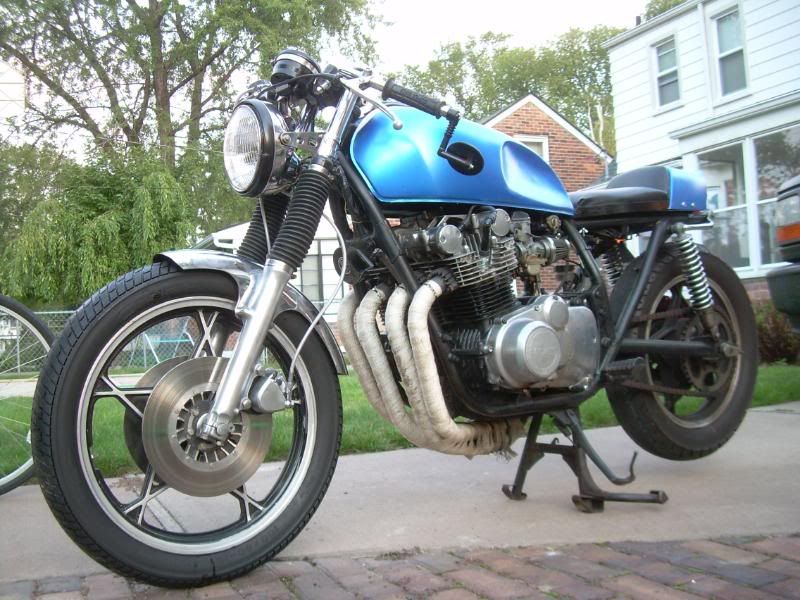
    Since I had to do a little disassembly, I once again decided to go whole hog. Here are the photos:

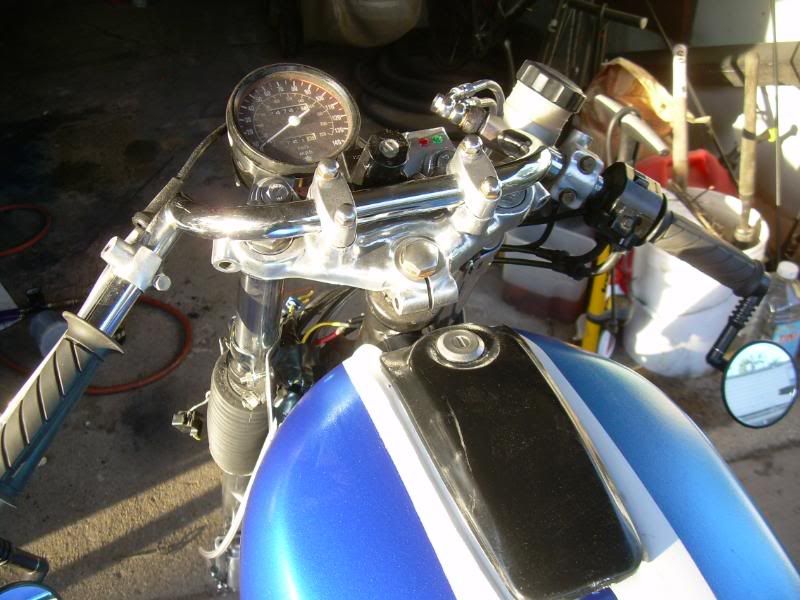
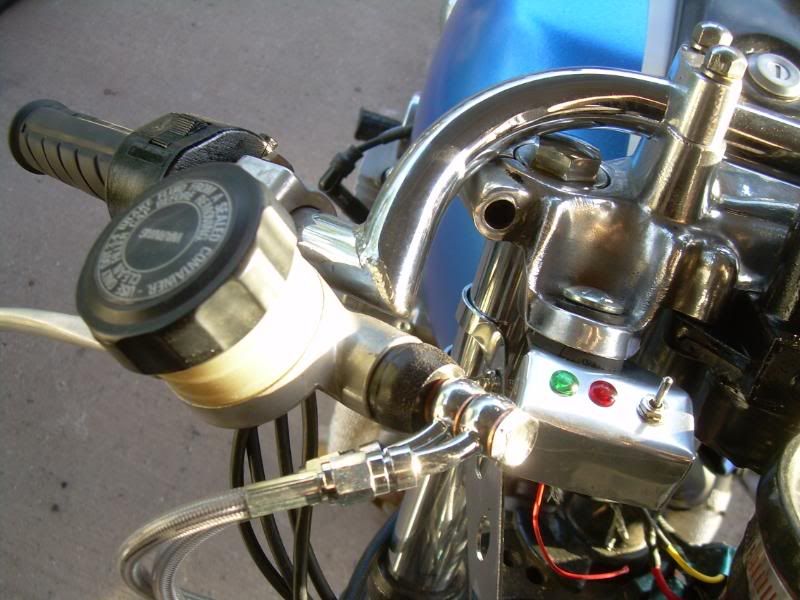
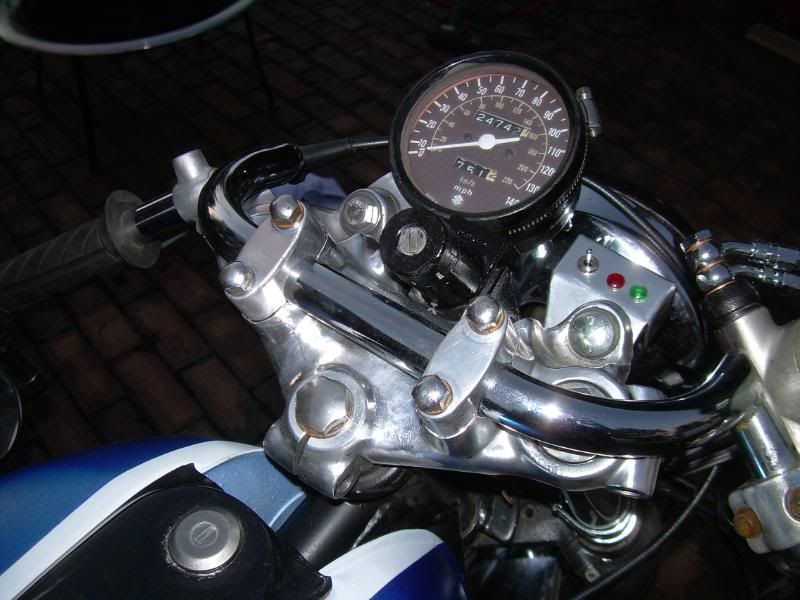
    I was never thrilled with the direction my homebew dash was going in, so I tried a different approach. I started the fab on a new bracket for the speedo, and a new 'box' for the idiot lights/light switch. I picked up a square of aluminum from a local hobby shop for the materials, and I am really happy with it so far. I was inexpensive and easy to work with. Should get better picks when it is all wired in.


    You can also see the double brake line, and I stripped and polished the top yolk.


    Last edited by Guest; 09-11-2008, 05:20 AM.

    #2
    cool story
    GS850GT

    Comment


      #3
      I recently set up a hybrid buffing device, and used it to buff the yolk. some other parts, and am in the process of stripping the brakes.

      I also need to do some carb tweaking, so I dug out my old part rack, and decided to give a damaged number three carb a spin on the buffer. Check this out:


      Comparison with unpolished carb:


      So, I think that I will be hitting the rack with the wheel.

      Anyway, I am hoping to get everything assembled before the weekend (a lofty goal, I know).

      More pics to come.

      Comment


        #4
        Lecture,lecture,lecture.Those damn treddlies can be a bitch when you're lubed up(previous experience in this area).Glad to hear you're OK.My carbs are in the mail.Cheers,Simon.
        http://i258.photobucket.com/albums/h...esMapSimon.jpg

        '79 GS1000S my daily ride in Aus

        '82 (x2) GS650ET in the shed

        Comment


          #5
          Your carbs look great. That was my plan once I got my jets sorted out.

          Can you elaborate a little as to why you chose the double lines for your front brake?

          Comment


            #6
            Looks pretty darn good....now show us your super secret hybrid buffing tool/wheel, sir
            Mike

            1982 GS1100EZ

            Text messages with my youngest brother Daniel right after he was paralyzed:

            Me: Hey Dan-O. Just wanted to say howdy & love ya!

            Dan-O: Howdy and Love you too. Doing good, feeling good.

            Me: Give 'em hell, Little Bro!

            Dan-O: Roger that! :)

            Comment


              #7
              Thank goodness you weren't riding the motoscoot or we likely wouldn't have ever heard from you again. Glad you are on the mend.
              Nice to see you have found a new hobby to help rehabilitate you. Can i send my dingy bits for a bit o polish?

              I've dabbled in polishing myself but I find it difficult and tedious to get a mirror finish. Can you share some info on your polishing rig and any tips you have. This could be another interesting tutorial for Mr. BC's pages.

              Hope you find time to get in some scooting but please stay off the hooch 'til you're back in the man room. Oh I forgot...powertools...maybe not such a good idea either.

              Stay safe.
              Spyug.

              Comment


                #8
                Originally posted by drhach View Post
                Your carbs look great. That was my plan once I got my jets sorted out.

                Can you elaborate a little as to why you chose the double lines for your front brake?
                The stock brake line setup has one line running from the master cylinder to a splitter mounted just below the headlight bucket on the bottom yolk. From that splitter a line runs to each brake. That makes 6 individual connections.

                My setup has two lines starting at the master and each runs to its own brake. So there are only 4 connections. It was way easier to bleed, removes clutter from behind the bucket, and I think it is more visually appealing.

                I didn't create this idea, I have seen it done elsewhere. In my mind, it is a simpler design and I used much better materials, so it should be way more reliable. Some people erroneously claim that it will preserve brake function if one line/brake fails. It won't, it is still a single system. A loss in pressure anywhere equals a loss of pressure everywhere.

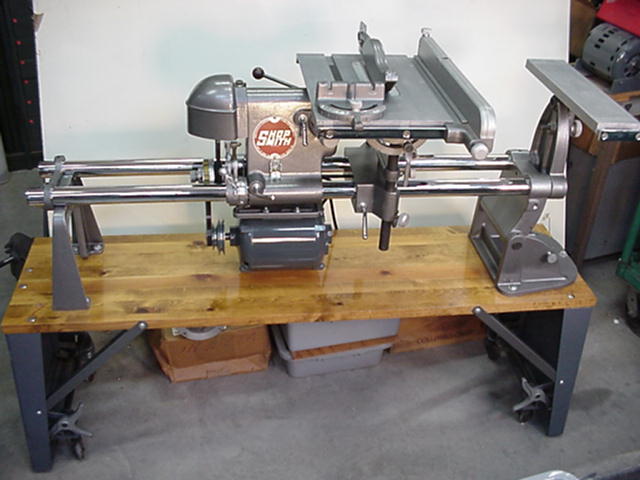
                As for the buffer device, I recently acquired an old Shopsmith:


                This isn't mine, but it's the same model. Space is limited in my garage, so this is a pretty perfect tool for me. It does a pretty fantastic job as a drill press/boring tool/disk sander. And just about anything that will mount to a spindle or can be held in a chuck will turn on it. I haven't played with the lathing ability yet, but I will soon.

                Comment


                  #9
                  Alrighty, buckle up for some picks:

                  Since I have replaced the brake lines and am in the process of building the dash and replacing the speedo cabe, and it was such a lovely day out today, I decided to do a long overdue tearing apart of the front end. Here is stripped front end next to the old configuration. I think you will agree that I made a good choice in direction:


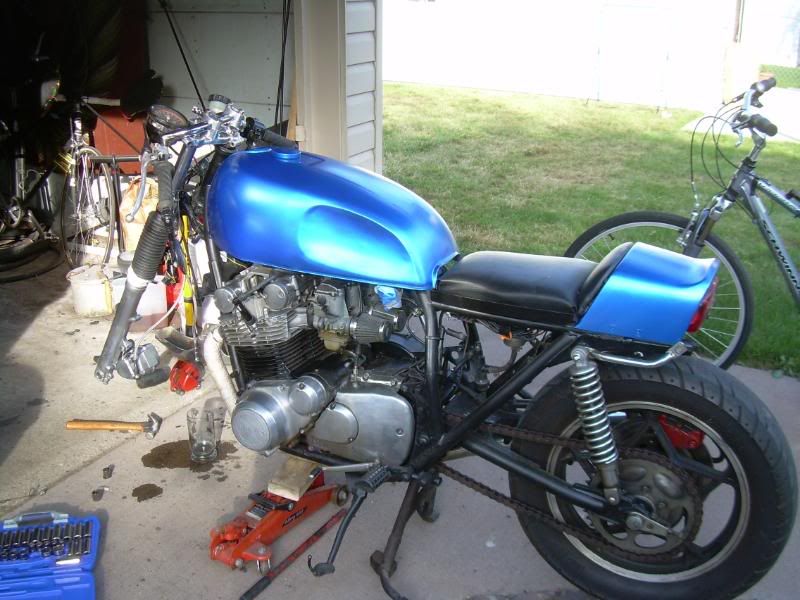
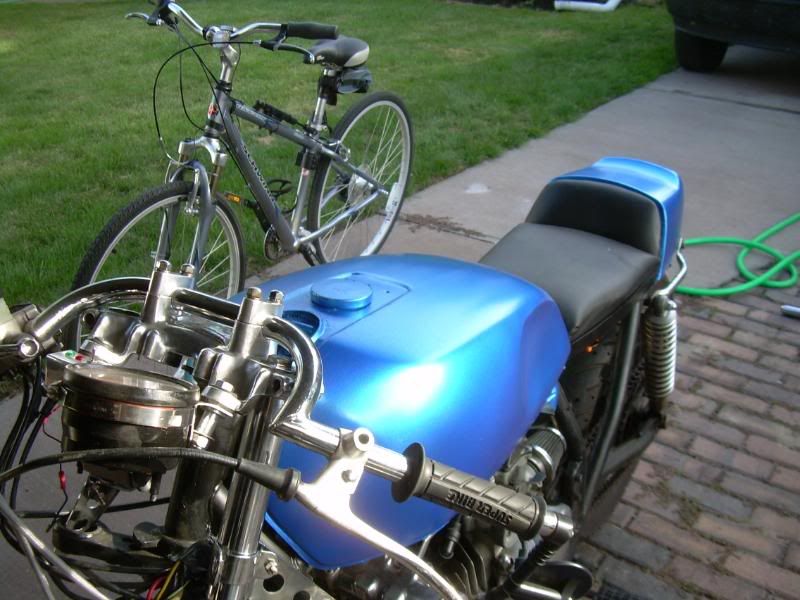
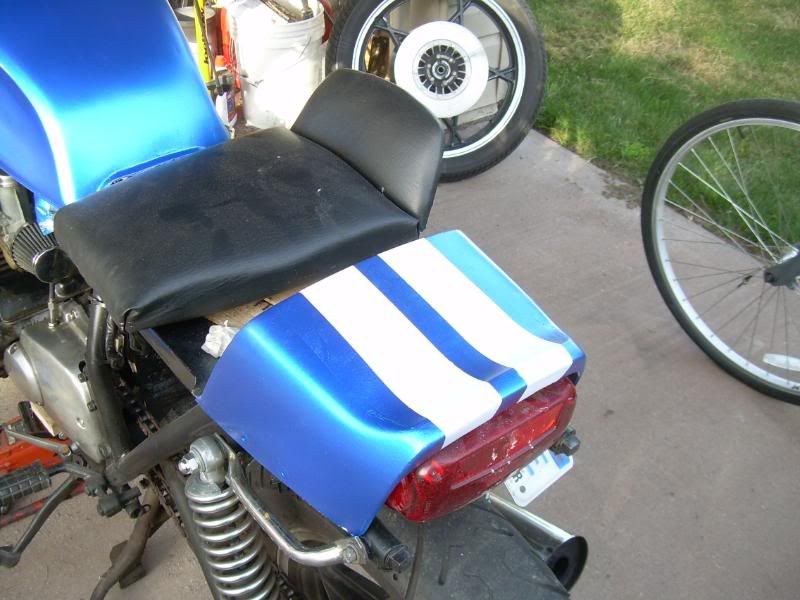
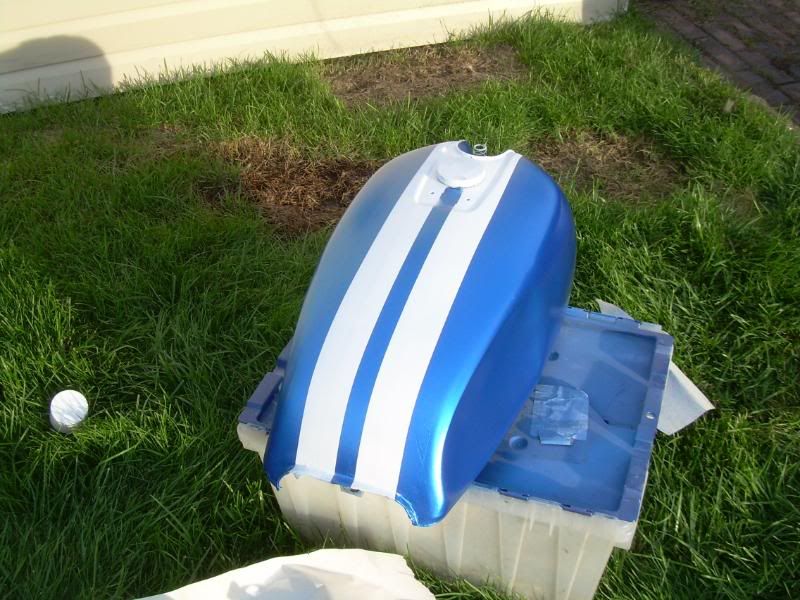
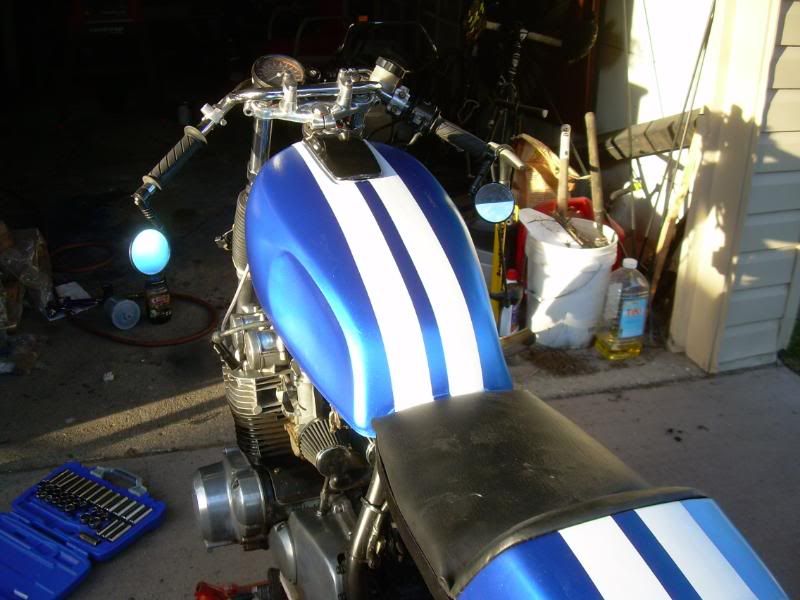
                  Anyone hwo has followed any of my threads knows that I have a hard time sitting on a paint job. Here is the latest. Metallic Blue (soon to be with white accents):


                  Comment


                    #10
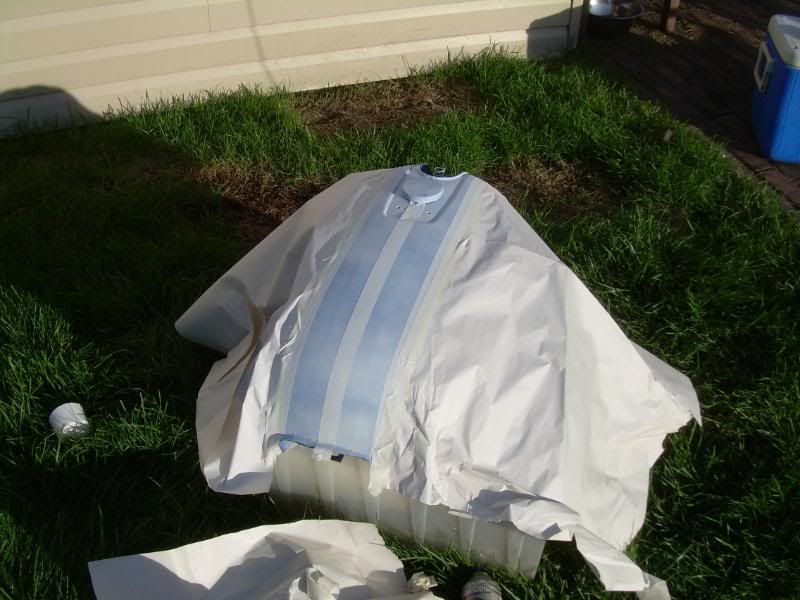
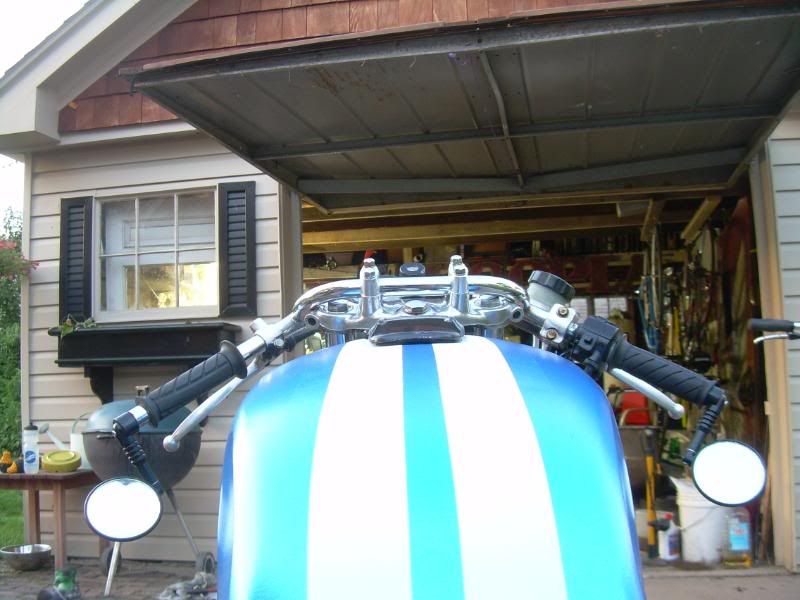
                    Here is the beginning of the stripes. I was doing this in concert with various stripping and polishing of other parts:


                    What do you think about my spray booth? Halfway through I saw my neighbor out smoking on his porch and asked him if the fumes were traveling over that far, he assured me that I didn't need to worry, and that he enjoyed getting high on paint fumes.


                    Comment


                      #11
                      Store your photos and videos online with secure storage from Photobucket. Available on iOS, Android and desktop. Securely backup your memories and sign up today!


                      Here is a better view of the polished top yolk. Better pics coming up:

                      Comment


                        #12
                        I do realize that with more effort I could have achieved a mirror like finish on the aluminum, but I am pretty happy with the level of polish. It isn't glaring, and it should be fairly easy to keep up:


                        This is what I was trying to explain in the post about a double connection at the cylinder. I like it, and it isn't really that much bulkier than the original setup (if you include the large rubber boot that was on it):


                        Comment


                          #13
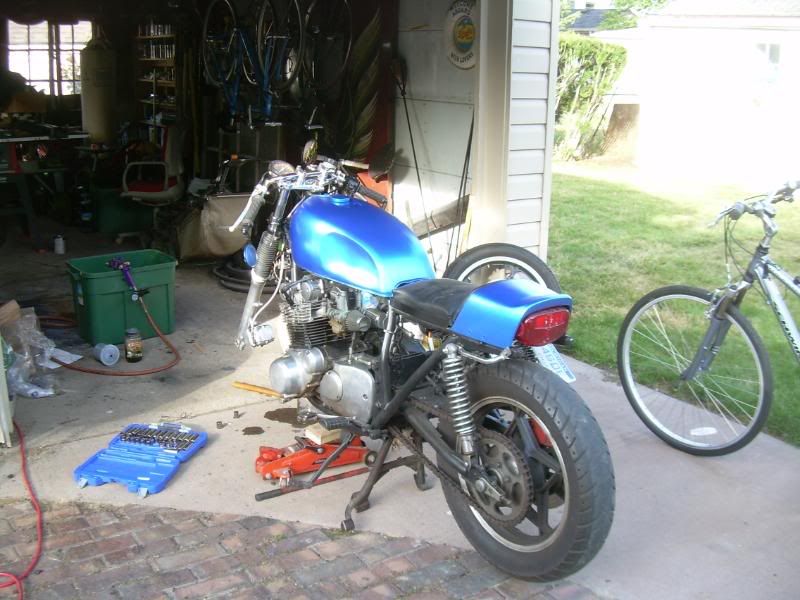
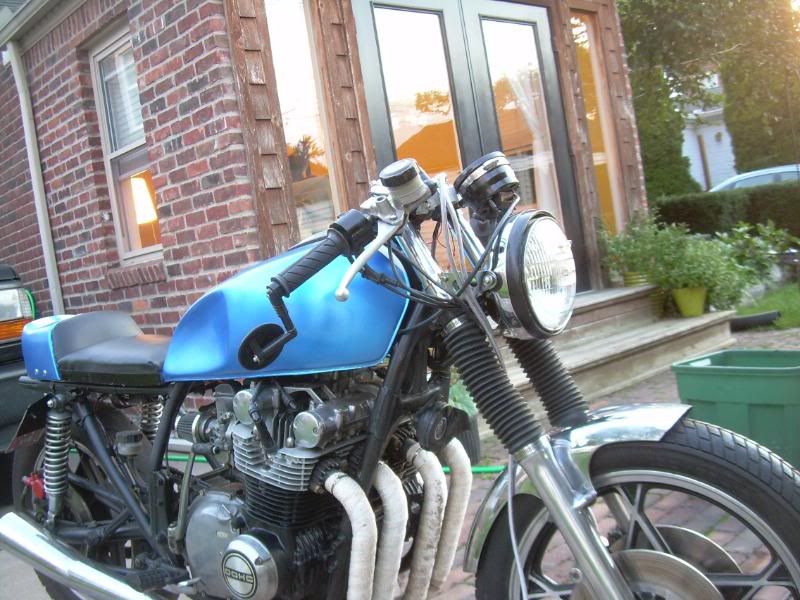
                          Now for some mostly assembled shots. I also sanded the out edges of the mags:


                          This pic I love. One of my goals has been to lower the body line as much as I could, and I think this is about as low as it gets without clip-ons and a custom top yolk:


                          Last edited by Guest; 09-11-2008, 11:06 PM.

                          Comment


                            #14
                            Nice work, diggin the stripes.
                            http://img.photobucket.com/albums/v5...tatesMap-1.jpg

                            Life is too short to ride an L.

                            Comment


                              #15
                              On the horizon:

                              Rebuild the back end (keeping with the changes that were made on the front). I ordered some gun bluing to recover some bolts and hardware back there that are looking pretty shabby (I know there is a debate going in another thread about the efficacy of this, please reserve it for that thread).

                              My mother is making a snap on leather seat cover from one of the hides she has (my mother is a college professor, and textiles is one of her specialties). I am pretty much giving up on getting that installed this season, so you should hopefully see it next season.

                              Over the weekend I intend to apply several coats of clear. For anyone interested, I used a fairly cheap lacquer paint and an HVLP gun, and will be using the same for clear. I know it doesn't have the durability of a two part paint, but I change it often, and I have gotten pretty good at not spilling gas all over it at the fill-up station. It is a good compromise between quality and money.

                              Last Thoughts: A Suzuki looks really good in blue and white.

                              Comment

                              Working...
                              X