If you take the shaft bushing off you will see it fits inside the indide of the stock sprocket outer damper. the hole is larger on the inside.
Announcement
Collapse
No announcement yet.
1982 1100E 530 Chain Conversion Thread
Collapse
X
-
that's the correct way dude. Make sure you put the locking washer between the spacer and the nut.Originally posted by Turtleface View Post
If you take the shaft bushing off you will see it fits inside the indide of the stock sprocket outer damper. the hole is larger on the inside.Last edited by katman; 12-12-2009, 04:41 PM.
-
 Turtleface
Ok, I see how that works now. Thanks a ton. I'm glad I planned on this being a few days project, instead of trying to knock it out in a few hours. Gives me time to consult the Resources. Once I've got everything cleaned, re-lubed, and re-torqued, I'll post pics of the entire process, probably sometime tomorrow night. We'll have ourselves a nice pictorial tutorial for everyone else to follow.Originally posted by katman View Postthat's the correct way dude. Make sure you put the locking washer between the spacer and the nut.
If you take the shaft bushing off you will see it fits inside the indide of the stock sprocket outer damper. the hole is larger on the inside.
Comment
-
 Turtleface
Progress So Far
Well, it's been a full day, that's for sure. Now that I've figured out how everything works, this seems like a pretty simple task, all in all. I've gotten everything apart and clean. Ready for it all to go back together tomorrow. I recently received a free center stand for my bike, from the PO, and recommend one to anyone who doesn't have one. It sure makes this procedure a breeze. The biggest problem I ran into was finding the motivation to scrub, scrub, scrub, scrub and scrub some more. Cleaning was the biggest time consumer today. Here's how I progressed:
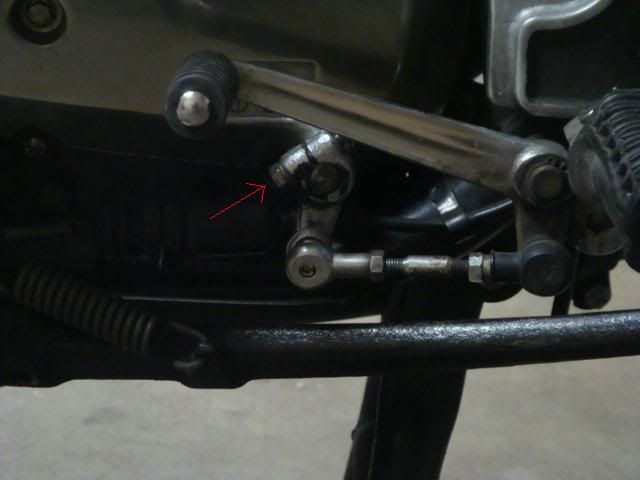
Started by removing this bolt, and pulling the shift linkage off the shaft.
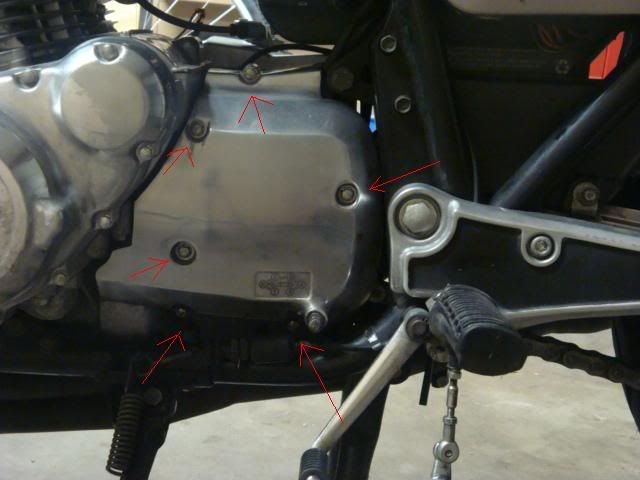
Next, these six bolts come out. They're all different lengths, so I just kept them in the sprocket cover, or threaded into their holes, to remember where each one went.
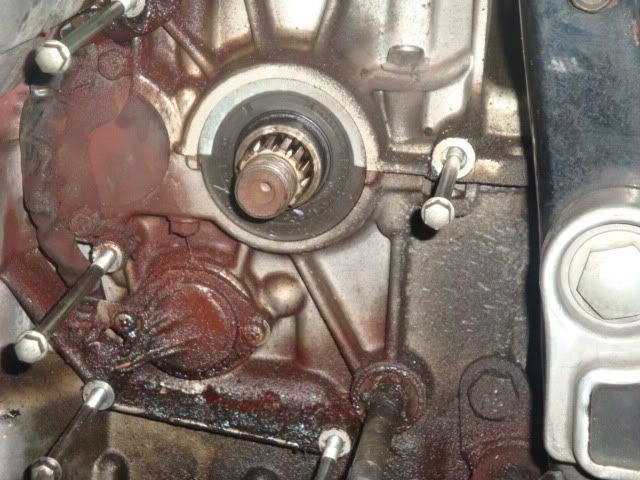
Here's what my front sprocket area looked like when I pulled the cover. Gross! The red stuff seems like a mixture of dirt and chain-lube. Looks like a rusty mess, but it's all just gunk. You can see the build up right above the bottom bolts. That stuff had to be chiseled out with a screwdriver.
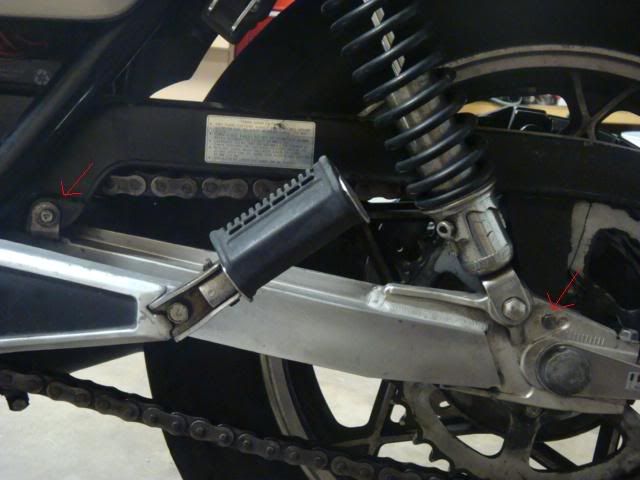
Remove these two bolts and get the chain guard out of the way. Now's a great time to clean it up, while you have it off. At this point in time, I ran a piece of 1x2 pine through the rear wheel, and situated it so that it braced the wheel against the swing arm so I could remove the front sprocket nut. After that, I cut the dead chain off with an angle grinder.
Comment
-
 Turtleface
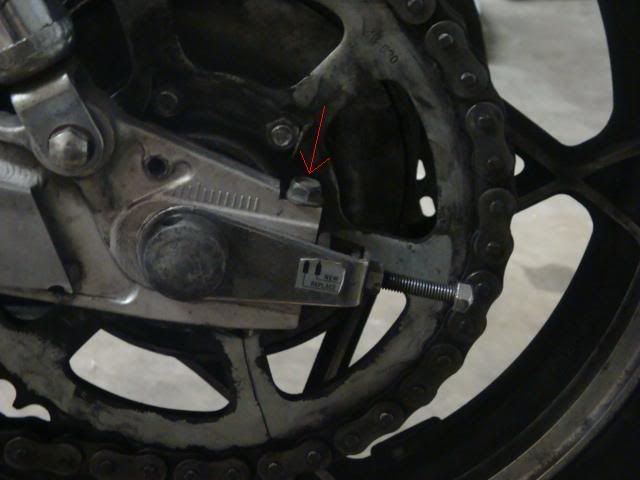
Next, I unbolted the bolt on the top of the swingarm, the one holding the adjuster blocks in place.
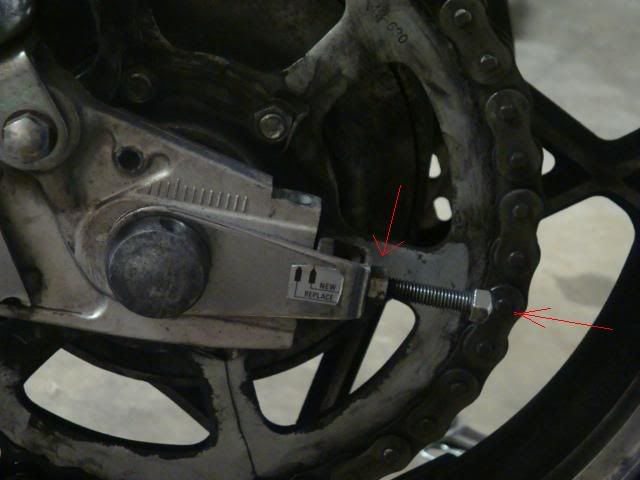
Back off the lock nut, and remove the adjuster bolt far enough to swing the adjuster down out of the way.
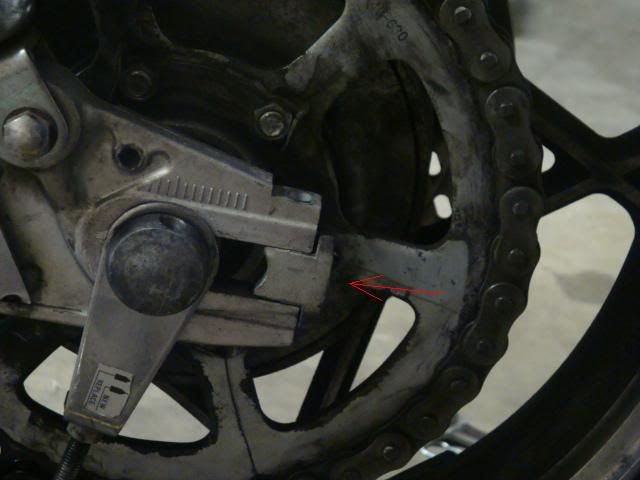
Remove the adjuster block. Repeat for the other side. At this point in time, I chased all the threads in the both of the adjuster assemblies. There was surface rust on mine, and this cleaned them up nicely. Action is now nice and smooth, everything turns well without any sort of binding.
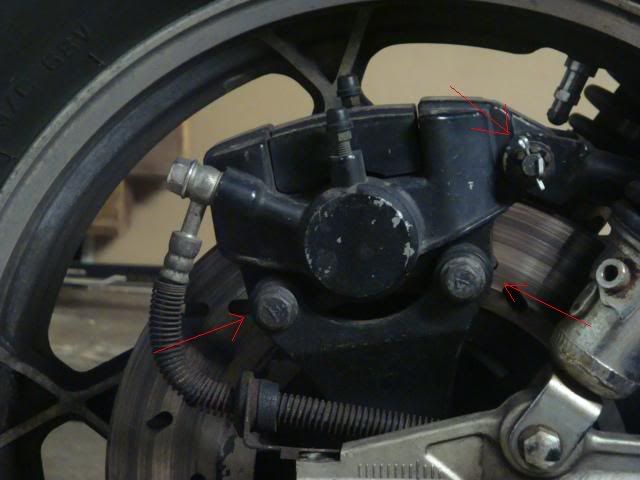
Remove the cotter pin on the castle nut, the castle nut, and the two bolts holding on the caliper. I slide the caliper onto a pair of Home Depot paint sticks at were approximately the same thickness as the rotor. Hopefully this keep the pistons pushed in, eliminating the need for brake bleeding later.
Comment
-
 Turtleface
Here are the paint sticks in holding the pistons apart.
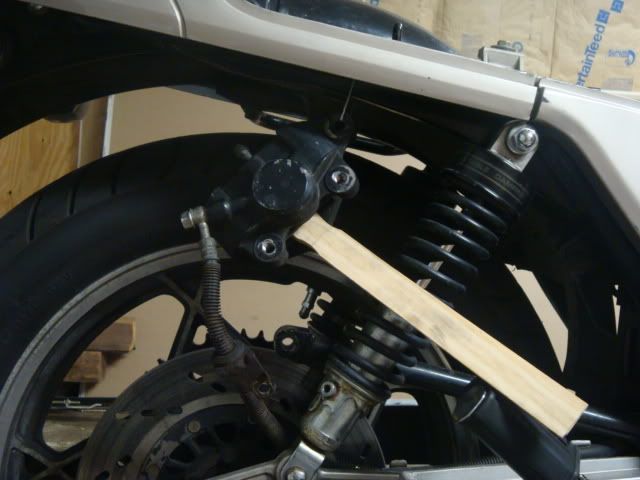
I tied the caliper to the frame with picture hanging wire, I wrapped the wire with black electrical tape where it contacted the frame, to prevent damage.
After the caliper's off, remove the cotter pin holding the rear axle. Remove the nut on the end of the axle, a screwdriver through the hole in the axle on the opposite side will help, and then the whole axle and wheel assembly should pull out from the swingarm. I took the opportunity to clean the swingarm, and the axle spacers and axle. I cleaned up the sprocket carrier as well, and all the hardware.
Here's the rear axle assembly, with spacers!
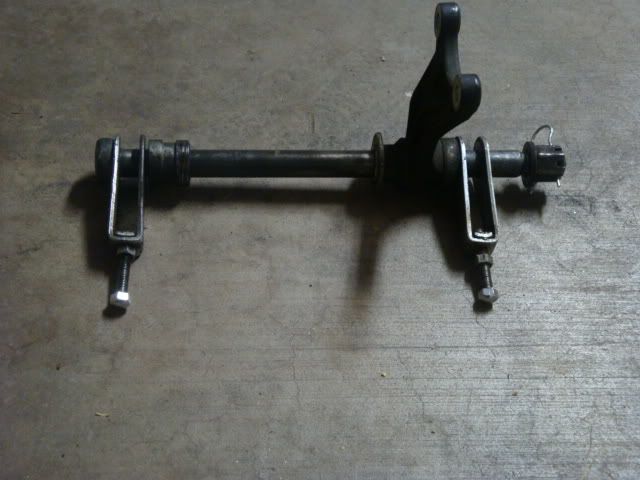
And here's what the same parts look after a quick bath, and reinstalled on the cleaned swingarm.
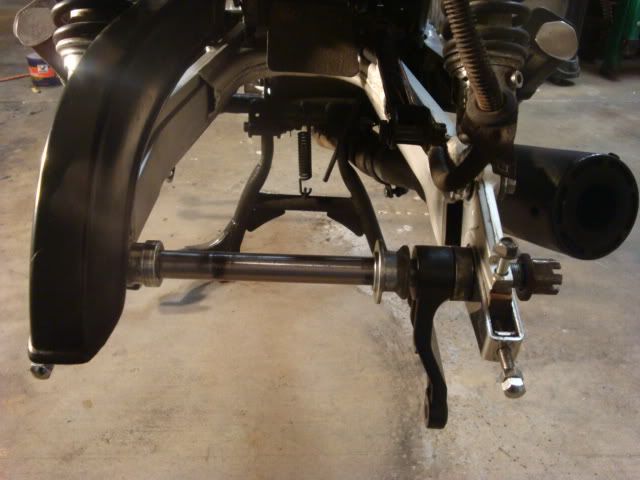
Just throwing everything back together so I don't lose anything. Here's a shot of the front sprocket cover area after a good cleaning.
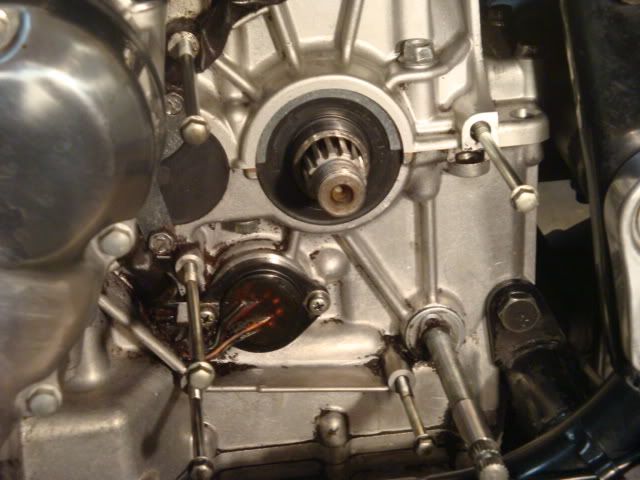
Got the vast majority of gunk off, there's still some in the harder to get to crevices. The rest will have to wait until I pull the engine next year for paint. I'm probably going to have everything soda blasted during prep.
Comment
-
 Turtleface
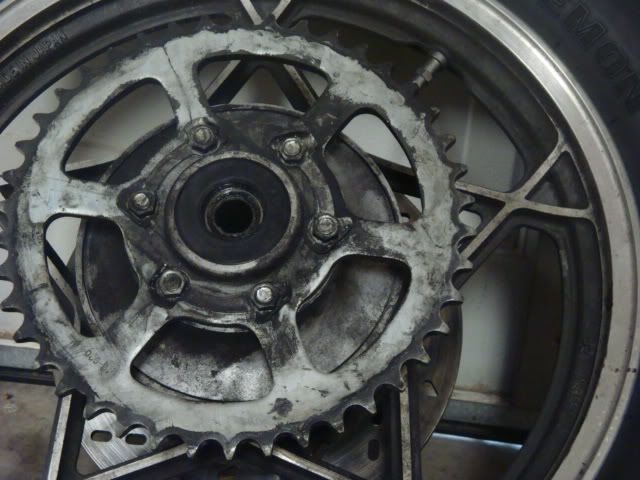
Here's the rear wheel assembly before cleaning.
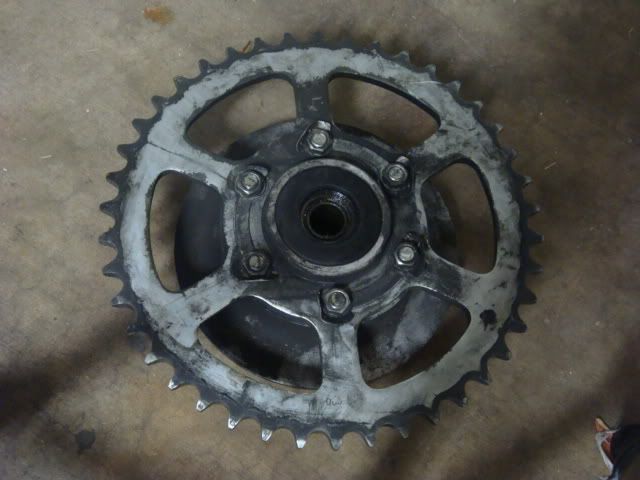
Here's the rear sprocket and carrier before cleaning.
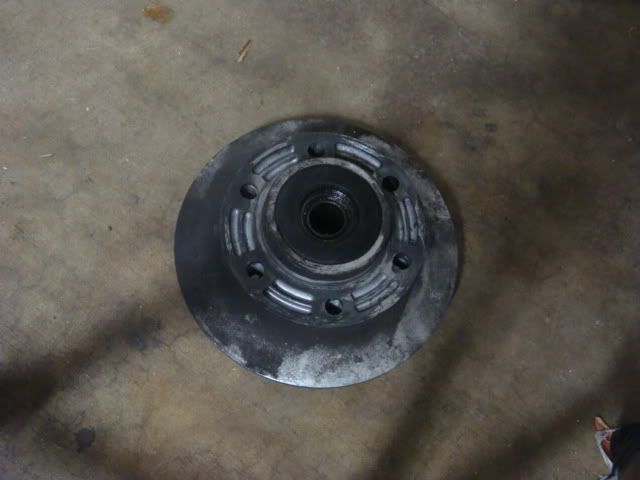
And just the carrier.
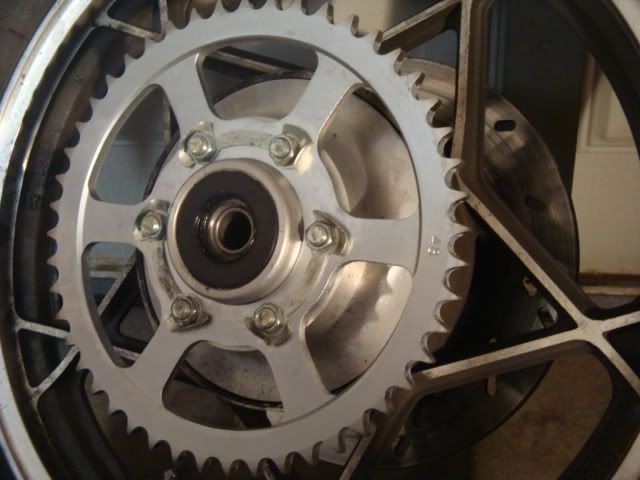
Here's how they look clean, and the new sprocket.
Comment
-
 Turtleface
And here's the new parts.

After I run over to a friends house to borrow his torque wrench, tomorrow's plan is to lube all the rear axle bits with a moly-fortified multi-purpose grease, and bolt everything back together. Loctite for all the sprocket, brake, and axle hardware. The hold downs for the adjuster blocks will probably get a little as well. Then I'll just have to install the new chain, install the masterlink, and adjust wheel alignment and chain slack. I'm pretty sure I've been riding on a trashed chain from the start, and if the bike was that much fun with a bad chain, I can only imagine what a new one will be like. And lighter than stock, and a quicker gear ratio as well. Today went pretty well, here's to hoping tomorrow will as well.
Might as well post the limit of pictures, so here's some more pics of cleaned parts. Shiny!
I know you guys are suckers for swing-arms, so here's a good one.
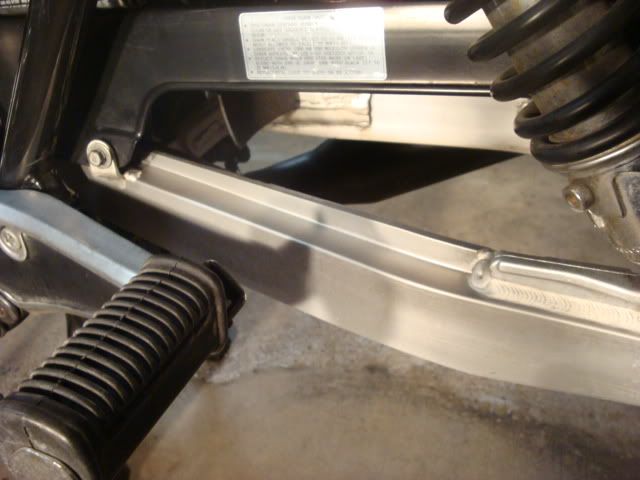
Towards the rear, and a little closer.
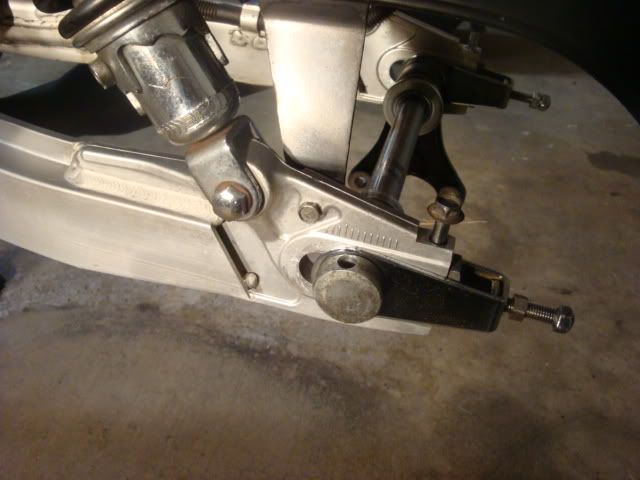
And here's how she sits now.

Comment
-
 mighty13d
did you say something other than ''bike pron?" I mean holy crap that swinger cleaned up nicely. Kind of like taking the glasses off the nerdy girl in high school, slapping some heels and a nice dress on her and she's the queen of the prom! hahah nice write up. Probably could have used a pic of the wooden block positioned in there and one of a ''before chain removal, but after sprocket cover is off'' but otherwise I would give you an A+!
VERY GOOD JOB!! maybe BassCliff can add this to his collection if it's not there already?????
Comment
-
 Turtleface
Originally posted by mighty13d View Postdid you say something other than ''bike pron?" I mean holy crap that swinger cleaned up nicely. Kind of like taking the glasses off the nerdy girl in high school, slapping some heels and a nice dress on her and she's the queen of the prom! hahah nice write up. Probably could have used a pic of the wooden block positioned in there and one of a ''before chain removal, but after sprocket cover is off'' but otherwise I would give you an A+!
VERY GOOD JOB!! maybe BassCliff can add this to his collection if it's not there already????? Thanks! Still have to fit it all together, I'll have to use the block trick to tighten down the front sprocket nut, I'll make sure to get a shot of it then. If this little write-up is well received, I'll continue with my plans to do more of them. I still need to clean carbs, refresh front forks, rebuild the brake system, install stainless lines, install my Progressive rear shocks and fork springs (thanks again, PO!) and the list goes on and on and on...And that's just to get it back to near stock condition. I say near stock, because any part I replace invariably has a better than stock option that usually turns out to be cheaper than the stock option, so I usually go the better than stock route.
Comment
-
Hi Turtleface, good looking project you have started with the 530 chain. I run the 630 on my 1100 and at one time I was tempted to do the change over to the 530 set-up however, I just like the look of the 630 to much and couldn't go through with it. As you discovered there are fewer bike shops carrying the 630 these days and the ones that do seem to charge well for them.
Thread hijack here to offer help to other 630 chain users.
To fix my chain replacement problem I found an industrial chain supplier that imports Japanese made 630 O-Ring chain and will sell me the 96 links I need for about half the price the bike shops charge (well that was when I bought the last chain four years ago). Maybe this is a solution to anyone having problems finding 630 chain or paying what seems to be a high price for it. Iam very happy with the chain quality and after 40.000 km on it all is well, cheers.Last edited by Shin-Ken 1074; 12-13-2009, 05:51 PM.Badgezz, we don need noh stinkin' badgezz!
Shin-Ken 1074
1982 GSX1100SXZ Wire Wheel Katana - BOM Nov 2011
1981 GSX1135 Katana Build completed Mar 2024, Curb Weight, all fluids and 21 lt fuel = 206 kg.
Comment
-
 Turtleface
Well, everything's bolted up and seems to be ok. The installation process is pretty much the reverse of the disassembly, with the only exception being the front sprocket.
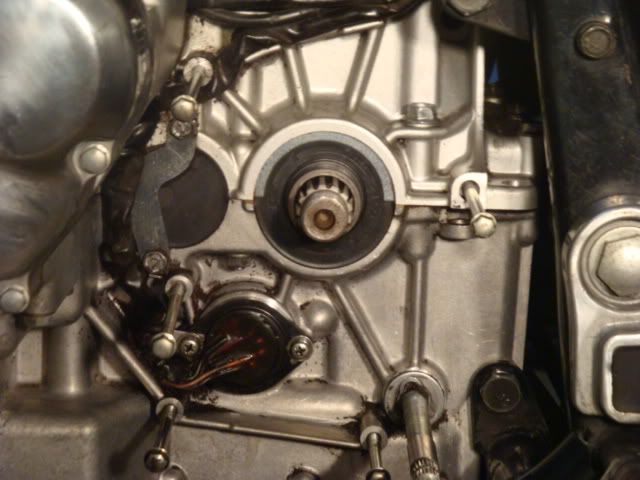
Here's what we start with, no sprocket.
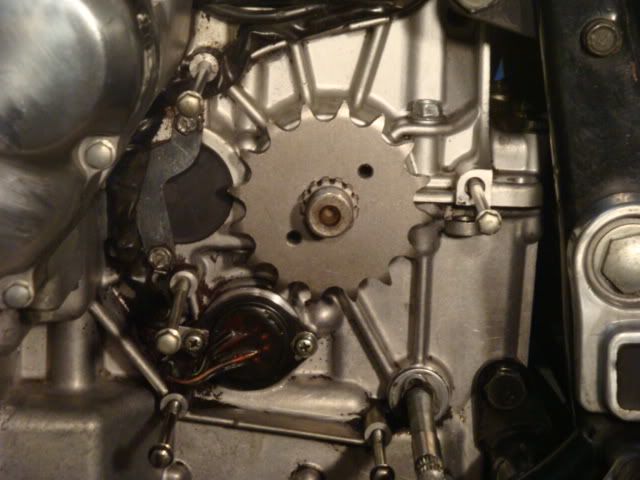
Sprocket goes on first.

Then the 6 mm spacer goes on.

Lastly, the sprocket nut and the splined washer goes on, washer underneath the nut, of course. At this point in time, you can't tighten the nut, since you can't stop the sprocket from turning, so leave it be for the moment,
Comment
-
 Turtleface
Now that the front sprocket is on, time to get the rear wheel assembly together. You did remember where all those axle spacers went, right? If not, just check the parts fiche, it's actually pretty easy to figure out. After that's all back in place, you'll need to toss the chain on. I slipped the master link in to hold the chain together while I was tightening the front sprocket. Here's how I positioned my piece of 1x2 in order to keep the rear wheel from turning.
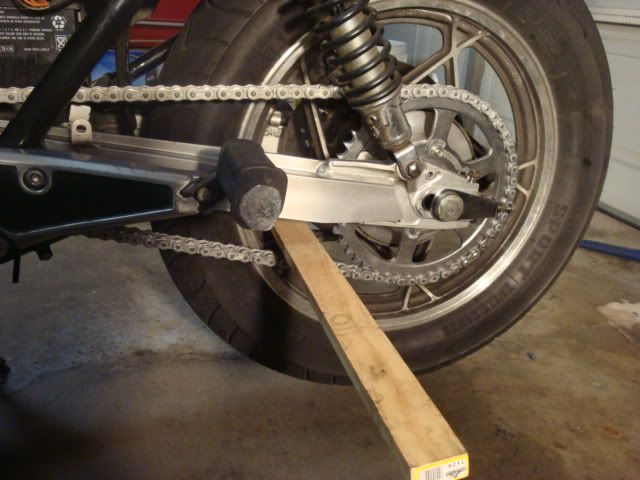
That's where it needs to be to tighten.
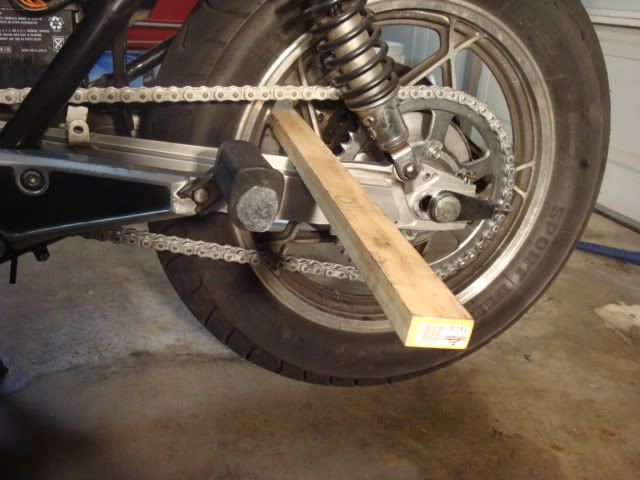
Here's how I positioned it to loosen the nut.
Before I cranked down on that sprocket nut, I put a little Loctite on the threads for extra insurance. Cover can go back on at this point. Bolted up the brake caliper and affixed the torque arm. I tightened the axle a bit to take up any slack in the spacer stack. Then I backed the axle adjusters all the way out, and pushed the wheel as far forward as possible. Clipped the master link together, dabbed a bit of silicone on it to insure that it stays where I want it to. After that, it's as simple as a chain cleaning, lube, and adjustment. Tighten the axle nut to the appropriate torque, replace the cotter pins, and it appears I'm ready to go.
Had a couple of hours to kill while I waited for a buddy to crawl out of bed so I could borrow his awesome Snap-On digital torque wrench. During this time, I removed the foam from the inside of the sprocket cover. I don't mind a little extra noise, and that stuff was gross. That stuff is a PITA to remove, but once I got the hang of it, it wasn't so bad. Soaked it overnight in mineral spirits to soften any glue, which helped. It seems to be spongy foam with a rubber like base that's in contact with the actual metal. If you can get a corner of the rubber like base up, you can usually peel out entire sections at a time, with a little elbow grease. Didn't get any before pictures of the cover (hands were covered in grime), so I'm not going to bother posting any after pics. Pretty sure you guys know what the inside of a sprocket cover looks like.
The instant I got the chain slack taken up properly, it started to sprinkle a bit, so first impressions will have to wait, hopefully little while.
Comment
.png)


Comment