Announcement

Collapse
No announcement yet.

GS1000 Base Gasket Replace. w/ Pics

Collapse
X
 
  • Filter
  • Time
  • Show
Clear All
new posts

    Look on bikebandit to see if the part numbers are the same. But you can remove the bolts, just takes patience, knowhow and perseverance. I would not venture an unknown head unless mine was certifiably toast.
    Do you have a drill press?

    Why did they break?
    Look at the bolts that came out OK, were they glued in with Lock-tite or something?
    Overtorqued?
    When you loosened them, did they do a kind of a double-click as first the head and then the threads started to move?
    Last edited by tkent02; 03-17-2008, 11:17 PM.
    http://img.photobucket.com/albums/v5...tatesMap-1.jpg

    Life is too short to ride an L.

    Comment


      Originally posted by stroka View Post
      well- I've got a 2 mm cobalt drill bit and screw/bolt extractor after reading this thread. But it is 10 bolts! How much more worst things will get in case if the bit will break?
      good call!!!

      if the bit breaks, then you have only ONE real problem - and an excuse to take it to the shop :-D (for that ONE only though :-D )
      sorry, dont know about the other head...

      make sure you dont re-use any of the old bolts (not that you have too many left - lol), somethings obviously wrong with them

      you also want to check if the threads will hold the new screws by torqueing all the NEW bolts (before doing any other work, NOT at the end), torqueing them approx 5% more than recomended
      that way if you strip any threads you can heli-coil them in time, not when everything is re-assembled!

      ps. you may not like this but on my 850 i had to recoil like 50 threads...
      (but the engine had big mileage and was appart before)
      hopefully better luck your way
      GS850GT

      Comment


        If you're afraid to remove the bolts take it to a machine shop, get new bolts and but the head back on. Don't forget to replace the valve stem seals.
        1983 GS 1100E w/ 1230 kit, .340 lift Web Cams, Ape heavy duty valve springs, 83 1100 head with 1.5mm oversized SS intake valves, 1150 crank, Vance and Hines 1150 SuperHub, Star Racing high volume oil pump gears, 36mm carebs Dynojet stage 3 jet kit, Posplayr's SSPB, Progressive rear shocks and fork springs, Dyna 2000, Dynatek green coils and Vance & Hines 4-1 exhaust.
        1985 GS1150ES stock with 85 Red E bodywork.

        Comment


          Originally posted by chef1366 View Post
          Don't forget to replace the valve stem seals.
          Just to clarify...

          The advice is to replace valve seals as standard procedure (assuming they're original) when you have the head off?

          Comment


            Originally posted by Roostabunny View Post
            Just to clarify...

            The advice is to replace valve seals as standard procedure (assuming they're original) when you have the head off?
            Yes, Yes and Yes
            If the head is off take off the valve springs and replace the valve stem seal. Easy to do with the head off and well worth it.
            1983 GS 1100E w/ 1230 kit, .340 lift Web Cams, Ape heavy duty valve springs, 83 1100 head with 1.5mm oversized SS intake valves, 1150 crank, Vance and Hines 1150 SuperHub, Star Racing high volume oil pump gears, 36mm carebs Dynojet stage 3 jet kit, Posplayr's SSPB, Progressive rear shocks and fork springs, Dyna 2000, Dynatek green coils and Vance & Hines 4-1 exhaust.
            1985 GS1150ES stock with 85 Red E bodywork.

            Comment


              First off BillyBoy, fantastic thread. Love all the pics. I was just over at another GSR members place the other day and we ended up having to remove the head and cylinders to his sons 850 that we were doing a valve adjusment to because on of the exhaust valves actually BROKE off and fell down into the cylinder:shock: At any rate, was much more work than I think either of us were planning, but IMO turned out to be a bit of fun as niether he nor I had ever removed the head and jugs from one of these. Simple as pah..We got the gasket surfaces cleaned up, and i think he is planning on changing out the seals and rings. Which leads me to my next question...do you or anyone have any pics of your proceedure for re-installing the pistons into the cylinders after re-ringing? Ive read about the hose clamp method, but i being a visual learner would like to see some pics if anyone has any! Thanks, and looking forward to seeing the finished product!

              TCK

              Comment


                Originally posted by TheCafeKid View Post
                ...do you or anyone have any pics of your proceedure for re-installing the pistons into the cylinders after re-ringing? Ive read about the hose clamp method, but i being a visual learner would like to see some pics if anyone has any!
                sorry, no pic, but the 850 has the bottom of the cylinders a bit wider than the actual cylinder dia, that helps instal pistons with no special tools,
                still a little fiddly but with patience (and lubrication) its not that difficult
                GS850GT

                Comment


                  So the 850 cylinders ARE tapered? Steve had mentioned that he thought someone had said that, but we couldnt tell just by looking. I think we should have no probs with four hands in there. Im actually really enjoying this project of his sons, and its not even my bike! lol Its been a good learning process for me, as i plan to, at some point, pull this extra 8v 750 motor i have apart, and either do a rebuild, or depending on how it goes for TKent, try that 850 top end swap on it.

                  Comment


                    Its not so much a taper as a chamfer on the bottom of the cylinder liners. But as the pistons slide into the chamfer the rings compress with a little help from podgy fingers and plenty of engine oil they will slip in OK. Make sure you do the two centre pistons first, raise them up above the height of the outer pistons, slide the barrels onto the studs, lower cylinders over centre pistons (if you do the outer pistons first with the cylinders lowered down you will struggle to get your fingers in between the cylinders and crankcase to compress the rings). By doing the inner cylinders first then you will find it easier to compress the rings on the outer pistons later on. You can chock the two inner pistons with a couple of pieces of wood so they will not go down and rotate the crank as you lower the cylinders onto them. Hope this all makes sense.

                    Comment


                      Originally posted by Suzuki_Don View Post
                      Its not so much a taper as a chamfer on the bottom of the cylinder liners. But as the pistons slide into the chamfer the rings compress with a little help from podgy fingers and plenty of engine oil they will slip in OK. Make sure you do the two centre pistons first, raise them up above the height of the outer pistons, slide the barrels onto the studs, lower cylinders over centre pistons (if you do the outer pistons first with the cylinders lowered down you will struggle to get your fingers in between the cylinders and crankcase to compress the rings). By doing the inner cylinders first then you will find it easier to compress the rings on the outer pistons later on. You can chock the two inner pistons with a couple of pieces of wood so they will not go down and rotate the crank as you lower the cylinders onto them. Hope this all makes sense.
                      I wish I had known this.
                      It's not a big deal getting the pistons back in. I've got no pics of it because I did it solo.

                      Comment


                        Originally posted by TheCafeKid View Post
                        First off BillyBoy, fantastic thread. Love all the pics. I was just over at another GSR members place the other day and we ended up having to remove the head and cylinders to his sons 850 that we were doing a valve adjusment to because on of the exhaust valves actually BROKE off and fell down into the cylinder:shock: At any rate, was much more work than I think either of us were planning, but IMO turned out to be a bit of fun as niether he nor I had ever removed the head and jugs from one of these. Simple as pah..We got the gasket surfaces cleaned up, and i think he is planning on changing out the seals and rings. Which leads me to my next question...do you or anyone have any pics of your proceedure for re-installing the pistons into the cylinders after re-ringing? Ive read about the hose clamp method, but i being a visual learner would like to see some pics if anyone has any! Thanks, and looking forward to seeing the finished product!

                        TCK
                        Thanks CK. I try.
                        I saw that thread. :shock:

                        Comment


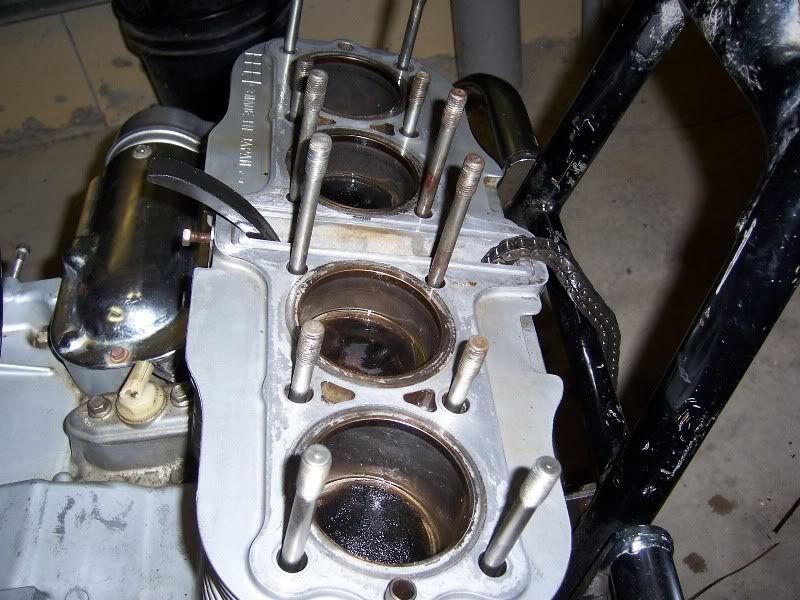
                          OK. This is just after I dropped the jugs on.


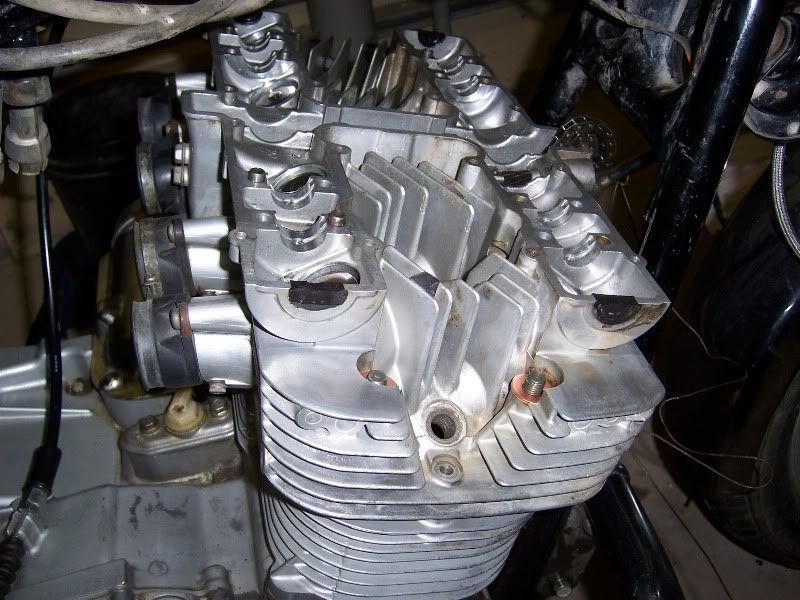
                          Head in place.


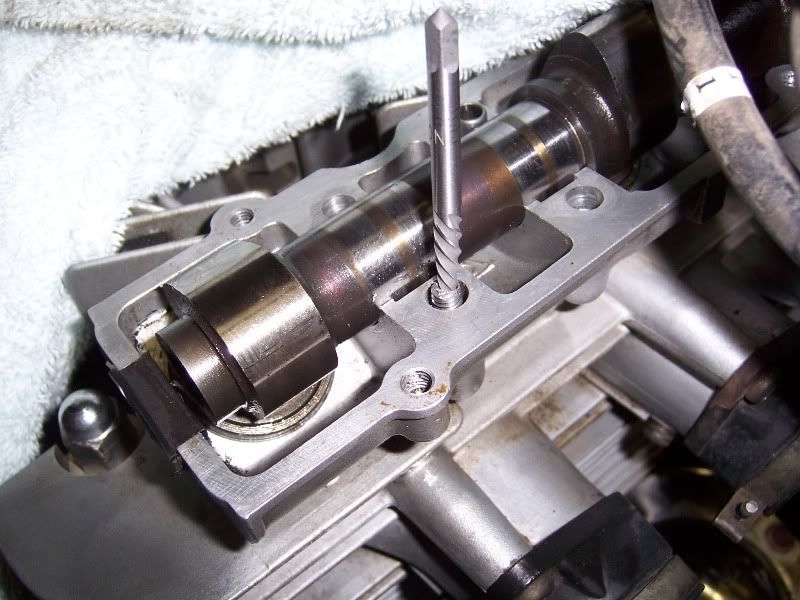
                          BUSTED CAM BOLT!!


                          Then I took the cam out and made sure there were no metal bits in there.
                          The vacuum worked well.

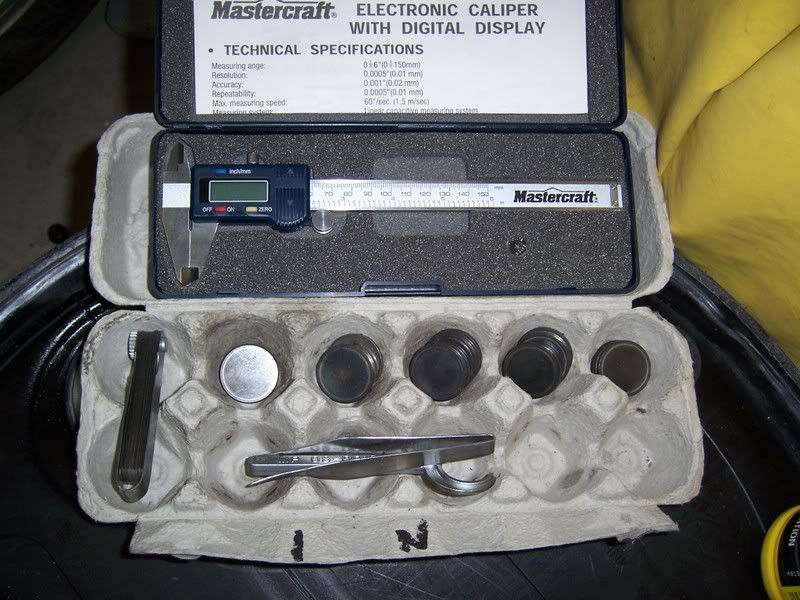
                          Then I adjusted the valves. It is nice and easy with my "Handy Dandy Shim Kit"!

                          Comment


                            Originally posted by Billyboy View Post
                            I wish I had known this.
                            It's not a big deal getting the pistons back in. I've got no pics of it because I did it solo.
                            Sorry Billyboy

                            Comment


                              Originally posted by Suzuki_Don View Post
                              Sorry Billyboy
                              Egh... 'at's alright....

                              Comment


                                something missing...

                                Originally posted by Billyboy View Post
                                Then I adjusted the valves. It is nice and easy with my "Handy Dandy Shim Kit"!
                                Yeah, there's something missing from your "kit", Billyboy. Where's the laptop with the valve adjust spreadsheet?
                                You may think you don't have it, but I just sent you a copy. 8-[
                                Hope it's not too late.

                                .
                                sigpic
                                mine: 2000 Honda GoldWing GL1500SE and 1980 GS850G'K' "Junior"
                                hers: 1982 GS850GL - "Angel" and 1969 Suzuki T250 Scrambler
                                #1 son: 1986 Yamaha Venture Royale 1300 and 1982 GS650GL "Rat Bagger"
                                #2 son: 1980 GS1000G
                                Family Portrait
                                Siblings and Spouses
                                Mom's first ride
                                Want a copy of my valve adjust spreadsheet for your 2-valve per cylinder engine? Send me an e-mail request (not a PM)
                                (Click on my username in the upper-left corner for e-mail info.)

                                Comment

                                Working...
                                X