Announcement

Collapse
No announcement yet.

Summer Project Weekend! 83 GS650GL

Collapse
X
 
  • Filter
  • Time
  • Show
Clear All
new posts

    #16
    Ok so the weekend project has turned into 2 weeks... I kind of expected that but didnt want to admit defeat so early on.

    Anyways my rings came in as well as my valve cover gasket. I however was slacking and did not get my valve oil seals done yet so with the help of my lovely assistant we got that done last night. Also I brought the cylinders into work today to get honed at the shop during my lunch break.

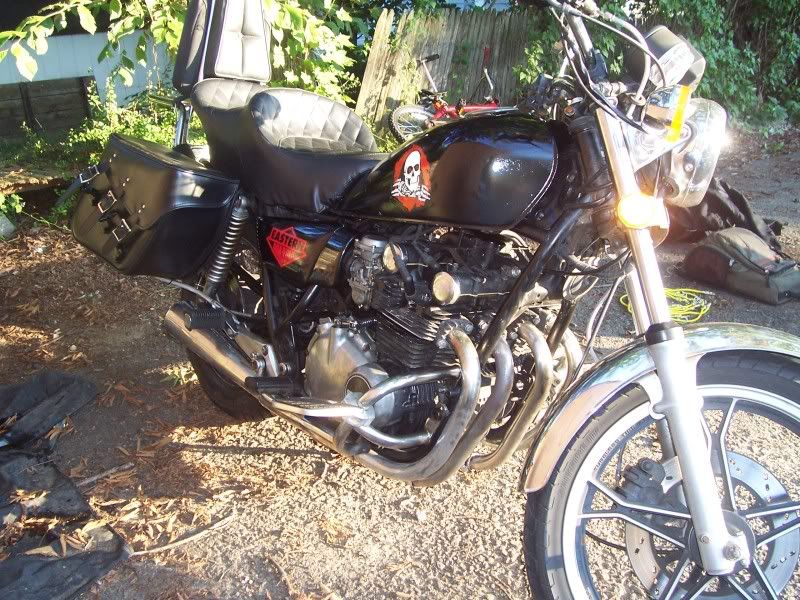
    The reinstall in planned for Thursday cause I got the kids over tonight and that wouldnt mix well. I do also plan to clean the paint up on my side covers, and clear them and the tank with a real 2 part clear in a can. I will just sand the old clear & paint on the tank with 1000 grit wet sand and call it good enough. Not to worried about looks just want it to have something to bite.

    Oh and might try some graphics on the side covers

    something like this:


    But mixed on the side cover with the graphic on the small "chrome" part and words bigger on the regular part. I am blacking it out first and spraying it red, likely freehand tag style just like it is there. Unless I stencil the copyright Powell part... but not giving away what the graphics are from is half the fun when someone recognizes it.
    Last edited by Guest; 08-11-2010, 07:20 AM.

    Comment


      #17
      It looks like you are well on your way to getting back on the road!

      I have never really been a fan of the big King and Queen seats, but the new cover on yours makes it look sooo comfortable, kind of like an overstuffed leather chair.

      I'm picking up an old yamaha to part out, and the K&Q seat on it is about the same softness as a brick. I can't imagine the torture you endured on the old foam. Now though, instead of monkey-butt, you may suffer from comfy-butt!

      Best of luck on the rest of the reassembly, and I can't wait to see what the Powell markings will look like on the side covers!

      If your bike were a Harley, or other such cruiser, I would suggest some mini skateboards for floorboard foot rests, but I am sure you like to actually lean your bike.

      Cheers,

      Comment


        #18
        Yea, my old custom sissy bar fit two skateboards perfectly between the seat and the bar for trips to the park and the bag stashed the helmets as well. This new one is a bit shorter but the rack can hold them just as easy with less wind drag.

        I got the side covers sanded down and black again, last time the chrome paint turned crusty gray... but this paint is made for plastic and came out pretty good. I will likely cut out something tonight once the engine is done and give it a try. Worse case I sand and black it out again.

        I got the cylinders honed out yesterday, and the piston rings and valve cover gasket in hand now. I can get it all together and torqued down tonight but still got some exhaust repairs to do. My neighbor recommended using some Map gas and brazing it... I was going to cut and clamp, but its worth a try.

        I will do better with pics later, more important is getting it riding again. My plan is likely Sunday as I am booked with moving my brother and birthday party stuff till then.

        Oh and I also am not a fan of the king/queen seat look. However I am a fan of new foam and comfort, I hope the bags and new sissy bar round it out and the rat skull keeps the eye off the seat lol.

        Comment


          #19
          Originally posted by Skateguy50 View Post
          Oh and I also am not a fan of the king/queen seat look. However I am a fan of new foam and comfort, I hope the bags and new sissy bar round it out and the rat skull keeps the eye off the seat lol.
          No one can see that seat when your tail is on it .
          We buy em ( fix em , repair em , curse at em ) , to ride the darn things , NOT look at . If your tailbone says its good, it is .

          Rat

          Comment


            #20
            I hear you on that, party why I try to balance the pretty with the not so pretty to not get stuck in that mindset of being something nice to look at vs something fun to ride.

            I think I will cut the stencil on the rat bones and throw that on the side covers tonight and maybe get a clear on it Saturday... or just use the clear on the tank and forget the sides, not sure how that will work on the plastic.

            Got one of them 2 part clear in a can deals to protect the tank a bit more. Plan to wash it good, then wet sand it with 1000grit and give it a whirl. Not worried how it looks just want something a bit stronger.

            Thinking something like this:


            Might skip the words though... not a fan of words lol.
            Last edited by Guest; 08-12-2010, 02:48 PM.

            Comment


              #21
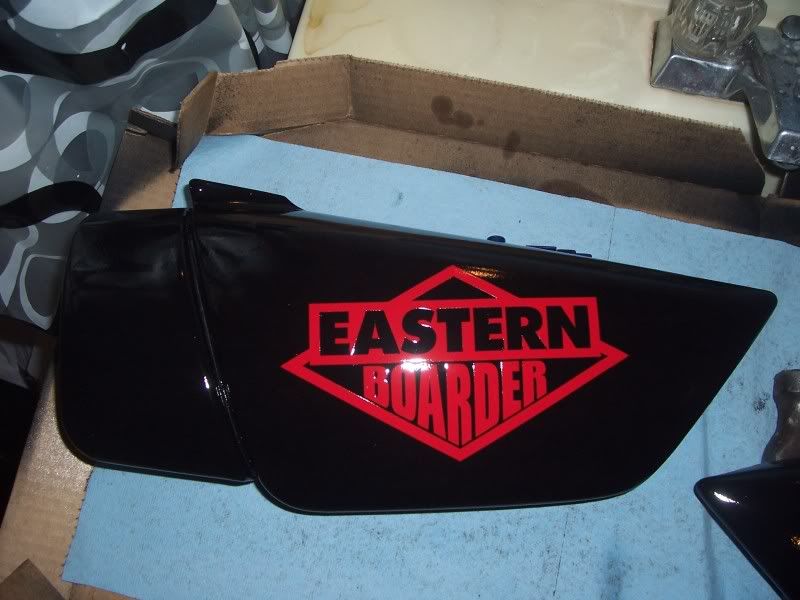
              Kept the side covers simple but threw a local reference in.

              Got two more GSR members over helping today and got the new rings installed, new OEM base gasket, freshly honed cylinders, new cylinder orings, new OEM head gasket and orings, head with new valve oil seals installed, all pressed into a nice sandwich at 10 ft-lbs then 18 ft-lbs. bit of rain and lack of sun meant that was done so no cams or timing but its coming along.

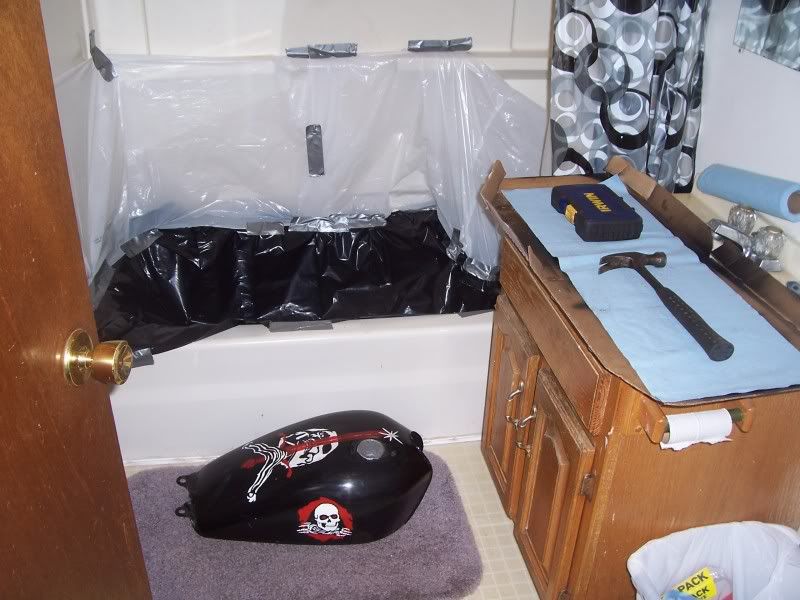
              I then installed some skateboard vinyl logos on the side covers and made myself a spray booth in the bathroom. Its not fast ventilation but has a ceiling exhaust fan so sealed it up and will run the fan all night and tomorrow if needed. Got 2 coats on so far... not sure how many coats I can get till the can hardens up but its better than it was.

              I didnt get any engine pics... I know I know... but Ryan did so maybe he will post em up.
              Getting ready to paint.


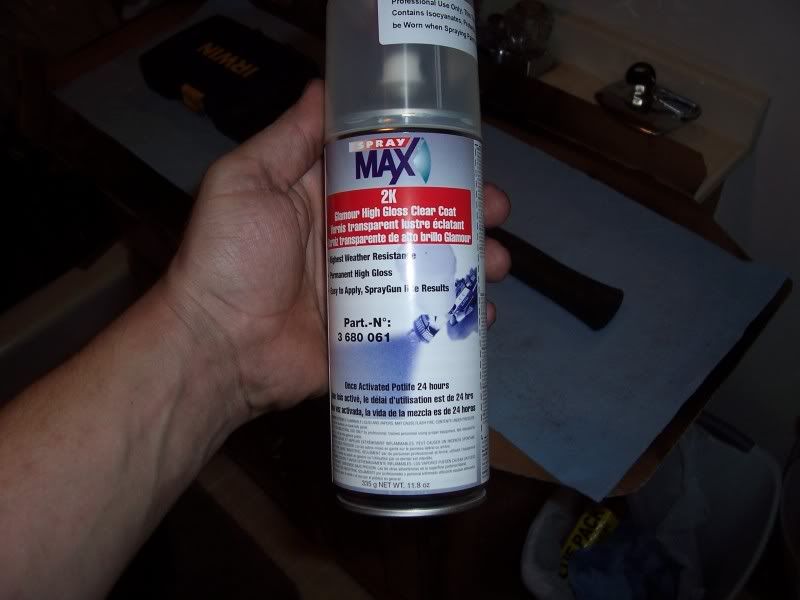
              Clear Coat in a Can.


              Newly painted side covers:


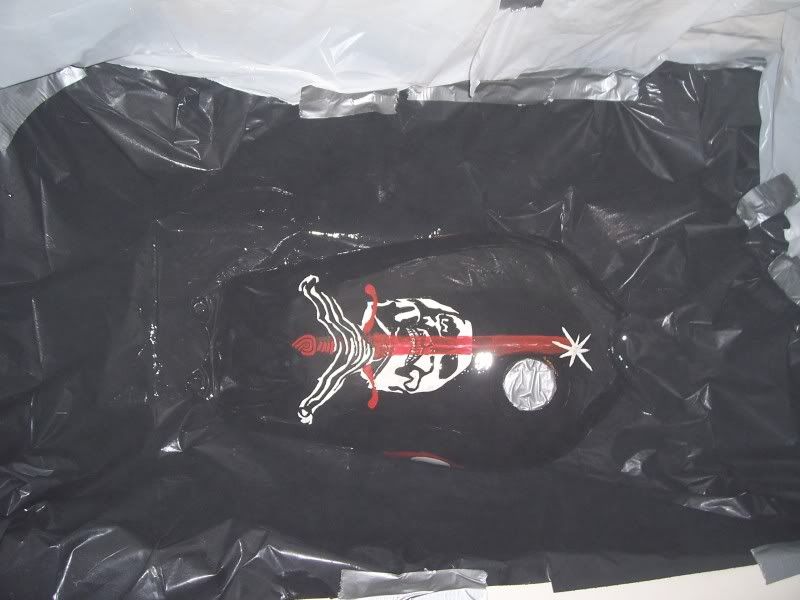
              Tank getting a real clear, I washed it in the tub first, then wet sanded it with 1000 grit, dried and sprayed it up.

              Comment


                #22
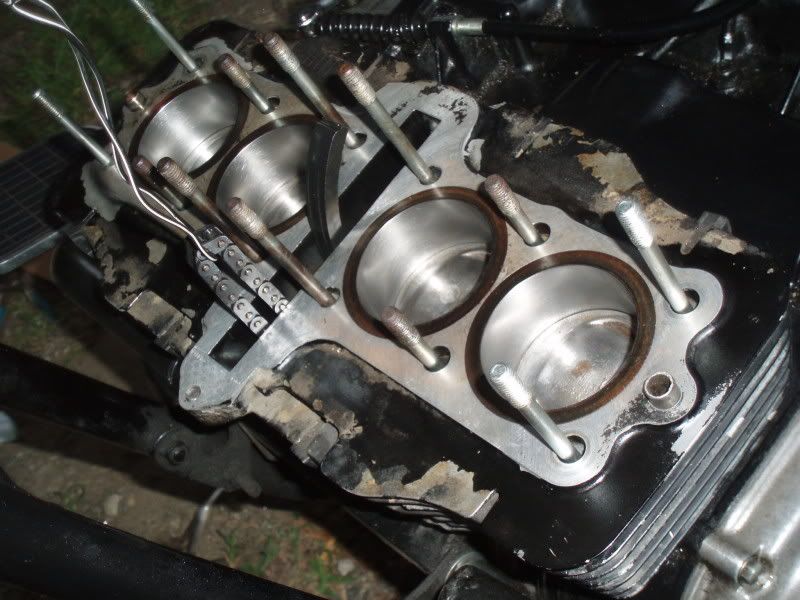
                Some of the engine pics curtosy of Ryan aka "TheRealFatShady"
                Him and Scott aka "gs scott" helped me out last night getting part of the engine back in. Took it slow but it all went down good.


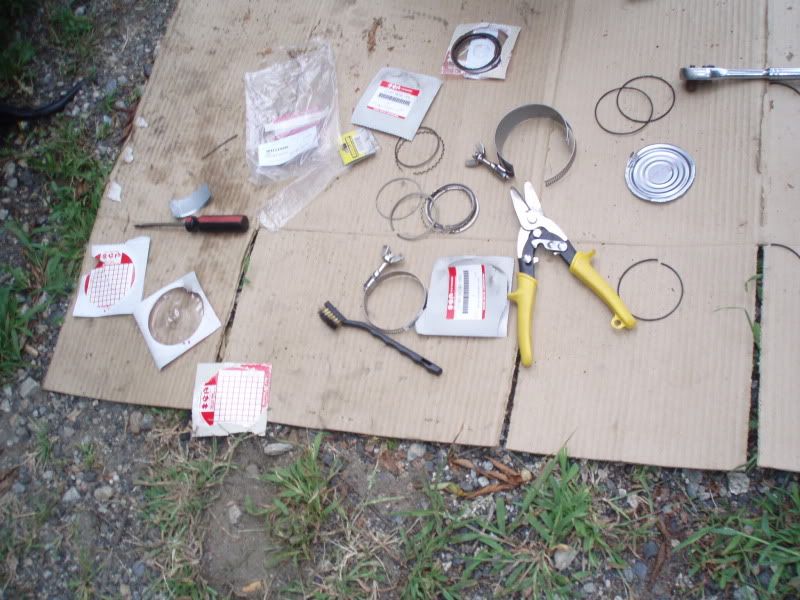
                New Rings:


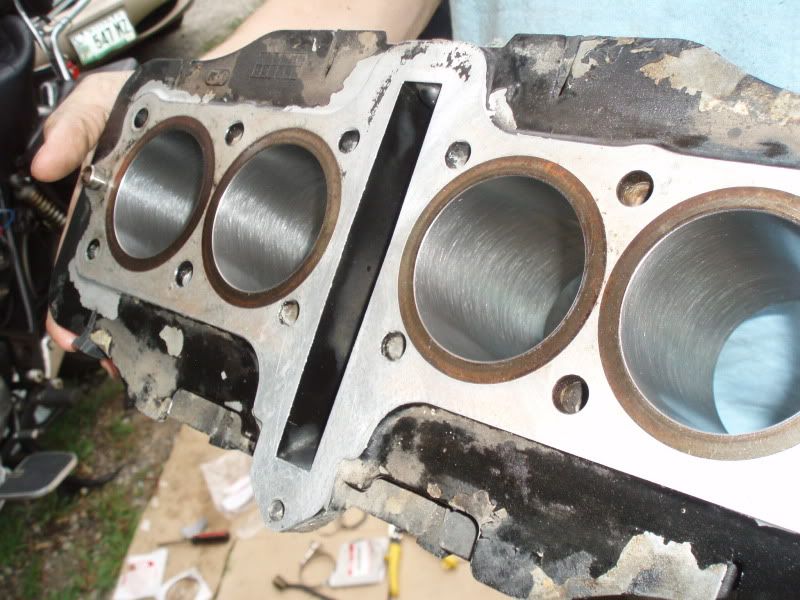
                Cylinders, freshly honed:


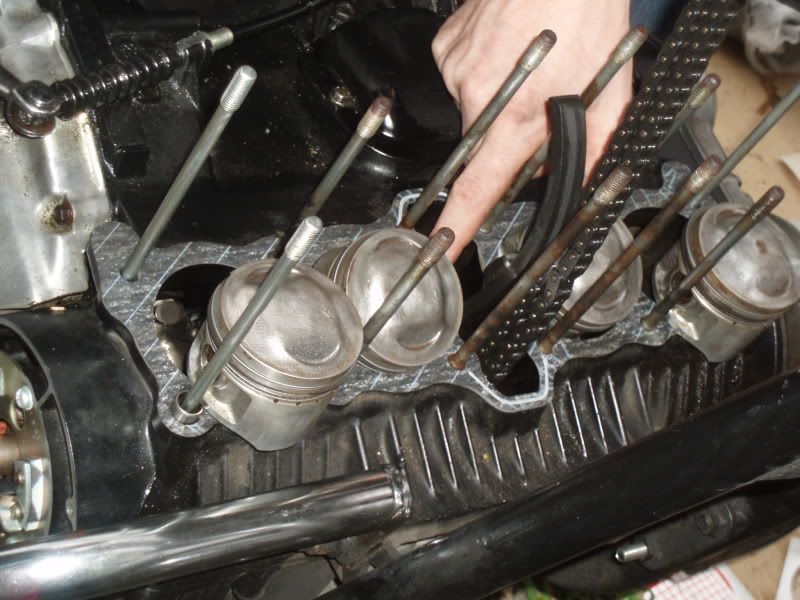
                Pistons w/ new rings on them:


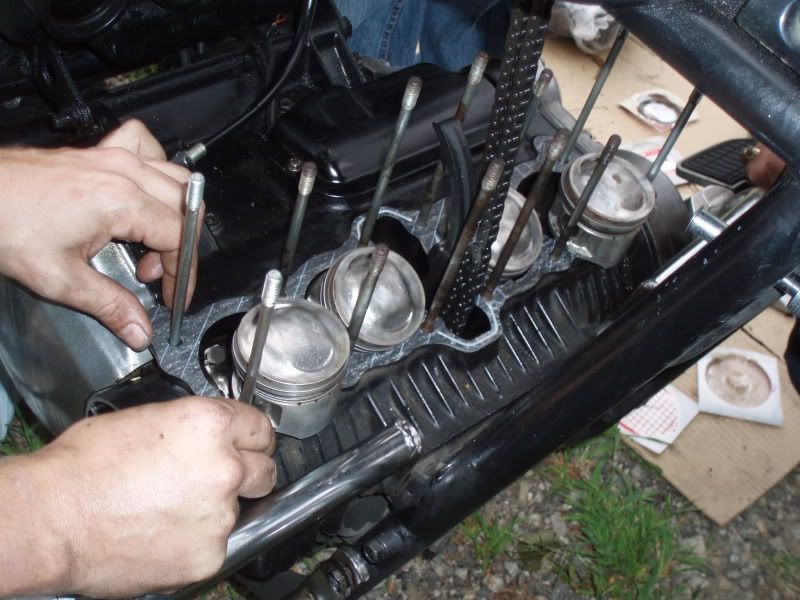
                Cylinders on/pistons inside them:

                Comment


                  #23
                  If your bike were a cat, I am sure it would be purring with all the attention you are lavishing on it!

                  The side covers look great, I can't wait to see the bike all back together!

                  Nothin' says lovin' like clean gasket surfaces!

                  Comment


                    #24
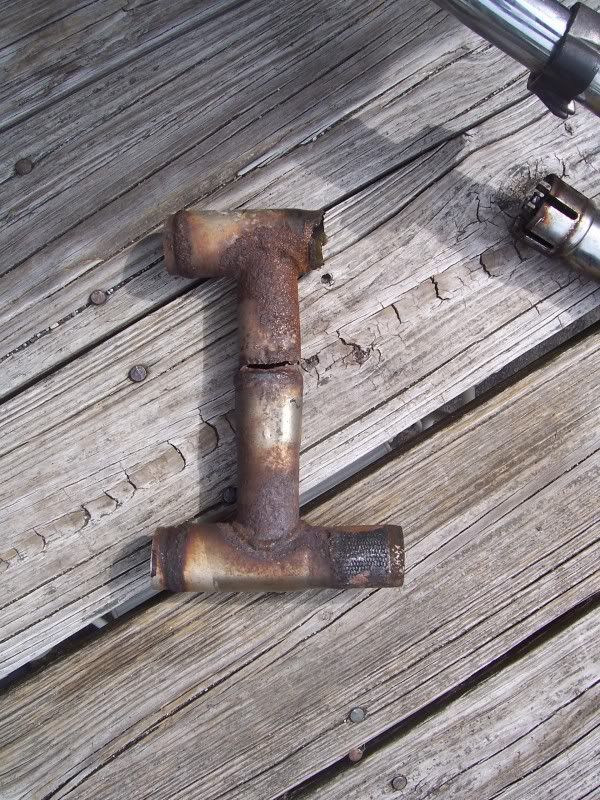
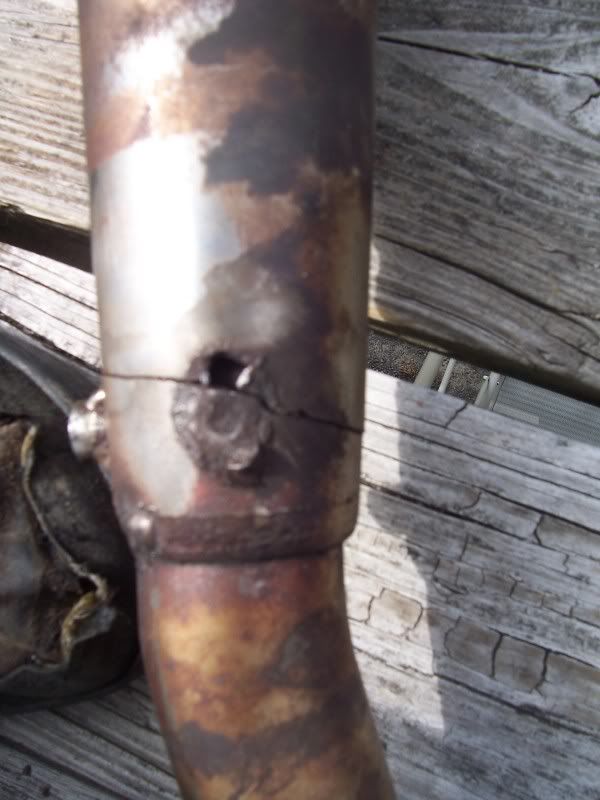
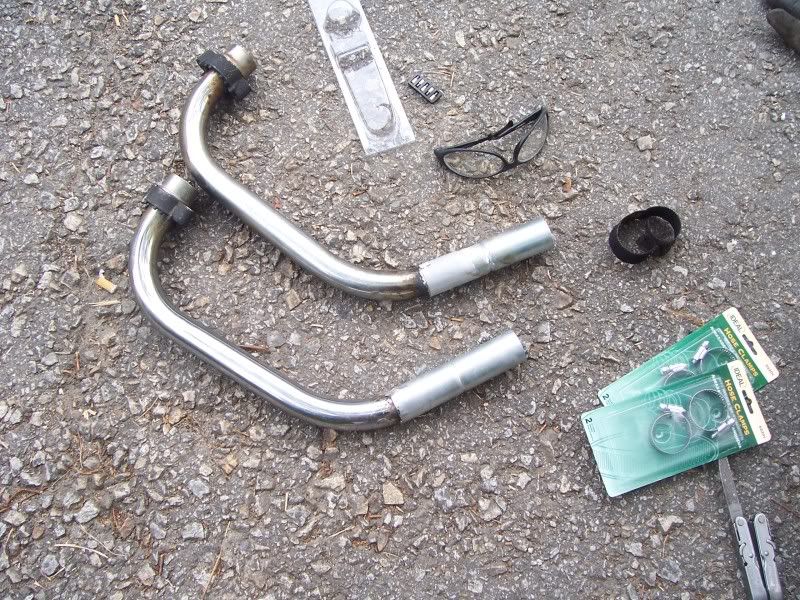
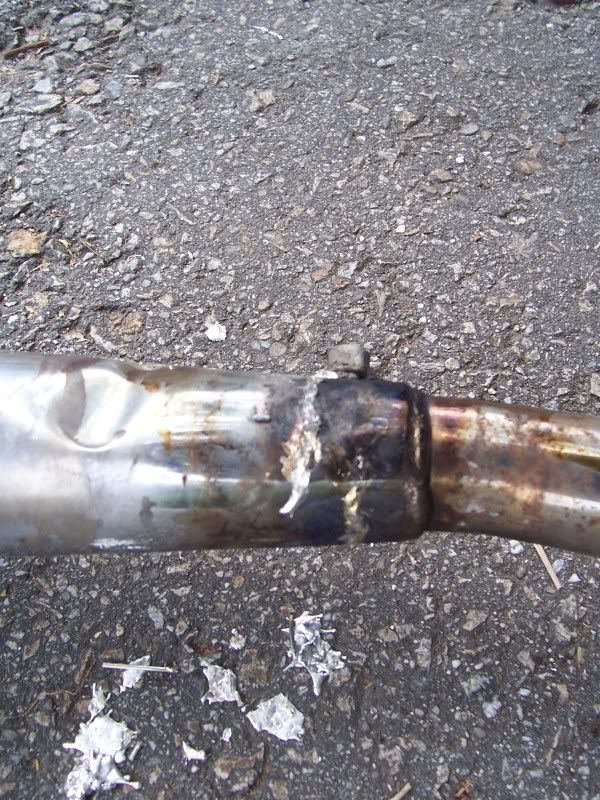
                    Next order of business is getting the pipes solid... will wait for Sunday, but had a decent crack in the muffler just under the heat shield behind the weld joint. Also the crossover was rusted through and number 3 was seperated just before the clamp.

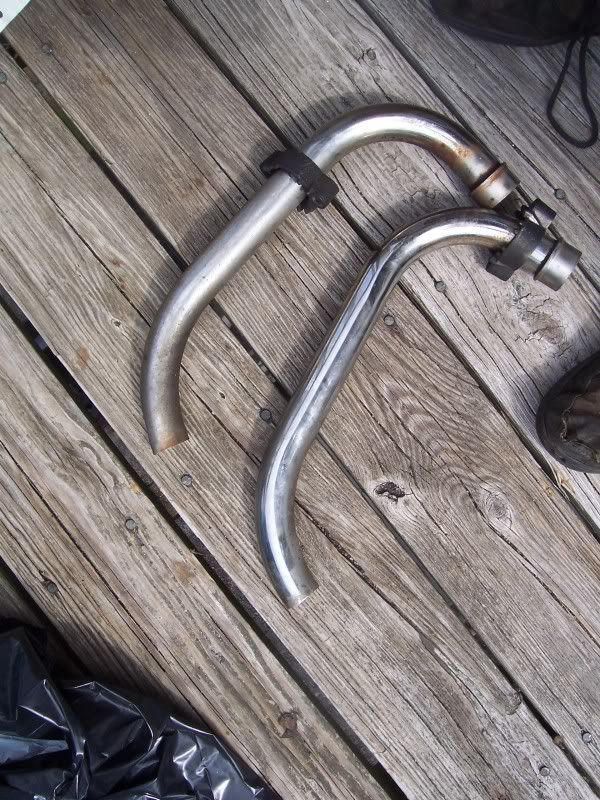
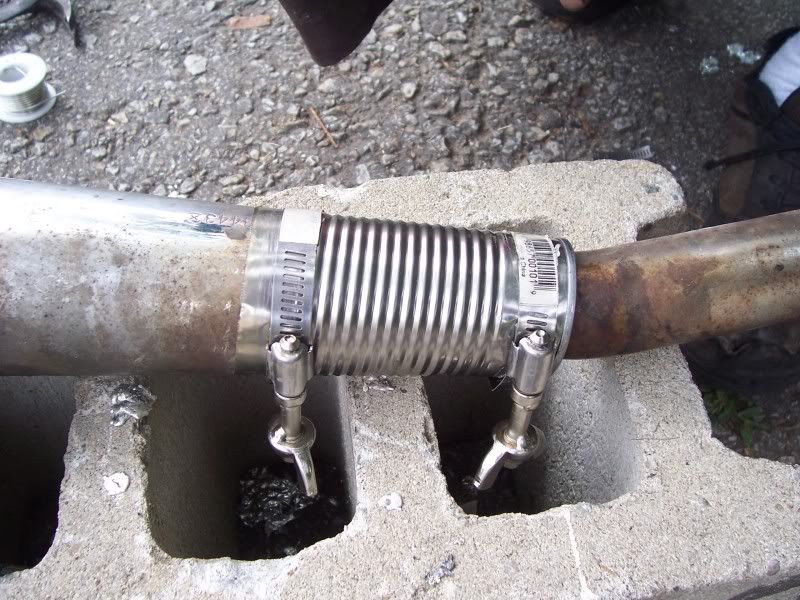
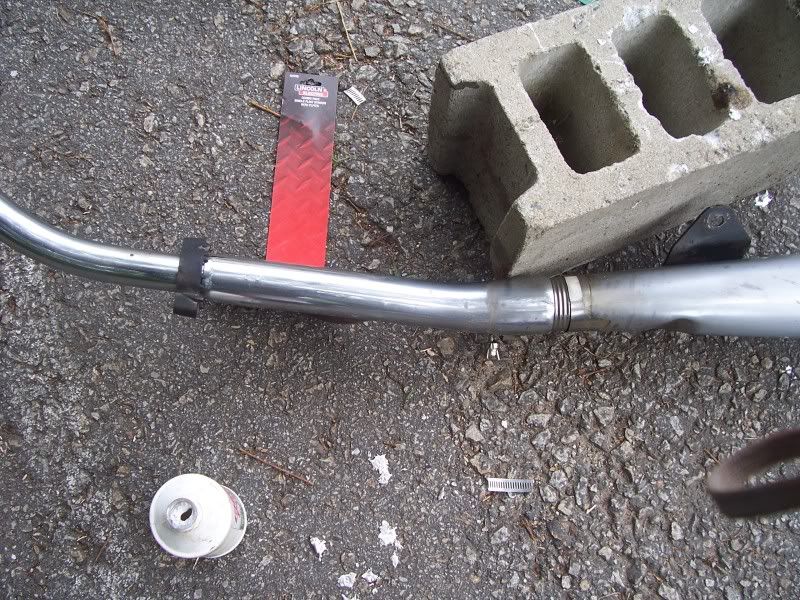
                    Going to try my luck brazing the muffer part and putting straight pipes on 2 and 3 and skipping the crossover. Likely will braze and clamp those ones.

                    Oh and still got to get the cams on and timed and that fun stuff. With any luck I will be on the road again soon.

                    Comment


                      #25
                      Originally posted by Skateguy50 View Post

                      Cylinders, freshly honed:


                      Pistons w/ new rings on them:


                      Cylinders on/pistons inside them:
                      Ohhhhhh ! that is lookin NICE , I just love virgin cylinder walls

                      Rat

                      Comment


                        #26
                        Almost back together got another night to wrench.

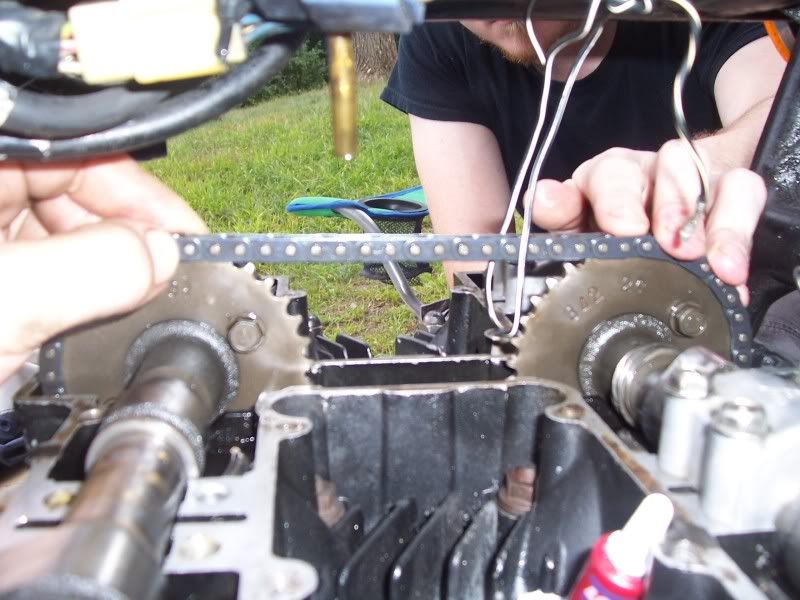
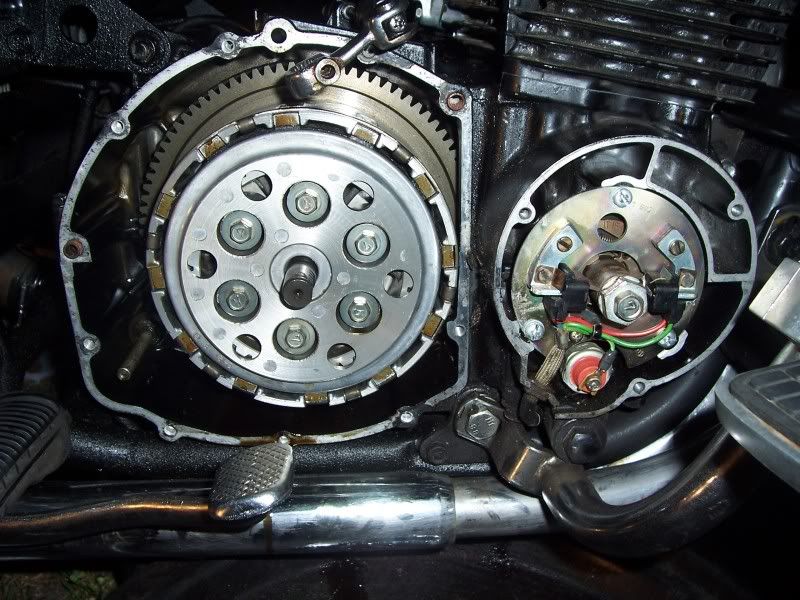
                        Got the cams on and timing done, then valve cover gasket and cover. Dumped out the messy oil and then did the clutch springs for good measure. I could not find my plugs in the bags but figured some new NGKs where in order.

                        Just need the carbs and tank put back in and fire it up, could have kept going but was late enough. Also want to get the first ride in to set the rings in the light.

                        Comment


                          #27
                          Some pictures, I feel like I am taking way to many pictures while working and still seem to miss a lot of the steps. Anyways here a a few more action shots.

                          My exhaust issues:


                          The "fixes":


                          Cams going back in:


                          Clutch Springs being replaced:


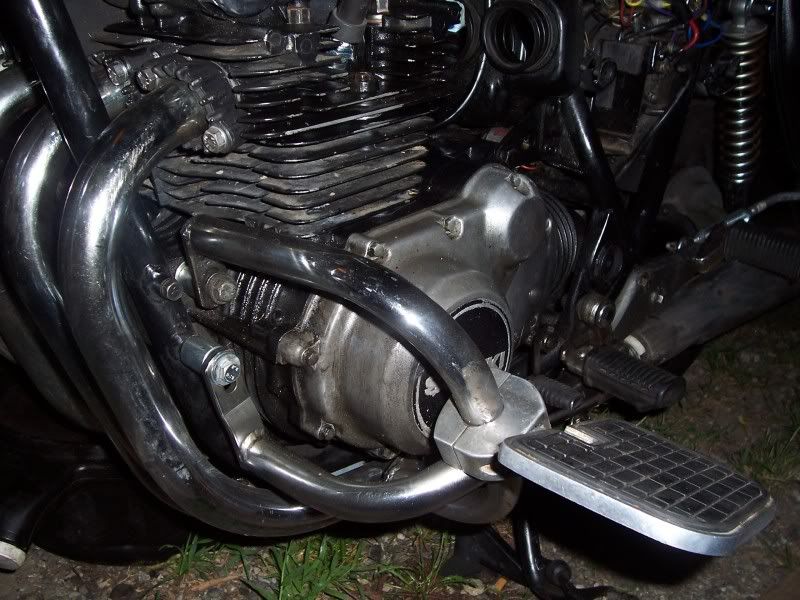
                          Random but this kindof shows my spacers installed to get the highway footrest off the case:

                          Comment


                            #28
                            No pictures tonight but its ALIVE, took a bit of prime to get it to fire but wow did it come on sounding smooth. I took it for a 10 minute run through all the gears to set the rings... ready a few different ideas on the subject but tried to just vary the rpm a lot.

                            It ran so much stronger than it ever had before, glad I changed the clutch springs while I was in it or else it might have slipped earlier.

                            Had a lot of other things going on but it was great to have it on the road again. Need to check the torque in the am, top off the oil, and adjust a few things but think I am taking it to work tomorrow.

                            Comment


                              #29
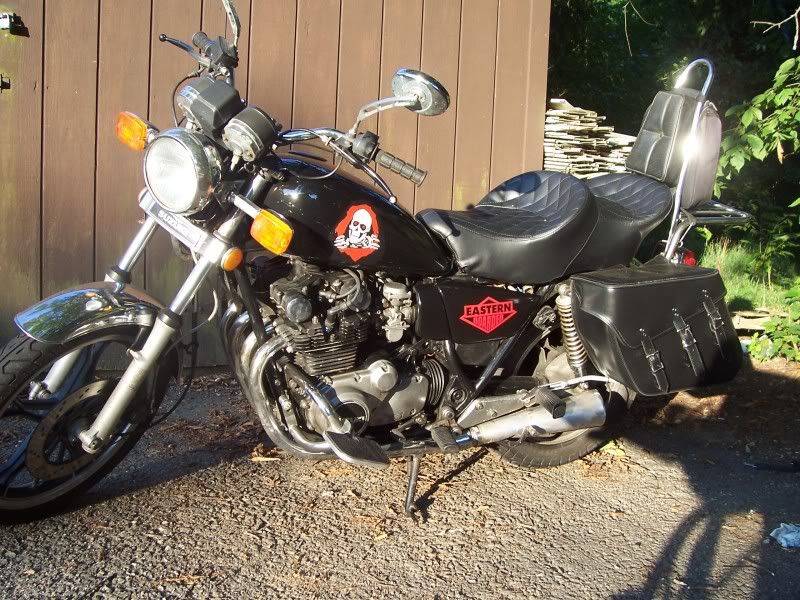
                              Back to life pictures:


                              I took the bike to work today after the sucessful test run last night, only I really should have done 2 things. First charge the battery up on the trickle charger (drained it to nothing trying to get it to fire last night) and second filled up the tank (had it extremely low to work on the bike).

                              Well I figured if it would start in the morning I am good to go, and it did. However I let it idle a long time while I packed up some tools and bags and got all my gear on. Half way to the gas station I got stopped at a light and it died at idle. Figured I must need to set the idle adjust better I tried to start it and power was very low... Okay must need a bump start. I pushed it up the hill and down the road to the right, station was just a bit more up the hill but figured I would bump start it then ride to station. Thats when I figured out the gas was out too.... so now I had twice the hill to push it to. Got it gassed up, rolled it down the hill and got going again.

                              Well figured I would rev it high at stops and keep it going to charge up, this went good until the last 5 miles on the pike was a parking lot cause my earlier issues got me from normally a nice ride to the start of rush "hour" (really its like 4 hrs here). Anyways getting off the ramp I saw a nice gap between lanes and thought about just cutting threw then the bike cuts out again... seems to not charged up enough (this battery had faulted the last 2 winters on and off on charges so I know its not great). Anyway pushed it up the ramp and bump started it again and got through the tolls. The next highway was also a parking lot so I jumped on the back roads and got in.

                              Might make some calls and see if I can get a new one... but unless its charged up then its no help right away but needs to happen.

                              Regardless its great to be on the GS again even if it included my first time ever pushing it.

                              Comment


                                #30
                                Woo Hoo!

                                It's great that you have the bike back together and running!

                                Those little cracks in the exhaust just seem to pop up out of nowhere don't they? I think I had 3 I had to weld when my exhaust was off.

                                The side covers look like a nice compliment to the art on the tank, now you just need to nail down some sponsors!

                                Great work on keeping another GS out of the wreckers, and keep us updated with ride reports, and more pictures of course!

                                Comment

                                Working...
                                X