Announcement

Collapse
No announcement yet.

1981 GS750 not sure build

Collapse
X
 
  • Filter
  • Time
  • Show
Clear All
new posts

    1981 GS750 not sure build

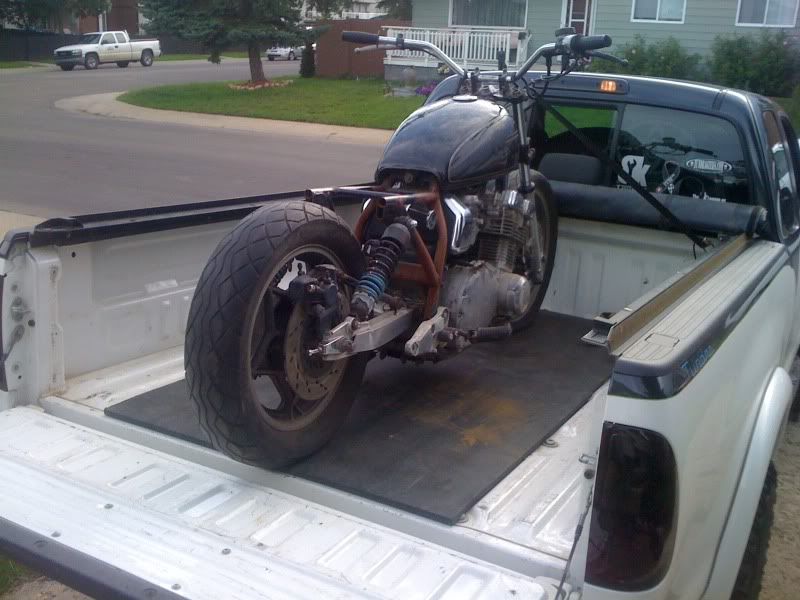
    I had the itch to build a bobber bike. Been looking on kijiji for months to find the right deal for a bobber build. I came across this one and it came with a ton of parts. It wasn't completely together but seemed to be all there to put back together. So I got it. After more consideration I'm not completely set on building a bobber. After looking at a lot of cafe builds I may change my direction, But here's what we're working with.

    In the truck now at new home.


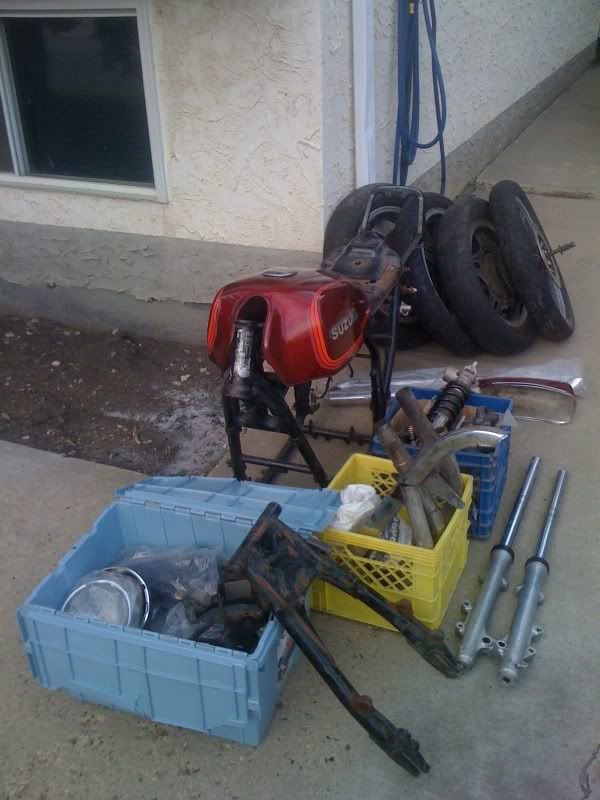
    The extras and such.


    on the ground


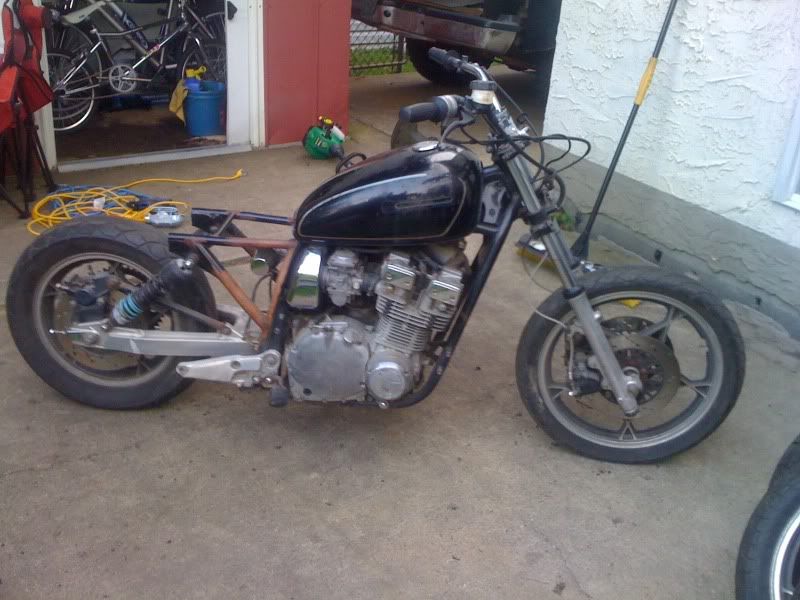
    straight bars added. My personal favorite look. May not be for everyone.


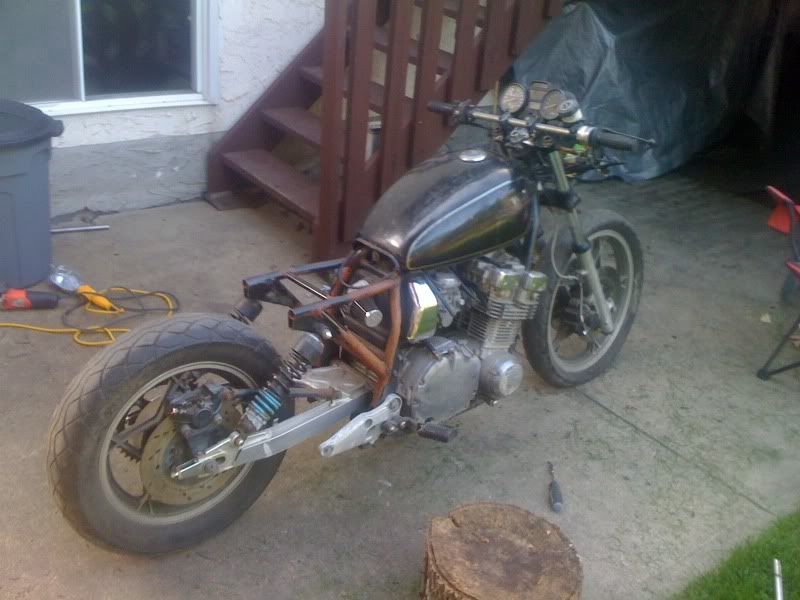
    Gauges, headlight, battery box, wiring, fuel lines, ignition, throttle/clutch cables, chain. Its all on there now. I still need to build a mount for the foot brake master cylinder so will be searching for a pic of how that used to mount up so I can fab something up.


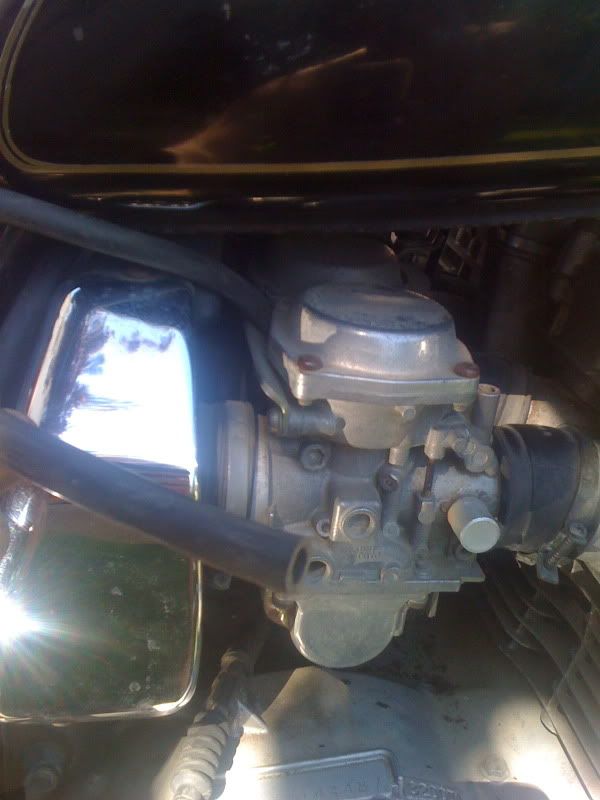
    I have a hose coming from the carbs on each side of decent length...Not sure where they go. 2 hoses...


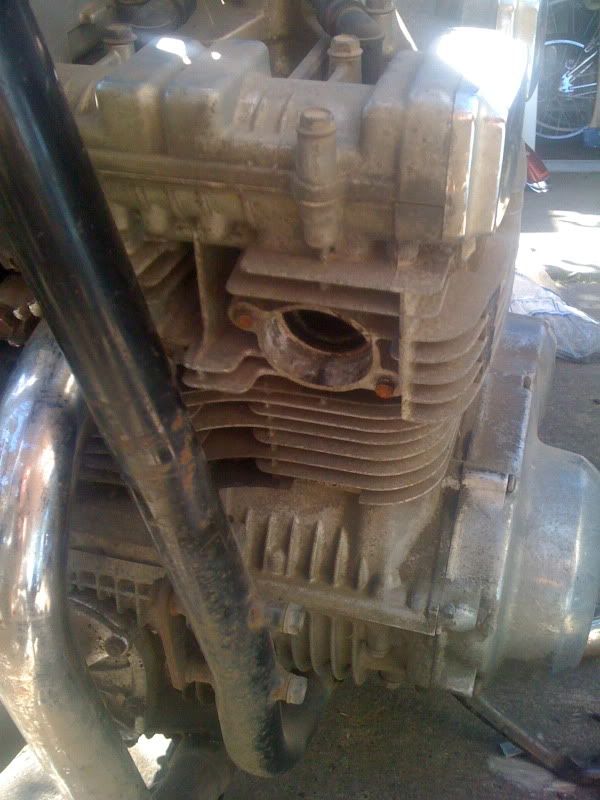
    Any tips for getting broken bolts out? I found these when I went to put the exhaust back on. Grabbing my pb blaster from the shop tomorrow to soak them.


    So over all I have it cranking good now and what lights I have (headlight and gauge/gear lights) work. But it hasn't fired yet. I have good spark at the plug wires, Didn't pull any plugs yet. Also haven't pulled the carbs yet either. So will be my next checking into things. Also planning on putting the other swinger on which has a shock mount a bit more forward to maybe get a little less angle on the shocks. Which will put the back end up a bit more hence the thinking about a cafe bike...

    #2
    lots of options

    yeah, good score for a project, came with lots of goodies. The two hoses hanging by the carbs are probably just the two vent hoses. It is said to try to rout them away from the exhaust , down out the bottom of the bike and also not directly into the path of the back tire in case they ever leak gas you dont catch on fire or get a slippery back tire. Go to the "Garage" section on the homepage and read the carb rebuild series. Lots of pictures for dummies like me. it shows all the carb hoses and lines and where they go.
    Last edited by Guest; 07-31-2011, 01:36 AM.

    Comment


      #3
      Thanks, Will do.

      Comment


        #4
        So I think I'm sticking with the bobber look, Swapped out the shocks and it doesn't bottom out anymore. Really wasn't sold on the hard tail...But good news, I cleaned out some major gunk from #1 carb and the fuel line from the petcock. My bike fired and ran for a few seconds. I dont have a choke hooked up anywhere so maybe someone could post a pic of how it is supposed to be if they dont mind. I was just cranking and holding the slide with the left hand. So now that there is a hope of life in this bike still. I guess it will be time to go through the carbs with a thorough and complete cleaning. Then try to get it all tuned up. Been reading a ton of info already here and its so helpful.

        Also I tried welding nuts to the broken bolts on the exhaust after soaking for a day in pb blaster. No luck, Nuts kept breaking off. So sometime I'll load er up in the truck and go use the oxy acetylene torch at the shop and see what happens. Dont think one of those little propane torches would get hot enough would it? Atleast there is enough of the bolt still there I can get on it with vice grips.

        Bike with different rear shocks/springs and the front lowered about an inch.


        Last edited by Guest; 08-02-2011, 11:56 PM.

        Comment


          #5
          Looking better! You might be better off with your little propane torch. The idea is to heat the aluminum head surrounding the broken bolt. It will expand faster than the steel bolt. You Oxy-Acetelene torch rig may throw too much heat at it. Aluminum is REAL hard to see when it is getting close to the melting point and it is each to cause more damage.
          Heat it with the popane, then PB Blaster at the seam. Let it cool a while then repeat several times. The PB Blaster will seep into the threads. Spray it down one last time and let it set overnight. Then next day, heat the aluminum rather quickly grab the bolt with your vice-grips and see it it turns. If it does. spray it and work it back and forth... baby steps...till it's out.
          I've gotten some VERY stubborn bolts out this way at home and at work. I HATE drilling out broken bolts!
          Just a tip... don't modify that aluminum swing-arm. Especially since you have a steel on to play with. If you get tempted, sell it to ME!

          Comment


            #6
            haha thanks. I wont mod the alum swingarm but plan to run it for now. I did try to mount the steel swingarm to see what could be done with it, But the pivot shaft I have in the alum one is larger diameter and didnt fit in the steel one.

            I actually welded a stud to the broken bolts in the exhaust for now to bolt the exhaust on but will play with it with the propane torch like you say. Didn't bother bringing the oxy acetylene one home.

            The bike is running now but not very good. Ordered the o-ring kit from cycleorings so when that gets here I will be fully disassembling the carbs for a cleaning. Changed the plugs and found #2 extremely hard to remove but some pb blaster for a couple days and a breaker bar slowly got it out without any damage. Pipes 2 and 3 get HOT but 1 and 4 are just barely warm. Will also need to check the valves soon too.

            Got the seat pan mounted with the front slip in and the rear latch. And mocked up a rear fender tonight. As it sits now...Still need to fab up an exhaust/mufflers or find one cuz whats on it right now is all I have that came with it.


            Anyway on to more reading and learning...
            Last edited by Guest; 08-09-2011, 11:33 PM.

            Comment


              #7
              Looking good. The new shocks look much better. I know you like drag bars, but I think apes look great on a bobber. Will be watching.

              Comment


                #8
                So I got some pipes n lights on today. Lights aren't wired yet. I found the signal wires but don't think the switch works. So have some tracing to do.

                Took the carbs all apart and replaced the o rings which were purchased from Robert Barr. I have not dipped them yet since I haven't seen the dip in the parts store. ( If any canadians are listening in on this where did you get your carb dip from?) Put the carbs back on and it runs and idles a bit better. But I have a leak now coming from the airbox and left vent tube. Before it was just the airbox and wasn't as bad. Was hoping the o-rings and checking float levels and the needles would fix that up but guess will have to try again. After the bowls were filled I could pull the vacuum line off carb two for the petcock and then no leaking. But the petcock doesn't leak with that hose off either so I'm thinking the petcock is still good, Has to be somewhere with the floats... Anyway just a pic at the end of the day.

                Last edited by Guest; 08-20-2011, 10:08 PM.

                Comment


                  #9
                  Starting to look pretty darn good. Plans for the seat? Did you get new float bowl gaskets with the o-rings? Z-1 has them as do others for our CV carbs.
                  On my GoldWing Bobber the recomendation was NOT to use carb dip. Their Keihin Carbs have felt shaft seals and the dip method destroys them in short order. The recomendation I used was to put the striped bodies and small pieces in a large coffee can of DISTILLED water and a cup of Lemon Juice and boil them. I did mine outside on the grill for about 30-40 minutes. (Reports of boiling them too long darkens the aluminum and gives it a dull finish)
                  The lemon juice's citric acid is enough to clean the carbs, but mild enough to not harm the seals. I hosed them down well with spray carb cleaner before and after. I can tell you from first hand experiance it worked great. This method is also used by Members of other forums I belong to that are in countrys where the Carb dip is not allowed.
                  Hope that helps...
                  Last edited by Guest; 08-21-2011, 10:44 AM.

                  Comment


                    #10
                    Thanks for the boiling tip. Will try that on the next saturday I have all day to work on it. No I didn't get new gaskets. I'm not getting any leakage around the gaskets its just out the tubes and carbs into the air box. The seat I was thinking about usuing expanding foam on that pan and shaping one to my liking. then maybe a small layer of foam and a cover. Never really made a seat before other than a rolled and hammered up piece of flat metal. Which it may come to that if I dont like how this one turns out. But just sitting on the metal pan on there now is not all that uncomfortable.

                    Comment


                      #11
                      The boiling water and lemon juice did the trick. Pulled them all apart again. I'm getting pretty good at taking them out of the bike and all apart now and back in. Anyway no more leaky leaky and it even idled on its own without the choke for the first time tonight. More testing tomorrow maybe even a test ride around the block if I get the tail and brake lights working.

                      Comment


                        #12
                        what kind of bike is the swing arm from?

                        Comment


                          #13
                          Originally posted by 1980c10 View Post
                          what kind of bike is the swing arm from?
                          suzuki gs1100

                          Comment


                            #14
                            that is correct from what I'm told, It came with the bike when I got it...

                            Took it out for the first ride around the block tonight. The mufflers are going to have to get angled up a bit with a new mounting bracket as well. Took the first 90 corner and she scraped. Moved them up a bit and was better till I leaned it over good on the last corner and still got it. Oh well, no biggie. Not running perfect yet but cant believe how well it does run now. Every now and then it bogs just a bit at the start of acceleration. Need to check the valves and then sync the carbs. Just pluggin away at it though.

                            Comment


                              #15
                              So there it is. Not real appealing to the eye right now but a blast to ride. Took it out for a bit more than around the block ride tonight and runs like a champ. Anyway Basically how its gonna be mostly till winter other than continuing on with needed maintenance, then tear down, clean it up and make it look nice to roll out next spring.

                              Comment

                              Working...
                              X